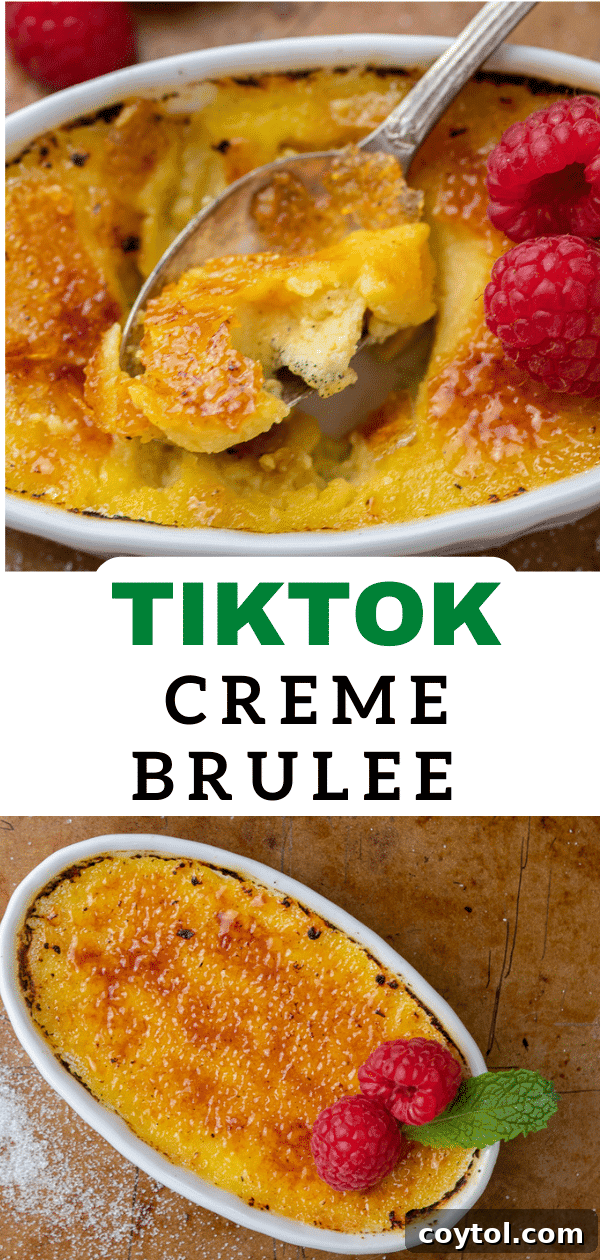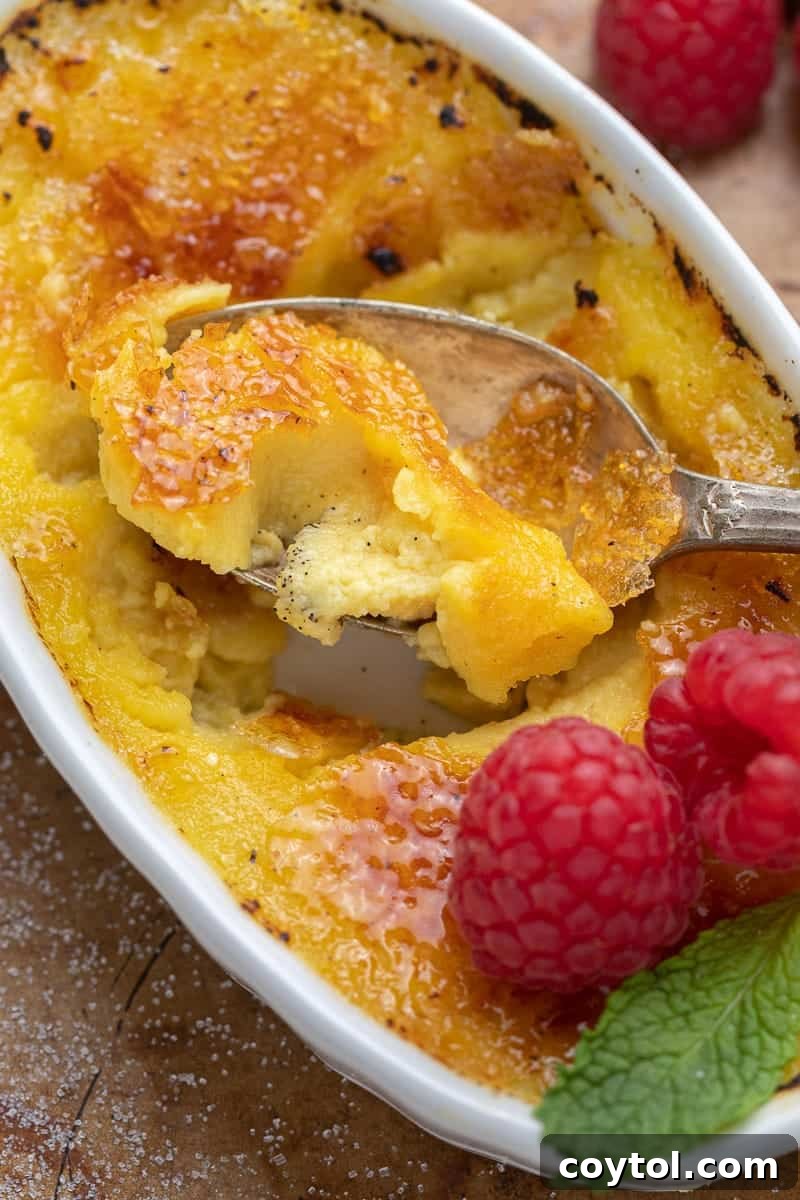
Discover the magic of a luscious, creamy crème brûlée made effortlessly with just three simple ingredients! This viral ice cream crème brûlée recipe transforms a classic French dessert into an incredibly easy sweet treat you can enjoy anytime. Prepare to be amazed by its rich, custardy texture and signature caramelized sugar topping – once you try this hack, you’ll wonder why you ever made it any other way!
Looking for more trending recipes? Explore these popular finds that our community adores: Tiktok Custard Toast – Air Fryer/Oven Yogurt Toast, The viral Creamy Lemonade recipe, and The Best Crumbl Peanut Butter Brownie Cookies!

Are you ready to impress with minimal effort? This 3-ingredient crème brûlée is one of those sensational TikTok viral recipes that demands your immediate attention! Imagine creating a sophisticated French dessert, known for its smooth custard base and iconic brittle sugar crust, right in your own kitchen with incredible ease. No complicated techniques, no lengthy prep times – just pure dessert magic that comes together almost effortlessly. If you’ve ever been intimidated by the thought of making crème brûlée from scratch, this recipe is about to change everything you thought you knew about gourmet desserts at home.
The secret to this unbelievably simple yet decadent recipe lies in a clever ingredient hack: using good quality ice cream as the base. Yes, you read that right – ice cream! It might sound unconventional, but trust the process. The rich, creamy texture and inherent sweetness of ice cream provide the perfect foundation for a custardy crème brûlée, cutting down on numerous steps and ingredients typically required. This ingenious method ensures a consistently smooth and luxurious custard every single time, making it accessible to even the most novice bakers. Prepare to be astounded by the rich flavor and melt-in-your-mouth consistency this shortcut delivers.
Unlock the Secret to the Best 3-Ingredient Ice Cream Crème Brûlée
In this comprehensive guide, we’ll demystify the art of crème brûlée, showing you exactly how to “hack” this exquisite French delicacy. Forget the notion that authentic crème brûlée requires hours of labor and a culinary degree. Our streamlined approach makes this elegant dessert entirely attainable for those with bustling schedules and a craving for something truly special. Traditional crème brûlée often involves preparing a custard base from scratch, steeping vanilla beans in cream, and allowing the mixture to chill overnight – a method I frequently employed during my time working at a prestigious French pastry shop in Las Vegas. While those artisanal versions are undeniably sublime, this ice cream-based alternative offers an equally delightful experience with a fraction of the time commitment. It’s about enjoying gourmet taste without the gourmet effort, proving that convenience doesn’t have to compromise on quality.
This recipe is designed for modern dessert enthusiasts who appreciate both flavor and efficiency. It empowers you to create a restaurant-quality dessert that looks and tastes like it took all day to make, but only requires a few minutes of active preparation. We’ll delve into the precise steps to ensure your crème brûlée sets perfectly, achieves that signature silky smooth texture, and boasts a beautifully brittle, golden-brown caramelized sugar crust. Get ready to add a show-stopping dessert to your repertoire that will leave your guests utterly impressed, all thanks to a brilliant culinary shortcut.
Why This 3-Ingredient Crème Brûlée Recipe is a Must-Try
This ice cream crème brûlée isn’t just a recipe; it’s a revelation. Here’s why you absolutely need to make this dessert, whether you’re a seasoned baker or a kitchen novice:
- Incredibly Simple & Minimal Ingredients: The star appeal of this recipe is its brevity. Crafted with only three core ingredients – ice cream, egg yolks, and sugar – it eliminates the need for heavy cream, vanilla beans, and lengthy infusion times typically associated with crème brûlée. This simplicity means less shopping, less measuring, and a quicker path to dessert bliss.
- Effortlessly Impressive Results: Despite its straightforward nature, this crème brûlée delivers an end product that is remarkably sophisticated and elegant. The smooth, creamy custard and the satisfying crack of the caramelized sugar crust will impress family and friends, making them believe you spent hours slaving away in the kitchen. It’s the perfect dessert to elevate any meal or celebration.
- A True One-Bowl Wonder: Streamline your cleanup with this one-bowl recipe! The custard mixture comes together quickly in a single bowl, minimizing dishes and maximizing enjoyment. This convenience makes it ideal for busy weeknights or when you’re hosting and want to focus on your guests rather than a pile of dirty dishes.
- Fun and Engaging for All Ages: This recipe offers a fantastic opportunity to involve younger family members in the kitchen. Kids can help with melting the ice cream, whisking the egg yolks, and pouring the mixture into ramekins. Just be sure to handle the hot water bath and the torching steps yourself for safety. It’s a delightful activity that combines culinary learning with delicious rewards.
- Quick & Satisfying Gratification: Traditional crème brûlée can be a multi-day affair. This version significantly cuts down on active preparation and chilling time, allowing you to enjoy your homemade crème brûlée much faster. It’s perfect for those spontaneous dessert cravings or when you need a speedy yet elegant sweet finish.
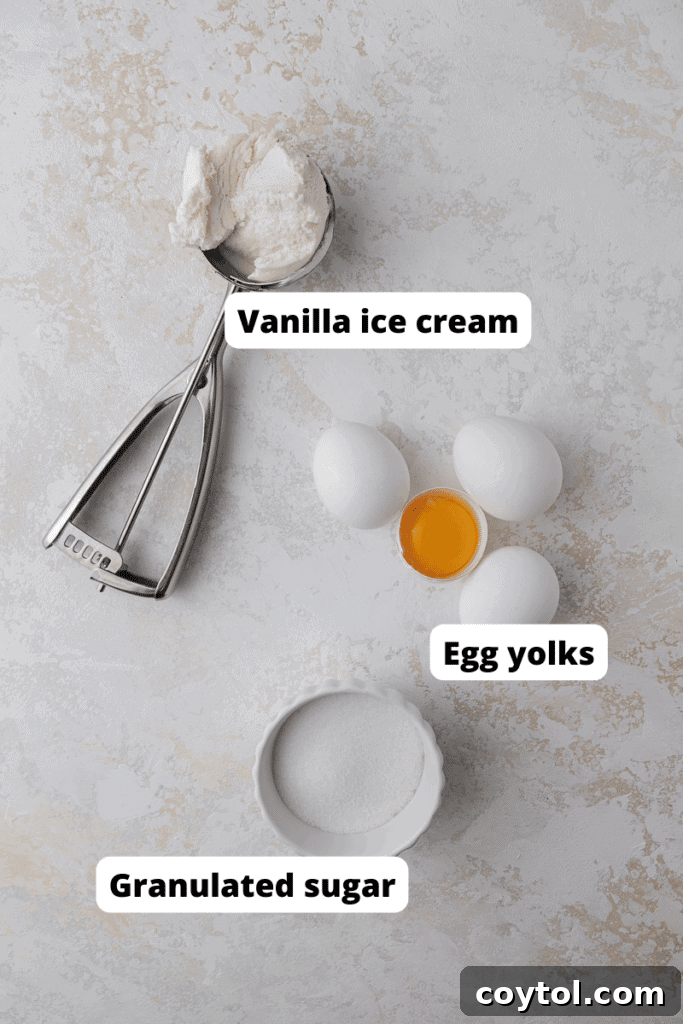
Essential Ingredients for Your TikTok Crème Brûlée
Crafting this viral crème brûlée requires just a few key components. The quality of your ingredients will directly influence the richness and flavor of your final dessert, so choose wisely!
- Vanilla Ice Cream: This is the hero ingredient that provides the creamy base, sweetness, and primary flavor for your custard. Opt for a high-quality, full-fat vanilla ice cream. Brands known for their rich, dense texture and authentic vanilla flavor will yield the best results. Avoid low-fat or “light” ice creams, as they may result in a less creamy, thinner custard. A premium ice cream will also contain fewer stabilizers and additives, leading to a smoother texture.
- Egg Yolks: The egg yolks are crucial for binding the custard, giving it that characteristic silky smooth texture and rich, golden hue. They act as a natural emulsifier and thickener, ensuring your crème brûlée sets beautifully. Use fresh, large egg yolks for optimal results. The number of yolks can slightly vary depending on the richness desired, but four yolks per two cups of ice cream generally provides the perfect consistency.
- Granulated Sugar: While the ice cream provides sweetness to the custard, granulated sugar is essential for the signature crunchy topping. A thin, even layer of granulated sugar is sprinkled over the chilled custard before being caramelized with a torch. This creates the delightful, brittle, amber crust that is the hallmark of crème brûlée.
- Salt (Optional): A tiny pinch of fine sea salt can dramatically enhance the overall flavor profile of your crème brûlée. Salt balances the sweetness, deepens the vanilla notes, and brings out the complexity of the custard. It’s a small addition that makes a significant difference, preventing the dessert from tasting overly sweet or one-dimensional.
- Vanilla Bean Paste (Optional): For an extra touch of gourmet luxury and intensified vanilla flavor, consider adding a teaspoon of vanilla bean paste. Nothing compares to the visual appeal and aromatic burst of tiny vanilla bean specks suspended within the creamy custard. While optional, it elevates the dessert to another level, especially if your vanilla ice cream isn’t intensely flavored.

Step-by-Step: How to Make TikTok’s 3-Ingredient Crème Brûlée
Get ready to whip up this impressive dessert with surprising ease. Follow these detailed instructions for a perfect ice cream crème brûlée every time. Remember to consult the full recipe card below for precise measurements and cooking times!
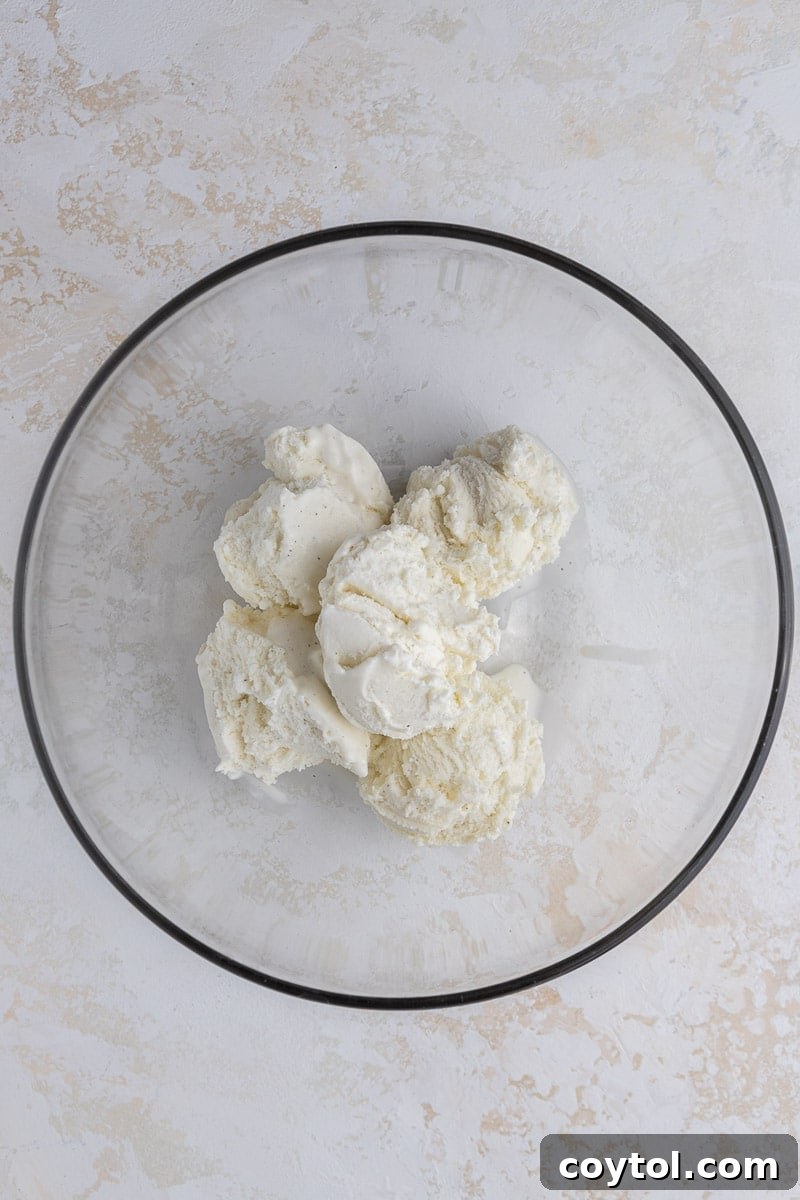
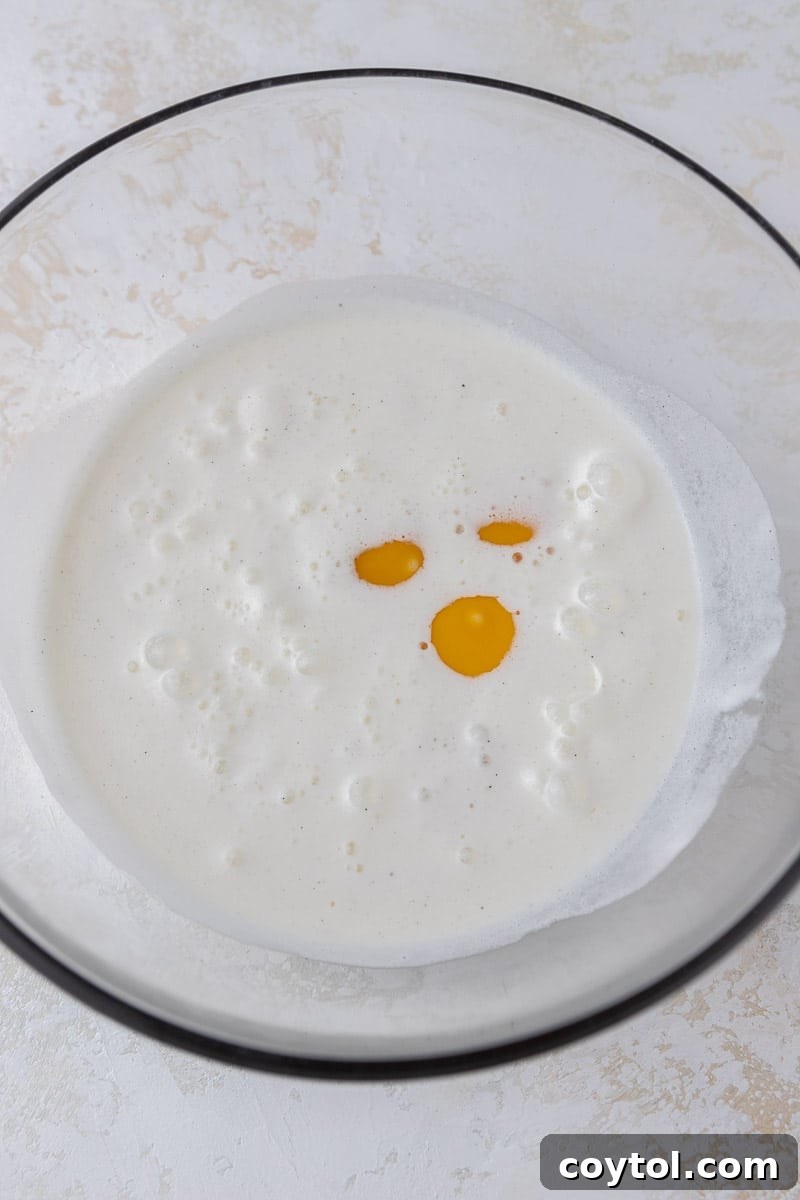
- Prepare Your Oven and Ice Cream: Begin by preheating your oven to 325°F (160°C). This ensures even baking once your ramekins are in. Next, scoop your vanilla ice cream into a microwave-safe bowl. Gently melt the ice cream in the microwave for 30-45 seconds, or until it’s completely liquid and smooth. Avoid overheating, as this can affect the texture. A fully melted, pourable consistency is what you’re aiming for.
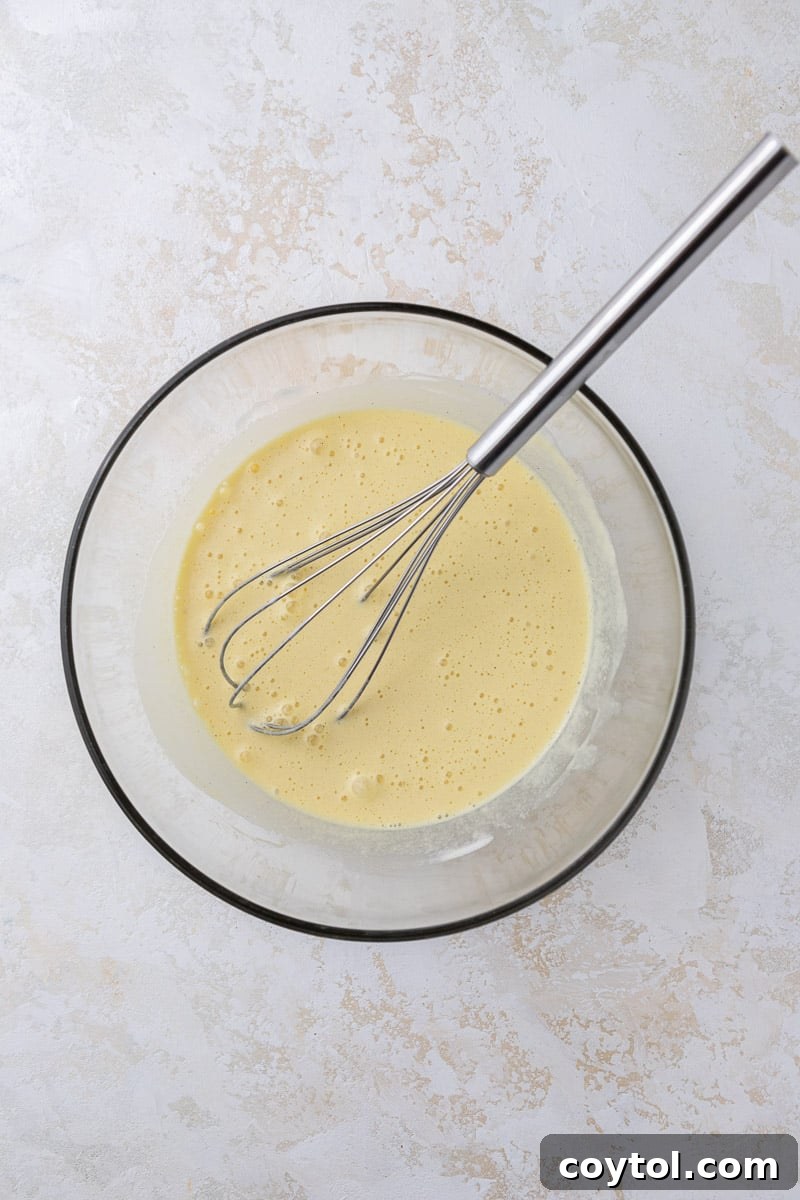
- Whisk in the Yolks and Flavorings: To the melted ice cream, add your egg yolks. If you’re using them, now is the time to also whisk in the optional pinch of salt and a teaspoon of vanilla bean paste for an elevated flavor. Whisk thoroughly until the mixture is homogenous and smooth, with no streaks of egg yolk visible. The melted ice cream already contains sugar and dairy, so this step truly simplifies the traditional custard base.
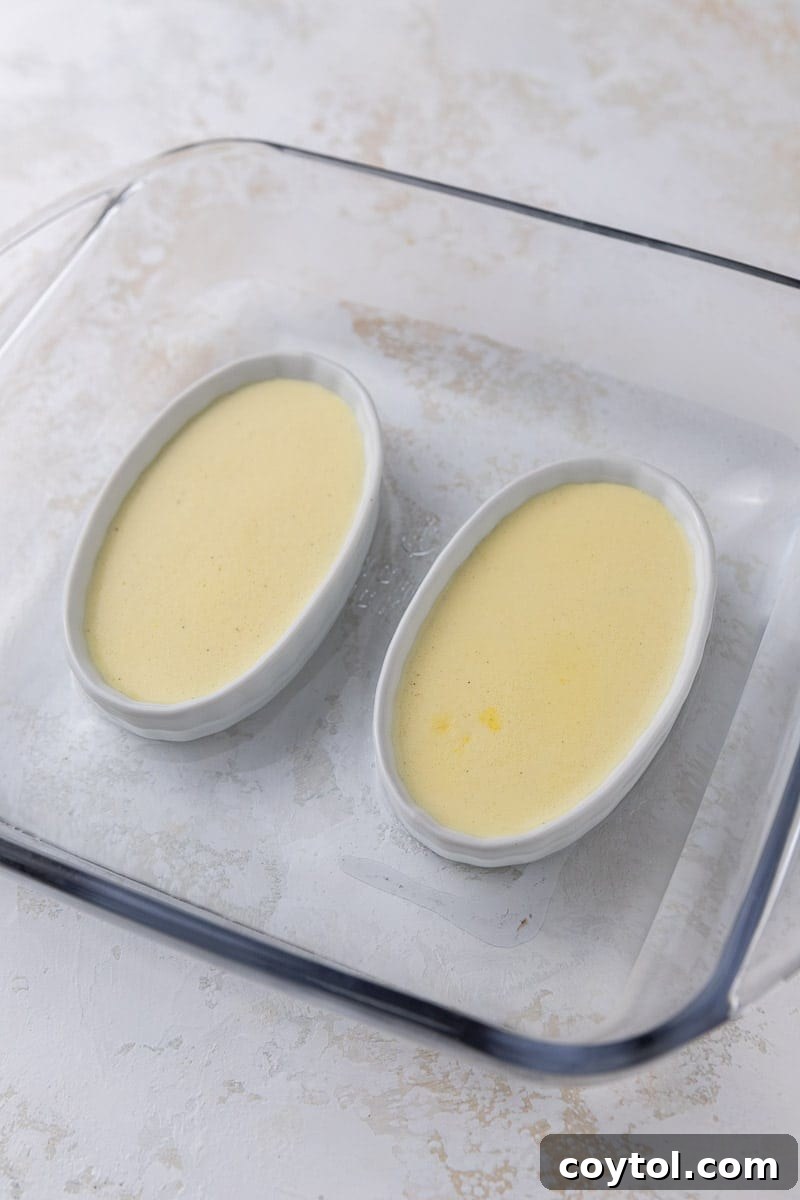
- Fill and Prepare for Baking: Carefully pour the crème brûlée mixture into individual oven-safe ramekins. Ensure the ramekins are placed in a deep baking dish. This dish will create a “bain-marie” or water bath, which is crucial for gentle, even cooking. Fill the baking dish with hot water, ensuring it reaches about halfway up the sides of the ramekins. The water bath prevents the custards from curdling or baking too quickly, resulting in a perfectly smooth, creamy texture.
- Bake to Perfection: Transfer the baking dish with the ramekins to your preheated oven. Bake for approximately 35-45 minutes. The exact baking time will depend on the size and depth of your ramekins – shallower ramekins will bake faster, while deeper ones may require a few extra minutes. You’ll know the crème brûlées are done when the edges are set and firm, but the center still has a slight, delicate jiggle.
- Chill for Optimal Texture: Once baked, carefully remove the ramekins from the water bath and allow them to cool completely to room temperature. If any foam has formed on top during baking, gently scrape it off with a spoon for a perfectly smooth surface. Then, transfer the cooled crème brûlées to the refrigerator and chill for a minimum of 2-4 hours. This chilling period is essential for the custard to fully set and achieve its signature creamy texture.
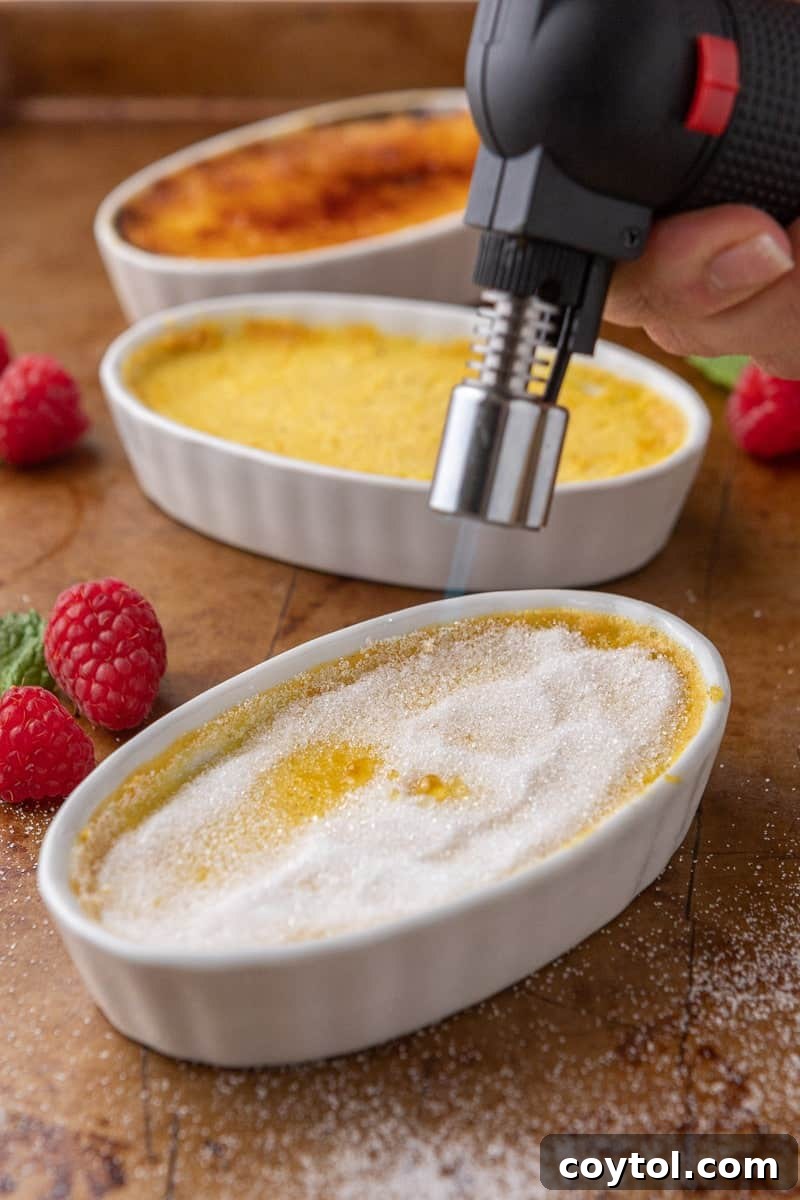
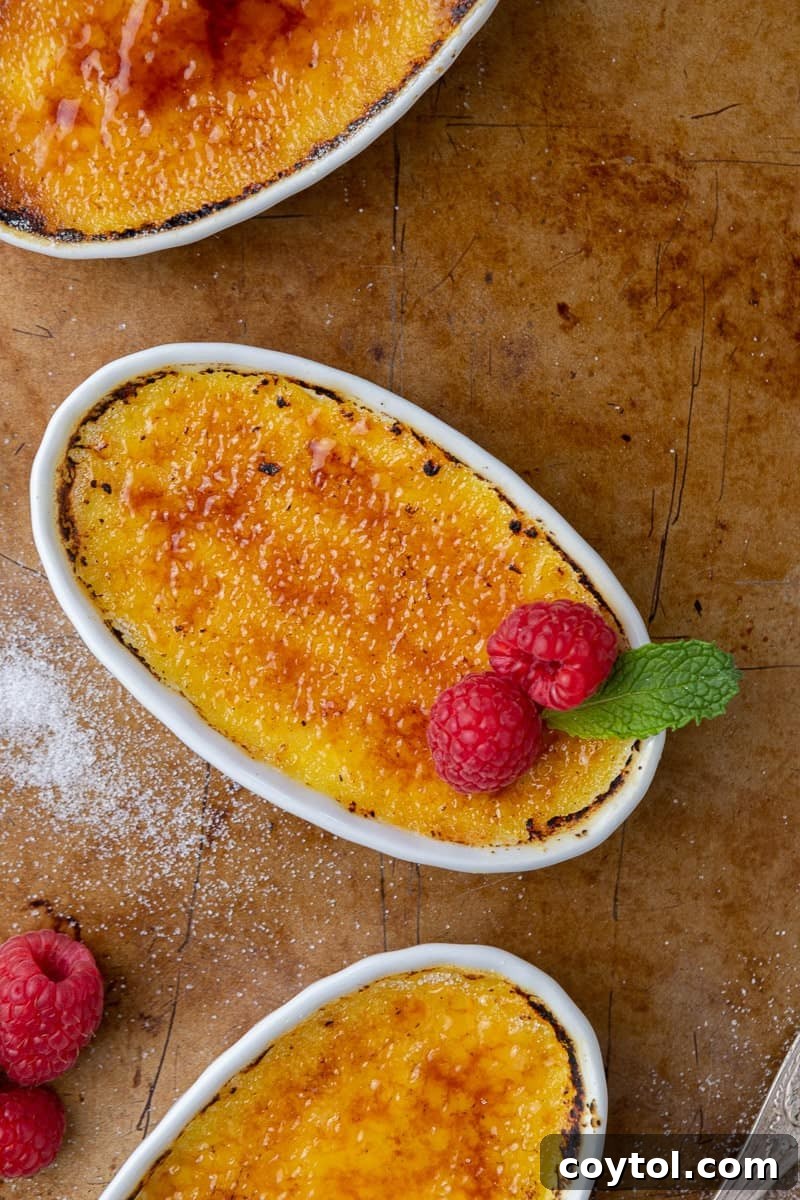
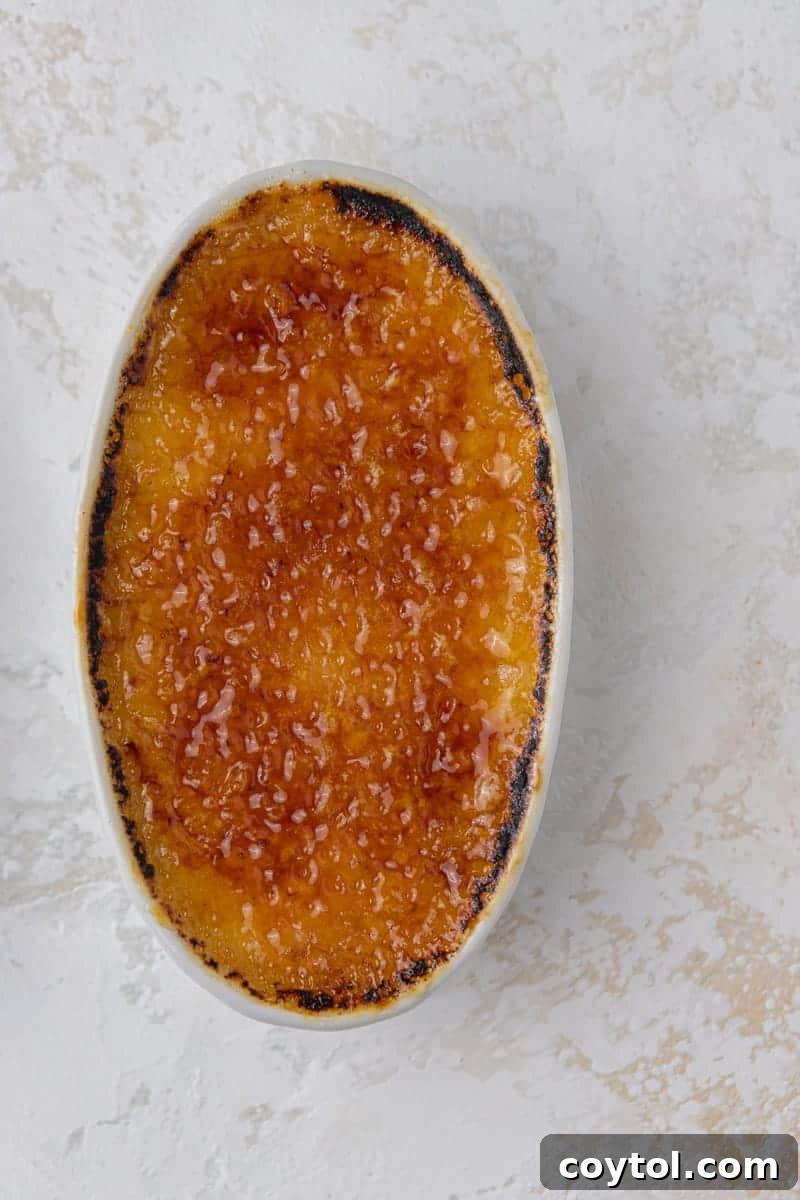
- Caramelize and Serve: Just before serving, remove the chilled crème brûlées from the fridge. Sprinkle an even layer of granulated sugar (about 1-2 teaspoons) over the top of each custard. Using a kitchen torch, caramelize the sugar until it melts, bubbles, and turns into a beautiful, brittle, golden-brown crust. Move the torch in continuous circular motions to ensure even caramelization and prevent burning. Serve immediately and enjoy the satisfying crack of the sugar before diving into the velvety smooth custard!
Frequently Asked Questions (FAQ) about 3-Ingredient Crème Brûlée
Got questions about this innovative dessert? We’ve got answers to help you master your ice cream crème brûlée.
How to Make Crème Brûlée Without a Torch?
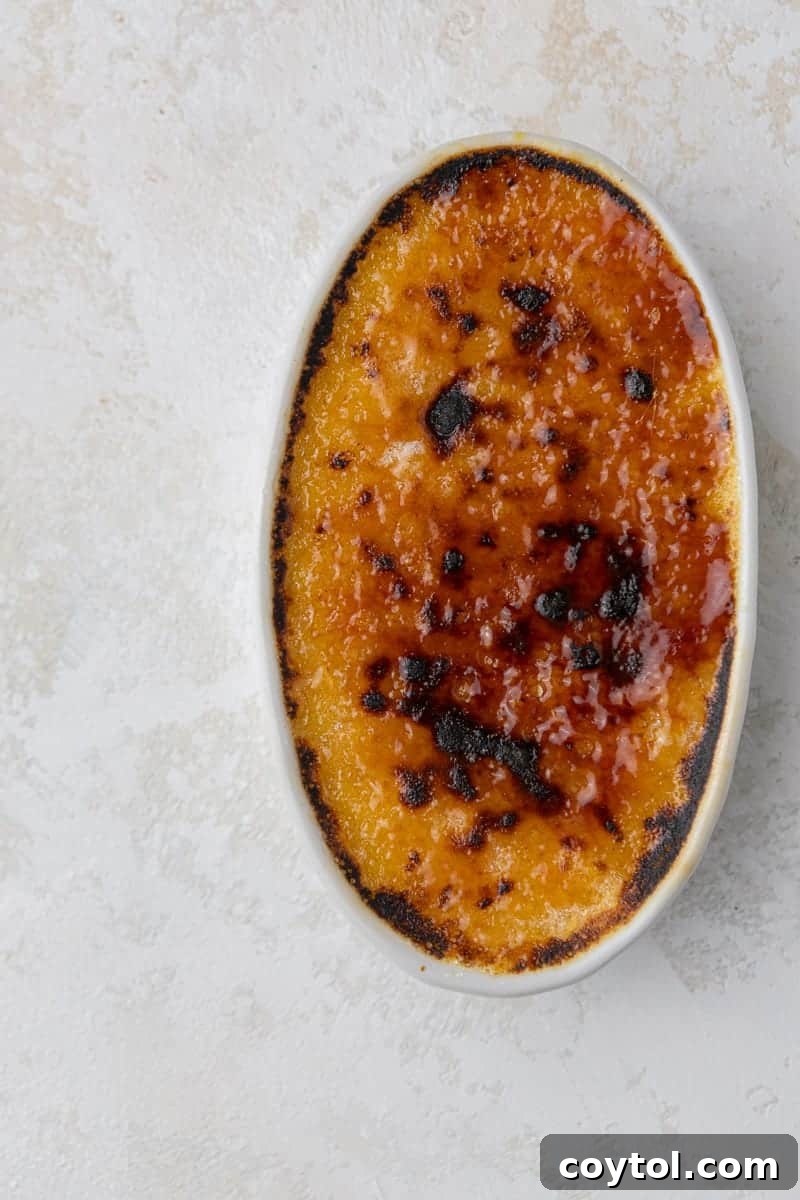
No kitchen torch? No problem! You can still achieve that irresistible caramelized crust using your oven’s broiler. Set your oven to high broil. Place the crème brûlées (with their sugar sprinkled on top) on a baking sheet and position them directly under the broiler. Watch them very carefully – the sugar can go from perfectly golden to burnt in a matter of seconds. Keep a close eye and remove them as soon as the sugar melts and turns a beautiful amber color. Remember, the ramekins and their contents will be extremely hot, so use caution when removing them from the oven. This method requires constant vigilance but yields a satisfyingly crisp topping.

Can I Use Different Flavored Ice Cream?
Absolutely! This recipe is incredibly versatile, inviting you to experiment with a myriad of ice cream flavors. Unleash your creativity and customize your crème brûlée to your heart’s content. The key is to use a cream-based ice cream rather than sorbets or those with large chunks (which might not melt smoothly or can interfere with the custard’s texture). Think beyond vanilla!
Here are some delicious flavor ideas to get you started:
- Chocolate Ice Cream: For a decadent chocolate crème brûlée, pairing beautifully with a raspberry garnish.
- Strawberry Ice Cream: Offering a fruity, delicate twist, especially lovely with fresh berries.
- Pumpkin Pie Ice Cream: A perfect autumnal treat, bringing warm spices to the custard.
- Caramel Ice Cream: Intensifying the caramelized notes, creating a deeply rich dessert.
- Coffee Ice Cream: For an elegant, slightly bitter kick that complements the sweet crust.
- Pistachio Ice Cream: Adding a nutty, sophisticated flavor and beautiful pale green hue.
The culinary world is your oyster when it comes to flavor combinations. Just ensure your chosen ice cream is smooth and melts well for the best custard consistency.
What Ramekins Should I Use for This Crème Brûlée?
The type and size of ramekins you use can influence both the aesthetic and the baking time of your crème brûlée. We recommend using shallow, wide ramekins, such as these oval-shaped shallow ramekins, as they allow for a greater surface area for the caramelized sugar, enhancing that satisfying crack. Shallow ramekins also tend to bake faster, setting the custard in less time. If you opt for deeper, more traditional soufflé-style ramekins, be prepared to extend the baking time by a few minutes to ensure the custard is fully set in the center. Always check for the characteristic slight jiggle in the middle to confirm doneness. Consistency in ramekin size for a single batch is also helpful for even baking.
Can I Make This 3-Ingredient Crème Brûlée Ahead of Time?
Absolutely! This crème brûlée is an excellent dessert to prepare in advance, making it perfect for entertaining or meal prep. You can bake the custards up to 3 days ahead of time. Store them in the refrigerator, carefully wrapped, and only caramelize the sugar topping just before serving to ensure the crust is perfectly crisp. Pre-torching and then storing will result in a sticky, melted topping.
How to Store Crème Brûlée?
To store your un-torched crème brûlées, allow them to cool completely to room temperature after baking, then wrap each ramekin tightly with plastic wrap to prevent a skin from forming and to absorb any fridge odors. Place them in the refrigerator, where they will keep well for up to 3 days. It’s crucial not to sprinkle with granulated sugar or torch the tops until you are ready to serve. If you caramelize the sugar too early, the moisture from the custard in the fridge will dissolve the sugar crust, turning it into a sticky, unappetizing mess. Always torch right before serving for that iconic crack!
Troubleshooting Common Crème Brûlée Issues
Even with an easy recipe, sometimes things go awry. Here are quick fixes for common issues:
- Custard is Too Soupy: This typically means it was underbaked. Pop it back in the water bath and continue baking until the edges are set and the center has a gentle wobble. Ensure your oven temperature is accurate.
- Custard is Grainy/Curdled: This is often a sign of overbaking or the water bath not being hot enough. The water bath cooks the custard gently. Next time, keep a closer eye on baking time and ensure the water bath is hot from the start.
- Sugar Burns Instantly When Torching: You might be holding the torch too close to the sugar or concentrating the flame in one spot for too long. Keep the torch moving constantly in small circles, holding it a few inches above the sugar, until it gradually melts and caramelizes.
- Crust is Sticky, Not Crunchy: This happens if the sugar wasn’t fully caramelized or if the crème brûlée sat too long after torching before serving. Always torch right before serving for the best texture.

3-Ingredient Crème Brûlée Recipe
If you’ve delighted in these simple ice cream 3-ingredient crème brûlées, please consider sharing your experience! Don’t forget to leave a 5-star review by clicking on the stars below the recipe title and description. Your feedback is invaluable and helps our community immensely.

Rating: 5 out of 5 stars (11 votes)
3-Ingredient Crème Brûlée with Ice Cream
Print Recipe
Ingredients
- 2 cups vanilla ice cream
- 4 egg yolks
- vanilla bean paste (optional)
- salt (optional)
- granulated sugar (for topping)
Instructions
-
Preheat your oven to 325°F (160°C).
-
In a large, microwave-safe bowl, melt the vanilla ice cream. Heat in the microwave for 30-45 seconds, stirring halfway through, until it is fully liquid and smooth.
-
Whisk in the egg yolks. If desired, also add the vanilla bean paste and a pinch of salt. Whisk vigorously until the mixture is completely combined and no streaks of egg yolk remain. For a true 3-ingredient version, simply combine melted ice cream and egg yolks.
-
Carefully pour the custard mixture into 4 oven-safe ramekins. Place these ramekins in a deep baking dish. Fill the baking dish with hot water, ensuring the water level reaches approximately halfway up the sides of the ramekins. This creates a water bath (bain-marie) for gentle baking.
-
Bake for 35-45 minutes. The precise baking time will vary based on the depth of your ramekins; shallow ramekins will require less time, while deeper ones will need more.
-
The crème brûlées are done when the edges are set and firm, but the center still retains a slight, delicate jiggle when gently shaken.
-
Carefully remove the ramekins from the water bath and let them cool completely to room temperature. If any foam has formed on the surface, gently skim it off with a spoon. For cold crème brûlées, chill them in the refrigerator for 2-3 hours before proceeding to the next step.
-
Just before serving, sprinkle about 1-2 teaspoons of granulated sugar evenly over the top of each chilled crème brûlée. Using a kitchen torch, caramelize the sugar until it melts, bubbles, and turns a beautiful golden-amber color. Move the torch in continuous circular motions to ensure even caramelization and prevent burning. Serve immediately and enjoy!
Notes
How to make creme brulee without a torch?
If you don’t have a kitchen torch, don’t worry! You can use your oven’s broiler. Set your oven to high broil and place the crème brûlées directly underneath. Broil until the sugar melts and turns golden.
It is crucial to keep a constant eye on your desserts, as they can quickly go from perfectly caramelized to burnt in mere seconds.
Also, be extremely cautious when removing the ramekins from the oven, as their edges will be very hot.
Nutrition
Nutrition information is automatically calculated, so should only be used as an approximation.
Thank you for exploring this incredible dessert hack!
If you thoroughly enjoyed this simple yet spectacular 3-ingredient ice cream crème brûlée recipe, we would love to hear from you. Please don’t hesitate to leave a comment below and share your experience and any creative twists you added! In the meantime, make sure to follow us on Instagram for more delightful recipes and kitchen inspiration!

Shop Essential Tools for This Recipe
This post may contain affiliate links. This means that at no additional cost to you, I may receive a small percentage of any purchase you make through these links, which helps support the creation of more delicious recipes!
Loved This 3-Ingredient Ice Cream Crème Brûlée? Pin It for Later!
Don’t let this incredible dessert hack slip away! Pin this recipe to your favorite Pinterest board so you can easily find it whenever a craving for quick, luxurious crème brûlée strikes. Share the simplicity and deliciousness with your friends and followers!