
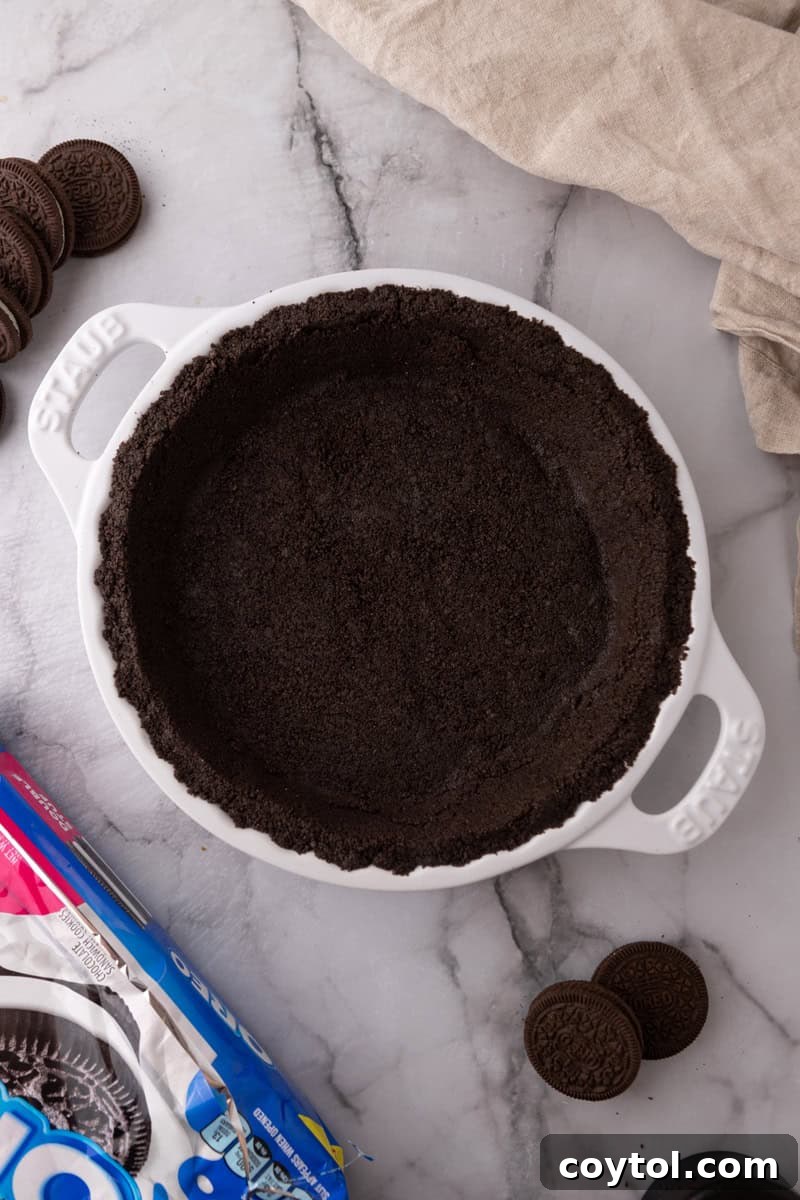
The Ultimate Easy Oreo Pie Crust Recipe: Your Go-To Dessert Base
Craving an unforgettable dessert that’s both incredibly simple to make and bursting with flavor? Look no further than this ultimate Oreo Pie Crust recipe. Forget the bland, store-bought alternatives; this homemade version transforms classic Oreo cookies into a rich, dark, and perfectly textured base for any sweet creation. It’s a delightful departure from traditional pie crusts, offering a unique cocoa flavor that complements a vast array of fillings.
Whether you prefer a cool, creamy dessert or a warm, baked delight, this versatile Oreo crust delivers. Enjoy it chilled for a soft, melt-in-your-mouth experience, or bake it for a delightfully crisp and crunchy texture. No matter your preference, its deep chocolate notes are absolutely irresistible, elevating your homemade pies, cheesecakes, and tarts to a whole new level.
If you’re accustomed to grabbing a pre-made crust from the grocery store, prepare to have your dessert world transformed! The thought of making a homemade pie crust can seem daunting, but this Oreo version is the perfect entry point for any aspiring baker. With just two simple ingredients and minimal effort, you’ll be creating a professional-quality crust in no time. Beyond its incredible ease, the distinctive dark cocoa flavor of Oreos naturally enhances almost any dessert filling, making it a truly versatile and indispensable recipe for your baking repertoire.
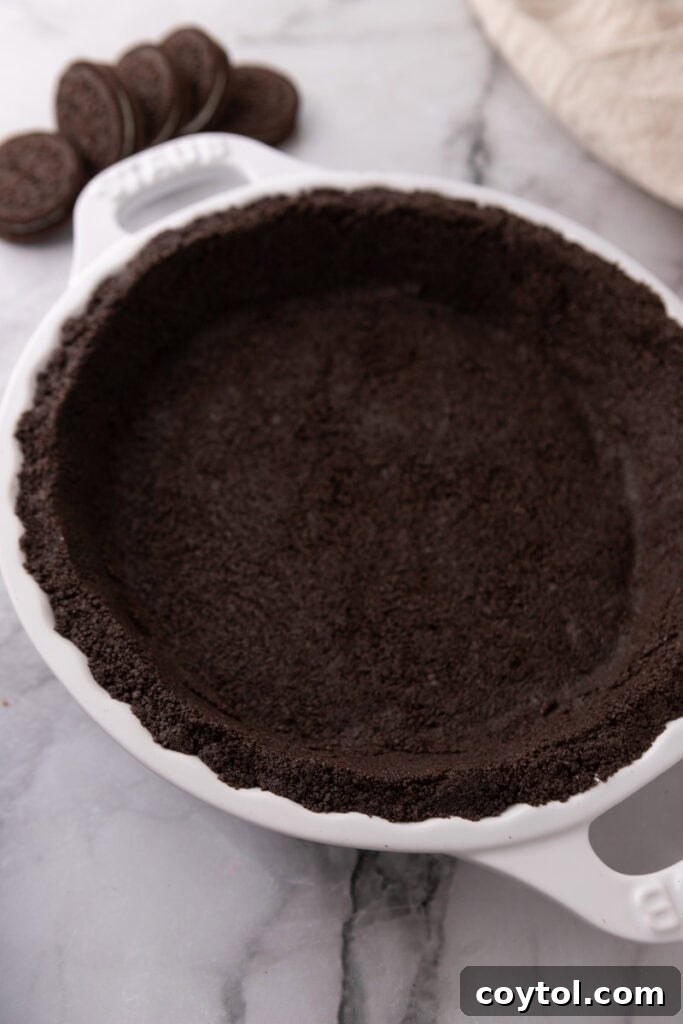
Why This Oreo Pie Crust Stands Out
One of the key elements that sets this recipe apart from many others found online is our decision to keep the delicious cream filling inside the Oreo cookies. There’s no need for tedious scraping or wasteful discarding. This simple choice saves you precious time in the kitchen and significantly reduces food waste. More importantly, the cream filling adds an extra layer of sweetness, richness, and binding power to the crust, contributing to its unique texture and depth of flavor.
Whether you’re a novice eager to try your hand at baking or a seasoned pro looking to add a new, impressive element to your desserts, this crunchy, flavorful Oreo crust is guaranteed to exceed your expectations. Its balance of sweetness, chocolate, and perfect texture makes it an ideal foundation for countless dessert possibilities.
Now that you’re ready to create the perfect Oreo cookie crust, you’ll undoubtedly need an equally delicious filling to go with it! Explore some fantastic pairing ideas:
- Dive into rich indulgence with this No-Bake Chocolate Cream Pie.
- Brighten things up with a zesty Key Lime Pie Recipe.
- For the ultimate chocolate lover, this Brownie Pie Recipe is an absolute must-try.
Essential Ingredients for Your Homemade Oreo Crust
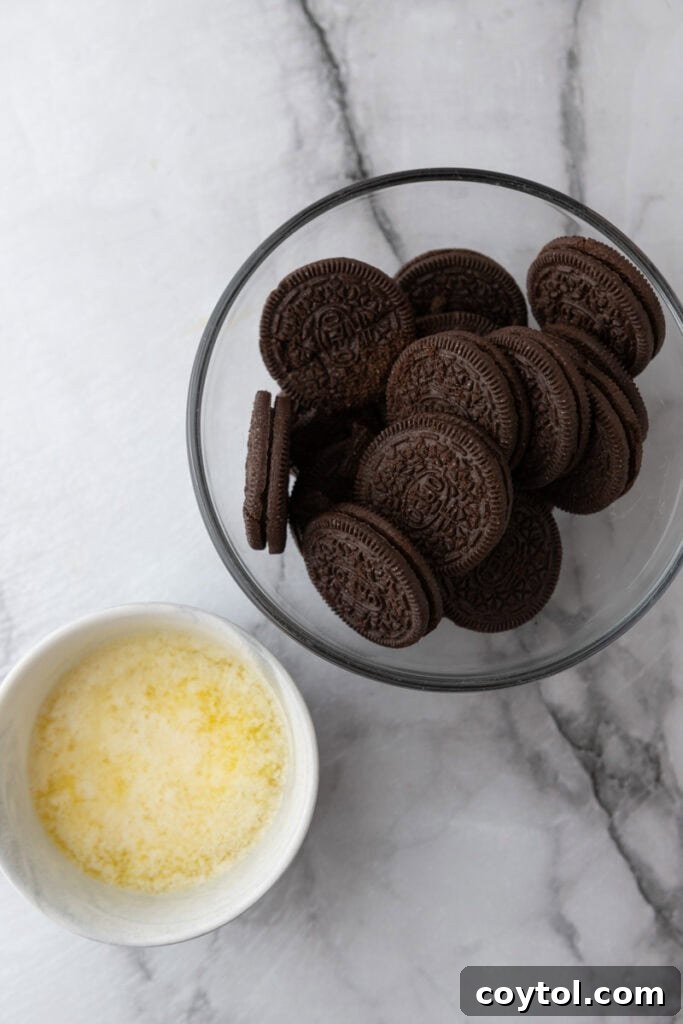
Crafting this phenomenal Oreo pie crust requires minimal ingredients, proving that sometimes the simplest recipes yield the most impressive results. Here’s what you’ll need:
- Whole Oreo Cookies: These iconic chocolate sandwich cookies are the star of our show. By using the whole cookie, including the cream filling, we achieve a perfectly balanced flavor and a moist crumb that binds beautifully. The dark cocoa provides a rich, intense chocolate base that forms the backbone of this delicious crust.
- Unsalted Butter: Melted butter acts as the crucial binding agent, coating each crushed Oreo crumb and allowing them to stick together firmly when pressed into the pie plate. Using unsalted butter gives you complete control over the overall saltiness of your crust. If you prefer a slightly saltier contrast to the sweet Oreos, you can always add a tiny pinch of salt separately or opt for salted butter (though you may want to slightly reduce the amount if using salted butter, as it can affect the moisture content).
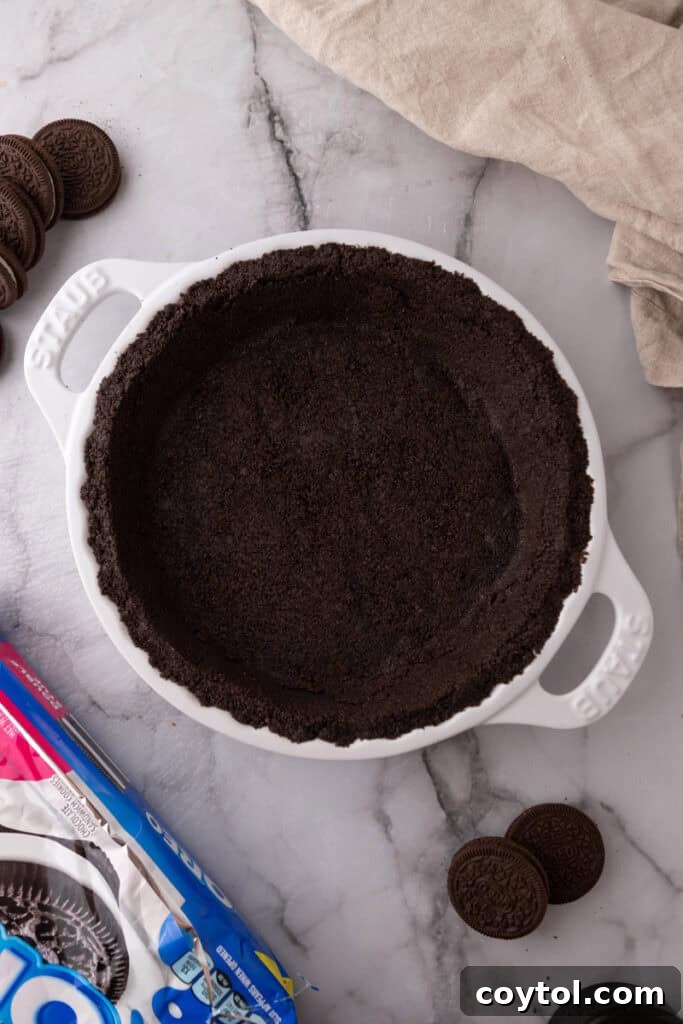
Equipment You’ll Need
Gathering your tools before you begin ensures a smooth and enjoyable baking process. For this easy Oreo pie crust, you’ll need:
- Food Processor: This is the quickest and most efficient way to achieve uniformly fine Oreo crumbs.
- Alternatively, a Zip-Top Bag and Rolling Pin: If you don’t have a food processor, this manual method works perfectly well for crushing the cookies.
- Microwave-Safe Bowl: For melting the butter.
- Large Mixing Bowl: To combine the crushed Oreos and melted butter.
- 9-inch Pie Plate: The standard size for most pies and tarts.
- Measuring Cups and Spoons: For accurate ingredient measurements.
- Spoon or Flat-Bottomed Measuring Cup: Essential for firmly pressing the crust into the pie plate.
Step-by-Step Guide: Crafting Your Perfect Oreo Pie Crust
Making your own homemade Oreo pie crust is incredibly straightforward. Follow these steps carefully to ensure a perfect, sturdy, and delicious base for your next dessert. Remember, for precise measurements and detailed baking times, always refer to the full recipe section at the end of this post.
- Melt the Butter: Begin by melting your unsalted butter. Place it in a small microwave-safe bowl and heat in 20-second intervals until it’s fully melted and warm. The warmth of the butter is key, as it helps it to more effectively coat and bind the dry cookie crumbs.
- Crush the Oreos: This step is crucial for the crust’s texture and ability to hold together.
- Using a Food Processor: Place the whole Oreo cookies into the bowl of a food processor. Pulse them repeatedly until they are transformed into very fine, even crumbs that resemble fine sand. Avoid over-processing to prevent turning them into a paste.
- Without a Food Processor: If you don’t have a food processor, place the Oreo cookies into a large, sturdy zip-top bag. Seal the bag, removing as much air as possible. Use a rolling pin or a heavy object to crush the cookies thoroughly until they reach a coarse sand-like consistency. Ensure there are no large chunks remaining, as smaller crumbs bind better.
- Combine Ingredients: Transfer the finely crushed Oreo crumbs into a large mixing bowl. Pour the warm, melted butter over the crumbs. Stir thoroughly with a spoon or spatula until the mixture is uniformly moistened. It should resemble wet sand, clumping together easily when squeezed. This even coating is vital for a crust that holds its shape.
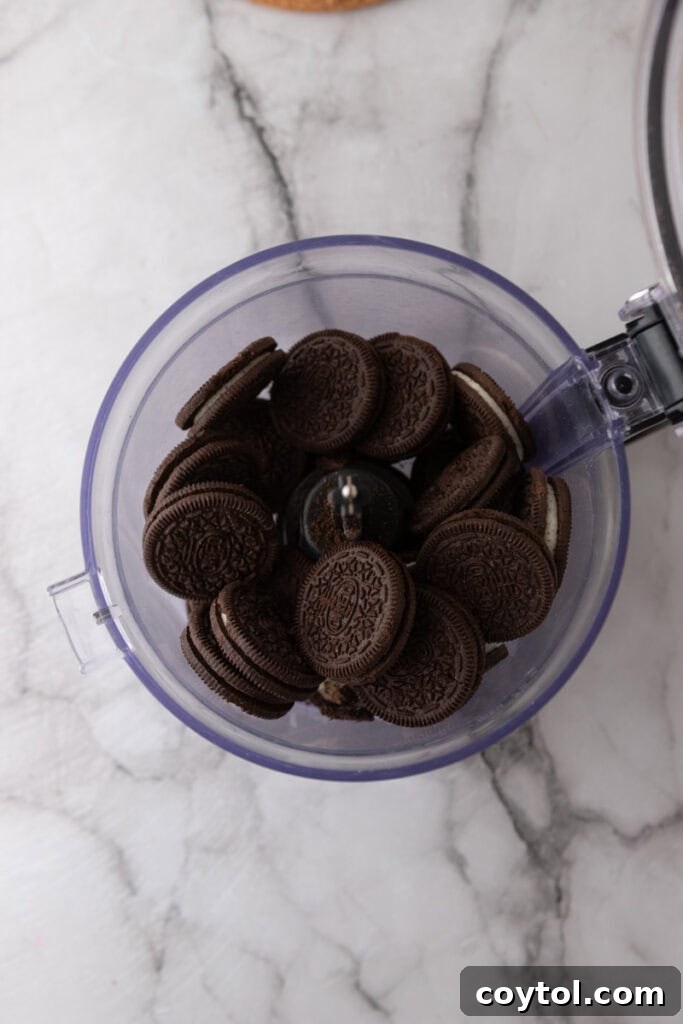
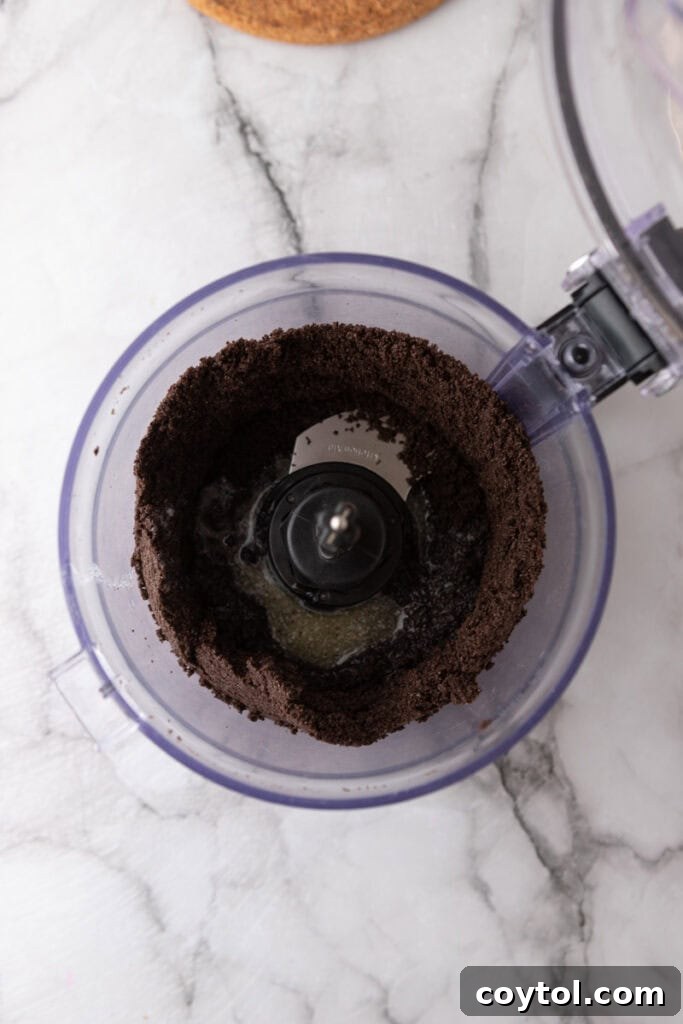
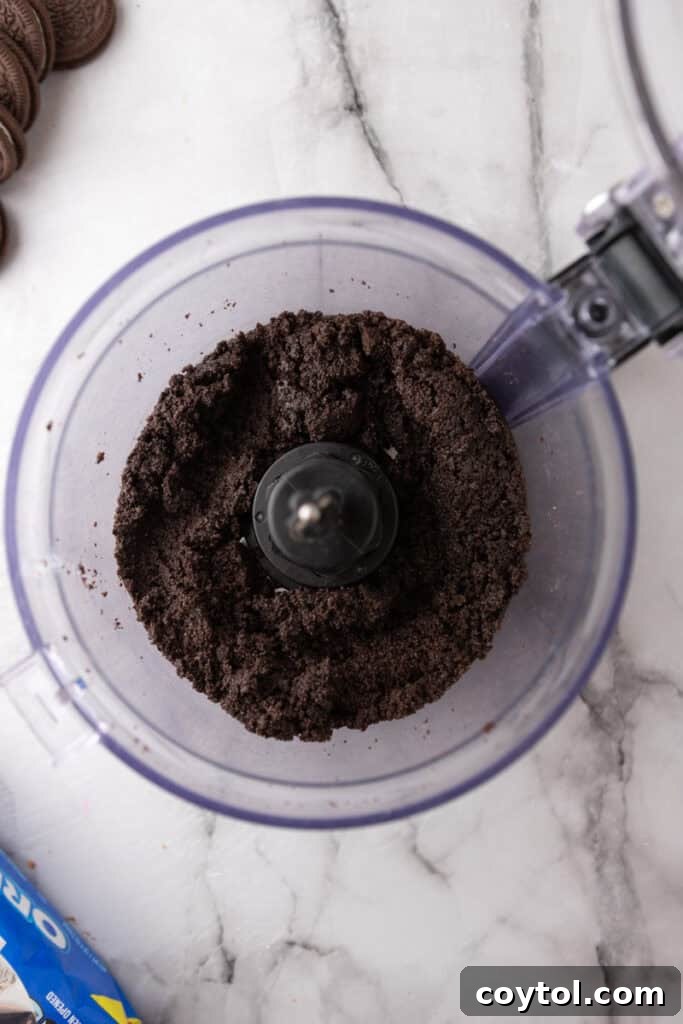
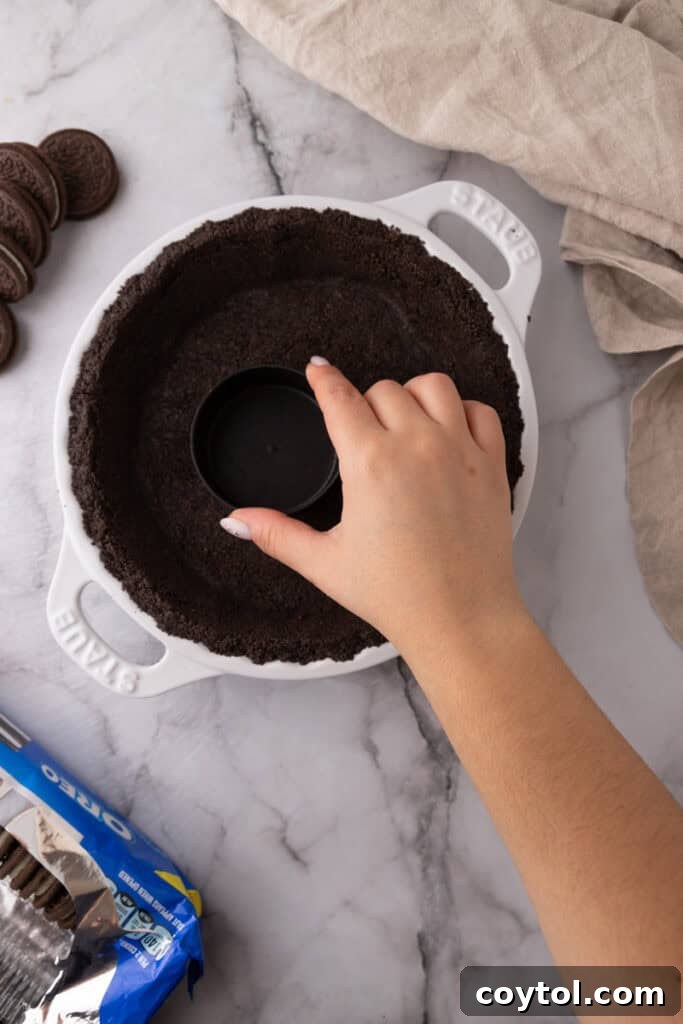
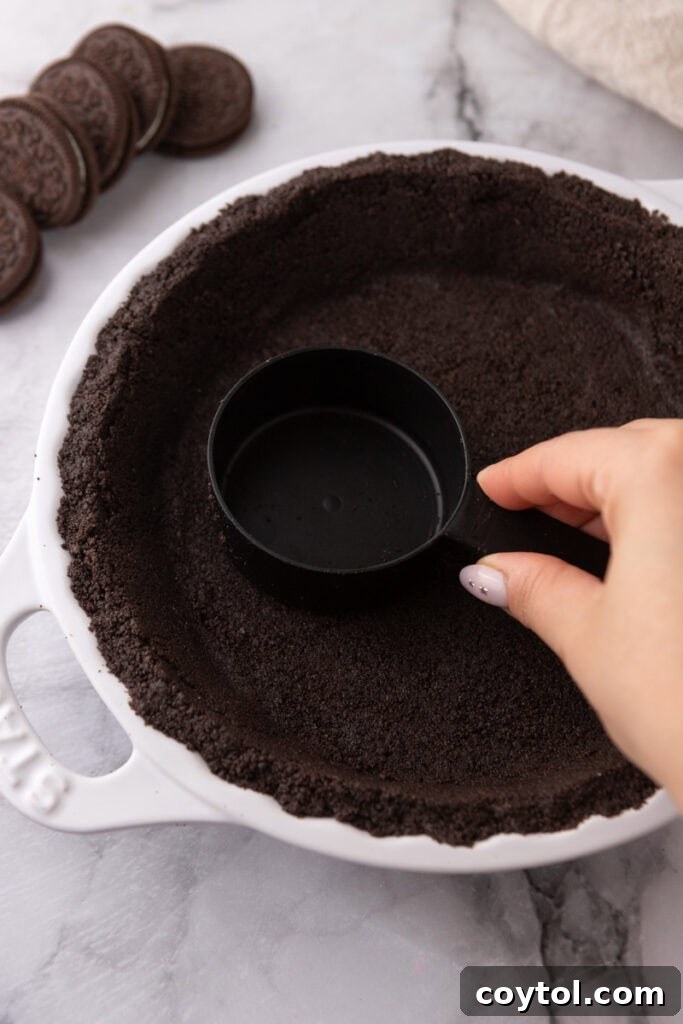
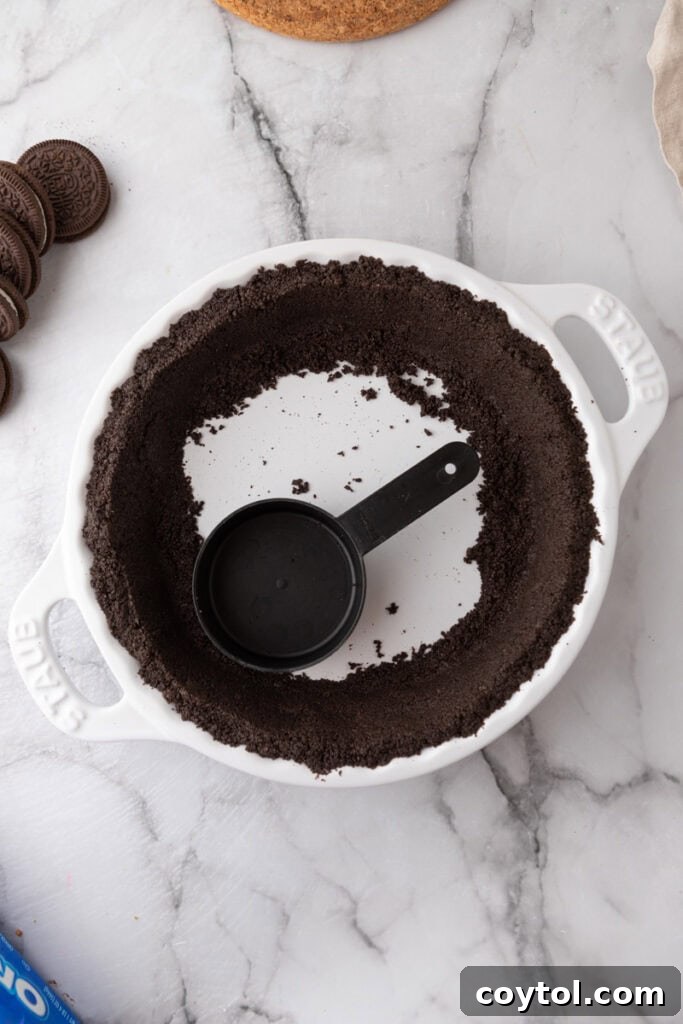
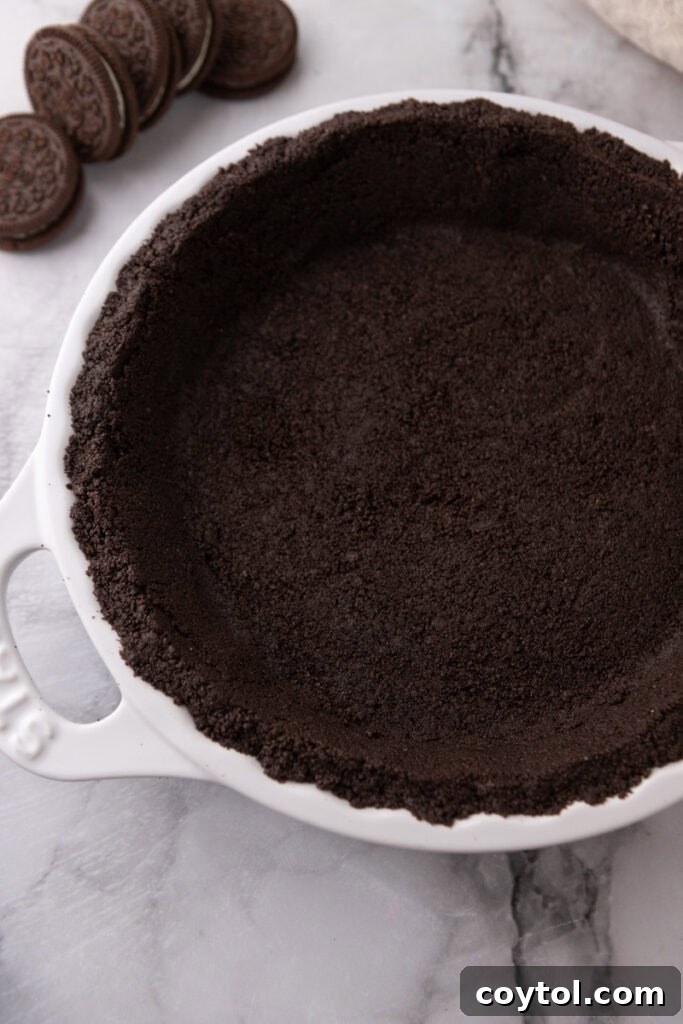
- Press into Pie Plate: Pour about two-thirds of the moistened crumb mixture into a standard 9-inch pie plate. Begin by firmly pressing the crumbs up the sides of the pie plate, creating an even wall. You can use the back of a spoon, your fingers, or the bottom of a flat-bottomed measuring cup for this. Once the sides are formed, add the remaining mixture to the base of the pie plate and press it down firmly and evenly. The firmer you press, the more cohesive and sturdy your crust will be.
- Choose Your Setting Method (No-Bake or Baked): Depending on your dessert, you have two excellent options for setting your Oreo crust:
- For a No-Bake Crust: This method is perfect for chilled or no-bake fillings. Once pressed into the pie plate, simply pop the pie pan into the refrigerator for at least 30 minutes, or into the freezer for about 15 minutes, to allow it to firm up before adding your desired filling. This creates a tender, chocolatey base ideal for creamy desserts. This is my go-to for my no-bake chocolate pie recipe!
- For a Baked Crust: If your recipe calls for a baked pie or you desire a crispier, toastier crust, preheat your oven to the specified temperature (usually around 350°F / 175°C). Bake the pressed crust for 8-10 minutes, or until it’s just set and you can detect a lovely warm, toasted aroma from the Oreos. Once baked, let it cool completely on a wire rack before adding any filling. Cooling is essential to prevent a soggy bottom.
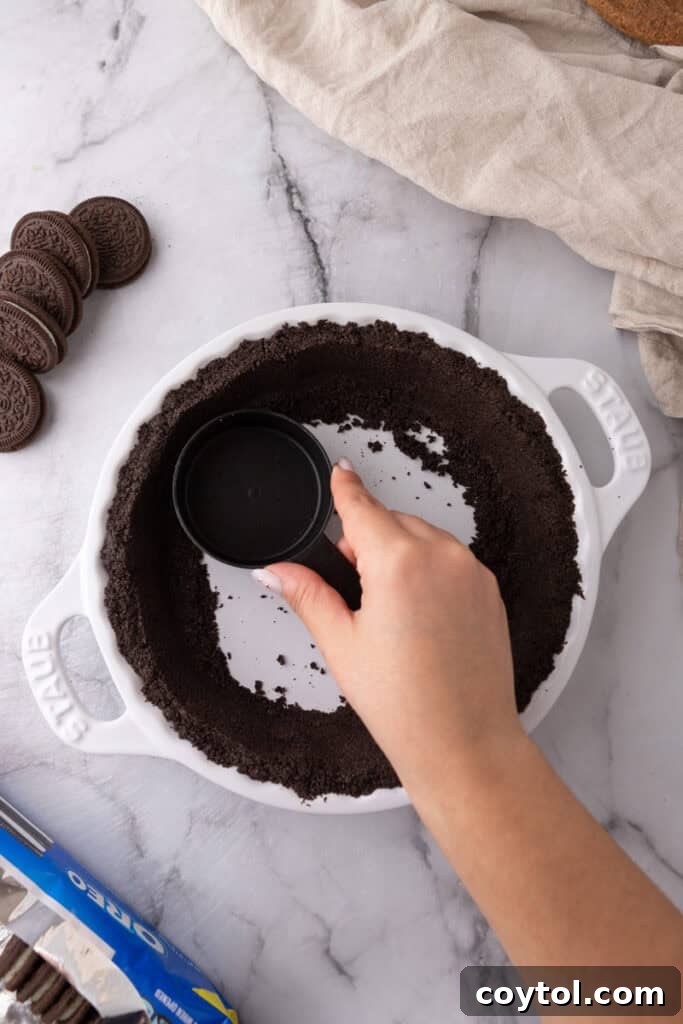
Expert Tips for a Flawless Oreo Pie Crust Every Time
- Keep the Butter Warm: Ensure your melted butter is still warm when you mix it with the Oreo crumbs. Warm butter flows more easily, allowing it to coat each crumb more smoothly and create a more cohesive mixture.
- Achieve Fine Crumbs: The finer you grind your chocolate sandwich cookies, the better your crumb crust will hold its shape. Very fine crumbs create more surface area for the butter to bind to, resulting in a sturdier crust that won’t fall apart.
- Balance the Sweetness: While Oreos are sweet, adding a tiny pinch of fine sea salt to your crumb mixture, or using salted butter (and adjusting quantity slightly), can beautifully balance the sweetness and enhance the overall flavor of the chocolate.
- Create a Moisture Barrier (Advanced Tip): For wet or custard-based fillings, especially with a no-bake crust, brush a thin layer of melted dark or white chocolate over the inside of the set crust before filling. Once the chocolate hardens, it creates a delicious moisture barrier that prevents the crust from becoming soggy.
- Press Firmly: This cannot be stressed enough! Use the back of a spoon, your fingers, or the bottom of a measuring cup to press the crumb mixture very hard and evenly into the bottom and up the sides of the 9-inch pie dish. A firmly packed crust is key to maintaining its structure and preventing crumbling when sliced.
- Even Baking for Baked Crusts: If baking, consider using a pie shield or aluminum foil around the edges of the crust for the last few minutes if you notice the edges browning too quickly, ensuring an even bake.
Why You’ll Fall in Love with This Recipe
There are countless reasons why this homemade Oreo pie crust deserves a permanent spot in your recipe collection:
- Superior Flavor and Texture: It simply tastes so much richer and has a more satisfying texture than any store-bought Oreo pie crust. The fresh crumbs and butter make all the difference.
- Minimal Effort, Maximum Impact: This incredibly easy recipe only requires two simple ingredients that are readily available at any grocery store. It’s proof that you don’t need a complicated ingredient list to create something truly delicious.
- Exciting Culinary Exploration: Moving beyond a traditional shortbread or graham cracker crust is a fantastic way to keep your desserts fresh, exciting, and full of delightful surprises. This Oreo crust opens up a world of new flavor pairings.
- A Must-Make for Oreo Enthusiasts: If you’re a devoted fan of Oreo cookies, this recipe is non-negotiable. It celebrates the beloved cookie in a whole new, delicious format.
- Versatile Base: Perfect for everything from creamy cheesecakes to refreshing ice cream pies, and rich chocolate tarts, this crust adapts beautifully to various dessert styles.
And since we’re celebrating all things Oreo, you simply must try some of my other favorite recipes featuring these delightful cookies:
- Indulge in these decadent Crumbl Chocolate Oreo Cookies.
- For a quick and easy treat, whip up these No-Bake Peanut Butter Oreo Bars.
- And you can’t go wrong with these incredibly Chewy Oreo Chocolate Chip Cookies!
Frequently Asked Questions (FAQ) About Oreo Pie Crusts
When is a No-Bake Oreo Crust the Best Choice?
The no-bake option for your Oreo pie crust is ideal for desserts that are designed to be chilled and don’t require oven time. It yields a softer, chewier, and intensely chocolatey crust that beautifully complements cold fillings.
- Pudding Pies: These classic, creamy desserts set perfectly in the refrigerator, and a no-bake Oreo crust provides the perfect soft, flavorful base without competing with the filling’s texture.
- Ice Cream Pies: An ice cream pie practically demands a no-bake crust. Its slight chewiness provides a delightful contrast to the frozen filling, and it saves you the step of baking then cooling.
- Mousse or Whipped Cream Fillings: Recipes like no-bake peanut butter pie, chocolate mousse pie, or no-bake s’mores pie, which feature light, airy textures, are best served with a cold-set crust. The delicate nature of these fillings holds best when kept chilled and doesn’t require the structural rigidity of a baked crust.
- Quick Desserts: When time is of the essence, a no-bake crust lets you assemble your dessert much faster, as there’s no waiting for the oven or for the crust to cool down.
When Should I Opt for a Baked Oreo Crust?
Choosing to bake your Oreo crust provides a firmer, crispier texture that is essential for certain types of fillings or for enhanced stability. Baking the crust adds a lovely toasted flavor and helps it stand up to heavier or wetter ingredients.
- Oreo Cheesecake Recipes: Cheesecakes often have rich, dense fillings that require a sturdy base. A baked Oreo crust offers the necessary structure and a satisfying crunch that prevents it from becoming soggy under the heavy filling. You could also par-bake the crust (bake for a shorter time) to ensure it stays extra crispy.
- Custard and Cream Pie Recipes: Desserts like pumpkin pie, banana cream pie, or coconut cream pie benefit greatly from a baked crust. The firmer texture creates a strong foundation that can support the delicate, often moist, custard or cream filling without becoming soft.
- Baked Pies with Delicate Fillings: Lemon tarts, French silk pie, or other desserts with delicate, often warm, fillings need a baked crust to maintain their structural integrity throughout the baking process and cooling.
- Heavy or Wet Fillings: Any baked dessert recipes involving fruit pies or other fillings with high moisture content will benefit from a pre-baked crust. Baking creates a crucial barrier that helps prevent the dreaded soggy bottom, ensuring your pie remains delicious from top to bottom.
- Making Ahead: Even for some no-bake desserts, baking the crust can add extra crunch and help it hold together better, especially if you’re preparing the pie a day or two in advance and storing it before serving. The added firmness improves its shelf stability.
Can I Experiment with Different Oreo Flavors?
Absolutely! The beauty of this recipe lies in its adaptability. While classic Oreos provide a fantastic chocolate base, feel free to unleash your creativity with other delightful Oreo cookie flavor variations:
- Double Stuf Oreos: If you love extra creaminess, these are a great choice. Just be mindful that they contain more filling, so you might need to reduce the amount of melted butter by a tad to maintain the right consistency.
- Golden Oreos: For a vanilla-flavored crust that’s bright and buttery, Golden Oreos are an excellent alternative, pairing wonderfully with fruit or lemon fillings.
- Red Velvet Oreos: These can add a beautiful hue and a subtle red velvet cake flavor to your crust, perfect for special occasions.
- Peanut Butter Oreos: An ideal choice for peanut butter lovers, creating a delicious base for chocolate-peanut butter desserts.
- Mint Oreos: Perfect for holiday desserts or any time you want a refreshing twist.
Get adventurous and try this recipe with any of your favorite Oreo cookie flavors to discover new and exciting dessert combinations!
How Do I Properly Store My Unfilled Oreo Crust?
If you’ve made your crust ahead of time and it’s still unfilled, proper storage is key to maintaining its freshness and texture:
- Room Temperature: For short-term storage, you can keep the unfilled crust in its pie plate, securely wrapped with plastic wrap or aluminum foil, on your kitchen counter at room temperature for up to 3 to 4 days. This is generally suitable for baked crusts.
- Refrigerator: To extend its freshness slightly, especially for no-bake crusts, store it in the fridge. Again, ensure it’s tightly wrapped to prevent it from absorbing odors or moisture from other foods. It can last a few days longer in the refrigerator than at room temperature.
Can I Prepare This Oreo Crust in Advance?
Absolutely! This Oreo pie crust is an excellent candidate for make-ahead preparation, saving you time and effort when you’re ready to assemble your dessert:
- Refrigerator Storage: A prepared, unfilled crust can be stored in the refrigerator for up to 5-7 days. Wrap it very tightly with plastic wrap to prevent it from drying out or absorbing external odors.
- Freezer Storage: For longer storage, you can freeze the unfilled crust for up to a month. Ensure it’s wrapped securely in multiple layers of plastic wrap, pressing out as much air as possible to prevent freezer burn.
- Using from Frozen: When you’re ready to use a frozen crust, there’s often no need to thaw it! You can bake it directly from frozen (adding a few extra minutes to the baking time if needed), or if it’s a no-bake crust, simply let it sit at room temperature for about 10-15 minutes while you prepare your filling.
Why Do We Keep the Cream Filling from the Oreo Cookies?
Keeping the cream filling in the Oreo cookies is a deliberate choice with several benefits:
- Binding Power: The creamy texture of the filling helps to bind the crushed cookie crumbs together more effectively, resulting in a more cohesive and less crumbly crust.
- Enhanced Flavor: The filling contributes additional sweetness and a distinct vanilla-like creaminess that complements the dark chocolate of the cookie, creating a more complex and satisfying flavor profile for the crust.
- Moisture and Texture: It adds moisture to the dry crumbs, preventing the crust from being too brittle and giving it a pleasant, slightly chewy quality, especially in no-bake applications.
- Time and Waste Saving: It eliminates the tedious step of scraping out the filling, saving you time and reducing food waste, making the recipe even easier and more efficient.
Is it Possible to Make This Recipe Gluten-Free?
Absolutely! Making this Oreo pie crust gluten-free is incredibly simple. Many brands, including Oreo, now offer delicious gluten-free versions of their chocolate sandwich cookies. Just ensure you’re using certified gluten-free Oreos, and the rest of the recipe remains exactly the same. You’ll still achieve the same fantastic taste and texture, just without the gluten!
Oreo Pie Crust Recipe
Skip the store-bought crust! This Oreo Pie Crust recipe is quick, easy, and packed with flavor! With just Oreos and butter, you’ll have the perfect base for cheesecakes, pudding pies, or ice cream cakes. Make it no-bake for a soft, chocolatey crust or bake it for a crisp, crunchy texture.
Cook Time: 10 mins
Total Time: 20 mins
Yield: 1 pie crust
Ingredients
- 24 Whole Oreo cookies (with filling)
- 5 tablespoons unsalted butter, melted
Instructions
Option 1: No-Bake Oreo Crust
- Use a food processor to pulse the 24 Oreo cookies into very fine crumbs. If using a rolling pin, place Oreos in a sturdy zip-top bag and crush until they resemble fine sand.
- In a large bowl, combine the Oreo crumbs with the 5 tablespoons of warm, melted butter. Stir thoroughly until the mixture is evenly moistened and resembles wet sand.
- Pour about two-thirds of the mixture into a 9-inch pie plate. Press it firmly up the sides using the back of a spoon or the bottom of a measuring cup. Add the rest of the mixture to the base and press it into an even layer. Ensure it’s packed very tightly.
- Refrigerate the crust for at least 30 minutes (or freeze for 15 minutes) before adding your desired filling.
Best for no-bake cheesecakes, pudding pies, and ice cream cakes!
Option 2: Baked Oreo Crust
- Preheat your oven to 350°F (175°C).
- Follow Steps 1-3 from the “No-Bake Oreo Crust” section above to crush the Oreos, mix with butter, and firmly press the mixture into a 9-inch pie pan.
- Bake the crust in the preheated oven for 8-10 minutes, or until it looks slightly firm and you can smell a warm, toasty aroma.
- Allow the baked crust to cool completely on a wire rack before adding your filling. This prevents condensation and keeps the crust crispy.
Nutrition
Calories: 1838 kcal | Carbohydrates: 205g | Protein: 16g | Fat: 112g | Saturated Fat: 52g | Polyunsaturated Fat: 12g | Monounsaturated Fat: 41g | Trans Fat: 2g | Cholesterol: 151mg | Sodium: 1125mg | Potassium: 691mg | Fiber: 8g | Sugar: 117g | Vitamin A: 1755IU | Calcium: 77mg | Iron: 35mg
Nutrition information is automatically calculated and should only be used as an approximation.
Like this recipe? We’d love to hear from you! Leave a comment below to share your experience or ask a question.