

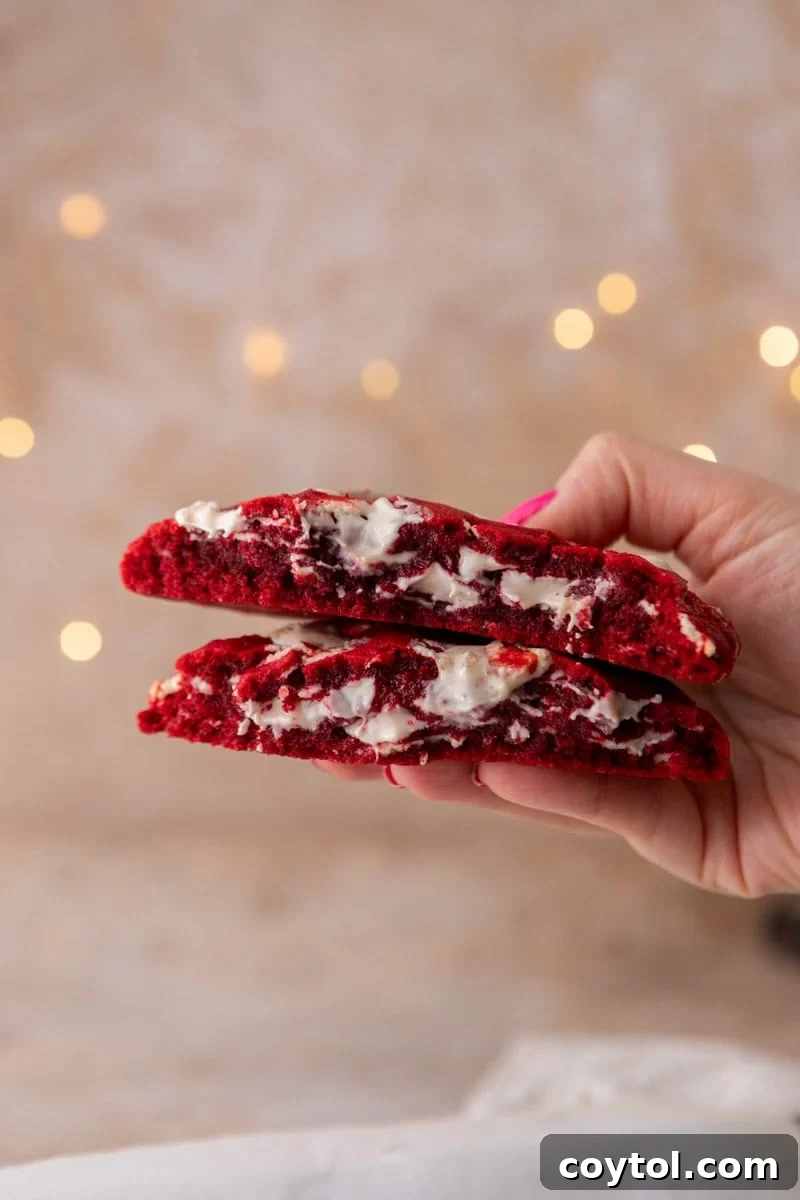
Craving something sweet but don’t want to bake an entire batch of cookies? This **single-serve red velvet cookie** is your ultimate indulgence! Imagine a perfectly rich, delightfully chewy cookie, generously studded with luscious white chocolate chunks that melt into dreamy, creamy pockets with every bite. Baked as one magnificent, large cookie, it boasts a glistening, slightly underbaked center and perfectly set, crispy edges, delivering all the iconic flavor of a classic red velvet cake in a convenient, satisfying cookie format. No more commitment to a full dozen when a single, decadent treat is all you desire.
If you’re a fan of single-serving desserts, we have more delightful recipes for you to explore! Satisfy your cravings with our chocolate chip cookie for one, dive into double the chocolate with our double chocolate cookie for one, or enjoy the nutty goodness of this single-serve peanut butter cookie recipe. Each one is designed to bring you maximum flavor with minimal effort.

A Personal Note on Chocolate Perfection
When developing this recipe, I experimented with various white chocolate options, and honestly, the results were always incredible. One of my absolute favorite versions featured Tony’s white chocolate cheesecake strawberry chocolate – the unique flavor profile complemented the rich red velvet base exceptionally well. However, classic white chocolate chunks are equally fantastic and create those signature gooey, melty pools throughout the cookie that make it so visually appealing and delicious. Don’t feel limited though! White chocolate chips or even regular semi-sweet chocolate chips work beautifully too, making this a wonderfully forgiving and flexible single-serve recipe you’ll be eager to bake again and again. The choice of chocolate allows for delightful customization to suit your personal taste.
Why You’ll Adore This Single-Serve Red Velvet Cookie
This isn’t just any cookie; it’s a perfectly crafted treat designed for those moments when only a fresh, warm, homemade cookie will do. Here’s why this recipe will become your new go-to:
- The Perfect Portion: It’s designed specifically as a single serving, ideal for satisfying a sudden craving without the hassle or temptation of a full batch of cookies. Enjoy one perfect cookie, perfectly portioned.
- Pantry Staples: Crafted with simple, everyday ingredients you likely already have in your kitchen, making it incredibly convenient to whip up anytime.
- Unmatched Richness & Chew: The inclusion of just one egg yolk is a secret weapon, contributing exceptional richness and that desirable chewy texture without making the cookie too dense or cake-like.
- Effortless Preparation: No fancy equipment is required! You only need a medium bowl and a rubber spatula, making cleanup a breeze and the baking process entirely stress-free.
- Instant Gratification: Forget about long chilling times. This recipe requires absolutely no chilling, meaning you can go from craving to cookie in under 30 minutes.
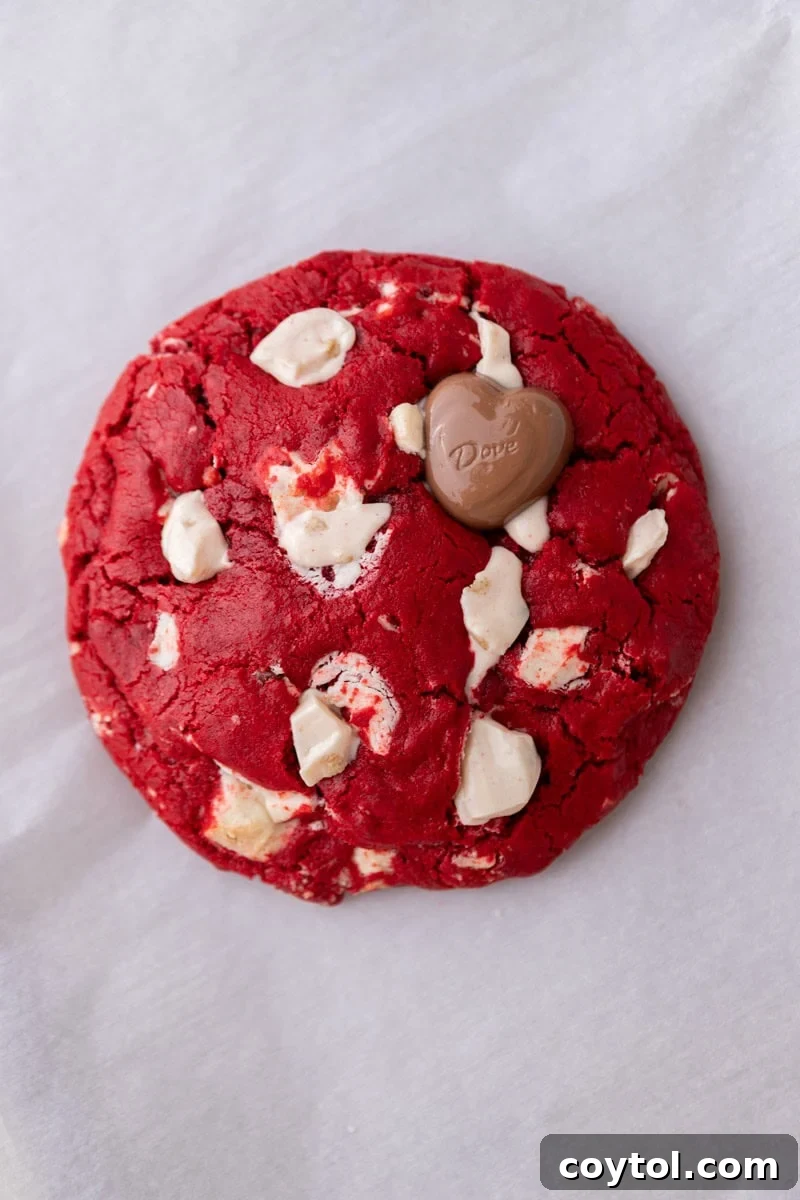
- Bakery-Style Perfection: Expect a thick, wonderfully chewy center crowned with a gorgeous, shiny, crackled top – hallmarks of a professional bakery-quality cookie.
- Loaded with White Chocolate: Packed generously with white chocolate chunks or chips, ensuring a burst of sweet, creamy chocolate in every single bite. The melted white chocolate adds an extra layer of decadence.
Essential Ingredients for Your Red Velvet Cookie
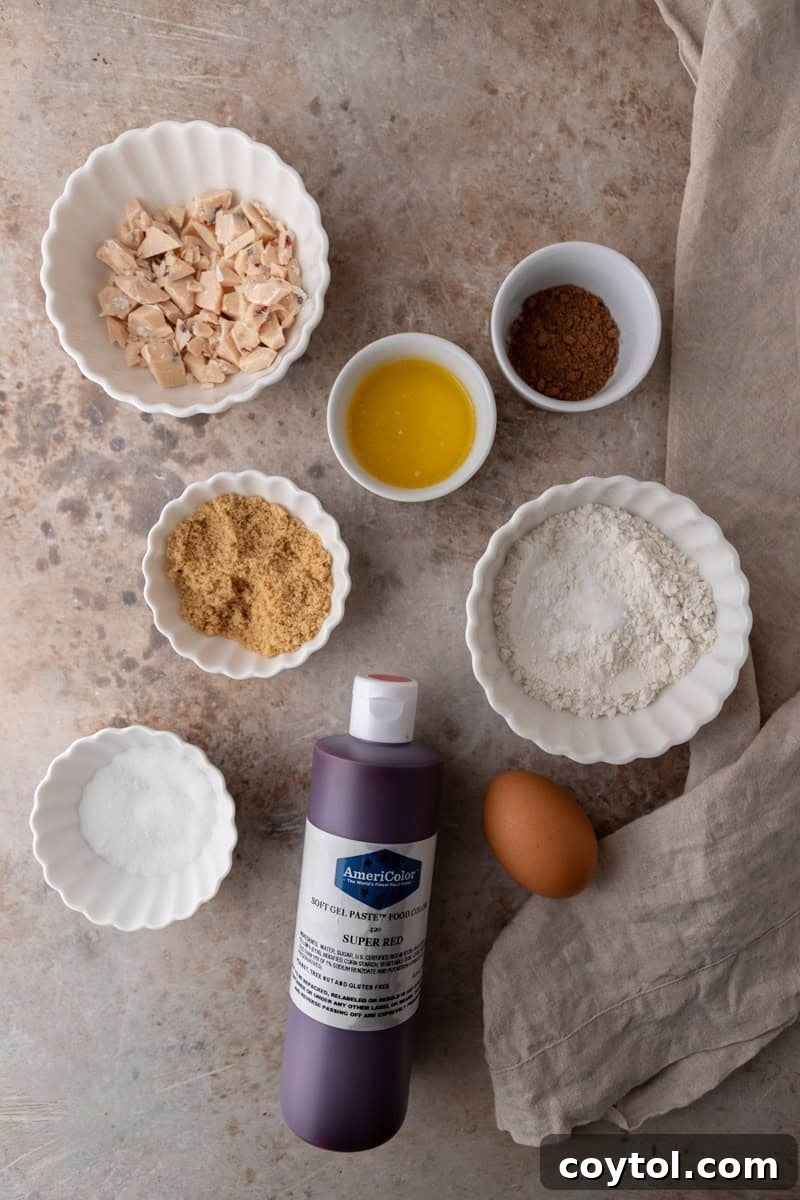
Gathering your ingredients is the first step towards this delightful treat. Here’s everything you’ll need to create this amazing single-serving red velvet cookie:
- Unsalted Butter: Melted and slightly cooled. While unsalted is generally preferred for baking control, salted butter works perfectly fine in a pinch and can even enhance the flavor.
- Brown Sugar & White Granulated Sugar: The combination of both sugars is key. Brown sugar adds moisture, chewiness, and a slight caramel note, while white sugar contributes to spread and crisp edges.
- Egg Yolk: Make sure it’s at room temperature for better emulsification and a smoother dough. This single yolk is crucial for richness and chew, preventing a cakey texture.
- Vanilla Extract: A high-quality vanilla extract is essential for depth of flavor, complementing the cocoa and sweet notes.
- Gel Red Food Coloring: For that iconic, vibrant red hue. Gel coloring is recommended as it provides intense color without adding excess liquid to the dough.
- All-Purpose Flour: The structural backbone of our cookie. Measure accurately, preferably by weight, or use the spoon-and-level method to avoid a dry, crumbly cookie.
- Unsweetened Cocoa Powder: A touch of cocoa is what gives red velvet its characteristic subtle chocolate flavor and deepens the red color.
- Cornstarch: The secret ingredient for an extra tender and chewy cookie. It helps to keep the cookie soft and prevents it from becoming tough.
- Baking Soda: Our leavening agent, which reacts with the acidic cocoa powder and brown sugar to help the cookie rise slightly and spread.
- Salt: Essential for balancing the sweetness and enhancing all the other flavors. Don’t skip it!
- White Chocolate Chunks or White Chocolate Chips: Chunks are preferred for those gorgeous melty pools, but chips are a great alternative.
A helpful tip for this recipe is that all ingredients are measured in tablespoons and teaspoons. This makes the recipe incredibly approachable, easy to follow, and simple to scale if you decide to make a double batch for sharing (or for yourself!).
Baking Your Perfect Single-Serve Red Velvet Cookie: A Step-by-Step Guide
Crafting this delicious cookie is surprisingly simple and requires minimal effort. Follow these detailed steps to achieve a bakery-quality treat in your own kitchen. For precise measurements and exact bake times, always refer to the full recipe card below.
- Prepare Your Oven and Pan: Begin by preheating your oven to 350°F (175°C). Line a small cookie sheet or baking tray with parchment paper. Parchment paper is crucial here as it prevents sticking and helps the cookie bake evenly, ensuring easy removal.
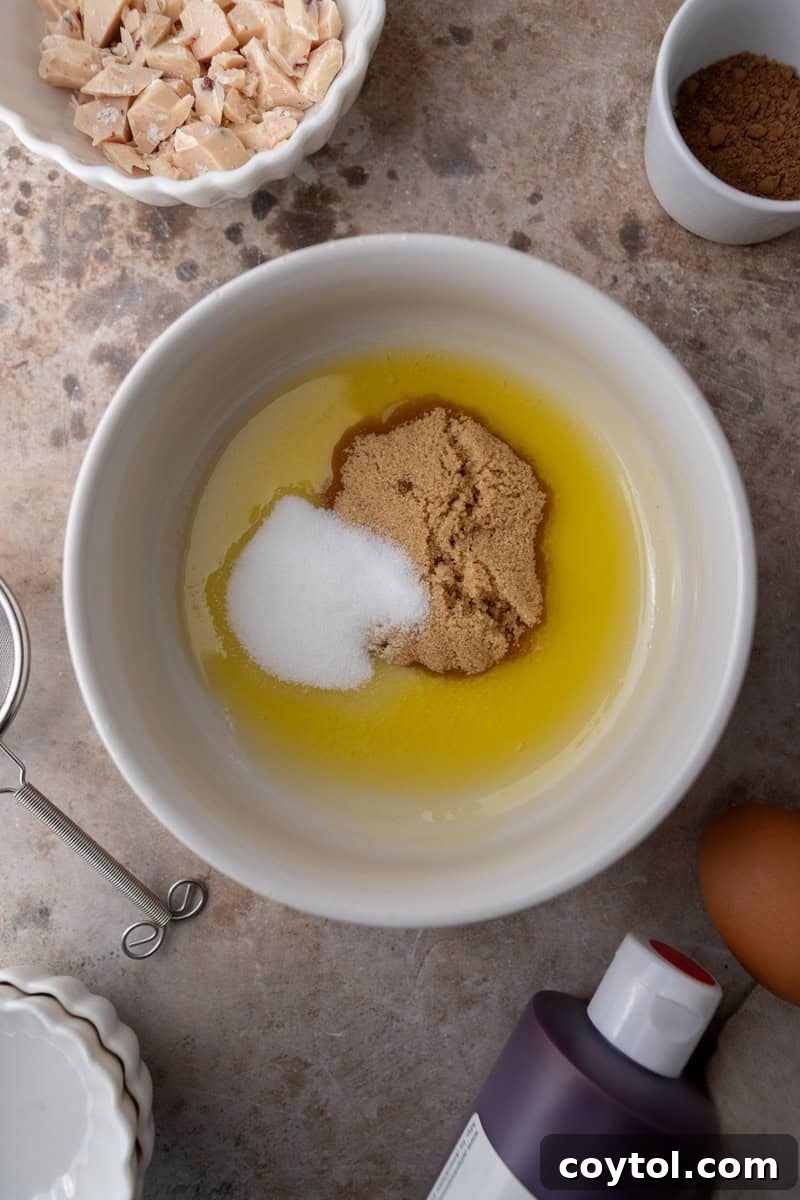
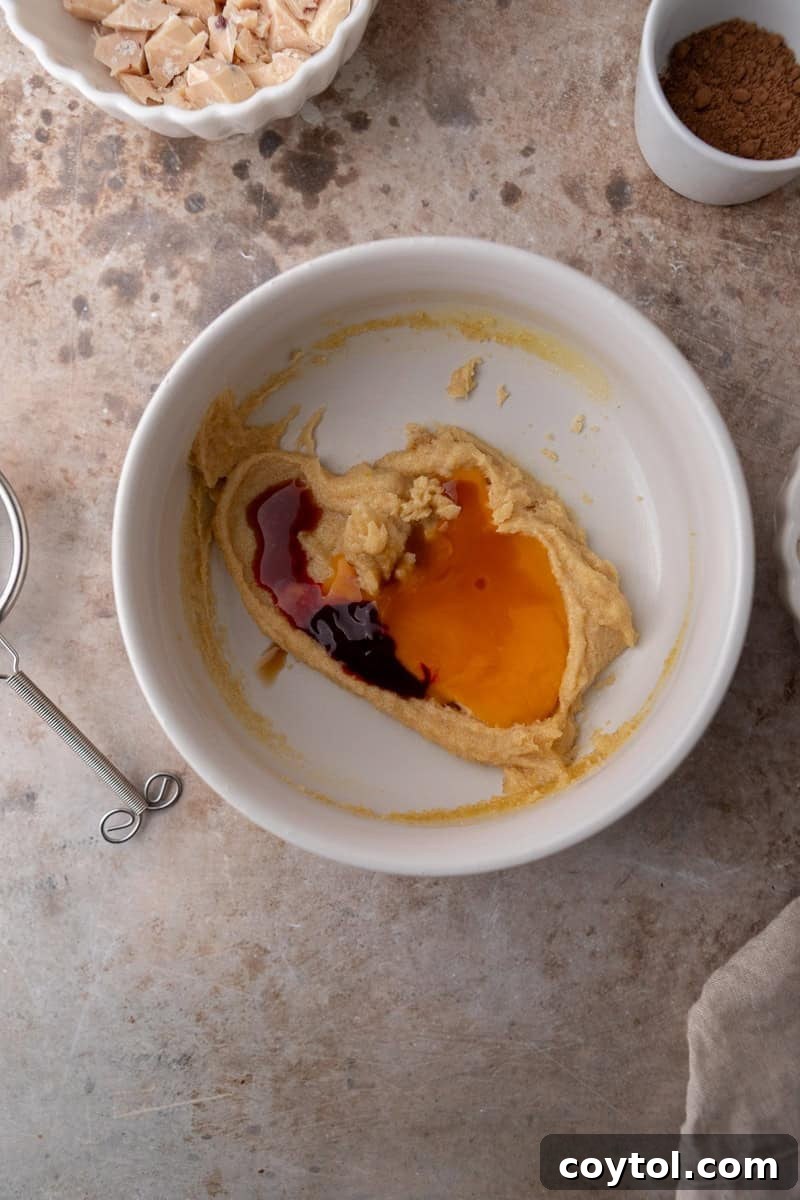
- Combine Wet Ingredients for a Glossy Base: In a medium-sized mixing bowl, combine the melted butter (ensure it’s slightly cooled so it doesn’t cook the egg yolk), brown sugar, and white granulated sugar. Whisk these together vigorously until the mixture is beautifully glossy and smooth, with no sugar lumps visible. This step helps to dissolve the sugars and create a rich foundation for your cookie. Next, whisk in the room-temperature egg yolk, vanilla extract, and the vibrant red gel food coloring. Continue whisking until the mixture is fully combined, a stunning uniform red, and perfectly shiny.
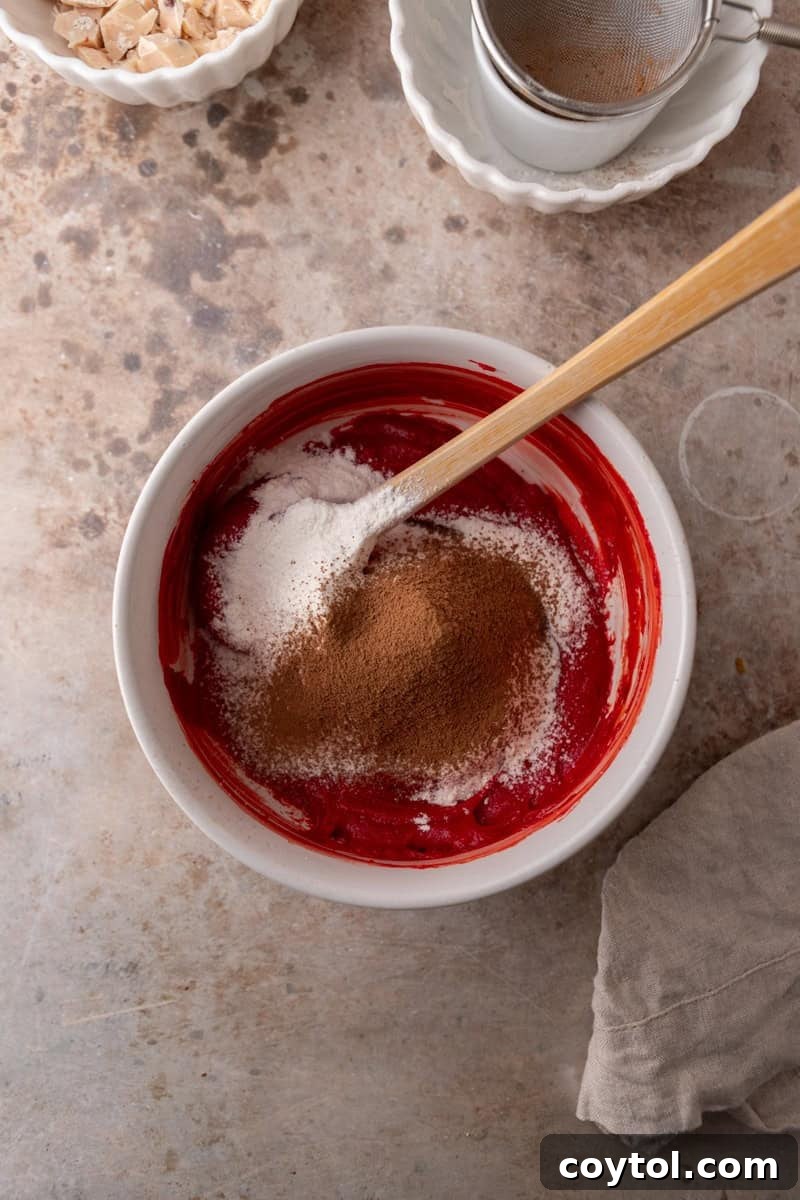
- Incorporate Dry Ingredients Gently: Carefully sprinkle the all-purpose flour, unsweetened cocoa powder, cornstarch, baking soda, and salt directly over the wet ingredients in the bowl. Using a rubber spatula, fold the dry ingredients into the wet mixture. It’s crucial to mix just until combined, being careful not to overmix. Overmixing can develop the gluten in the flour, leading to a tough, dry cookie rather than the desired chewy texture.
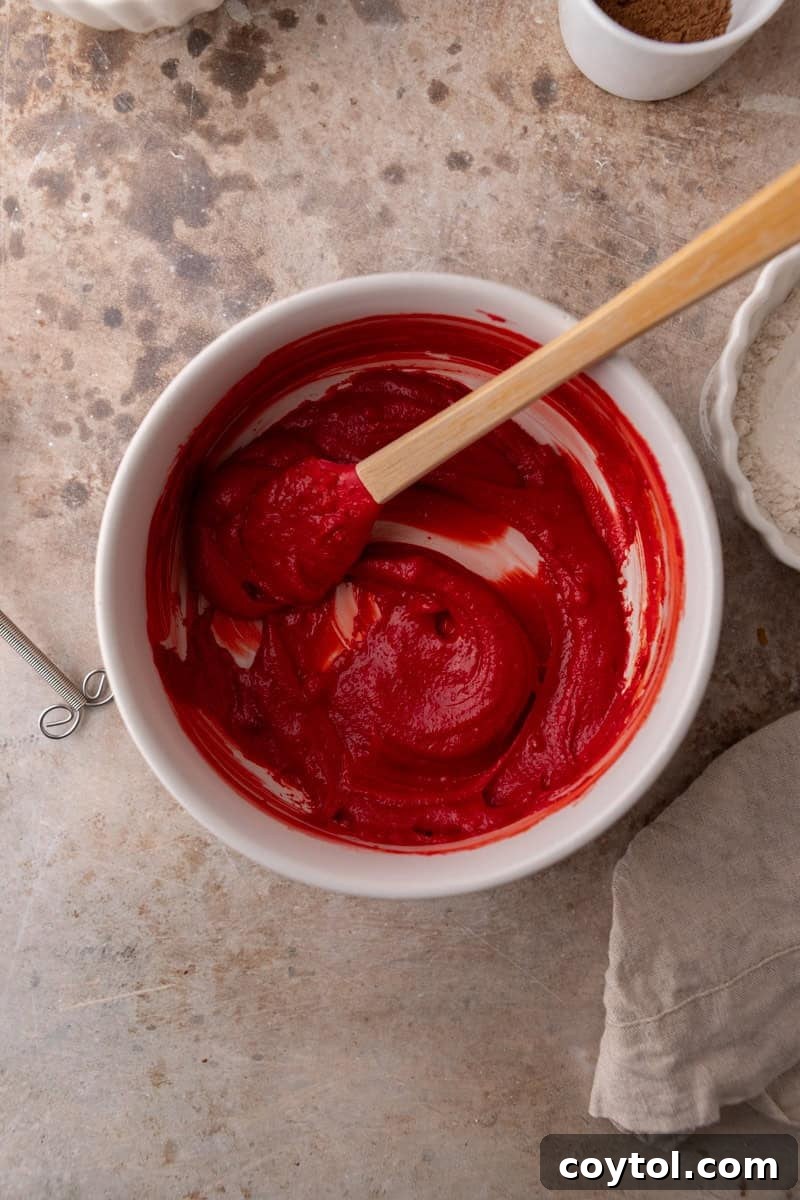
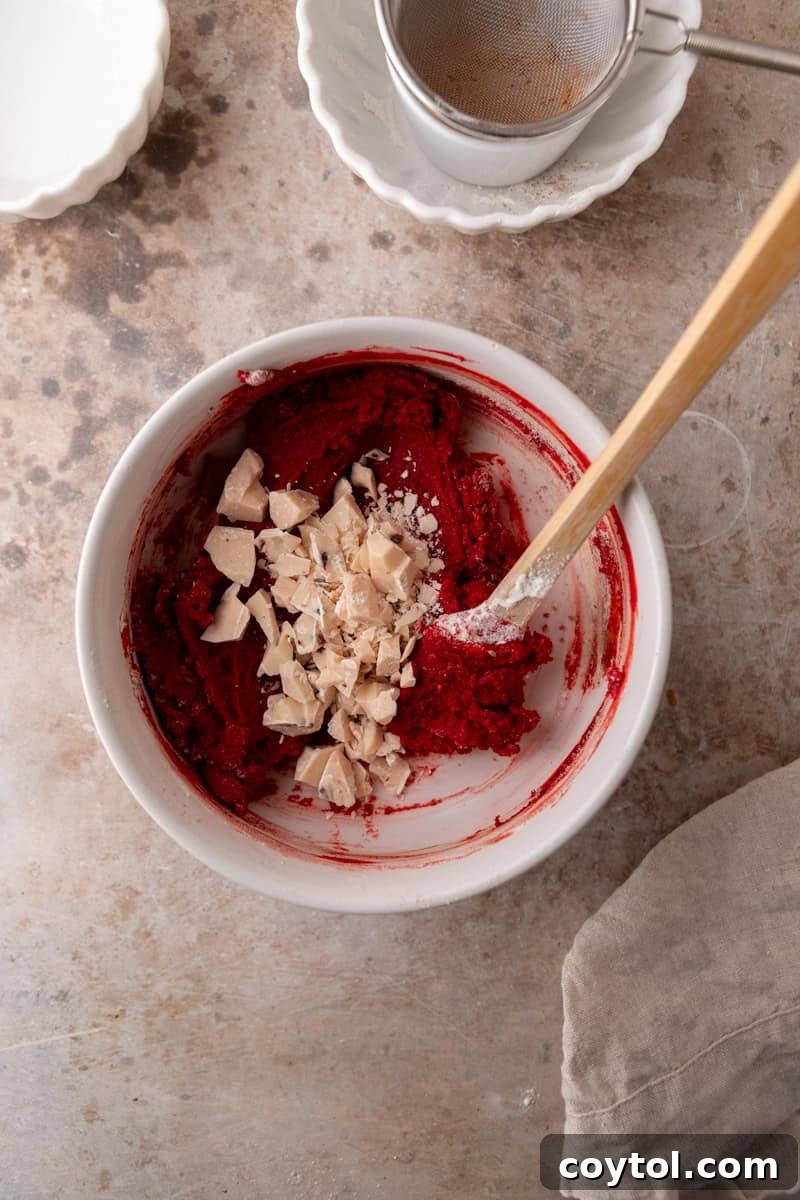
- Add the White Chocolate: Now, it’s time for the star mix-in! Fold in the majority of your white chocolate chunks or chips into the dough. Reserve a small handful of chunks to press into the top of the cookie after baking for that beautiful bakery-style aesthetic. This ensures those gooey pools of chocolate are visible on the surface.
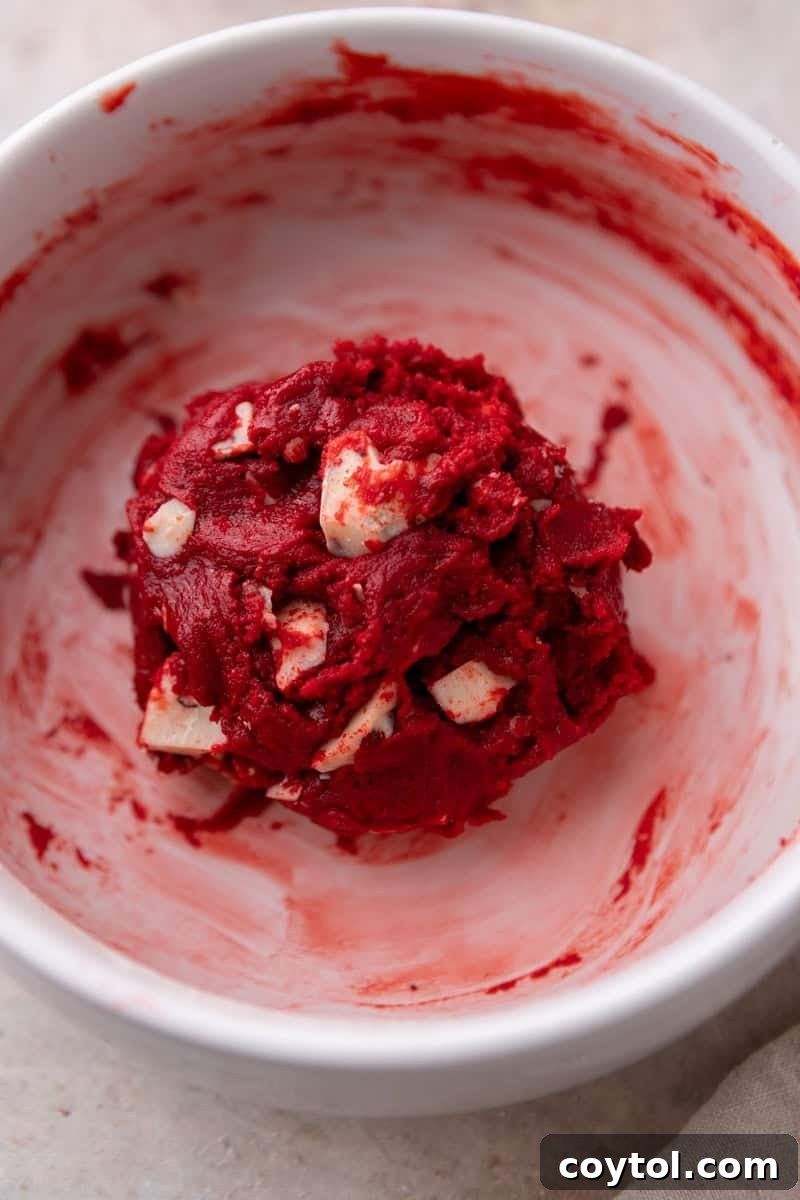
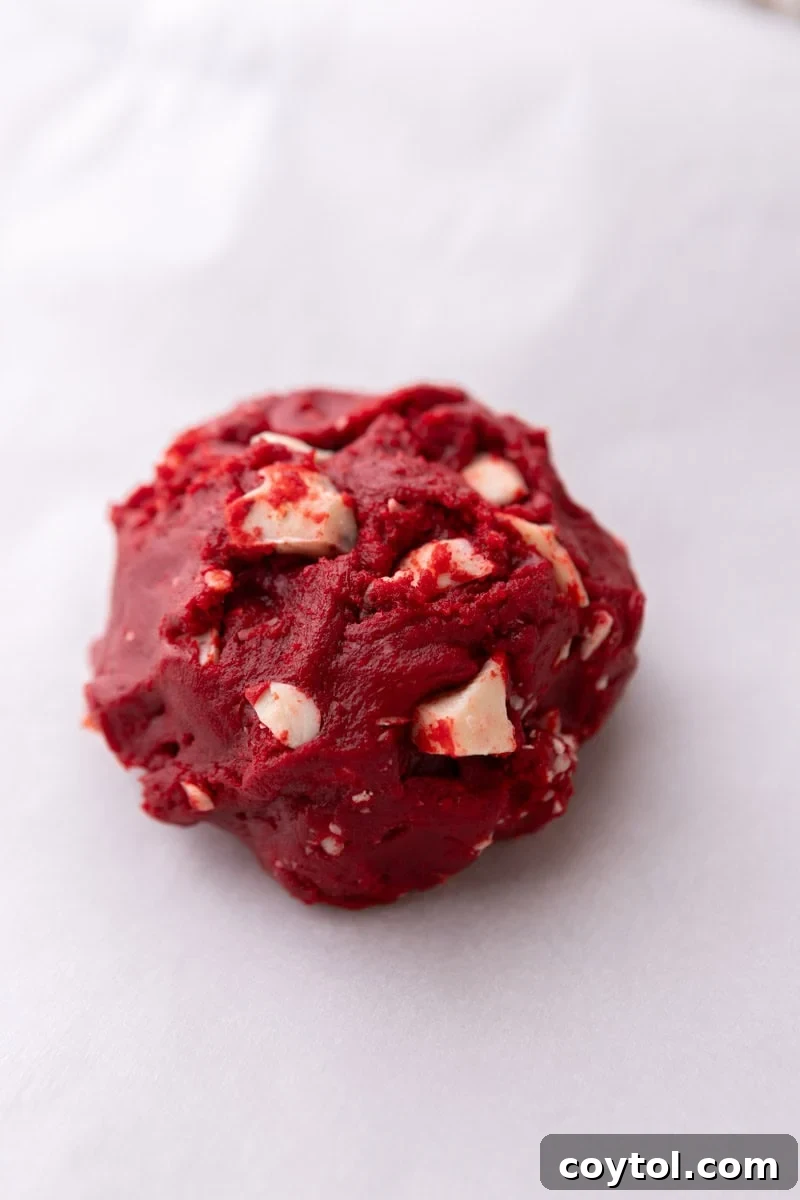
- Bake to Perfection: Gently form the entire dough into one large, uniform ball and place it in the center of your prepared cookie sheet. Bake for approximately 13 minutes. The key is to watch for the edges to be set and lightly golden, while the center still appears slightly underbaked and gloriously glossy. This ensures a perfectly chewy interior.
- The Finishing Touches & Cooling: As soon as the cookie comes out of the oven, while it’s still warm and pliable, press the reserved white chocolate chunks into the top. This enhances its visual appeal and creates even more melty goodness. For an extra special touch, I sometimes add a decorative Dove chocolate heart for a truly show-stopping look. Allow the cookie to cool on the baking pan for 5–10 minutes. This crucial cooling period allows the cookie to continue setting and firming up, ensuring it holds its shape and develops its ultimate chewy texture before you dive in.
The Science Behind This Perfect Cookie
Every element in this single-serve red velvet cookie recipe plays a vital role in achieving its irresistible texture and flavor:
- Melted Butter and Egg Yolk: The combination of melted butter and a single egg yolk is magical. Melted butter creates a denser, chewier cookie with a crinkly top, while the egg yolk contributes significant richness and helps achieve that desirable glossy, slightly fudgy center.
- Cornstarch for Chewiness: Adding a small amount of cornstarch is a brilliant trick to ensure the cookie remains incredibly chewy and soft, rather than developing a dry, cake-like texture. It interferes with gluten development, making the cookie more tender.
- No Baking Powder for Density: By relying solely on baking soda, we ensure a dense, substantial cookie similar to what you’d find in a high-end bakery. Baking powder would lead to a lighter, more cakey crumb, which isn’t the goal for this rich, chewy treat.
- Short Bake Time for a Soft Center: A precisely timed, shorter bake is essential. Pulling the cookie from the oven when its center is still slightly underbaked allows it to continue cooking gently from residual heat, resulting in that coveted soft, gooey, and perfectly chewy interior.
Expert Tips & Storage Recommendations
- Achieving a Glossy Center: For that signature shiny, slightly gooey center, it’s crucial to remove the cookie from the oven when the very middle still looks slightly underbaked and jiggly. Don’t worry, it will continue to set up beautifully as it cools on the baking sheet, transforming into the perfect texture.
- Optimal Storage: Once completely cooled, store your baked red velvet cookie in an airtight container or a ziplock bag at room temperature. It will stay wonderfully fresh and delicious for up to 2 days, though it’s best enjoyed warm and fresh from the oven!
- Customize Your Chocolate: While white chocolate chunks are fantastic, feel free to experiment with different types! Milk chocolate, dark chocolate, or even a mix of chocolates can create exciting variations.
- Flaky Sea Salt Finish: For an elevated taste experience, sprinkle a tiny pinch of flaky sea salt over the warm cookie immediately after it comes out of the oven. The salt perfectly contrasts the sweetness of the red velvet and white chocolate, enhancing all the flavors.

Frequently Asked Questions (FAQs)
Yes, absolutely! The cookie will still boast the classic red velvet flavor profile from the cocoa powder and vanilla extract. It just won’t have the signature vibrant red color. This modification will not impact the cookie’s texture or the required bake time.
Using only the egg yolk is a deliberate choice to maximize richness and create an exceptionally chewy texture. The yolk provides fat and emulsifiers without the extra liquid from the egg white, which could otherwise lead to a more cakey, less dense cookie. It also contributes to that desirable glossy center.
You certainly can! White chocolate chips work perfectly well and will still provide delicious flavor. However, white chocolate chunks tend to melt more irregularly, creating those wonderful, gooey pockets and pools of chocolate on top of the cookie, which adds to its bakery-style appeal. Both options are incredibly delicious.
Your cookie is ready when its edges appear set and lightly golden, but the center still looks slightly underbaked and beautifully glossy. This crucial visual cue ensures a soft, chewy interior. Remember, the cookie will continue to set and firm up as it cools on the baking sheet.
Yes, you can easily double all the ingredients in this recipe. You can either bake it as two large cookies (which might require a minute or two more baking time) or divide the dough into two slightly smaller cookies, in which case the bake time may need to be reduced by a couple of minutes.
A cakey texture often indicates that too much flour was used, or the dough was overmixed. To prevent this, measure your flour accurately (preferably by weight) and mix the dough gently with a spatula only until the ingredients are just combined. This helps maintain the cookie’s dense, chewy texture.
This recipe is designed for immediate baking, requiring no chilling. However, if you need to prepare ahead, the dough can be chilled briefly in the refrigerator for up to 30 minutes or frozen for longer storage. If baking from frozen, you might need to add 1-2 minutes to the bake time and potentially flatten the dough ball slightly before baking.
This recipe stands out for its meticulous balance of ingredients and technique. Using melted butter and both brown and white sugars creates a perfect foundation for texture. The single egg yolk ensures unparalleled richness and chewiness, while the short bake time guarantees a glossy, soft center. All these elements combine to deliver a truly indulgent, bakery-style red velvet cookie specifically portioned for one, without the fuss of a large batch.
Certainly! To make two smaller cookies, simply divide the cookie dough in half before shaping. Since they will be smaller than a single large cookie, adjust the baking time to approximately 9 minutes, or until the edges are set and the centers still look slightly soft.

Single-Serve Red Velvet White Chocolate Chunk Cookie
10 minutes
13 minutes
23 minutes
1
serving
Print Recipe
Ingredients
- 2 tbsp unsalted butter melted and slightly cooled
- 2 tbsp light brown sugar
- 1 tbsp granulated sugar
- 1 large egg yolk room temperature
- 1/2 tsp vanilla extract
- 1/2 tsp red gel food coloring
- 6 tbsp all-purpose flour
- 1 tsp unsweetened cocoa powder
- 1/4 tsp cornstarch
- 1/8 tsp baking soda
- 1/8 tsp salt
- 1/4 cup white chocolate chunks or chips
Instructions
-
Preheat oven to 350°F (175°C) and line a baking sheet with parchment paper.
-
In a small bowl, whisk together the melted butter, brown sugar, and granulated sugar until glossy and smooth.
-
Whisk in the egg yolk, vanilla extract, and red food coloring until fully combined and shiny.
-
Sprinkle the flour, cocoa powder, cornstarch, baking soda, and salt over the bowl. Fold gently with a spatula just until combined, being careful not to overmix.
-
Fold in most of the white chocolate chunks, saving a few for the top.
-
Form the dough into a thick ball, place on the parchment-lined baking sheet, and bake for 13 minutes until the edges look set and the center still appears slightly underbaked and glossy.
-
Press more white chocolate chunks into the top while the cookie is still warm for a beautiful bakery-style look.
-
Optional but highly recommended: sprinkle a tiny pinch of flaky sea salt. Let cool on the pan for 10–15 minutes before enjoying.
Notes
Nutrition
Calories:
812Calories
|
Carbohydrates:
98g
|
Protein:
11g
|
Fat:
43g
|
Saturated Fat:
25g
|
Polyunsaturated Fat:
2g
|
Monounsaturated Fat:
12g
|
Trans Fat:
1g
|
Cholesterol:
264mg
|
Sodium:
488mg
|
Potassium:
254mg
|
Fiber:
2g
|
Sugar:
62g
|
Vitamin A:
973IU
|
Vitamin C:
0.2mg
|
Calcium:
148mg
|
Iron:
3mg
Nutrition information is automatically calculated, so should only be used as an approximation.
Like this? Leave a comment below!