
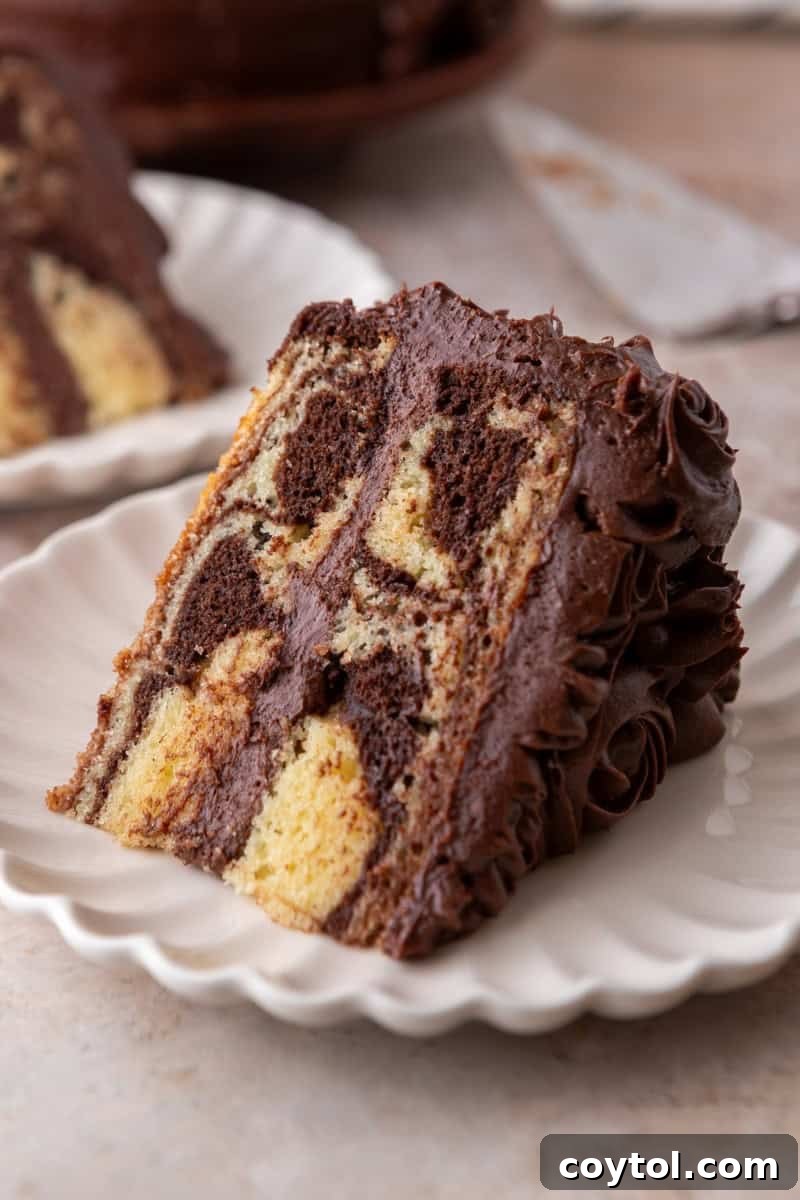
Prepare to be amazed by this layered marble cake – a recipe I meticulously perfected until every single slice showcased bold, beautifully defined vanilla and chocolate swirls, nestled within a crumb so moist it practically melts in your mouth. This isn’t just *any* marble cake; it’s the kind of irresistible dessert that inevitably has everyone reaching for a second, even a third, piece.
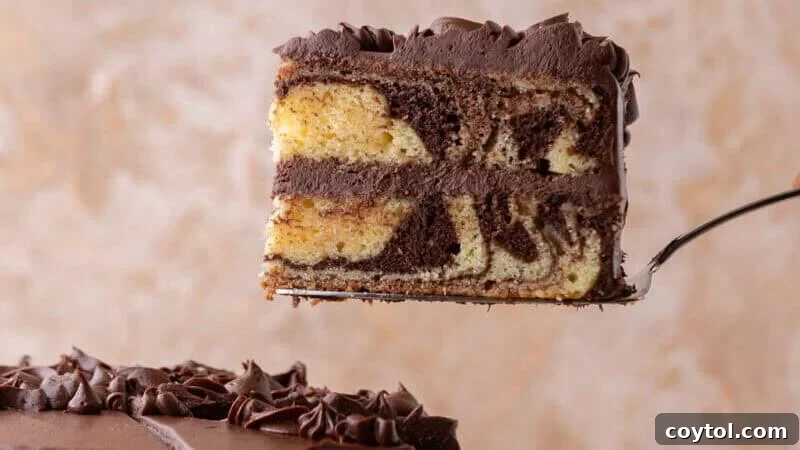
The secret weapon behind those flawlessly clean, vibrant swirls? It all comes down to one crucial step: *blooming the cocoa powder in hot coffee* before integrating it into the batter. This simple yet transformative technique not only intensifies and deepens the chocolate flavor to an extraordinary degree, but also ensures both the vanilla and chocolate batters maintain an identical, smooth consistency. This prevents the colors from bleeding into a dull, muddy brown, guaranteeing those picture-perfect, defined swirls you crave.
And let’s not forget the crown jewel: the chocolate cream cheese frosting. This isn’t your average buttercream; it’s a fudgy, rich, and wonderfully tangy masterpiece that perfectly balances the sweetness of the cake. It’s truly one of my all-time favorite frosting recipes, adding an unparalleled dimension of flavor and luxury. If you’ve ever had the pleasure of tasting the frosting from my beet chocolate cake recipe, you already have a hint of how utterly incredible this one is!
**My Journey to the Perfect Marble Cake**
For a long time, I hesitated to tackle a layered marble cake. My past experiences with them were, well, unremarkable. I often encountered cakes with muddy, indistinct swirls, a disappointingly dry crumb, and plain vanilla buttercreams that contributed little to the overall experience. I knew a marble cake could be so much more than “just okay.”
This persistent dissatisfaction became the driving force behind developing *this* particular recipe. I established a few non-negotiables: the swirls *had* to be bold and eye-catching, the crumb *had* to be unbelievably moist and tender, and the frosting *had* to elevate the entire cake, transforming it from good to truly exceptional. This meticulous approach led to countless trials and adjustments, each test bringing me closer to the ideal.
That’s precisely how I arrived at the inspired pairing of this cake with a rich, tangy chocolate cream cheese frosting. The subtle tanginess of the cream cheese brilliantly cuts through the richness of the chocolate and vanilla cake, creating a harmonious and perfectly balanced flavor profile that prevents it from being overly sweet or heavy. Even before I had finished frosting the entire cake, my partner Kyle tried a slice and immediately demanded to know when I would be making it again. That’s when I knew I had finally cracked the code to the ultimate marble cake.
**The Science Behind Its Unrivaled Moisture and Tenderness**
Achieving a cake this incredibly moist and tender is no accident; it’s the result of carefully chosen ingredients and precise baking techniques. Here’s a breakdown of what makes this layered marble cake stand out:
- Oil and Butter, a Dynamic Duo: Most cakes use either oil or butter, but this recipe cleverly combines both. Oil is a liquid at room temperature, which translates to a cake crumb that remains exceptionally tender and moist, even after refrigeration. Butter, on the other hand, contributes an unparalleled depth of rich, buttery flavor that oil simply cannot provide. Together, they create a cake that is both flavorful and incredibly soft. Cakes made with butter alone tend to firm up considerably when chilled, but the addition of oil here ensures your marble cake stays delightfully tender.
- Sour Cream for Velvety Texture: Sour cream is a secret weapon in many moist cake recipes, and it plays a vital role here. It adds extra fat and moisture, which contributes to a denser, more velvety, and luxurious crumb. The slight tang from the sour cream also brightens the flavors and helps to balance the sweetness, enhancing the overall taste complexity. It’s the ingredient that gives this cake its signature melt-in-your-mouth quality.
- Precise Baking Temperature (340°F / 170°C): While many cakes are baked at 350°F, this recipe calls for a slightly lower temperature of 340°F. This subtle difference is critical. Baking at a lower temperature allows the cake to rise more slowly and evenly, preventing the edges from baking too quickly and drying out before the center is cooked through. This extended, gentle bake time results in a uniformly tender and moist cake from edge to center. The beautiful outcome is a cake that remains soft for days and, remarkably, often tastes even better on day two as the flavors have more time to meld and deepen.
**Mastering the Art of Defined Marble Swirls**
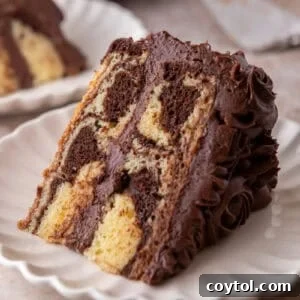
The hallmark of a truly spectacular marble cake is its striking, well-defined swirls – a feature where many recipes fall short, often resulting in messy or indistinguishable patterns. The key to achieving those bold, beautiful ribbons of vanilla and chocolate lies in two fundamental principles: matching the consistency of both batters and employing a judicious swirling technique.
- The Magic of Blooming Cocoa Powder: This is perhaps the most significant game-changer for chocolate flavor and swirl definition. By whisking Dutch-process cocoa powder into 3 tablespoons of hot coffee, you create a smooth, intensely flavored cocoa paste. This “blooming” process not only amplifies the chocolate’s depth, making it taste richer and more complex (without imparting any coffee flavor to the final cake), but also ensures the cocoa is fully hydrated. When this paste is folded into a portion of the vanilla batter, it doesn’t significantly thicken it. Both the vanilla and chocolate batters end up with virtually the same consistency, which is absolutely vital. If the chocolate batter is thicker than the vanilla, it will sink, or the colors will bleed into each other, leading to a muddy appearance instead of distinct swirls.
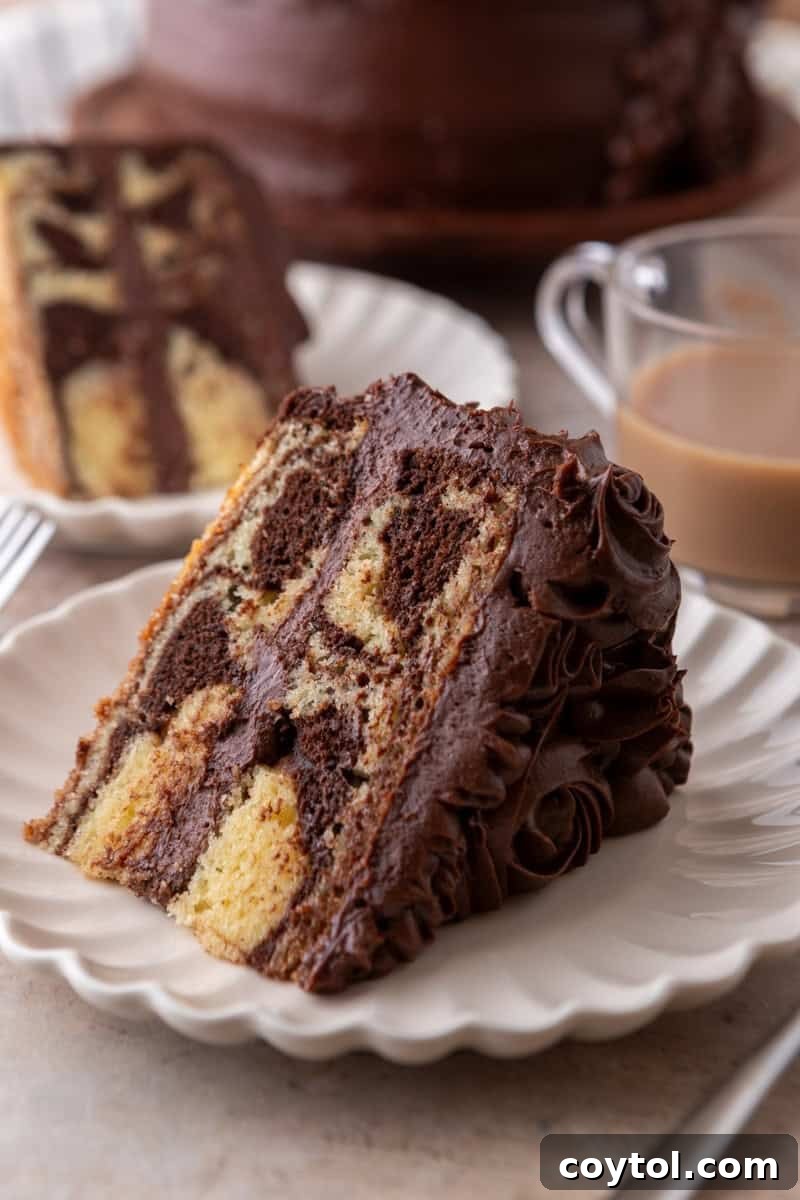
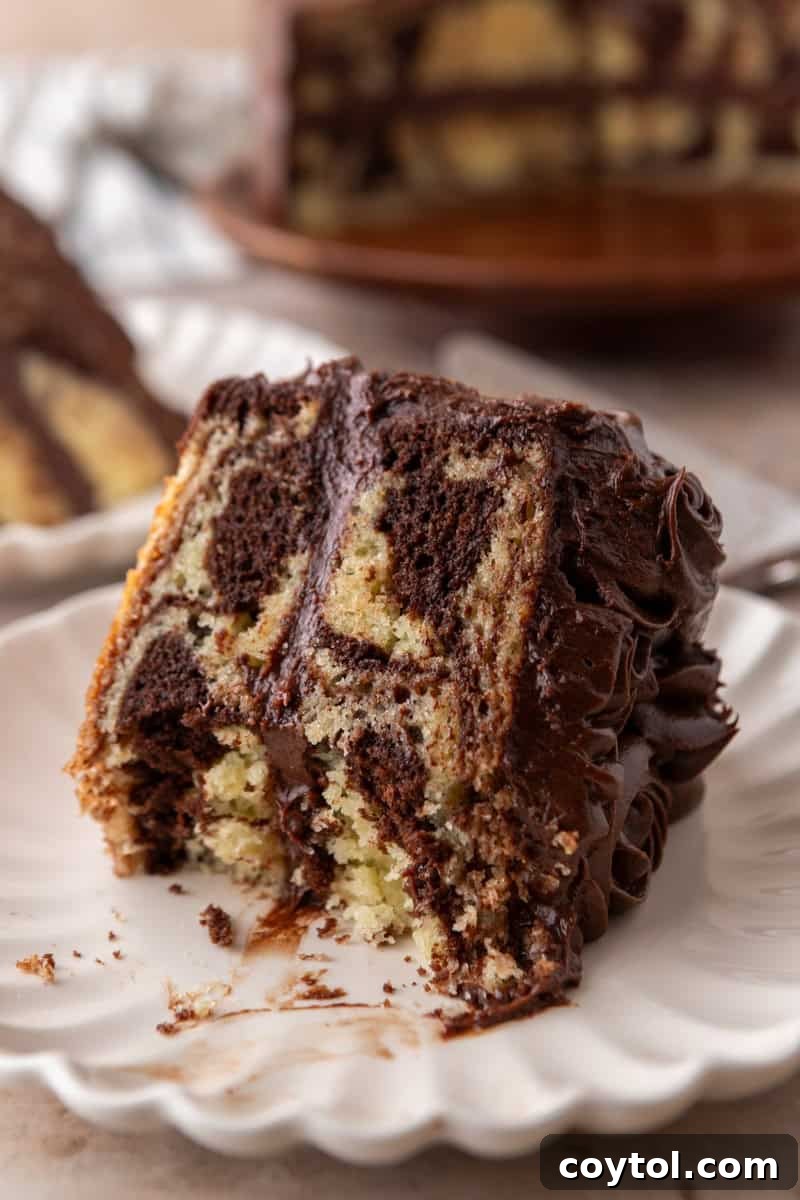
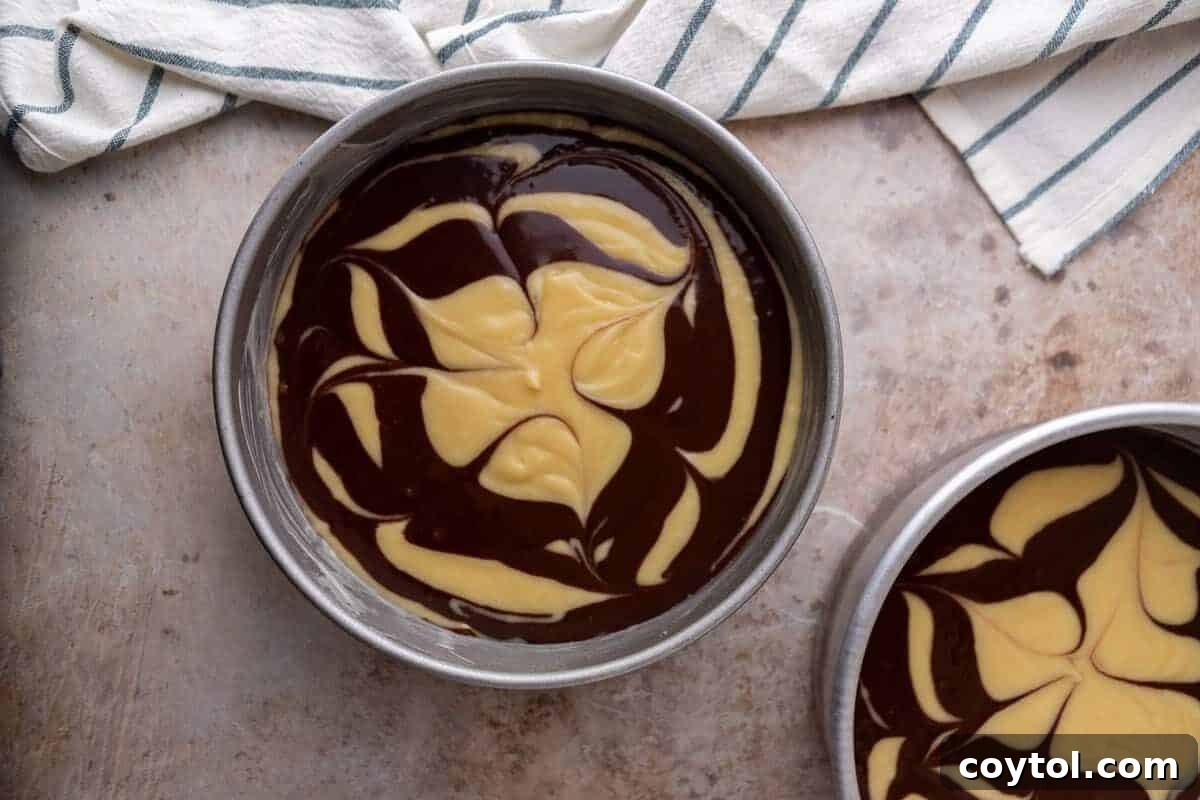
- The Art of Under-Swirling: Once your batters are in the pans, the temptation might be to swirl extensively to create intricate patterns. However, less is often more when it comes to marble cake. Using a knife or a skewer, gently go through the batter only 3 to 4 times, maximum. Every additional pass blends the colors further, diminishing the contrast and eventually leading to those undesirable muddy brown hues. You’re aiming for bold, striking ribbons of contrasting colors, not a uniform, light brown mix. Think of it as painting a masterpiece with deliberate strokes.
By carefully following these two crucial steps – blooming your cocoa for consistent batter texture and resisting the urge to over-swirl – you’ll unlock the secret to creating a marble cake with breathtakingly defined and vibrant patterns every single time.
**Essential Ingredients for Your Masterpiece**
This recipe starts with a single, versatile vanilla cake batter, a portion of which is then transformed into the chocolate batter with the addition of a rich cocoa paste. Understanding the role of each key ingredient will help you achieve the best results:
- Dutch-Process Cocoa Powder: For the deepest, most intense chocolate flavor and the darkest color, Dutch-process cocoa powder is non-negotiable. Its alkalinity (neutralized acidity) gives it a darker hue and a smoother, less bitter taste compared to natural cocoa, resulting in a superior contrast against the vanilla batter. This ensures your swirls are truly bold and striking.
- Oil and Melted Butter: As discussed, this combination is the secret to a cake that is both incredibly rich in flavor (from the butter) and consistently tender and moist, even when chilled (thanks to the oil). This dual-fat approach yields a crumb that truly melts in your mouth.
- Sour Cream: The unsung hero for a velvety, ultra-moist texture. The high fat content and acidity in sour cream break down gluten strands, keeping the cake exceptionally tender, while adding a subtle tang that enhances the overall flavor profile.
- Extra Sugar and Oil in the Chocolate Batter: This is a crucial detail often overlooked in other marble cake recipes. Cocoa powder is inherently drying because it absorbs moisture. To ensure the chocolate swirls are just as tender and moist as the vanilla portions, we compensate by adding a small amount of extra granulated sugar and vegetable oil to the chocolate batter. This balances the moisture absorption, guaranteeing a uniform texture throughout the cake.
- The Frosting – A Symphony of Chocolate: Our chocolate cream cheese frosting is crafted using both high-quality Dutch-process cocoa powder and melted dark chocolate (60-70% cacao). This double-chocolate approach provides an incredible depth of flavor and a wonderfully fudgy, rich finish. For comprehensive instructions and expert tips on perfecting this decadent topping, be sure to consult my full Chocolate Cream Cheese Frosting recipe.
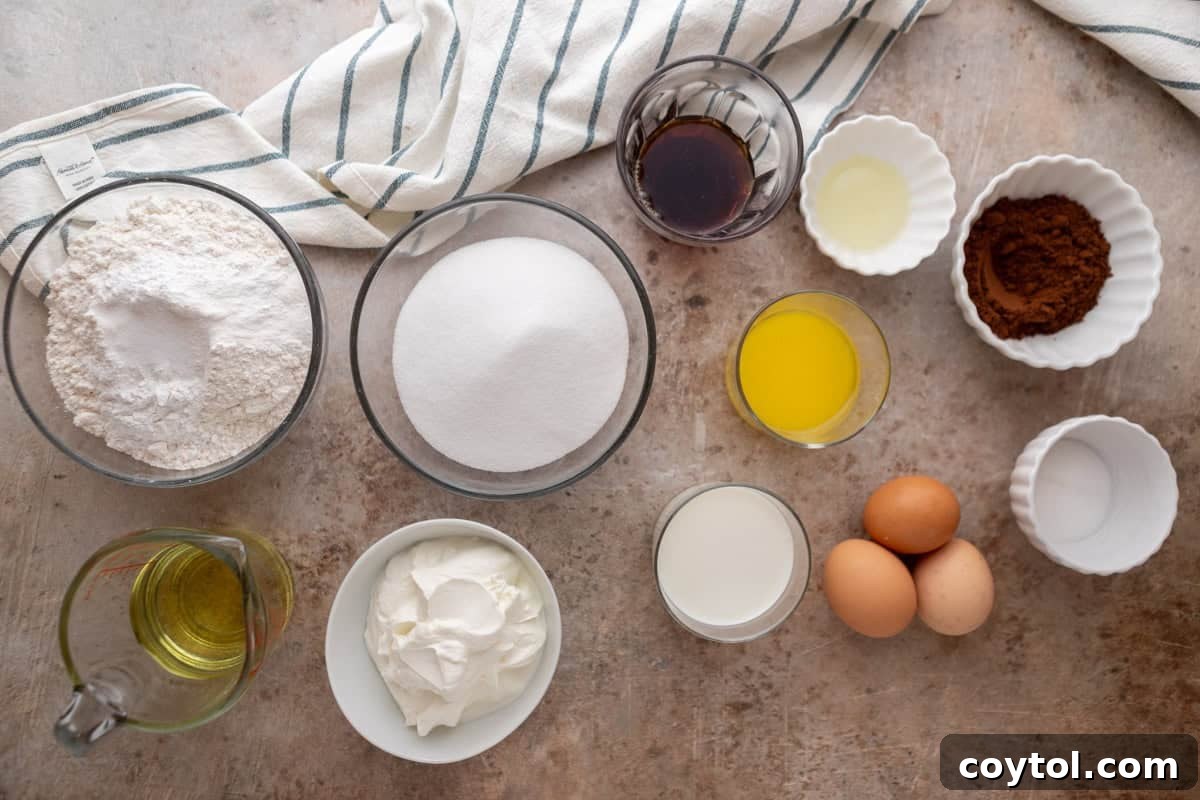
**Step-by-Step Guide: Crafting Your Layered Marble Cake**
Follow these detailed steps carefully to ensure your marble cake turns out perfectly moist, beautifully swirled, and utterly delicious.
- Prepare Your Workspace and Pans: Begin by preheating your oven to 340°F (170°C). This slightly lower temperature is key for an evenly baked, moist cake. Prepare two 8-inch round cake pans by thoroughly greasing them. For extra insurance against sticking, line the bottoms with parchment paper circles and then grease the parchment paper as well. For truly effortless cake release, I highly recommend using my trusted cake release goop – it works wonders!
- Create the Rich Cocoa Paste: In a small, heatproof bowl, combine the Dutch-process cocoa powder with 3 tablespoons of hot coffee. Whisk diligently until the mixture is completely smooth and glossy, resembling a thick, luxurious paste. This step “blooms” the cocoa, intensifying its flavor and ensuring a smooth, lump-free integration into the batter. Set this aside to cool slightly.
- Assemble the Vanilla Batter Base: In a large mixing bowl, whisk together all the dry ingredients for the vanilla batter: all-purpose flour, granulated sugar, baking powder, and salt. Ensure they are well combined. In a separate medium bowl, whisk together the wet ingredients: large eggs (at room temperature), sour cream (at room temperature), vegetable oil, slightly cooled melted unsalted butter, vanilla extract, and whole milk (at room temperature). Whisk until thoroughly combined and smooth.
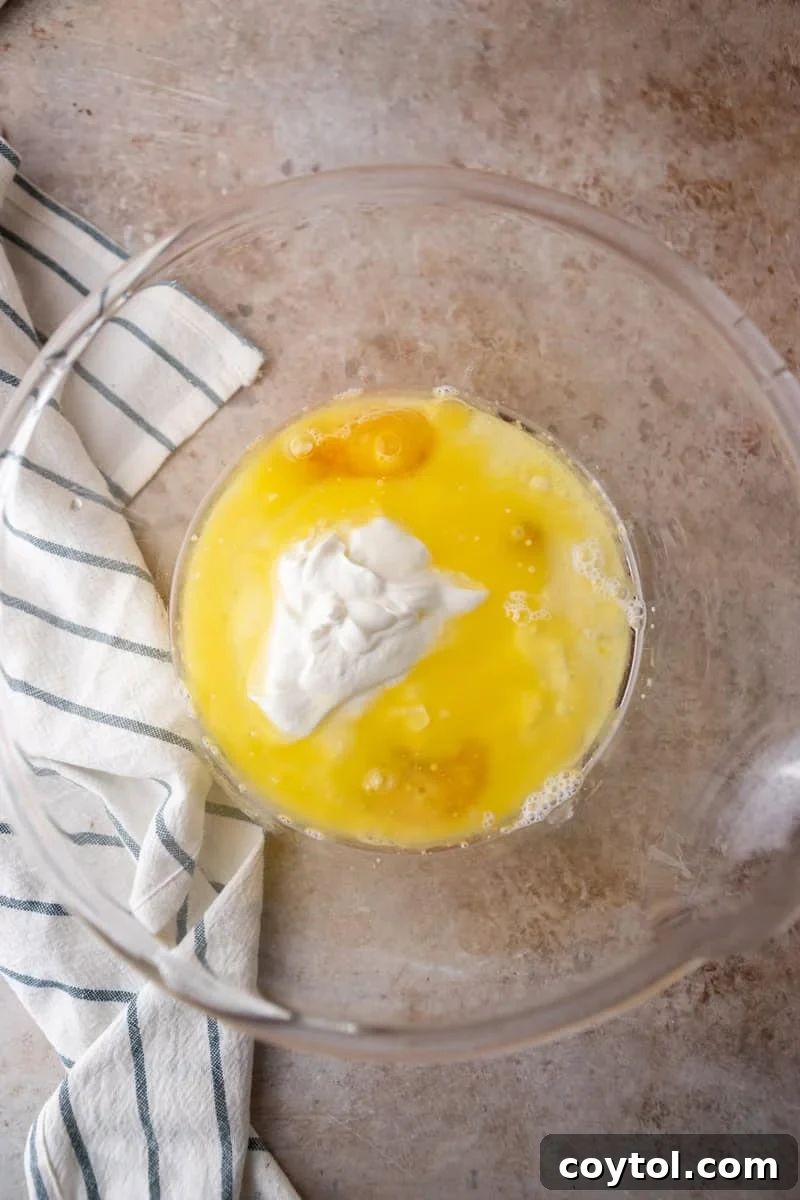
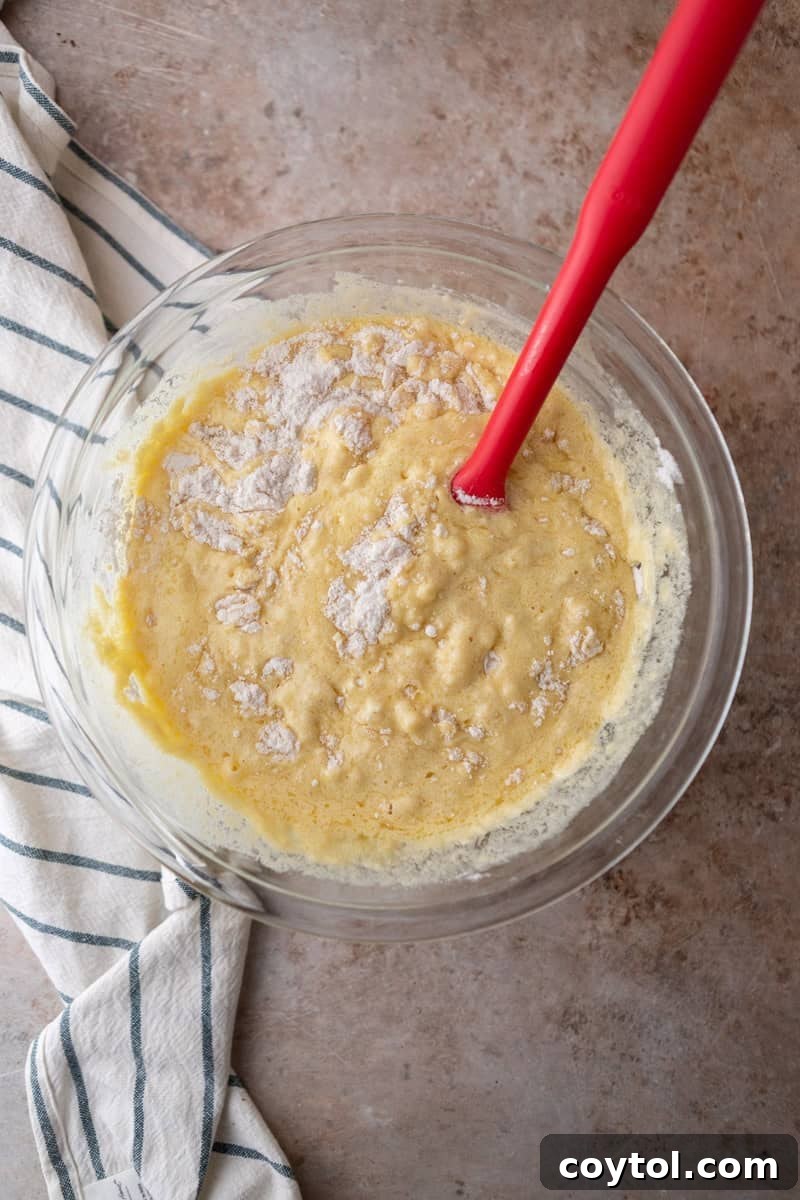
- Combine Wet and Dry Ingredients: Pour the whisked wet ingredients into the dry ingredients. Using a spatula or whisk, gently stir until the batter is *just smooth*. Be careful not to overmix, as this can develop gluten and lead to a tough cake. A few small lumps are acceptable.
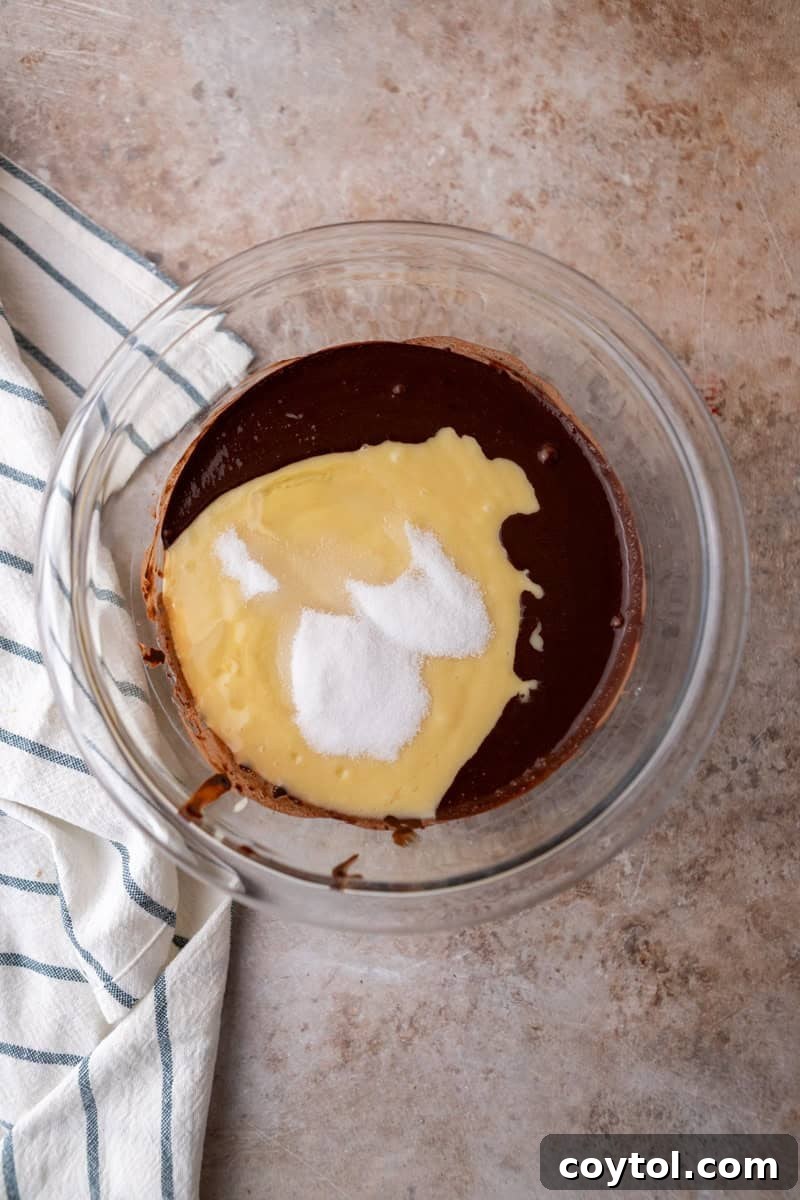
- Form the Chocolate Batter: Carefully transfer approximately one-third of the vanilla batter (roughly 1½ cups) into a separate clean bowl. To this, add the previously prepared bloomed cocoa paste, along with the extra 2 tablespoons of granulated sugar and 1 tablespoon of vegetable oil. Gently fold these ingredients together until the chocolate batter is uniform in color and consistency. The added sugar and oil compensate for cocoa’s drying properties, ensuring the chocolate swirls are as tender as the vanilla.
- Swirl and Fill the Pans: Divide the plain vanilla batter evenly between your two prepared 8-inch cake pans. Then, using a large spoon, dollop 5-6 spoonfuls of the chocolate batter on top of the vanilla batter in each pan. For beautiful, defined swirls, take a knife or a skewer and gently run it through the batters only 3 to 4 times. Resist the urge to over-swirl! For a slightly different, playful design, you can also drop spoonfuls of batter directly in the center, layering them on top of each other, as I sometimes do.
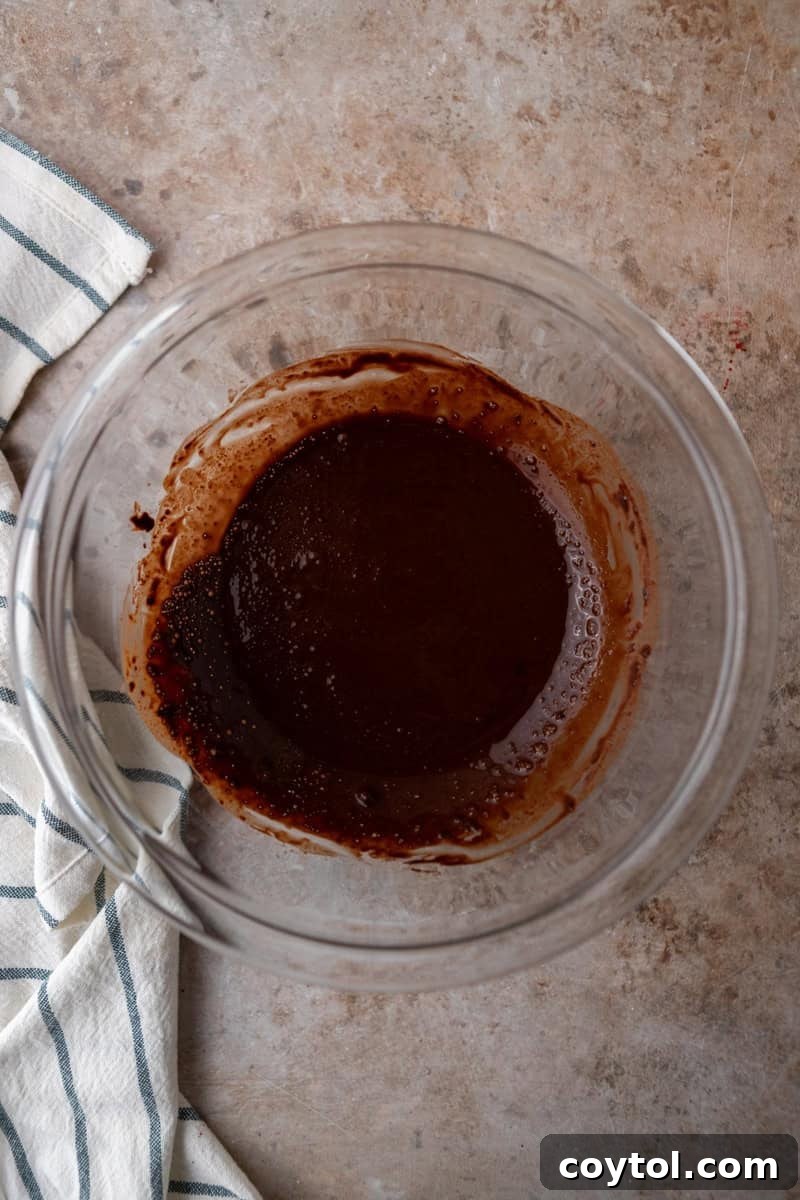
- Bake to Perfection: Transfer the filled cake pans to your preheated oven. Bake for approximately 27-32 minutes at 340°F (170°C). The cake layers are done when a wooden toothpick inserted into the center comes out with moist crumbs attached, not wet batter. Avoid opening the oven door too early, especially during the first 20 minutes, to prevent the cakes from sinking.
- Cooling Process: Once baked, remove the cakes from the oven and let them cool in their pans for about 10 minutes. This allows the delicate structure to set. After 10 minutes, carefully invert the cakes onto a wire cooling rack, remove the parchment paper, and let them cool completely to room temperature before frosting. Attempting to frost warm cakes will result in melted frosting and a messy situation!
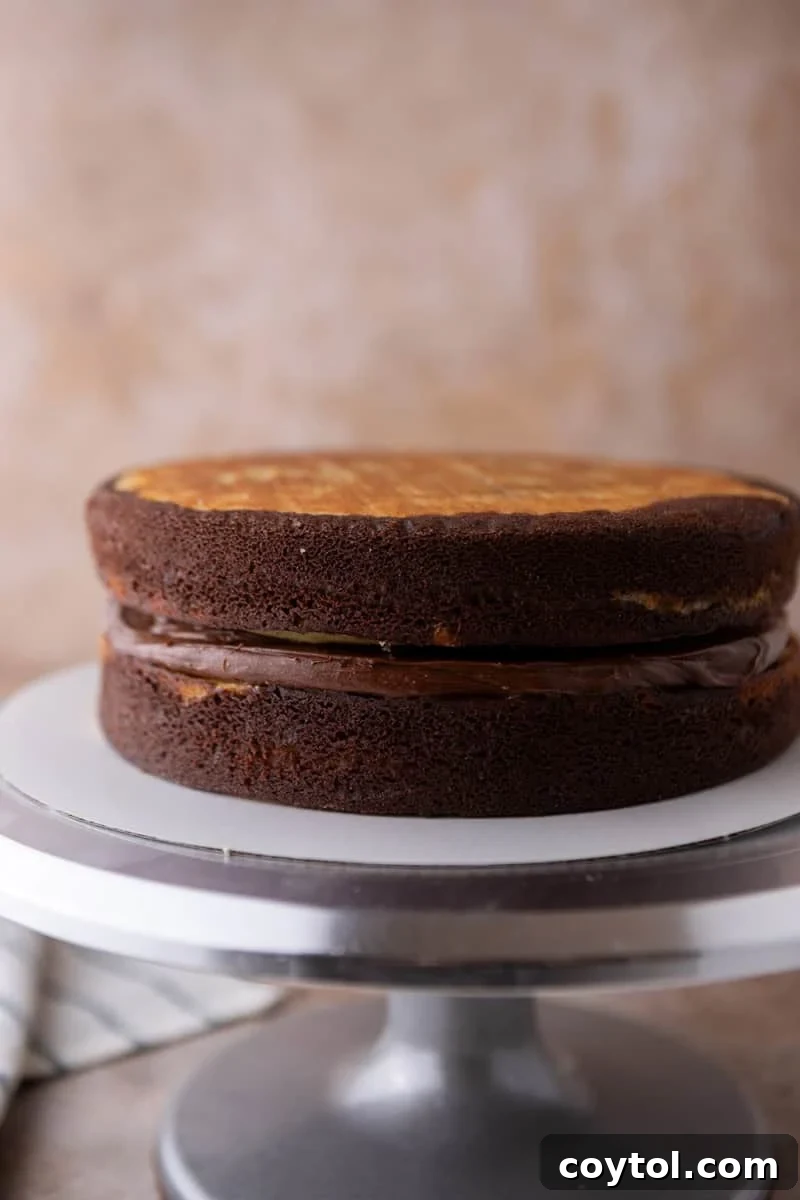
- Level the Cake Layers: Once your cake layers are completely cool, use a sharp serrated knife (a bread knife works well) to carefully level off any domes that may have formed on top. This ensures that your cake layers stack evenly and create a stable, professional-looking finished cake.
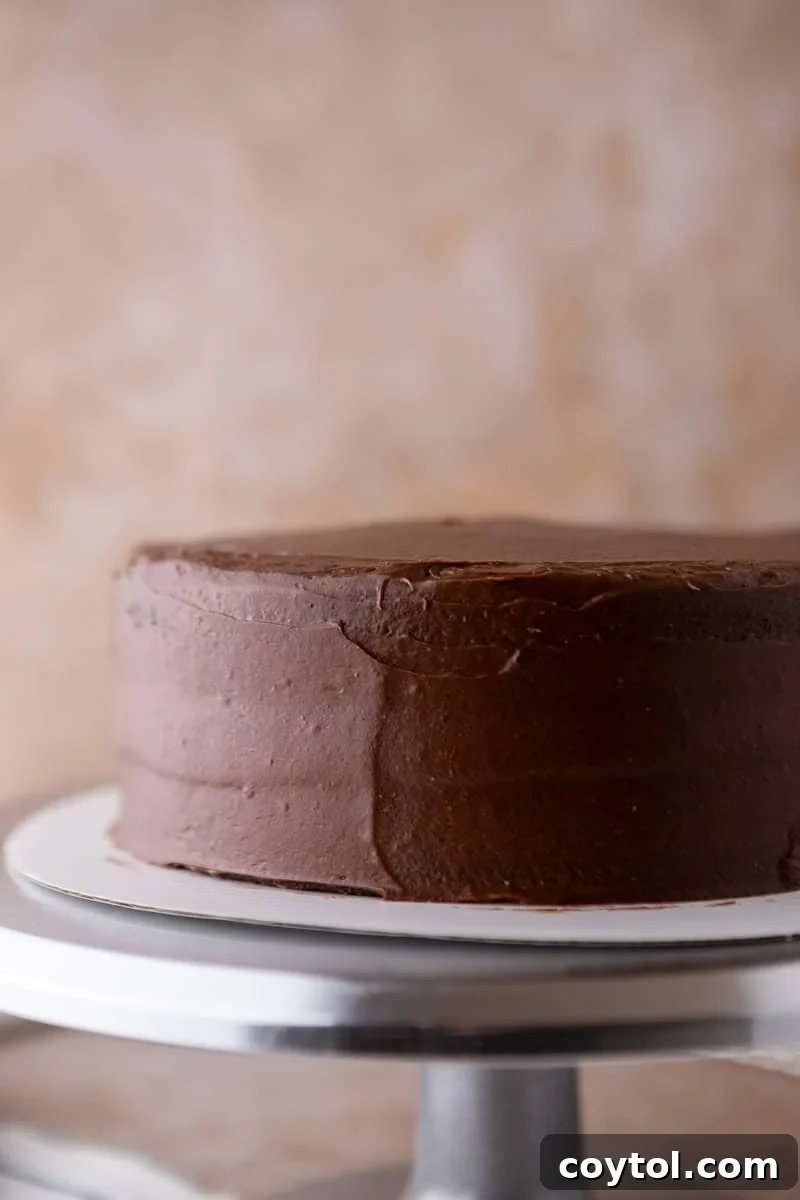
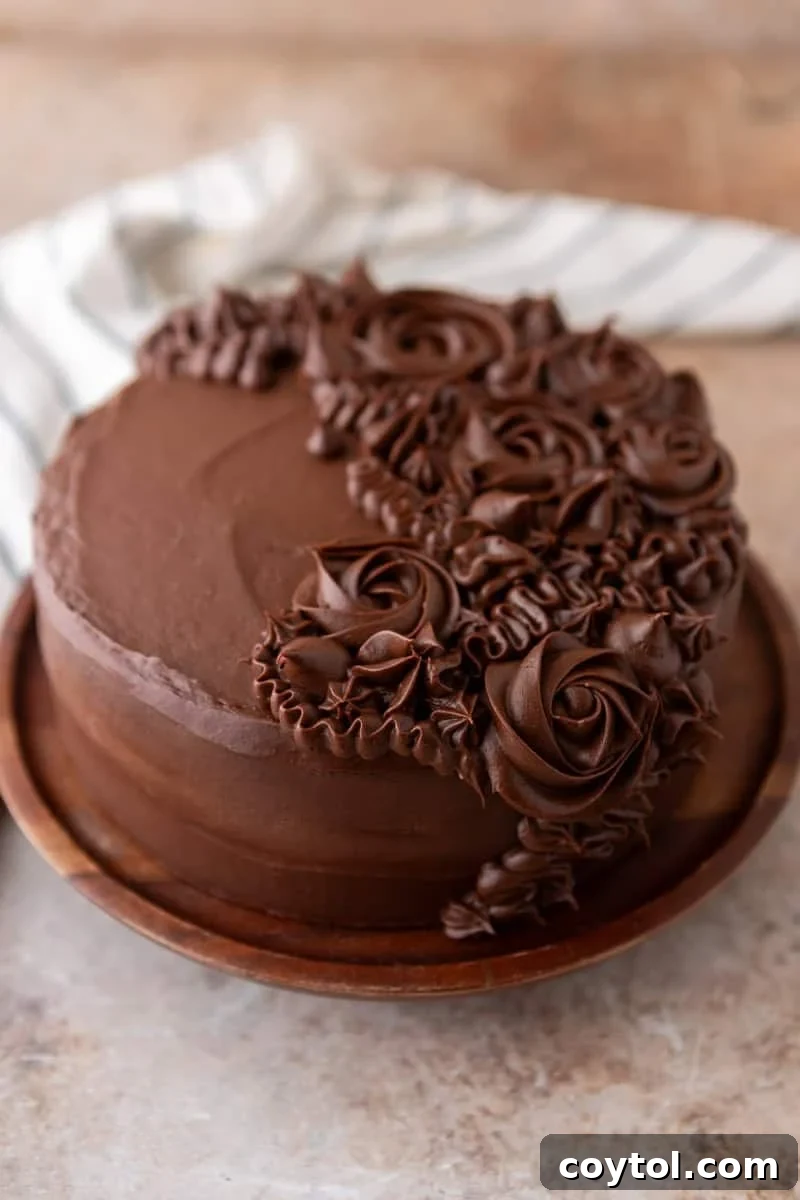
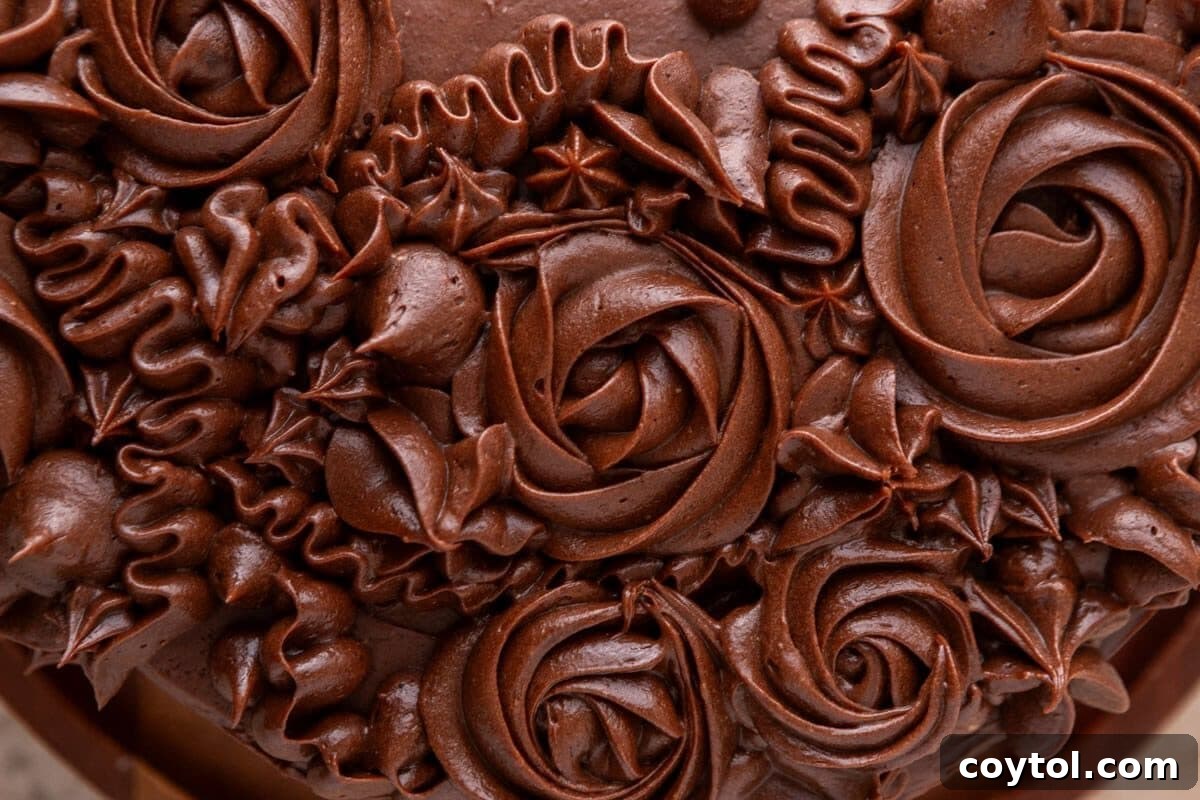
- Frost and Decorate: With your cake layers cool and level, it’s time for the decadent chocolate cream cheese frosting! Start by applying a thin “crumb coat” of frosting all over the entire cake. This traps any loose crumbs, preventing them from mixing into your final frosting layer. Refrigerate the cake for 15-20 minutes to allow the crumb coat to set. Once set, apply the remaining frosting for your final, smooth, or swirled layer. Feel free to get creative with decoration; I often add intricate piped detailing using various tips to give it an elegant touch.
**Decadent Chocolate Cream Cheese Frosting: A Recipe in Itself**
This rich and tangy chocolate cream cheese frosting is the perfect complement to our moist marble cake. Here’s how to whip up a batch that’s fudgy, creamy, and irresistibly delicious:
- Cream the Fats: In a large mixing bowl, using an electric mixer fitted with a paddle attachment, beat the softened cream cheese and unsalted butter together on medium-high speed for about 3-4 minutes. Continue until the mixture is exceptionally light, fluffy, and completely smooth, with no lumps of cream cheese remaining. This aeration is key to a light frosting.
- Combine Dry Ingredients: In a separate bowl, sift together the powdered sugar and Dutch-process cocoa powder. Sifting prevents lumps and ensures a silky-smooth frosting.
- Gradually Add Dry and Liquid: With the mixer on low speed, gradually add the sifted powdered sugar and cocoa mixture to the creamed butter and cream cheese, alternating with small additions of heavy cream. Start and end with the dry ingredients. Mix until just combined after each addition, scraping down the sides of the bowl as needed.
- Infuse Flavors: Once all the powdered sugar and cocoa are incorporated, add the vanilla extract and a pinch of salt. Mix on low speed, then increase to medium-high and beat for another minute until smooth.
- Fold in Melted Chocolate: Finally, mix in the melted and *slightly cooled* dark chocolate until the frosting is utterly smooth, creamy, and uniform in color. Ensure the melted chocolate isn’t hot, as it could melt the butter and cream cheese, leading to a runny frosting.
- Adjust Consistency: If your frosting appears too thick, add a tablespoon of heavy cream at a time, beating until desired consistency is reached. If, however, it’s too soft or runny, refrigerate it for 15-20 minutes, then re-whip it with an electric mixer for a minute or two until it regains its smooth, fluffy consistency.
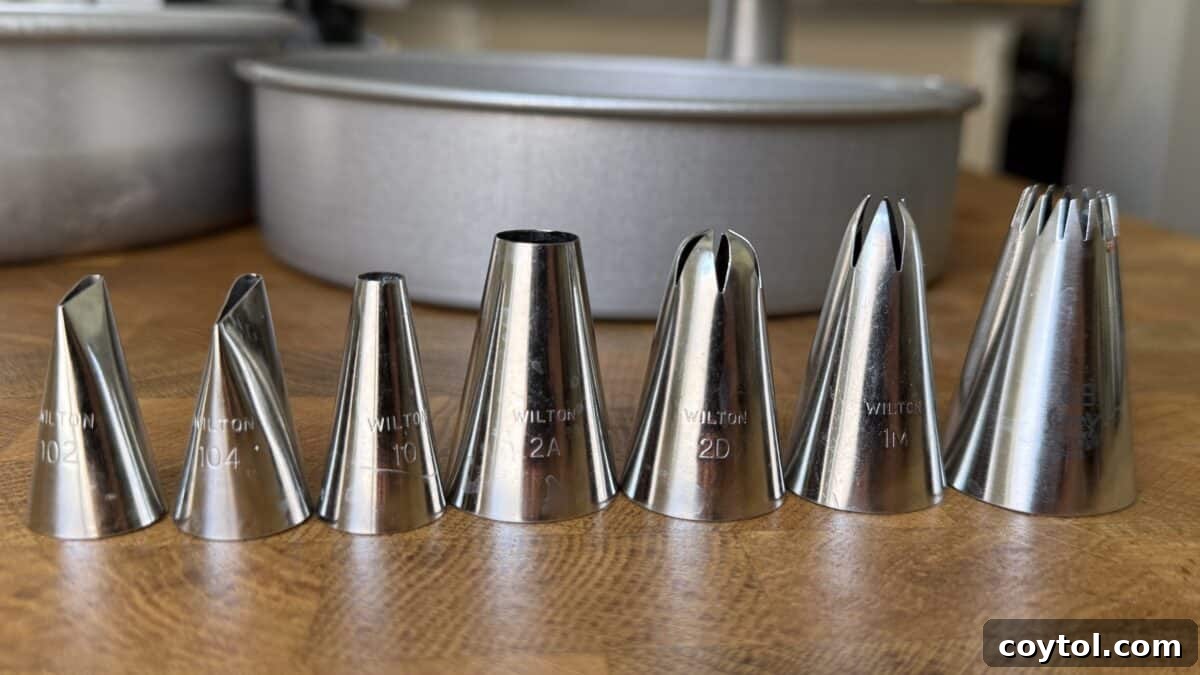
To decorate my cake, I utilized a selection of specific piping tips to achieve intricate details. However, feel free to unleash your creativity and experiment with any piping tips you already have on hand. Your unique touch will make the cake even more special.
**Expert Tips for Unbeatable Results**
To ensure your layered marble cake is nothing short of perfection, keep these crucial tips in mind:
- Always Bloom the Cocoa in Hot Coffee: This is the single most impactful step for achieving a rich, deep chocolate flavor and ensuring both batters have the same consistency, leading to those beautifully defined swirls. Don’t skip it!
- Compensate for Cocoa’s Drying Effect: The extra sugar and oil added to the chocolate batter are vital. Cocoa powder absorbs moisture, and without this compensation, your chocolate swirls will bake up drier than the vanilla portions, resulting in an inconsistent texture.
- Mindful Swirling – Less is More: Limit your swirling to 3-4 gentle passes with a knife or skewer. Over-swirling is the number one cause of muddy, indistinct patterns. Aim for bold ribbons, not a uniform blend.
- Room Temperature Ingredients are Key: Ensure your eggs, sour cream, and milk are at room temperature. This allows them to emulsify more smoothly with the fats, creating a homogenous batter and a finer crumb. Plan ahead and let them sit out for about an hour before you begin baking.
- Patience is a Virtue: Cool Completely: Do not attempt to frost a warm cake. Even slightly warm layers will melt your frosting, leading to a runny mess. Allow ample time for the cake layers to cool completely on a wire rack.
- The Day-Two Phenomenon: This cake, like many excellent baked goods, actually tastes *better* on the second day. The flavors have time to meld and deepen, and the crumb somehow becomes even more moist and tender overnight. If you can resist, baking a day in advance is highly recommended.
- Don’t Overmix the Batter: When combining wet and dry ingredients, mix only until just combined. Overmixing develops gluten, which can result in a tough, chewy cake rather than the desired tender crumb.
- Calibrate Your Oven: Oven temperatures can vary significantly. If you frequently bake, investing in an inexpensive oven thermometer can help ensure your oven is truly at the temperature you set, preventing over or under-baking.
**Storage Guidelines**
Proper storage is essential to maintain the freshness and incredible texture of your layered marble cake:
- Frosted Cake: Store the frosted cake covered in the refrigerator for up to 4 days. Cream cheese frosting requires refrigeration. For the best serving experience, allow the cake to sit at room temperature for 20-30 minutes before slicing to let the frosting soften slightly and the cake flavors bloom.
- Unfrosted Cake Layers: If you’re baking ahead, unfrosted cake layers can be wrapped tightly in plastic wrap and stored at room temperature for up to 2 days. For longer storage, freeze the tightly wrapped layers for up to 2 months. Thaw at room temperature before leveling and frosting.
- Prepared Frosting: The chocolate cream cheese frosting can be made up to 2 days in advance. Store it in an airtight container in the refrigerator. Before using, allow it to come to room temperature for about 30 minutes, then re-whip it with an electric mixer for a minute or two until it regains its smooth, fluffy consistency.
**Frequently Asked Questions About This Layered Marble Cake**
While buttermilk can be used, it will result in a slightly lighter crumb compared to the dense, velvety texture that sour cream provides. If you opt for buttermilk, use ¾ cup and increase the vegetable oil by 2 tablespoons to maintain moisture.
Natural cocoa powder will work, but for the most striking swirls and a deeper, richer chocolate flavor, Dutch-process cocoa is highly recommended. Dutch-process cocoa has a darker color and a less acidic profile, which creates a more pronounced contrast with the vanilla batter.
Yes, you can use two 9-inch round cake pans. Be aware that the cake layers will be thinner. As a result, you will need to reduce the baking time to approximately 24-26 minutes. Always check for doneness with a toothpick.
Absolutely! This recipe adapts beautifully to cupcakes. Line a muffin tin with paper liners. Fill each liner about two-thirds full, alternating spoonfuls of vanilla and chocolate batter. Use a toothpick to gently swirl the batters 1-2 times. Bake for 18-22 minutes at 340°F (170°C), or until a toothpick comes out with moist crumbs.
Not at all! We only use 3 tablespoons of hot coffee to bloom the cocoa powder. This small amount is primarily used to intensify and deepen the chocolate flavor, much like vanilla extract enhances sweetness without making the cake taste like vanilla. You can use hot water instead, but the chocolate flavor won’t be as profound.
The most common reason for muddy swirls is over-swirling the batter. Limit yourself to only 3-4 gentle passes with a knife or skewer. Another factor could be inconsistent batter consistencies; ensure both the vanilla and chocolate batters are of similar thickness, which our bloomed cocoa method helps to achieve.
Several factors can cause a cake to sink. The most frequent culprits are underbaking (always pull the cake when a toothpick comes out with moist crumbs, not wet batter), opening the oven door too early (especially before 20-25 minutes of baking, which can cause temperature fluctuations and collapse), or occasionally, using too much leavening agent (baking powder/soda) in proportion to the flour.
The Ultimate Layered Marble Cake with Chocolate Cream Cheese Frosting
A truly exceptional layered marble cake featuring bold, defined vanilla and chocolate swirls. Crafted with a unique blend of oil, butter, and sour cream for an unbelievably tender, moist crumb, and crowned with a rich, tangy, and fudgy chocolate cream cheese frosting. This recipe is designed for perfection and guarantees a delightful baking experience and a show-stopping dessert.
45 mins
30 mins
1 hr 15 mins
16 servings
Ingredients
For the Vanilla Batter (Base):
- 2 1/3 cups all-purpose flour
- 1 1/2 cups granulated sugar
- 1 tablespoon baking powder
- 3/4 teaspoon salt
- 3 large eggs, room temperature
- 1 cup sour cream, room temperature
- 1/2 cup vegetable oil
- 1/4 cup unsalted butter, melted and slightly cooled
- 2 teaspoons vanilla extract
- 1/2 cup whole milk, room temperature
For the Chocolate Swirl:
- 1/3 cup Dutch-process cocoa powder
- 3 tablespoons hot coffee, for blooming
- 2 tablespoons granulated sugar
- 1 tablespoon vegetable oil
For the Chocolate Cream Cheese Frosting:
- 8 oz cream cheese, softened
- 1/2 cup unsalted butter, softened
- 2 2/3 cups powdered sugar
- 1/2 cup Dutch-process cocoa powder
- 1/3 cup heavy cream, added gradually
- 2 teaspoons vanilla extract
- 1/4 teaspoon salt
- 3.5 oz dark chocolate (60-70% cacao), melted and cooled
Instructions
Make the Cake:
- Preheat the oven to 340°F (170°C). Grease two 8-inch round cake pans and line the bottoms with parchment paper, then grease the parchment.
- In a small bowl, whisk together the 1/3 cup Dutch-process cocoa powder and 3 tablespoons of hot coffee until completely smooth and glossy. Set aside.
- In a large bowl, whisk together the 2 1/3 cups all-purpose flour, 1 1/2 cups granulated sugar, 1 tablespoon baking powder, and 3/4 teaspoon salt.
- In a separate bowl, whisk the 3 large eggs (room temperature), 1 cup sour cream (room temperature), 1/2 cup vegetable oil, 1/4 cup unsalted butter (melted and slightly cooled), 2 teaspoons vanilla extract, and 1/2 cup whole milk (room temperature) until smooth.
- Pour the wet ingredients into the dry ingredients and stir until just combined. Be careful not to overmix.
- Transfer about 1/3 of the batter (roughly 1 1/2 cups) to a separate bowl. Add the bloomed cocoa paste, 2 tablespoons of granulated sugar, and 1 tablespoon of vegetable oil. Fold until uniform.
- Divide the vanilla batter between the two prepared pans. Dollop the chocolate batter on top (5-6 spoonfuls per pan). Swirl with a knife or skewer 3-4 times, taking care not to over-swirl.
- Bake for 27-32 minutes, or until a toothpick inserted into the center comes out with moist crumbs. Cool in pans for 10 minutes, then turn out onto a wire rack to cool completely.
Make the Chocolate Cream Cheese Frosting:
- In a large bowl, beat the 8 oz softened cream cheese, 1/2 cup softened unsalted butter, and 1/4 teaspoon salt together until light, fluffy, and smooth, about 3-4 minutes.
- Sift together the 2 2/3 cups powdered sugar and 1/2 cup Dutch-process cocoa powder. Add gradually to the cream cheese mixture, alternating with the 1/3 cup heavy cream. Start and end with dry ingredients.
- Add the 2 teaspoons vanilla extract and mix until fully combined. Then, mix in the 3.5 oz melted and cooled dark chocolate until the frosting is smooth and creamy.
- If the frosting is too thick, add more heavy cream 1 tablespoon at a time until desired consistency is reached. If it’s too soft, refrigerate for 15-20 minutes and re-whip until firm.
Assemble the Cake:
- Once the cake layers are completely cool, use a serrated knife to carefully level off any domes to ensure even stacking.
- Place the first cake layer on a cake stand or serving plate, flat side up. Spread about 3/4 cup of the chocolate cream cheese frosting evenly over the top.
- Carefully place the second cake layer on top, flat side up. Apply a thin layer of frosting over the entire cake – this is your “crumb coat” to trap loose crumbs. Refrigerate for 15-20 minutes until set.
- Finally, apply the remaining frosting to the cake, smoothing it out or creating decorative swirls as desired. Garnish with chocolate shavings, extra cocoa powder, or piped details for a beautiful finish.
Nutrition
Calories: 528kcal | Carbohydrates: 62g | Protein: 6g | Fat: 30g | Saturated Fat: 14g | Polyunsaturated Fat: 5g | Monounsaturated Fat: 8g | Trans Fat: 0.4g | Cholesterol: 83mg | Sodium: 294mg | Potassium: 201mg | Fiber: 3g | Sugar: 43g | Vitamin A: 678IU | Vitamin C: 0.2mg | Calcium: 106mg | Iron: 2mg
Nutrition information is automatically calculated and should only be used as an approximation.
Like this recipe? We’d love to hear from you! Share your thoughts and experiences by leaving a comment below.