
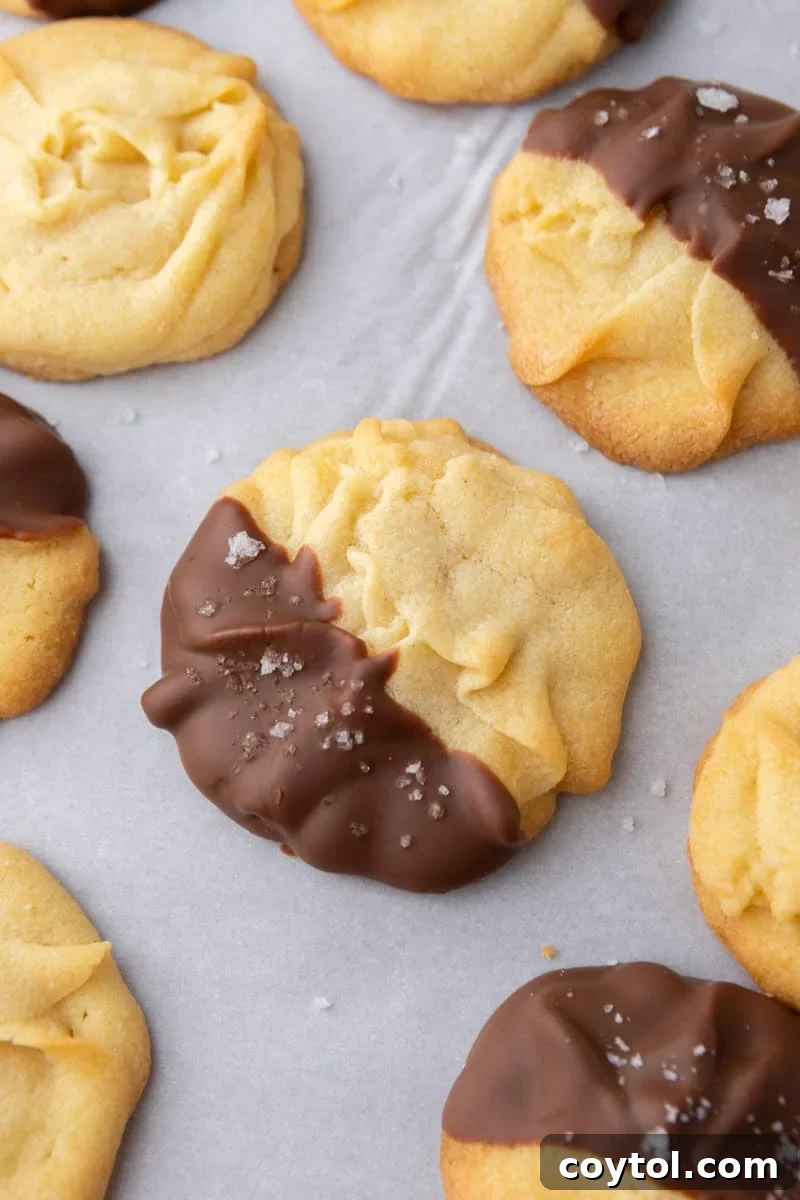
There’s an undeniable charm to classic Danish butter cookies. For many, the sight of that iconic blue tin evokes a wave of nostalgia, conjuring memories of holidays, family gatherings, and perhaps even repurposed sewing kits! These homemade, Danish-style piped butter cookies capture everything you adore about those beloved treats – the rich, buttery flavor, the satisfying crispness, the delicate sweetness, and that unmistakable melt-in-your-mouth tenderness. Crafted with premium ingredients like fragrant vanilla bean paste and enhancing milk powder, our recipe ensures a soft, pipeable dough that consistently holds its exquisite shape, delivering bakery-quality perfection in every bite.
Whether your childhood was sweetened by the distinctive flavor of Royal Dansk blue tin butter cookies or you simply cherish a luxurious, buttery delight for the holiday season, this homemade rendition transcends the store-bought experience. Each cookie is a testament to simple ingredients brought together to create something truly extraordinary, tasting even better than the familiar classic. If your palate appreciates such buttery confections, be sure to also explore our delightful sugar cookie fudge and these comforting ginger molasses cookies for more irresistible treats.
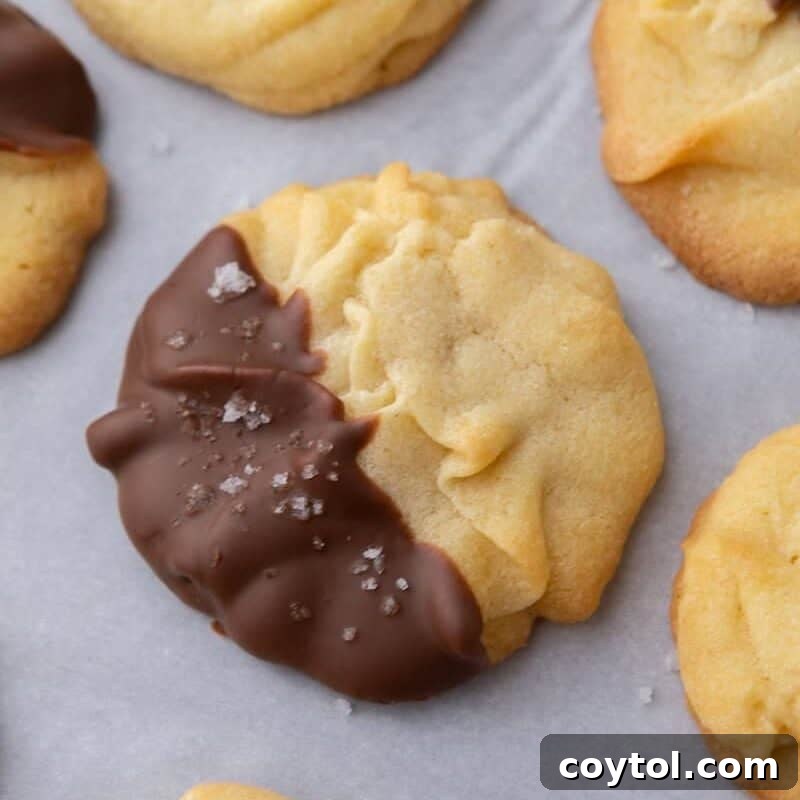
The Secret to Perfect Piped Danish Butter Cookies: Why This Recipe Stands Out
Crafting the perfect Danish butter cookie is an art, and this recipe is meticulously designed to ensure success every time. We’ve incorporated specific techniques and ingredients that guarantee the authentic flavor, crisp texture, and elegant appearance you expect from a truly exceptional butter cookie. Here’s why this recipe consistently delivers:
- The Right Piping Tip is Key: Using an open-star piping tip is not just for aesthetics; it’s fundamental to achieving the classic look and delightful texture that defines traditional piped butter cookies. The ridges created by the star tip allow for a delicate crispness on the edges while keeping the center tender.
- Precise Butter Temperature (65°F): Butter, softened to the ideal temperature of 65°F (around 18°C), is crucial. It should be soft enough to cream easily but firm enough to hold air and provide the perfect pipeable consistency for the dough. Butter that is too warm will result in a greasy, spreading dough, while butter that is too cold will be too stiff to pipe smoothly.
- The Magic of Milk Powder: This often-overlooked ingredient is a game-changer. Milk powder enhances the cookies with a deeper, richer, and more complex dairy flavor, contributing significantly to that signature bakery-style Danish cookie taste. It also helps achieve a more tender crumb.
- Cornstarch for Crisp-Tender Texture: A small amount of cornstarch is added to the flour mixture to create a uniquely crisp yet tender crumb. It helps to soften the flour’s gluten, preventing the cookies from becoming tough and ensuring they melt in your mouth.
- Essential Chilling After Piping: Don’t skip this vital step! Chilling the piped cookies for 20-30 minutes before baking helps firm up the butter. This prevents the dough from spreading excessively in the oven, ensuring your intricate swirl details remain defined and beautiful.
- Low and Slow Baking (325°F): Baking at a slightly lower oven temperature (325°F or 160°C) is essential for even baking and to achieve that delicate, pale golden color Danish cookies are famous for. A higher temperature can lead to overly browned edges before the center is fully baked, affecting both taste and appearance.
A Personal Connection to Classic Butter Cookies
There’s something truly special about these cookies. Growing up, I was absolutely enchanted by the iconic blue tin Danish butter cookies – you know, the ones almost every family eventually uses to store their sewing supplies! The nostalgia they evoke is powerful, and I’ve always dreamed of recreating that magic at home. This homemade piped butter cookie recipe hits every single nostalgic note I cherish, but with an even more profound buttery flavor and an impossibly softer, melt-away texture.
The texture of these cookies is, simply put, unreal. They boast a delightful crispness around the edges, yielding to a wonderfully tender center. The combination of aromatic vanilla bean paste and the depth added by milk powder imbues them with that authentic, rich bakery-style essence that a basic recipe simply can’t achieve. And the best part? They maintain their beautiful piped shape flawlessly during baking. No spreading, no morphing into shapeless blobs – just perfect, elegant swirls every single time.
These are more than just cookies; they’re an experience. I plan to bake them throughout the entire Christmas season because they possess an elegant, festive look that belies their incredibly simple preparation. Without fail, everyone who tries them immediately asks for the recipe, a testament to their irresistible appeal.
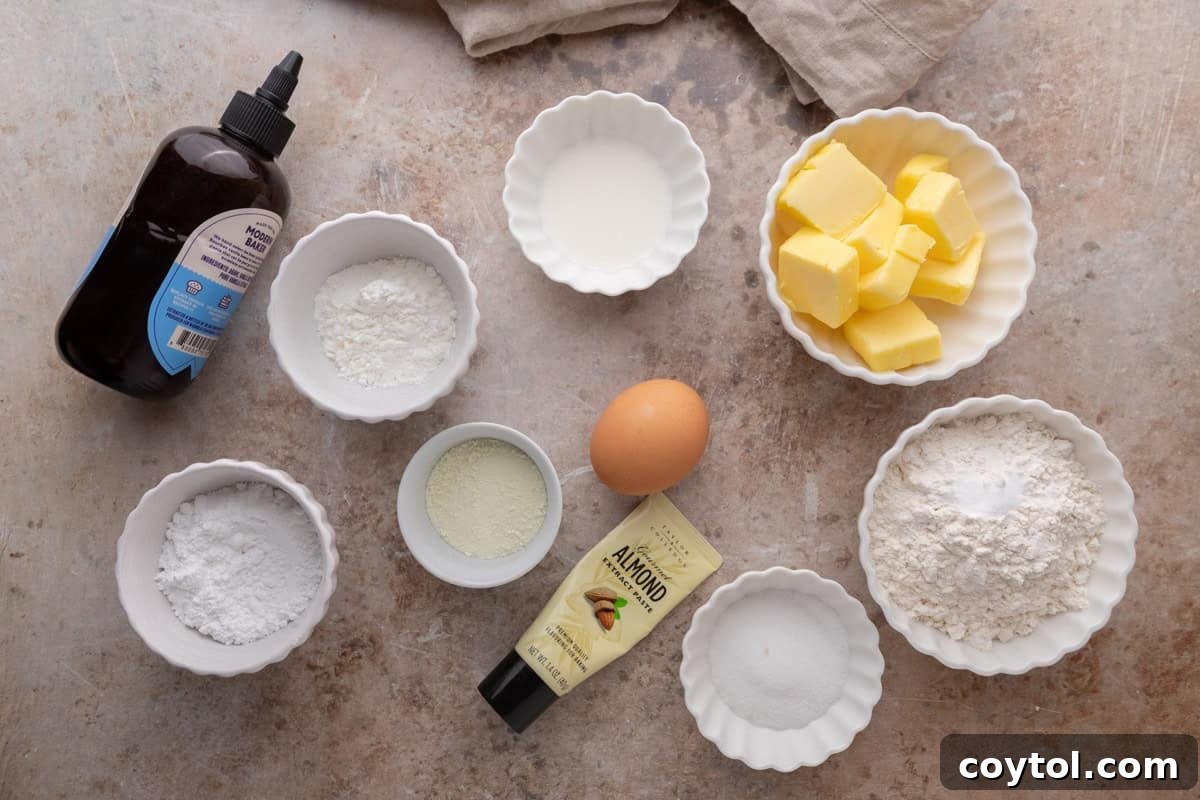
Key Ingredients for Exquisite Danish-Style Piped Butter Cookies
Achieving the signature taste and texture of Danish butter cookies relies on a precise combination of high-quality ingredients. Each component plays a vital role in creating that perfect buttery, crisp, and tender bite. (For precise measurements, please refer to the full recipe card below).
- Unsalted Butter: This is the star of butter cookies! Ensure it’s softened to true room temperature (approximately 65°F or 18°C). It should be pliable when pressed, but not glossy or greasy, which indicates it’s too warm. Using unsalted butter allows you to control the overall saltiness of the cookies.
- Powdered Sugar + Granulated Sugar: The combination of these two sugars is crucial. Powdered sugar (confectioners’ sugar) contributes to the incredibly smooth texture of the dough and the delicate crispness of the baked cookie. Granulated sugar adds structure and a touch more sweetness. Sifting powdered sugar is recommended to prevent lumps.
- Vanilla Bean Paste: For a truly luxurious and fragrant aroma, vanilla bean paste is highly recommended. It offers a more intense and complex vanilla flavor compared to extract, with visible specks of vanilla bean. If unavailable, pure vanilla extract can be used as a substitute.
- Almond Extract: While optional, a hint of almond extract adds a subtle, classic Danish-style flavor that complements the butter and vanilla beautifully, elevating the overall taste profile.
- Egg Yolk: A single large egg yolk is used, not the whole egg. The yolk provides richness, helps bind the dough, and contributes to the cookies’ golden hue and desirable crumb structure, making them tender and less prone to crumbling.
- Milk Powder: As mentioned, this ingredient is key to achieving that authentic, rich bakery flavor and depth. It intensifies the milky, creamy notes without adding excess liquid, which could negatively impact the dough’s consistency.
- All-Purpose Flour: Use all-purpose flour that has been spooned into the measuring cup and then leveled off. This ensures accuracy, as scooping directly can compact the flour, leading to too much dry ingredient and a stiff dough. For best results, weighing your flour with a kitchen scale is always preferred.
- Cornstarch: This secret ingredient is essential for creating the signature melt-in-your-mouth texture and a slight crispness without making the cookies hard. It reduces the gluten development in the flour, resulting in a more delicate cookie.
- Salt: A small amount of salt is vital to balance the sweetness and enhance all the rich, buttery flavors, ensuring the cookies aren’t bland.
Delightful Flavor Variations for Your Piped Butter Cookies (Fun & Festive!)
While classic Danish butter cookies are perfect on their own, they also serve as a wonderful canvas for creative flavor enhancements. Here are some fun and festive ways to customize your batch, whether for holidays, special occasions, or just to add a unique twist:
- Espresso Kick: For coffee lovers, add ½ teaspoon of espresso powder to the dry ingredients for a sophisticated coffee-shop inspired twist. The subtle bitterness of espresso perfectly complements the sweetness of the butter cookie.
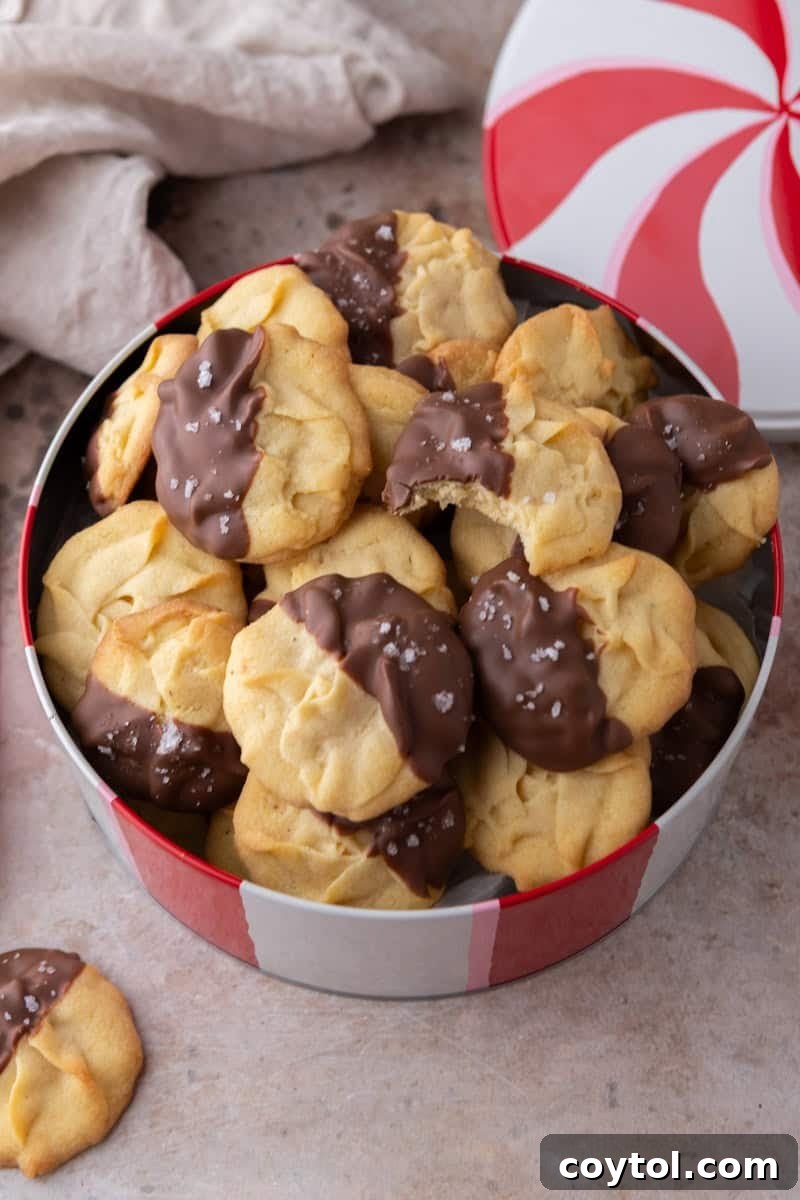
- Elegant Chocolate-Dipped: Elevate your cookies by dipping half of them in melted chocolate. Dark, milk, or white chocolate all work beautifully. (As pictured in this article, I found dark chocolate with a sprinkle of flaky salt to be utterly perfect!) This adds a layer of richness and a beautiful presentation.
- Sweet Cherry Center: For a touch of color and fruity sweetness, place a small maraschino cherry in the center of each piped cookie before baking. This is a classic variation that adds a lovely visual and taste element.
- Sparkling Sprinkle Edges: For added texture and visual appeal, gently roll the piped edges of the unbaked cookies in coarse sugar, nonpareils, or holiday sprinkles before chilling and baking.
- Warm Cinnamon Sugar: Lightly dust the unbaked cookies with a mixture of cinnamon and granulated sugar before baking. This adds a warm, spicy note that is especially inviting during colder months.
- Citrus Zest: Add 1-2 teaspoons of finely grated lemon or orange zest to the butter mixture for a bright, refreshing flavor profile.
- Nutty Crunch: Before baking, sprinkle finely chopped nuts (like almonds or pecans) on top of the piped cookies for a delightful crunch and nutty flavor.
Step-by-Step Guide: Crafting Your Perfect Piped Danish Butter Cookies
Making these elegant Danish butter cookies is a straightforward process, but paying attention to each step ensures the best results. Follow these detailed instructions to create beautiful, delicious cookies that will impress everyone.
- Prepare Your Butter and Sugar: In the bowl of a stand mixer fitted with the paddle attachment, combine the softened unsalted butter with both the powdered sugar and granulated sugar. Beat on medium-high speed for 2-3 minutes until the mixture is light, fluffy, and pale in color. Remember to scrape down the sides of the bowl halfway through to ensure all ingredients are well incorporated. This creaming step is vital for incorporating air, which contributes to the cookies’ light texture.
- Incorporate Flavorings and Egg Yolk: Reduce the mixer speed to low. Add the vanilla bean paste (or vanilla extract), optional almond extract, room temperature egg yolk, and milk powder. Mix until thoroughly combined and the mixture is smooth and creamy. Be careful not to overmix at this stage.
- Add Dry Ingredients: In a separate bowl, sift together the all-purpose flour, cornstarch, and salt. Gradually add this dry mixture to the butter mixture in the stand mixer, mixing on the lowest speed just until a cohesive dough forms. Stop mixing as soon as the flour streaks disappear to avoid developing too much gluten, which can make the cookies tough.
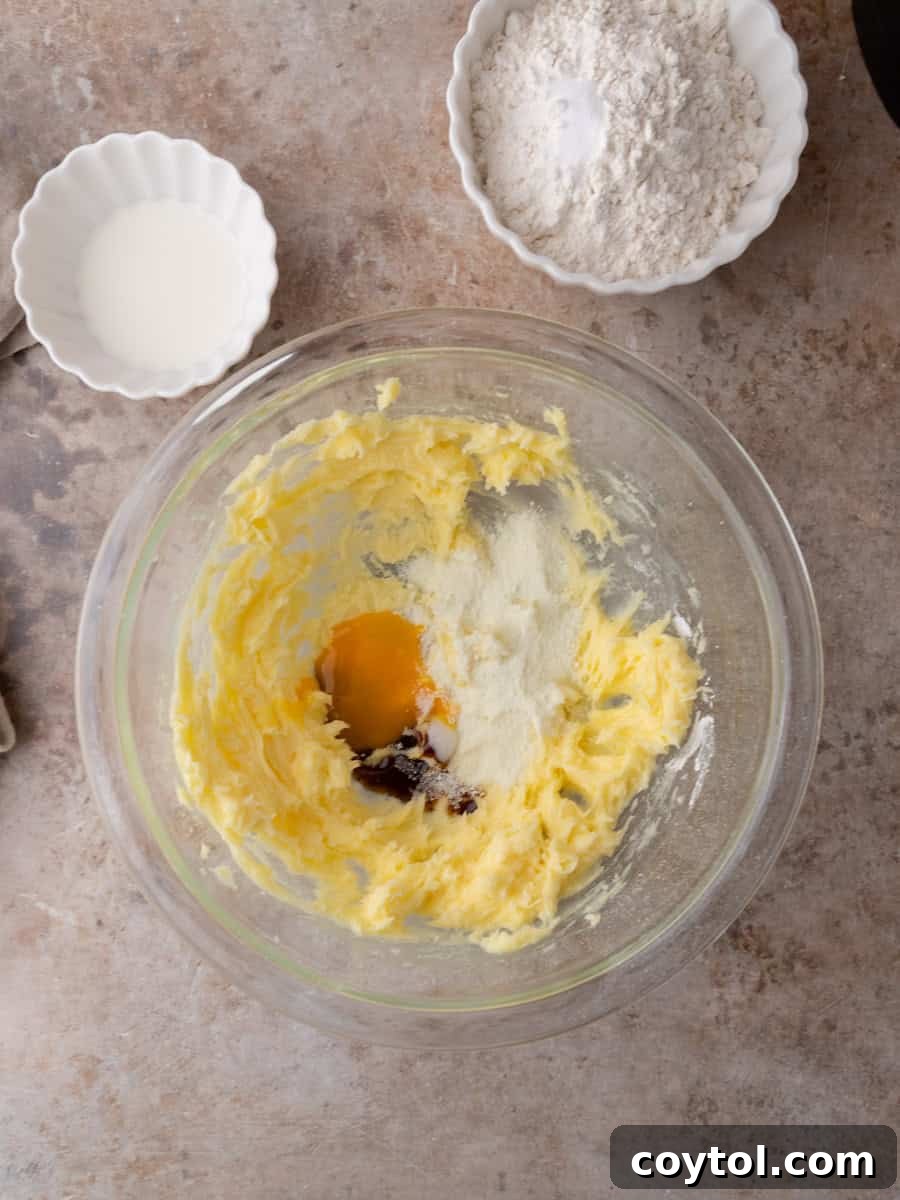
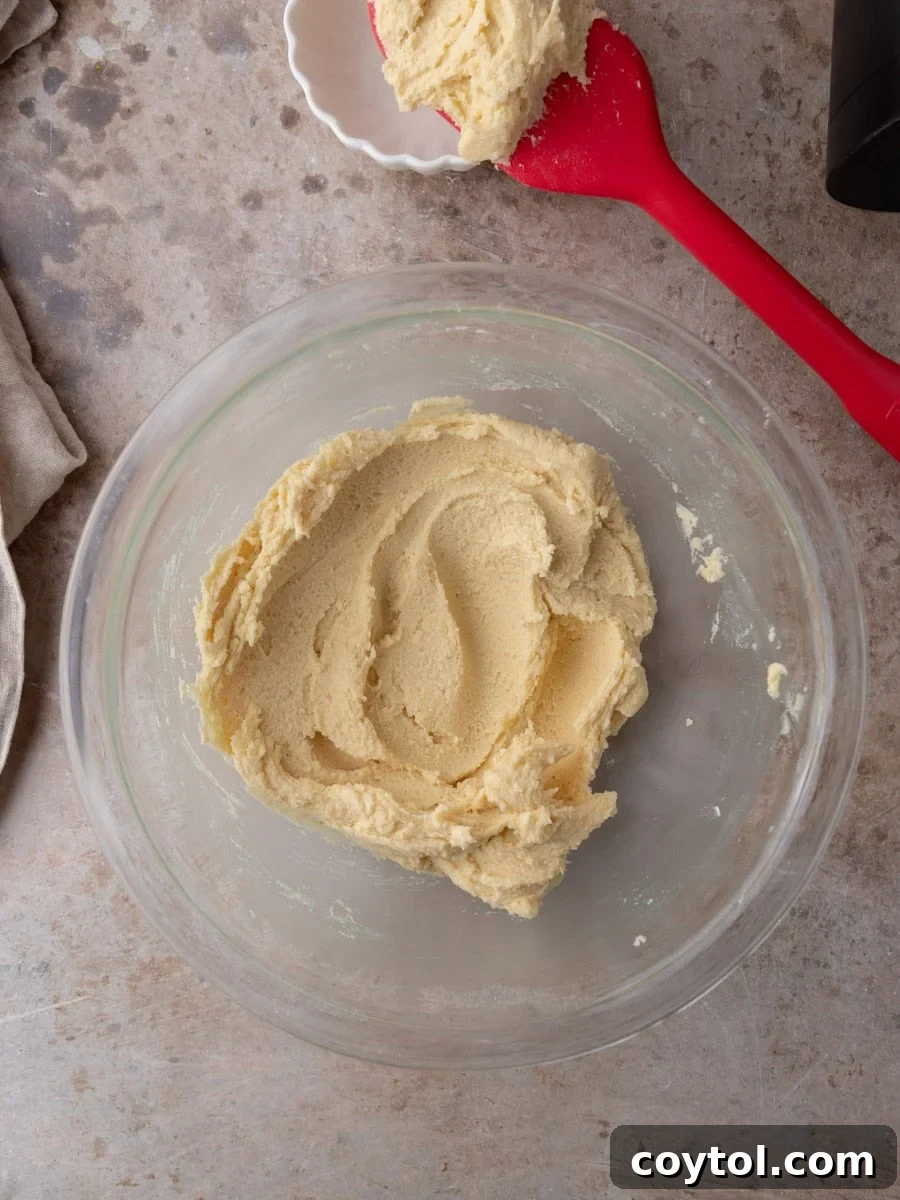
- Check and Adjust Dough Texture: The finished dough should be soft, smooth, and easily pipeable, similar to a thick frosting. It should not be stiff or crumbly. If, for any reason, your dough feels too stiff to pipe, you can add a tiny splash of heavy cream (about ½ tablespoon at a time) and mix briefly until the desired consistency is achieved. In most cases, if your butter was at the correct temperature, you won’t need to add any extra liquid.
- Pipe Your Cookies: Prepare a large piping bag by fitting it with an open-star tip (such as Ateco #827 or Wilton 1M). Transfer the cookie dough into the piping bag. On a baking sheet lined with parchment paper, pipe your desired shapes – classic rosettes, elegant S-shapes, or simple rings, aiming for about 1 ½–2 inches in width. Pipe firmly and consistently to ensure even shapes.
- Chill for Definition: This is a critical step for maintaining the cookies’ beautiful designs. Place the baking sheets with the piped cookies into the refrigerator and chill for 20-30 minutes. This chilling period allows the butter in the dough to firm up, which will prevent the cookies from spreading too much during baking and help them hold their intricate swirls.
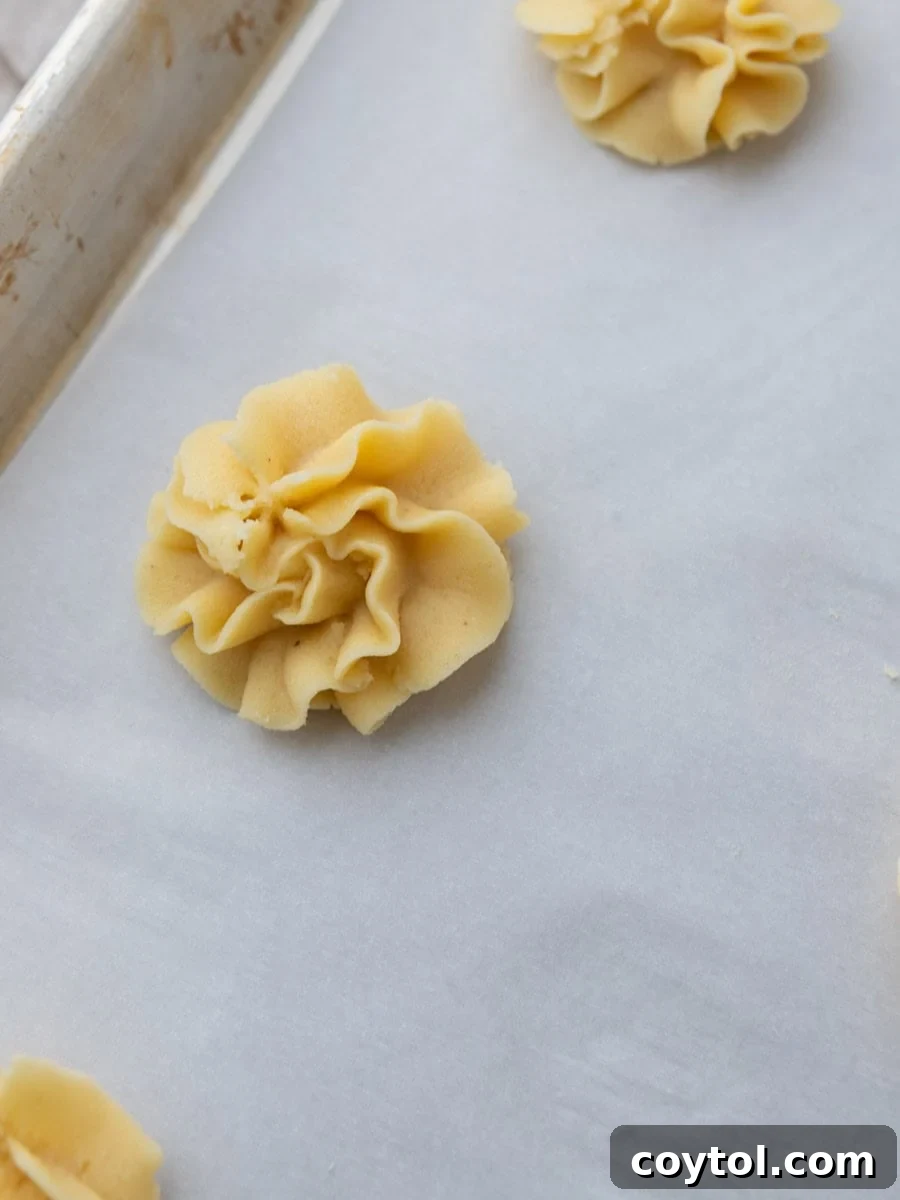
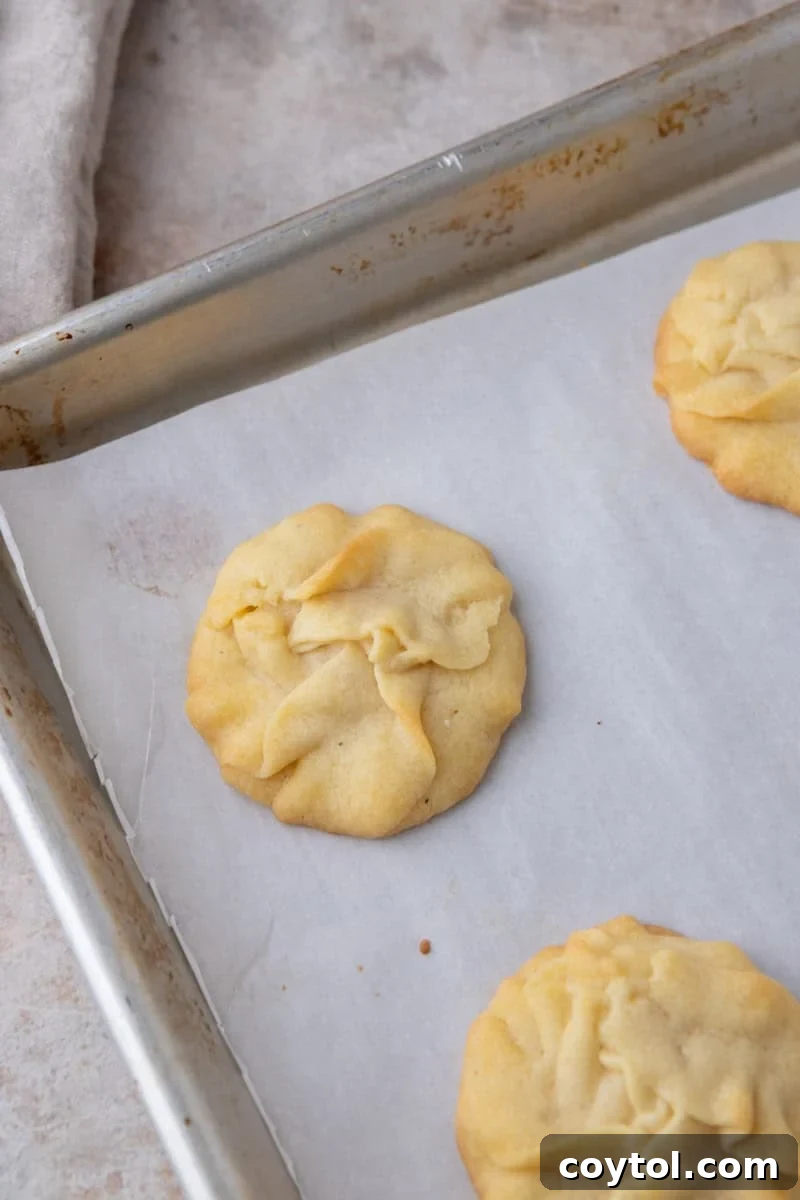
- Preheat Oven and Bake: While the cookies are chilling, preheat your oven to 325°F (160°C). Line two large baking sheets with light-colored parchment paper. Once the oven is preheated and the cookies are sufficiently chilled, transfer them to the preheated oven. Bake on the center rack for 10-11 minutes, or until the edges are lightly golden, but the centers remain pale. Rotate the baking sheets halfway through the baking time to ensure even coloring. Overbaking will result in a drier, less tender cookie.
- Cool Completely: Allow the baked cookies to cool on the baking sheet for about 5 minutes after removing them from the oven. They will be quite delicate when warm. After 5 minutes, carefully transfer them to a wire rack to cool completely. This helps them achieve their final crisp texture.
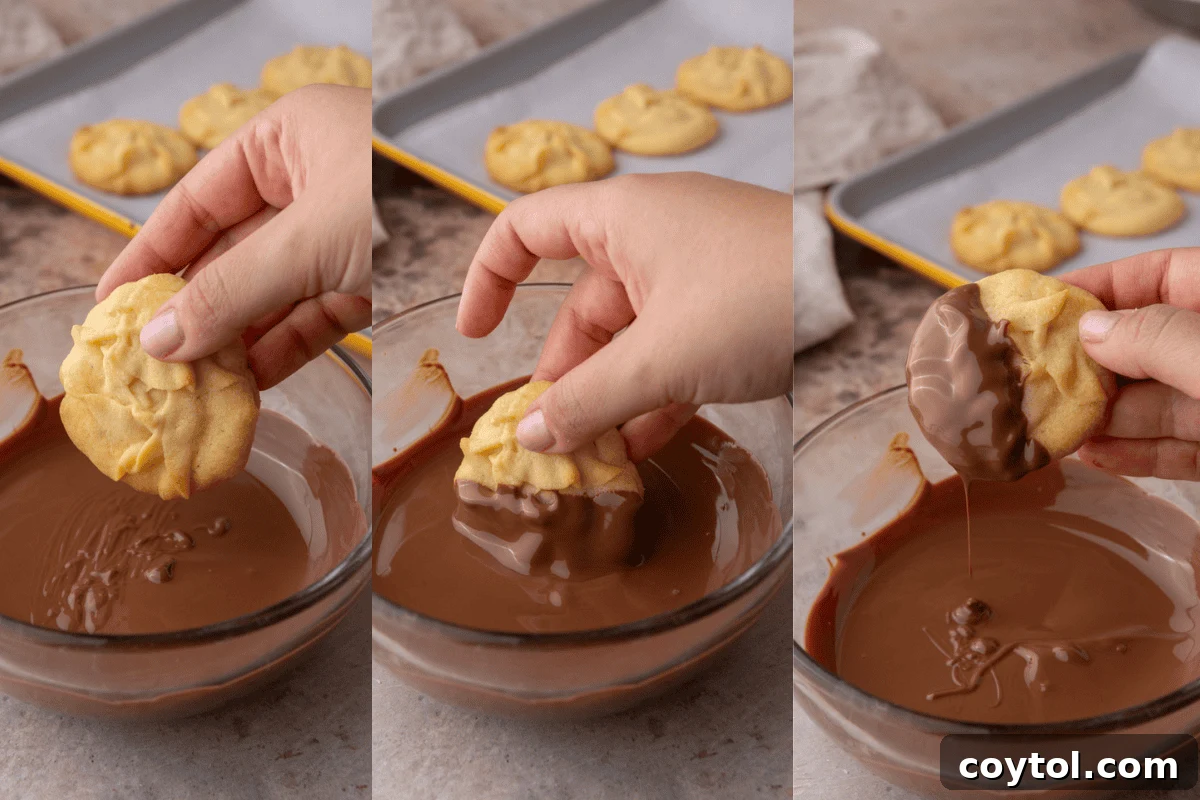
Optional Chocolate Dip: For an extra touch of indulgence, once your cookies are completely cooled, dip half of each cookie into a bowl of your favorite melted chocolate (milk, dark, or white chocolate). Place them back on a parchment-lined baking sheet and, if desired, sprinkle with flaky sea salt before the chocolate sets. This adds a beautiful finish and a delightful flavor contrast.
Essential Tips for Achieving Perfect Danish Butter Cookie Texture
Success in baking these classic cookies hinges on a few crucial details. Keep these tips in mind to ensure your Danish butter cookies turn out beautifully crisp, tender, and perfectly shaped every time:
- Avoid Overbaking: This is perhaps the most important tip. Danish butter cookies are known for their pale centers. Bake them just until the edges are lightly golden, but the middle remains visibly lighter. Overbaking will make them dry, tough, and lose their delicate, melt-in-your-mouth quality.
- Use Light-Colored Baking Sheets with White Parchment: The color of your baking sheet significantly affects how quickly the bottoms of your cookies brown. Dark-colored pans absorb more heat, leading to darker, sometimes burnt, bottoms. Similarly, brown parchment paper can contribute to faster browning. Opt for light-colored baking sheets and white parchment paper for even, gentle baking and that desirable pale finish.
- Pipe with Firm, Even Pressure: When piping, apply consistent and firm pressure on the piping bag. This ensures the dough adheres smoothly to the parchment paper and creates well-defined shapes that don’t curl up or detach during baking. Uneven pressure can lead to lopsided or messy cookies.
- The Chill is Crucial! Do not skip the chilling step after piping. Refrigerating the piped cookie dough for 20-30 minutes allows the butter to firm up. This rigidity is what prevents the cookies from spreading excessively in the oven, ensuring your intricate piped designs remain sharp, crisp, and perfect. It’s the secret to those beautiful, distinct swirls.
- Measure Flour Accurately: Too much flour is a common pitfall. Always spoon and level your all-purpose flour or, ideally, weigh it using a kitchen scale for the most accurate results. Excess flour will result in a stiff dough that is difficult to pipe and dry, crumbly cookies.
- Butter Temperature is Key: As mentioned, ensure your butter is at precisely 65°F (18°C). Too cold, and the dough will be stiff; too warm, and it will be greasy and spread.
Troubleshooting Danish Piped Butter Cookies (Quick Fixes for Common Issues)
Even experienced bakers can encounter small hurdles. Here are quick solutions to common problems you might face when making these Danish piped butter cookies, ensuring you can confidently achieve perfect results:
- Dough Too Stiff to Pipe? If your dough feels too firm and is difficult to pipe, it likely means your butter was too cold or you added too much flour. To fix this, add ½ tablespoon of heavy cream or whole milk at a time to the dough and mix briefly until it reaches a smooth, pipeable consistency that resembles thick frosting. Be careful not to add too much liquid.
- Cookies Spreading Too Much? Excessive spreading is usually due to the dough being too warm, or an imbalance in ingredients.
- **Solution 1 (Warm Dough):** If your kitchen is warm or the dough has sat out, the butter might be too soft. Place your piped cookies into the refrigerator and chill them for a longer period, 20-30 minutes, before baking.
- **Solution 2 (Ingredient Imbalance):** If chilling doesn’t fully resolve the issue, it’s possible you added too much liquid (like cream) or not enough flour. Try mixing in 1-2 tablespoons of additional all-purpose flour to the remaining dough to firm it up slightly.
- Edges Browning Too Quickly or Too Much? This typically indicates your oven runs hot, or you’re using the wrong type of baking sheet.
- **Solution 1 (Oven Temperature):** Bake your cookies at 325°F (160°C) as specified. If edges still brown too fast, consider reducing your oven temperature by another 10-15 degrees (e.g., to 310-315°F or 155°C) and adjust baking time accordingly. An oven thermometer can help verify your oven’s accuracy.
- **Solution 2 (Baking Sheet):** Ensure you are using a light-colored baking sheet and white parchment paper. Dark pans absorb more heat and can cause bottoms and edges to brown too quickly.
- Piped Shapes Not Holding Their Definition? If your beautiful piped swirls are losing their intricate details and looking “blobby,” the butter in your dough was likely too soft. Don’t underestimate the importance of the chilling step! Always refrigerate the piped cookies for at least 20-30 minutes before baking to ensure the butter firms up and your designs stay crisp.
Frequently Asked Questions About These Danish Butter Cookies
What to Serve These Danish Butter Cookies With?
These exquisite butter cookies are incredibly versatile and pair beautifully with a variety of beverages and desserts. Enjoy them with a warm cup of coffee, a comforting mug of tea, or rich hot cocoa for a perfect afternoon treat. They are also a stunning addition to any holiday charcuterie dessert board, offering a buttery counterpoint to fruits, cheeses, and other sweet delights. Their elegant appearance makes them the prettiest and most welcome addition to any Christmas cookie tray or holiday gift assortment.
Is Chilling the Piped Cookies Absolutely Necessary? Can I Skip It?
While you technically *can* bake them without chilling, it is strongly advised against. Chilling the piped cookies for 20-30 minutes before baking is a non-negotiable step for achieving professional-looking results. This crucial period allows the butter in the dough to firm up significantly. Without chilling, the butter will melt too quickly in the oven, causing the cookies to spread excessively, lose their intricate piped shapes, and result in flatter, less attractive cookies. For sharp, defined swirls and perfect crispness, chilling is essential.
Can I Prepare the Dough in Advance?
Absolutely! This is a fantastic recipe for make-ahead convenience. You can prepare the cookie dough up to 3 days in advance and store it, tightly wrapped in plastic wrap, in the refrigerator. If refrigerating for longer than a few hours, you might need to let the dough warm up slightly at room temperature for about 15-30 minutes before it becomes soft enough to pipe smoothly. Alternatively, you can pipe all the rosettes or shapes onto baking sheets, then chill them until firm, and then transfer the firm, unbaked cookies to an airtight container or freezer bag. They can be frozen for up to 2 months. When ready to bake, you can often bake them directly from frozen, adding a minute or two to the baking time.
What’s the Best Way to Store Them to Maintain Crispness?
To keep your Danish butter cookies wonderfully crisp and fresh, store them in an airtight container at room temperature. For optimal preservation and to prevent them from sticking or becoming soggy, place a sheet of parchment paper between layers of cookies. Stored correctly, these cookies will remain fresh and delicious for 1-2 weeks. If you live in a particularly humid environment, which can make cookies lose their crispness faster, consider storing them in an airtight container in the refrigerator instead.
Can I Add Color or Different Flavors to the Dough?
Yes, absolutely! The dough is very adaptable. For festive occasions, you can add a few drops of gel food coloring to the dough after the wet ingredients are mixed, before adding the flour. Gel colors are concentrated and won’t significantly alter the dough’s consistency. For flavor variations beyond almond extract, consider adding other extracts like lemon, orange, or peppermint. You could also mix in a small amount of matcha powder for a vibrant green color and earthy flavor, or even finely ground spices like cardamom for a truly Scandinavian twist. Experiment and have fun!
Can I Use a Cookie Press Instead of a Piping Bag?
Yes, this dough works beautifully with a cookie press! The consistency is perfectly suited for pressing out various decorative shapes. If using a cookie press, ensure your dough is at a good, pliable temperature (around 65°F / 18°C) – not too cold, or it will be hard to press, and not too warm, or it will be too soft and spread. Always remember to chill the pressed cookies briefly before baking to help them hold their intricate shapes.

Piped Butter Cookies (Danish Style)
15 minutes
11 minutes
46 minutes
30
cookies
Print Recipe
Equipment
Ingredients
-
1
cup
unsalted butter
softened (about 65°F, soft but not greasy) -
½
cup
powdered sugar
sifted -
¼
cup
granulated sugar -
2
tsp
vanilla bean paste
or 1 ½ tsp pure vanilla extract -
¼
tsp
almond extract
optional, for classic Danish aroma -
1
large egg yolk
room temperature -
2
Tbsp
milk powder
(adds rich bakery flavor) -
2
cups
+ 1 Tablespoon all-purpose flour
spooned & leveled, or weighed with a kitchen scale (the metric measurement includes the tbsp, so don’t add more on top of the metric amount) -
1
tbsp
cornstarch -
¼
tsp
salt
Optional toppings: coarse sugar, melted chocolate, maraschino cherries, sprinkles
-
1
tbsp
heavy cream or whole milk
Not a must if the dough is pipeable.
Instructions
-
In a stand mixer fitted with the paddle, beat butter, powdered sugar, and granulated sugar on medium-high for 2–3 minutes until light and fluffy. Scrape the bowl halfway through.1 cup unsalted butter,
½ cup powdered sugar,
¼ cup granulated sugar -
Mix in vanilla bean paste, almond extract, egg yolk, and milk powder until smooth and creamy.2 tsp vanilla bean paste,
¼ tsp almond extract,
1 large egg yolk,
2 Tbsp milk powder -
Sift together flour, cornstarch, and salt. Add to the butter mixture, mix on low just until combined.2 cups + 1 Tablespoon all-purpose flour,
1 tbsp cornstarch,
¼ tsp salt -
The dough should be soft and pipeable, not stiff or crumbly. Add heavy cream ½ tablespoon at a time until the consistency resembles thick frosting that holds a swirl. (I didn’t have to add any)1 tbsp heavy cream or whole milk
-
Transfer dough to a piping bag fitted with a large open-star tip (Ateco #827 or Wilton 1M). Pipe rosettes, S-shapes, or rings about 1 ½–2 inches wide onto a parchment-lined baking sheet.
-
Refrigerate the piped cookies on the tray for 20-30 minutes. This keeps the definition sharp.
-
While the cookies are chilling, preheat the oven to 325°F (160°C). Line 2 large, light-colored baking sheets with white parchment paper.
-
Bake on the center rack for 10-11 minutes, until edges are lightly golden but centers remain pale. Rotate halfway for even color. Avoid overbaking.
-
Let cool on the pan for 5 minutes, then transfer to a wire rack to cool completely.
Chocolate Dip (Optional)
-
If you decide to dip these in chocolate, wait until they are completely cooled. Then dip half a cookie in a bowl of melted chocolate (Milk, Dark, or White Chocolate). Place them on a parchment lined baking sheet, and top with sprinkles of sea salt like I did here. Let the chocolate set completely before storing.
Nutrition
Calories:
106
Calories
|
Carbohydrates:
11
g
|
Protein:
1
g
|
Fat:
7
g
|
Saturated Fat:
4
g
|
Polyunsaturated Fat:
0.3
g
|
Monounsaturated Fat:
2
g
|
Trans Fat:
0.2
g
|
Cholesterol:
23
mg
|
Sodium:
23
mg
|
Potassium:
18
mg
|
Fiber:
0.2
g
|
Sugar:
4
g
|
Vitamin A:
203
IU
|
Vitamin C:
0.04
mg
|
Calcium:
8
mg
|
Iron:
0.4
mg
Nutrition information is automatically calculated, so should only be used as an approximation.
Enjoyed this recipe? Share your thoughts below!
In conclusion, these homemade Danish piped butter cookies are more than just a recipe; they are a journey back to cherished memories and an invitation to create new ones. With their irresistible buttery flavor, delicate crispness, and elegant presentation, they are destined to become a staple in your baking repertoire. From understanding the role of each ingredient to mastering the piping and baking techniques, you now have all the tools to achieve bakery-quality results in your own kitchen. Whether served with a warm drink or shared as a thoughtful gift, these cookies embody comfort and joy. So, gather your ingredients, follow these steps, and prepare to delight in the timeless charm of truly exceptional Danish butter cookies. Happy baking!