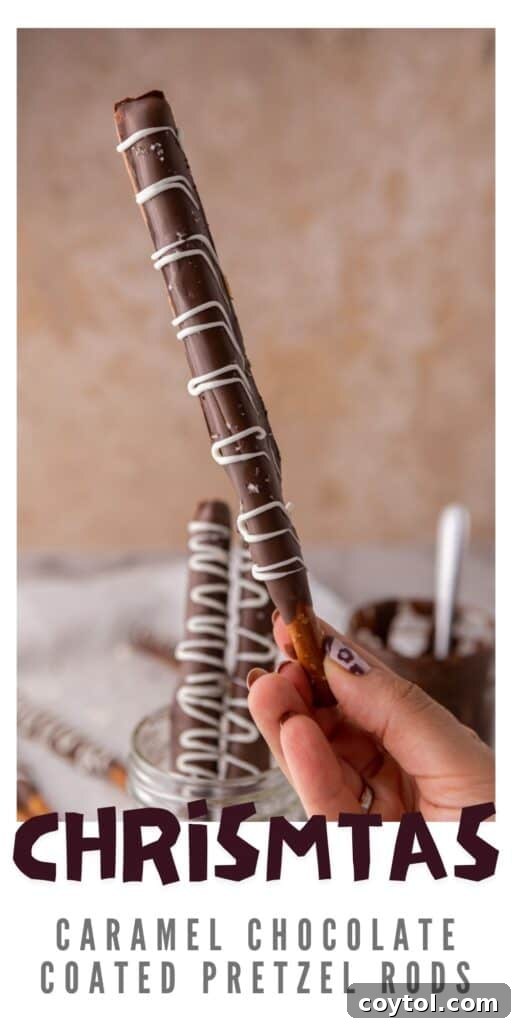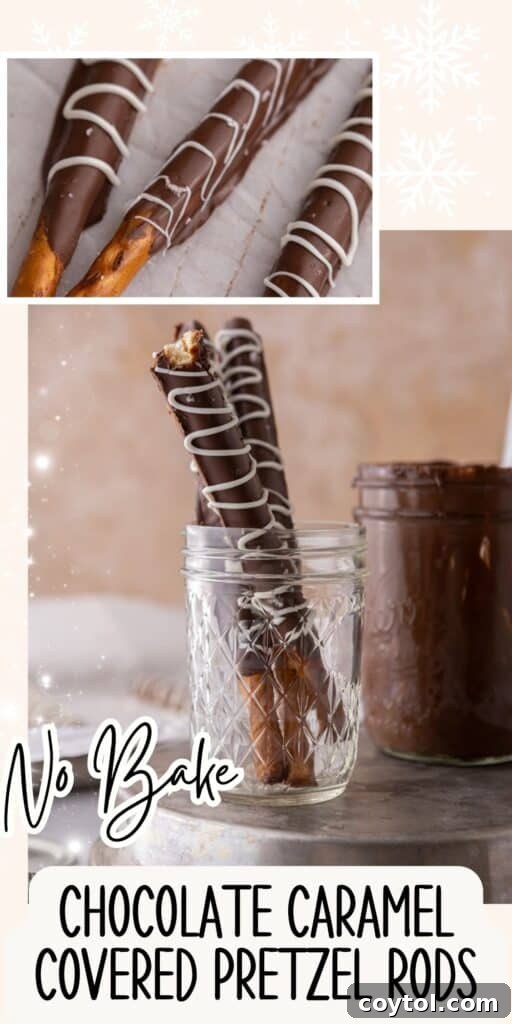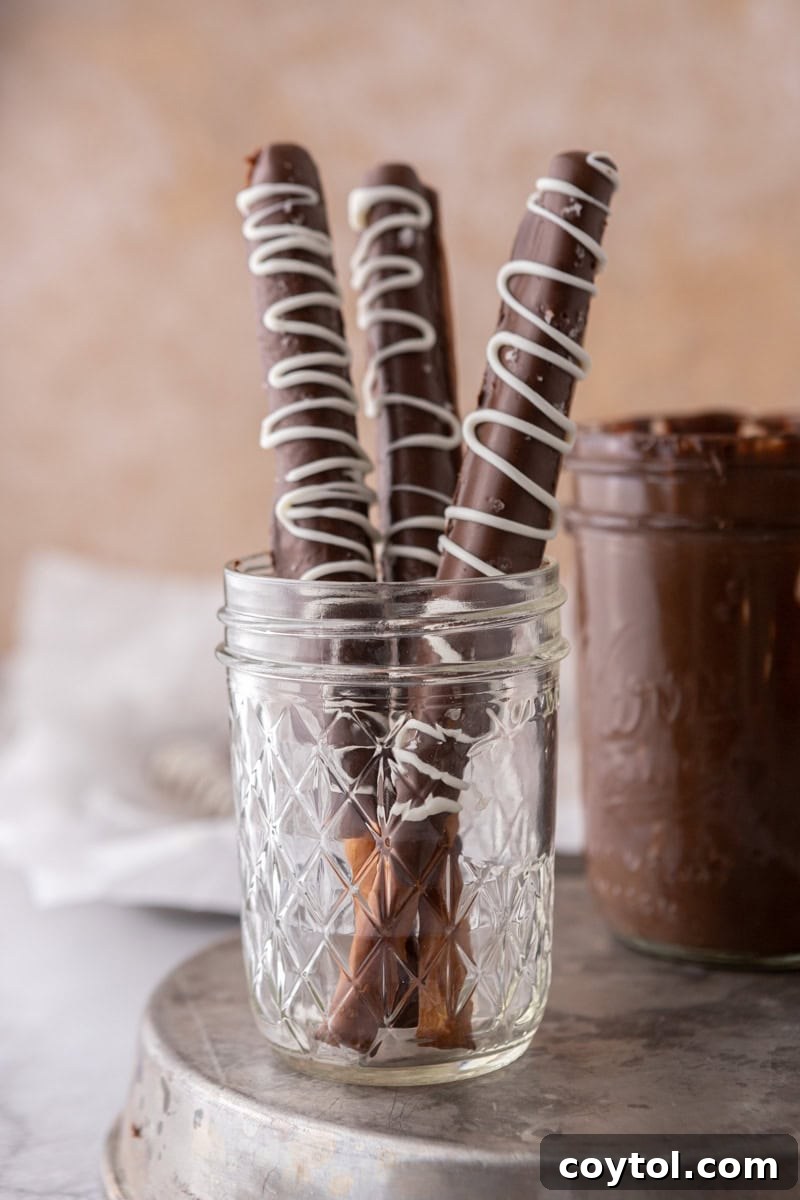
Irresistible Caramel Chocolate Pretzel Rods: Your Ultimate No-Bake Holiday Treat
Discover the magic of these exquisite caramel chocolate covered pretzel rods – the quintessential no-bake delight perfect for any festive occasion. Whether you’re seeking a cozy snack to enjoy during your favorite holiday movies, or aiming to craft charming homemade gifts to accompany your cookie boxes, this recipe offers a simple yet impressive solution. Combining the perfect balance of salty crunch, chewy caramel, and smooth chocolate, these pretzel rods are guaranteed to be a hit with everyone, from casual snackers to serious sweet tooths. Dive into this incredibly easy recipe and prepare to create a truly memorable treat that embodies the spirit of effortless indulgence and festive cheer.
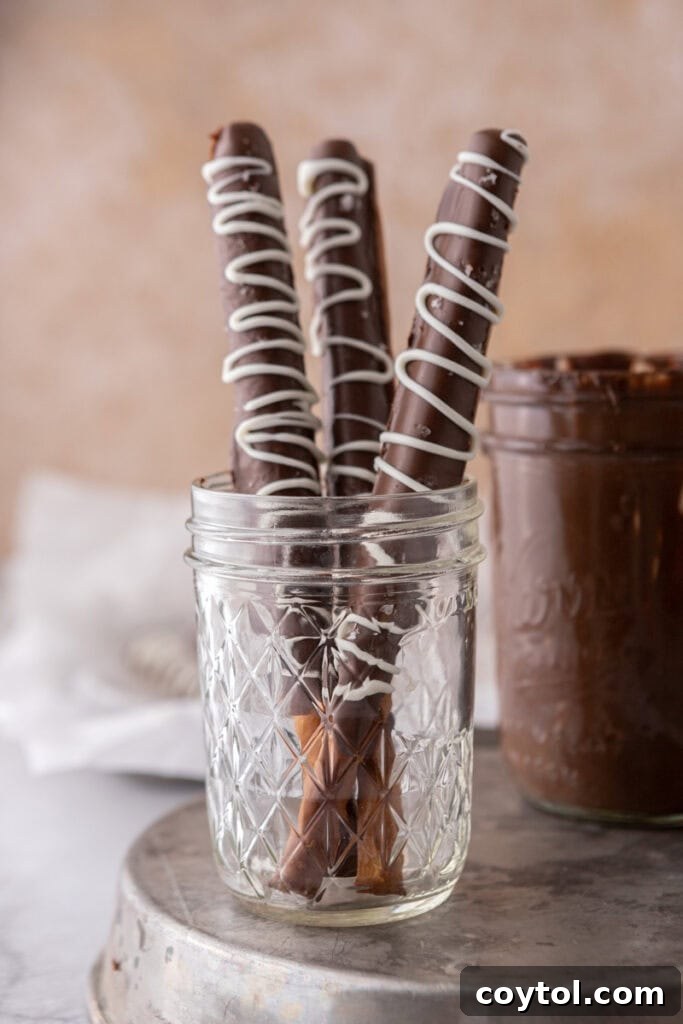
This delightful recipe stands out for its incredible simplicity and adaptability, making it an ideal project for bakers of all skill levels, even those new to the kitchen. You have complete freedom to customize these treats to your heart’s content: experiment with different types of chocolate, get creative with an array of toppings, and even prepare them in advance to simplify your holiday hosting or gifting. Whether you’re a devoted caramel enthusiast, a fervent chocolate lover, or someone who appreciates the harmonious blend of sweet and salty, this straightforward recipe unites the best of these beloved flavors. You’ll be amazed by how effortlessly these gourmet-looking pretzel rods come together, creating a treat that tastes far more complex than it is to make!
Since you appreciate the classic combination of caramel and chocolate, you might also enjoy exploring these other tempting treats. Consider trying our Salted Caramel Pretzel Bark for another quick and satisfying sweet and salty snack, or indulge in the rich decadence of these CRUMBL Caramel Coconut Fudge Cookies for a truly decadent experience. Each recipe offers a unique way to enjoy these complementary flavors, ensuring there’s always something new and exciting to bake.
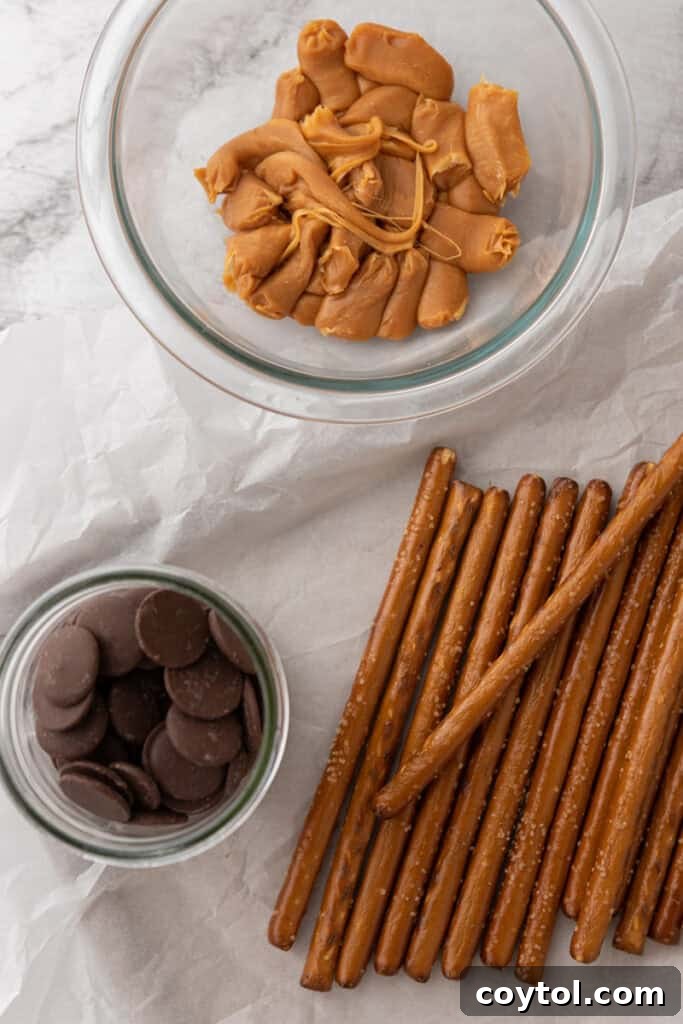
Essential Ingredients for Perfect Caramel Chocolate Pretzel Rods
Crafting these irresistible caramel chocolate pretzel rods requires just a few key ingredients, readily available at your local grocery store. Each component plays a vital role in achieving that perfect balance of crunch, chewiness, and rich flavor. Below is a detailed list of what you’ll need. For precise measurements and step-by-step instructions, please refer to the complete recipe card located at the bottom of this page.
- Thick Pretzel Rods: The foundation of our treat! Opt for thick pretzel rods over the thinner varieties. Their substantial size provides a satisfyingly robust crunch and a better canvas for holding the generous layers of caramel and chocolate, contributing to a superior overall texture and eating experience. They are less prone to breaking during dipping and offer a more substantial bite.
- Soft Caramels: These form the luscious, chewy layer that perfectly hugs the salty pretzel. Using soft, individually wrapped caramels (like Werther’s Original or similar brands) ensures easy melting and a smooth, creamy texture. This sweet, buttery caramel provides an ideal counterpoint to the pretzel’s saltiness before the final chocolate coating. Unwrapped caramels are best for ease, or you can purchase blocks of soft caramel and chop them.
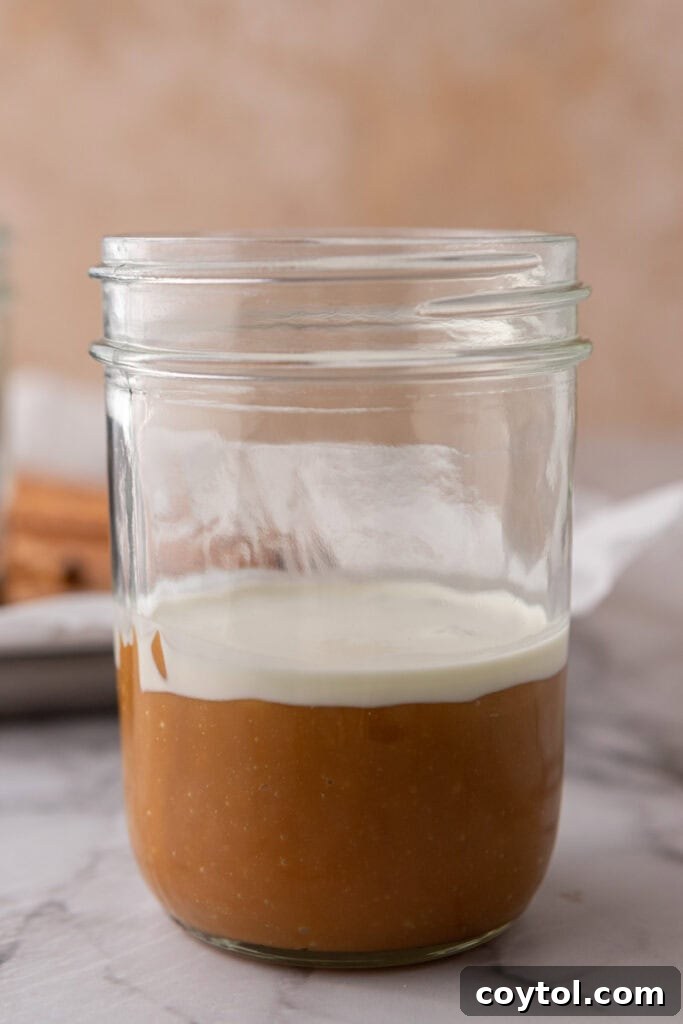
- Heavy Cream: A crucial ingredient for transforming the firm caramels into a velvety, spreadable dream. Heavy cream not only adds richness but also thins the melted caramel just enough to make dipping effortless, ensuring an even and luxurious coating on every pretzel rod. This prevents the caramel from becoming too thick or brittle.
- Chocolate Melting Wafers: For a flawlessly smooth and glossy finish, chocolate melting wafers (also known as candy melts) are highly recommended. They melt beautifully and set quickly, creating a professional-looking coating that won’t seize or become streaky. You have the freedom to choose your favorite: classic milk chocolate for a sweeter profile, rich dark chocolate for a more intense flavor, or vibrant white chocolate for a contrasting look and taste. Good quality chocolate will make a significant difference in taste and texture.
- Optional Toppings: This is where you can truly let your creativity shine! Elevate your pretzel rods with a variety of toppings. Consider festive sprinkles for a pop of color, finely crushed nuts (like pecans, walnuts, or almonds) for added texture, a delicate sprinkle of flaky sea salt to enhance the sweet and salty dynamic, or even a drizzle of contrasting chocolate. Crushed toffee bits, mini chocolate chips, or even a dusting of cocoa powder can also be delightful additions.
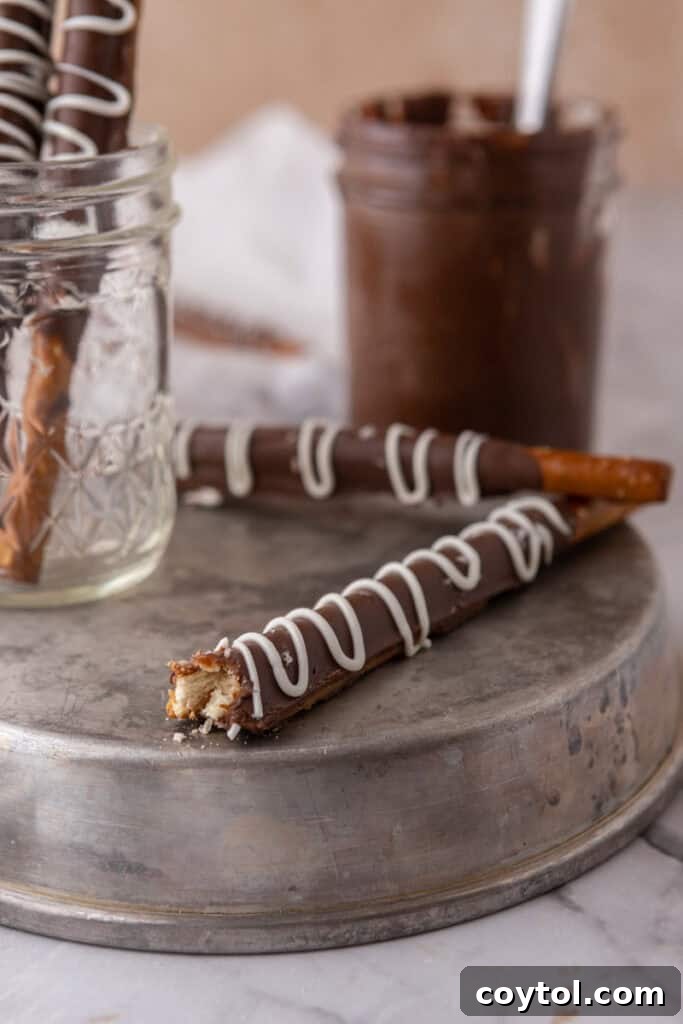
Step-by-Step Guide: Crafting Your Caramel Chocolate Pretzel Rods
Making these gourmet-style caramel chocolate pretzel rods is surprisingly simple and a genuinely enjoyable process. Follow these detailed steps to ensure perfectly coated, delicious treats every time. Remember to consult the full recipe card at the end of this post for precise measurements and additional tips!
- Prepare Your Workspace: Begin by lining a large baking sheet with parchment paper or a silicone baking mat (like a Silpat). This non-stick surface is essential for preventing your dipped pretzels from adhering as they set, making cleanup a breeze. Ensure your work area is clean and organized, with all ingredients within easy reach.
- Melt the Caramels: Unwrap all your soft caramels and place them into a sturdy, microwave-safe bowl. The easier the caramels are to unwrap, the quicker this step will be!
- Add Heavy Cream: Pour the heavy cream directly over the unwrapped caramels in the bowl. This cream is key to achieving a smooth, pliable caramel consistency.
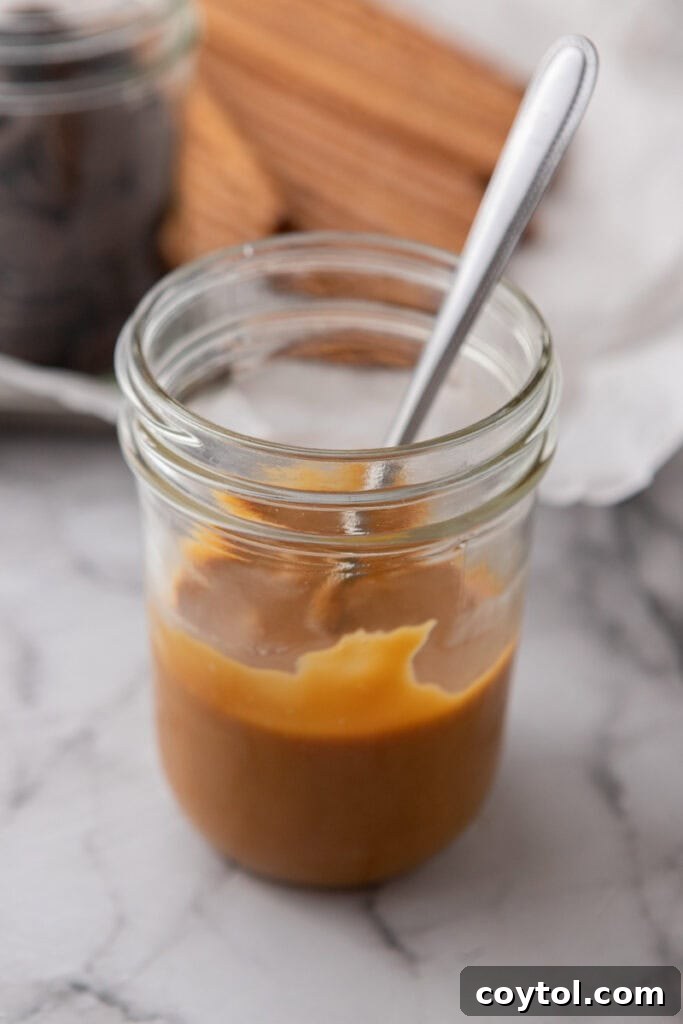
- Microwave and Stir for Smooth Caramel: Heat the caramel and cream mixture in the microwave in short 30-second intervals. After each interval, remove the bowl and stir vigorously with a spoon or spatula. Continue this process until the caramels are completely melted, smooth, and free of any lumps. The mixture should be thick enough to cling to the pretzel but thin enough to drip easily. Avoid overheating to prevent scorching.
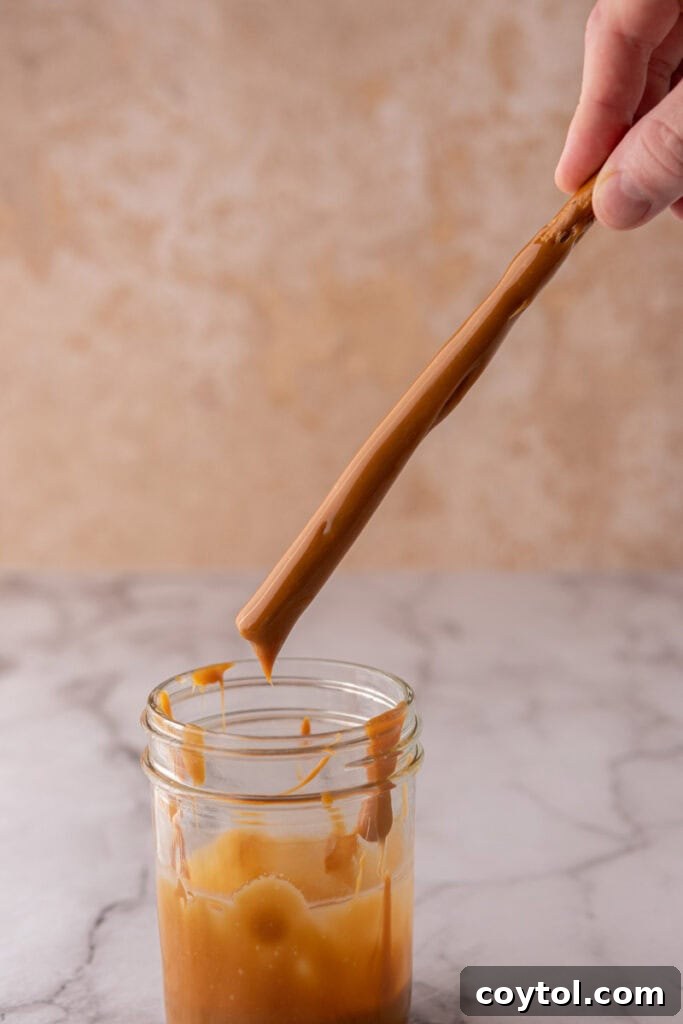
- Dip in Caramel: Holding each thick pretzel rod by its top few inches, carefully dip it into the warm, melted caramel. Rotate and swirl the pretzel to ensure an even coating, leaving about 2-3 inches at the top bare for easy handling and a neat finish. Aim for a generous but not excessive layer.
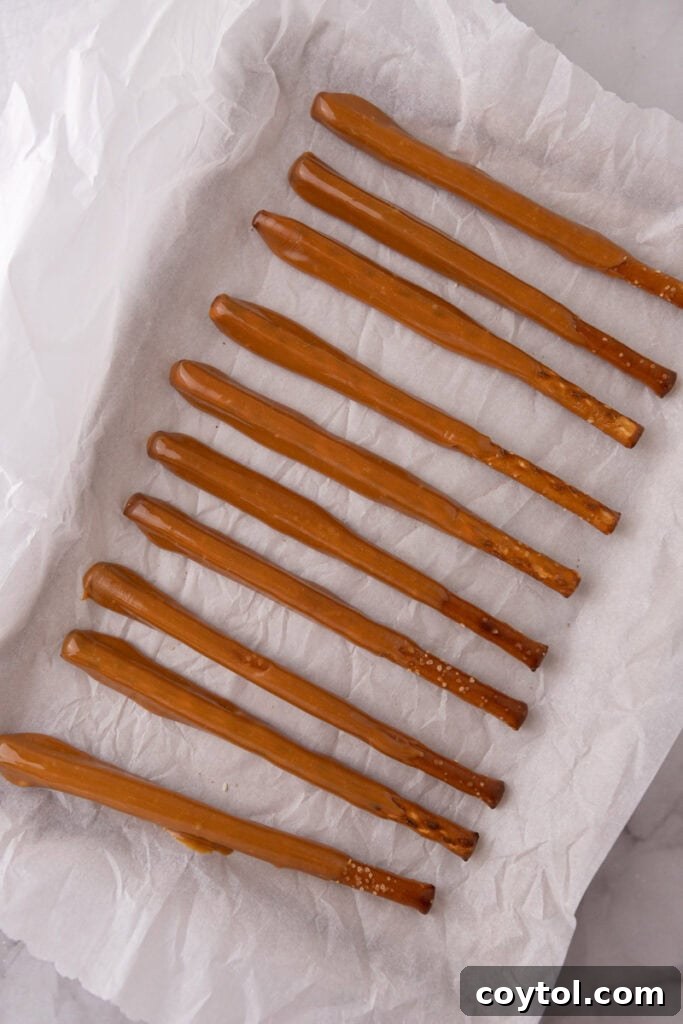
- Drip and Place: Gently lift the caramel-coated pretzel rod, allowing any excess caramel to drip back into the bowl for a few seconds. This prevents pooling and ensures a clean, uniform layer that won’t create a sticky mess. Carefully place the dipped pretzel onto your prepared baking sheet, ensuring they don’t touch each other.
- Set the Caramel: Once all pretzels are caramel-coated, allow the caramel to set. This typically takes about 15-20 minutes at room temperature. For a quicker set, or if your kitchen is warm, transfer the baking sheet to the refrigerator for 10-15 minutes. The caramel needs to be firm to the touch before moving on to the chocolate dipping, otherwise, it may slide off.
- Melt the Chocolate: In a separate clean, microwave-safe bowl, melt your chosen chocolate wafers (or chips, with a touch of coconut oil/shortening) according to the package directions. This usually involves microwaving in 30-second bursts, stirring thoroughly after each interval until the chocolate is completely smooth and liquid. For best results and a tempered-like finish, melt slowly. Alternatively, you can use a double boiler on the stovetop for a more controlled melting process, ensuring the chocolate doesn’t burn.
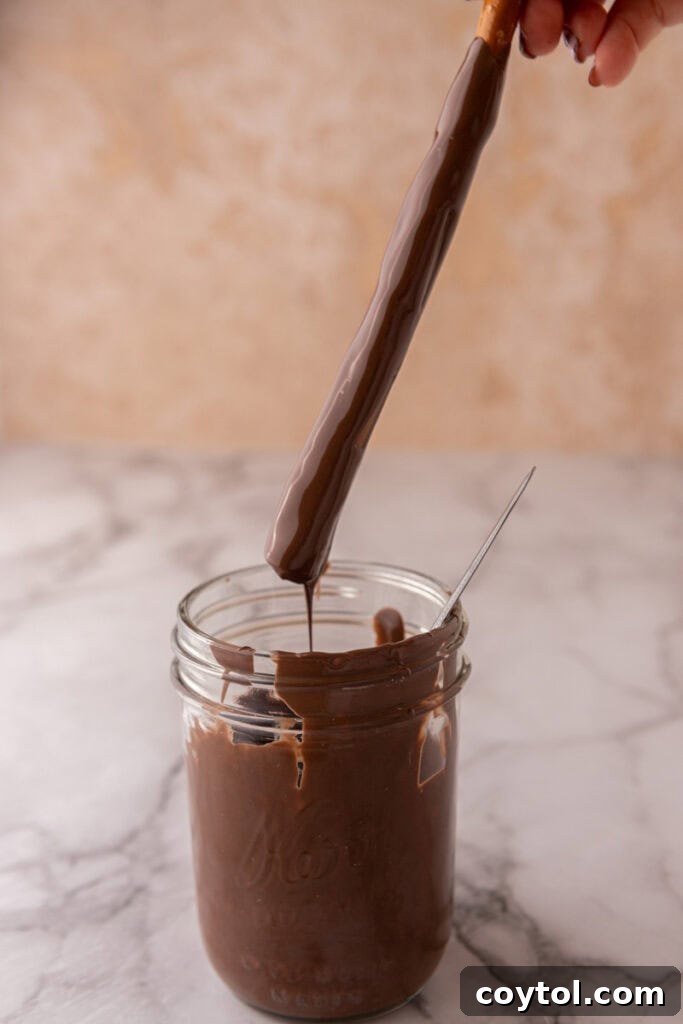
- Dip in Chocolate: Once the caramel is fully set, hold each pretzel rod again by its bare end. Dip it into the melted chocolate, ensuring the entire caramel layer is completely enveloped. You can tilt the bowl slightly to ensure full coverage. Work efficiently as melted chocolate can thicken as it cools.
- Shake Off Excess: Gently tap the pretzel rod against the side of the bowl or against your wrist to shake off any superfluous chocolate. This helps create a smooth, thin coating and prevents thick, uneven patches. Return the chocolate-coated pretzel to the parchment-lined baking sheet, leaving space between each rod.
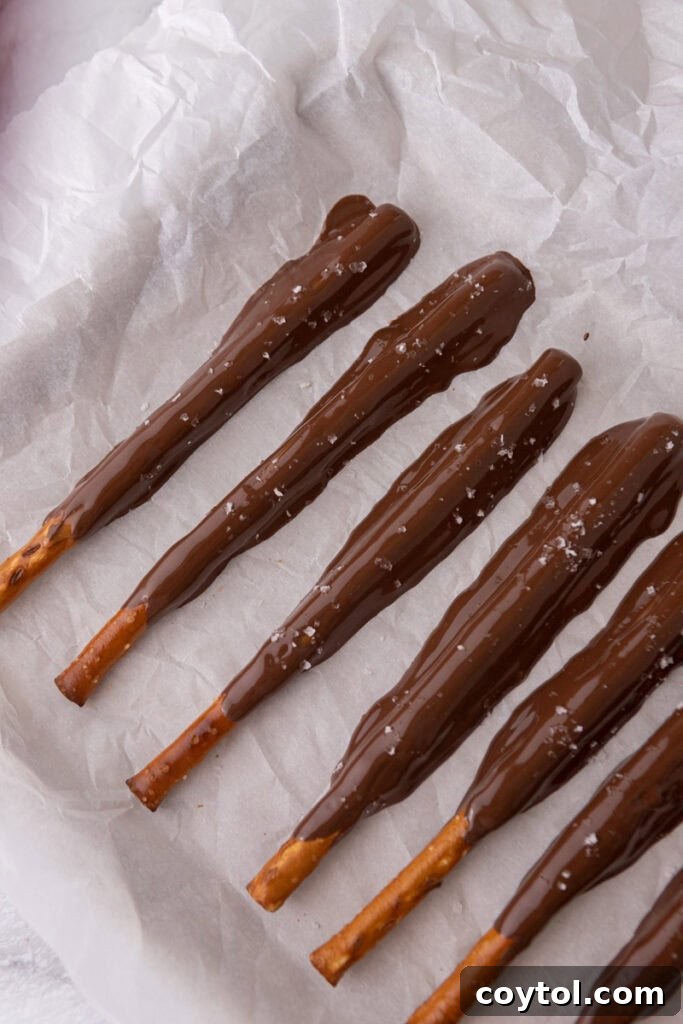
- Add Toppings (Optional): While the chocolate is still wet and pliable, quickly sprinkle your desired toppings over the dipped pretzel rods. This is the best time for sprinkles, crushed nuts, or a delicate pinch of flaky sea salt to adhere securely. Don’t wait too long, as chocolate sets quickly! For multiple toppings, create small sections or patterns.
- Final Setting: Allow the chocolate to set completely. This can be done at room temperature, which might take 30-60 minutes depending on your environment. To expedite the process, place the baking sheet in the refrigerator for 10-15 minutes until the chocolate is firm and no longer tacky. Do not freeze, as this can cause condensation when thawing.
- Enjoy!: Once the chocolate is fully set and firm, your homemade caramel chocolate pretzel rods are ready to be savored! Carefully lift them from the parchment paper and arrange them aesthetically for serving or gifting. They are best enjoyed at room temperature or slightly chilled.
Why These Caramel Chocolate Pretzel Rods Are a Must-Make!
There are countless reasons why these caramel chocolate pretzel rods deserve a spot on your baking list, especially during the festive season or any time you crave a special treat. They are more than just a dessert; they are a delightful experience to create and share:
- Effortlessly Simple Ingredients: You won’t need to hunt for exotic items. This sweet treat uses only a few common ingredients that are easily accessible in the baking aisle of any standard grocery store. This makes it a stress-free baking project, perfect for impromptu cravings or last-minute gifting, requiring minimal preparation and specialized tools.
- The Ultimate Holiday Gift: During the bustling holiday season, these pretzel rods make for an exquisite and thoughtful homemade gift. Package them in cello bags with a festive ribbon, and they become a charming addition to any Christmas cookie box, hostess gift, or thoughtful present for teachers and neighbors. Their homemade touch and gourmet appearance truly convey warmth and care, making them much more personal than store-bought options.
- Versatile for Any Special Occasion: Beyond the holidays, these delightful treats are incredibly versatile. They are a fantastic addition to various gatherings and celebrations, from baby showers and birthday parties to bake sales, family reunions, or even as a unique dessert bar offering. Their appealing look and universally loved flavor profile make them suitable for almost any event where a sweet bite is welcomed, catering to diverse tastes.
- Perfect Sweet & Salty Balance: The magic of these pretzel rods lies in their harmonious blend of flavors. The crispy, salty pretzel provides an addictive contrast to the rich, chewy caramel and the smooth, sweet chocolate, creating a taste sensation that keeps you coming back for more. This delightful interplay of flavors and textures is what makes them so universally appealing.
- No-Bake Convenience: Forget about heating up the oven and dealing with complex baking techniques! This no-bake recipe is ideal for warmer months or when you simply want to avoid the extra heat and fuss of traditional baking. It’s quick, easy, and yields impressive results without a single moment of oven time, making it perfect for novice bakers or those short on time.
- Kid-Friendly Fun: This recipe is a fantastic activity for getting children involved in the kitchen. Dipping, sprinkling, and decorating are simple and enjoyable tasks that even little hands can manage, making it a wonderful way to create delicious memories together. It encourages creativity and a sense of accomplishment for young aspiring chefs.
- Customizable to Your Liking: The basic recipe is a canvas for your creativity. Easily swap out milk chocolate for dark or white, or add different extracts to the chocolate (like peppermint or almond). The possibilities for toppings are endless, ensuring you can tailor these treats to any theme or personal preference.
Frequently Asked Questions – FAQ
How to store these caramel chocolate pretzel rods?
To keep your caramel chocolate pretzel rods fresh and delicious, store any leftovers in an airtight container. Placing them in the refrigerator is recommended, especially in warmer climates, as it helps the chocolate and caramel maintain their firm texture. When stored properly in the fridge, they will remain wonderfully edible for up to two to three weeks, ensuring you always have a delightful treat ready whenever a sweet craving strikes. For optimal freshness, you might separate layers with parchment paper to prevent sticking.
Can I use homemade caramel instead of store-bought caramels?
Absolutely! Using homemade caramel can elevate these pretzel rods with an even richer, more complex flavor profile. The key is to ensure your homemade caramel is sufficiently thick to coat the pretzel rods without dripping excessively. If your caramel seems too thin after cooking, allow it to cool slightly at room temperature; it will thicken as it cools. You want a consistency that clings well to the pretzel but is still dippable. For those who enjoy making caramel from scratch, there are many excellent homemade caramel sauce recipes available that can be adapted for dipping; just be sure it’s thick enough to set.
Can I substitute chocolate melting wafers with chocolate chips?
Yes, you can certainly use chocolate chips as a substitute for chocolate melting wafers. However, chocolate chips are formulated to hold their shape, which means they might not melt as smoothly or produce as glossy a finish as melting wafers. To achieve a smoother consistency and ensure even coating when using chocolate chips, it’s highly recommended to add about a teaspoon of coconut oil or vegetable shortening per cup of chocolate chips during the melting process. This small addition will help the chocolate become more fluid, easier to work with, and provide that desirable silky texture and snap when set.
How do I prevent the caramel from sliding off the pretzels?
Several factors contribute to the caramel adhering properly. Firstly, ensure your pretzel rods are at room temperature before dipping. Cold pretzels can cause the warm caramel to seize or not stick uniformly. Secondly, and most importantly, allow the caramel layer to set completely before you dip the pretzels into the chocolate. If the caramel is still warm or too soft, the subsequent chocolate layer might cause it to become unstable and slide. Chilling the caramel-coated pretzels in the refrigerator for 10-15 minutes can significantly help them firm up quickly and securely. Also, ensure your caramel isn’t too hot or too thin; if it’s too thin, it won’t cling properly.
What are some creative variations for caramel chocolate pretzel rods?
The beauty of this recipe lies in its versatility! Beyond classic sprinkles and sea salt, consider these exciting variations to personalize your pretzel rods:
- Nutty Crunch: Roll the chocolate-dipped pretzels in finely chopped peanuts, almonds, walnuts, or even pistachios for an extra layer of texture and rich flavor. Toasting the nuts beforehand can enhance their aroma.
- Candy Crush: Press crushed candy pieces like M&M’s, Heath bars, crushed peppermints (especially for holidays), or Butterfingers onto the wet chocolate for a burst of color and flavor.
- Cookie Crumble: Dip them in crushed Oreos, Biscoff cookies, or graham crackers for a cookies-and-cream or s’mores inspired twist.
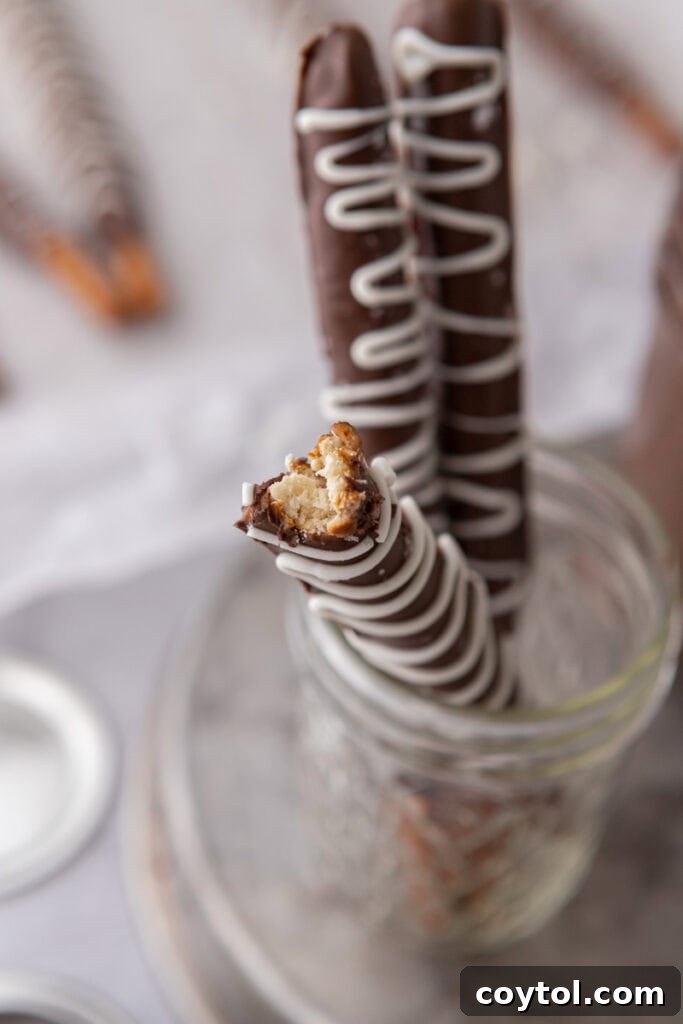
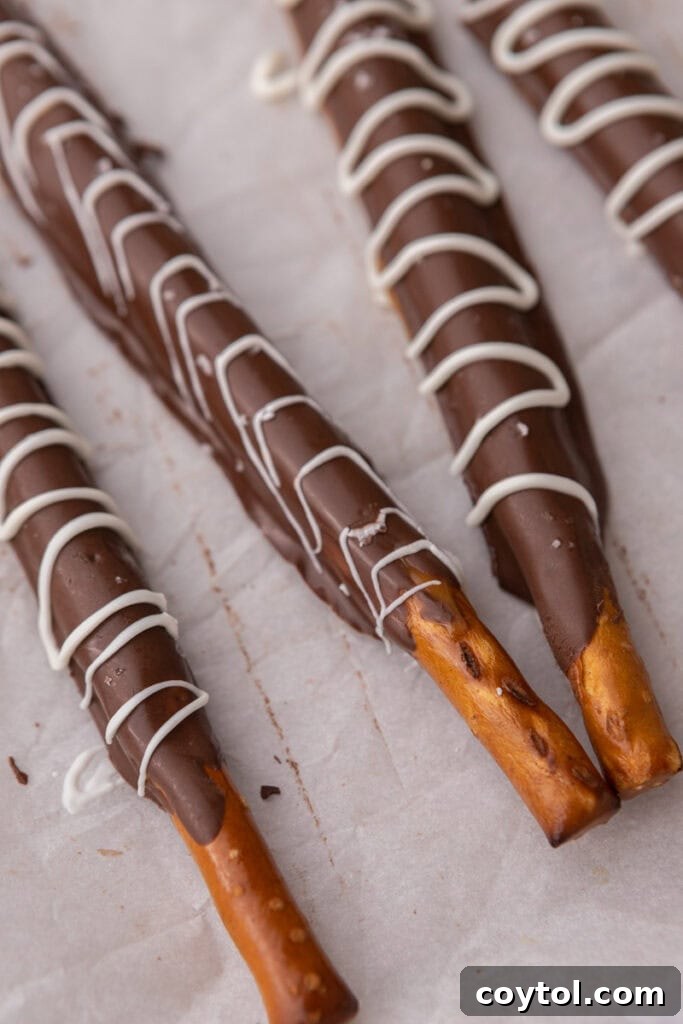
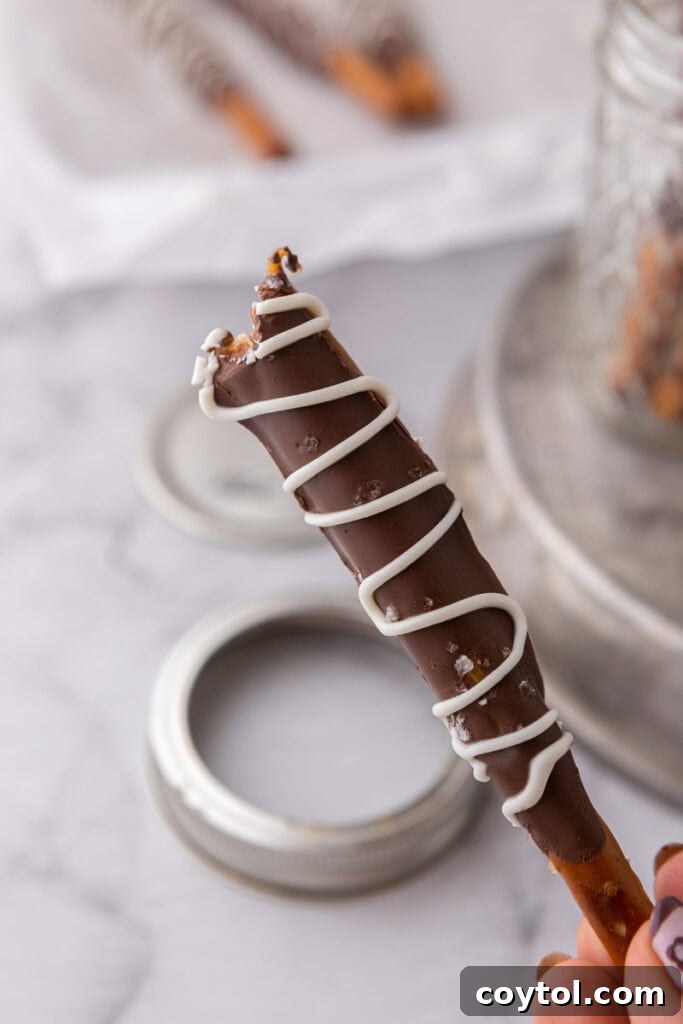
- Drizzle Design: After the main chocolate layer has set, melt a contrasting color of chocolate (white chocolate on dark, or vice-versa) and drizzle it in decorative patterns for an elegant and artistic touch.
- Spicy Kick: A tiny pinch of cayenne pepper or chili powder mixed into dark chocolate can create a surprisingly delicious sweet-and-spicy treat for an adventurous palate.
- Toasted Coconut: Roll in toasted shredded coconut for a tropical twist, especially good with white chocolate.
Can I make these caramel chocolate pretzel rods ahead of time?
Absolutely! These pretzel rods are an excellent make-ahead treat, which is perfect for busy holiday preparations or party planning. You can prepare them up to two weeks in advance. Store them in an airtight container in the refrigerator to maintain their freshness and prevent the chocolate from blooming. If you’re planning to give them as gifts, making them ahead allows you ample time for packaging and presentation, ensuring they are fresh and ready when needed without last-minute stress. Allow them to come to room temperature for about 10-15 minutes before serving for optimal texture.
What to do with leftover pretzel rods?
If you find yourself with extra thick pretzel rods after making a batch of these delectable treats, don’t let them go to waste! Store them in an airtight container in a cool, dry place, and they will remain fresh for several weeks. These sturdy pretzels are incredibly versatile and can be used in a variety of other recipes. Keep an eye out for more exciting pretzel rod recipes coming soon, offering even more creative ways to enjoy that satisfying crunch. In the meantime, they make a great snack on their own, can be broken up and added to trail mix or crunchy pie crusts, or even used as stir sticks for hot chocolate or coffee!
The Best Caramel Chocolate Pretzel Rods Recipe
Caramel Chocolate Pretzel Rods
20 mins
20 mins
14 servings
Print Recipe
Ingredients
- 14 thick pretzel rods
- 40 soft caramels (e.g., Werther’s Original or similar, unwrapped)
- 2 tablespoons heavy cream
- 12 oz semi-sweet chocolate chips or chocolate melting wafers
- Optional: flaky sea salt, sprinkles, crushed nuts, or other desired toppings
- 1 teaspoon coconut oil or shortening (if using chocolate chips for smoother melting)
Instructions
-
Line a baking sheet with parchment paper or a Silpat mat to prevent any sticking.
-
Unwrap the soft caramels and place them in a microwave-safe bowl. Add the heavy cream.
-
Microwave the caramel mixture in 30-second intervals, stirring thoroughly after each interval, until the caramels are completely melted and smooth. The mixture should be fluid enough for dipping.
-
Dip each thick pretzel rod into the melted caramel, covering most of the rod but leaving a few inches at the top uncovered for easy handling. Allow any excess caramel to drip off before placing onto the prepared baking sheet.
-
Allow the caramel to set for approximately 15-20 minutes at room temperature, or accelerate the process by chilling the pretzels in the refrigerator for 10-15 minutes until the caramel is firm.
-
In a separate microwave-safe bowl, melt the chocolate wafers (or chocolate chips with coconut oil/shortening) according to package instructions, typically in 30-second intervals, stirring until completely smooth and melted. Alternatively, use a double boiler.
-
Once the caramel is firmly set, dip each caramel-coated pretzel rod into the melted chocolate, ensuring the entire caramel layer is covered. Gently shake off any extra chocolate.
-
While the chocolate is still wet, sprinkle your chosen toppings—such as flaky sea salt, festive sprinkles, or crushed nuts—over the pretzel rods.
-
Allow the chocolate to set completely at room temperature, or place the baking sheet in the refrigerator for 10-15 minutes to speed up the setting process.
-
Once the chocolate is firm, your delectable caramel chocolate pretzel rods are ready to be enjoyed or packaged for gifting!
Notes
Nutrition Information (Approximate Per Serving)
Carbohydrates: 36g |
Protein: 3g |
Fat: 12g |
Saturated Fat: 7g |
Polyunsaturated Fat: 1g |
Monounsaturated Fat: 3g |
Trans Fat: 0.02g |
Cholesterol: 6mg |
Sodium: 85mg |
Potassium: 203mg |
Fiber: 2g |
Sugar: 28g |
Vitamin A: 56 IU |
Vitamin C: 0.1mg |
Calcium: 56mg |
Iron: 2mg
Nutrition information is automatically calculated and should be used as an approximation. Actual values may vary based on ingredients, preparation methods, and specific brands used.
Did you love this recipe? Share your thoughts in a comment below!

Pin This Recipe for Later: Caramel Chocolate Pretzel Rods!
If you’ve enjoyed creating and tasting these delectable caramel chocolate covered pretzel rods, be sure to save this recipe! Pin it to your favorite dessert or holiday boards on Pinterest so you can easily find it for future festivities, gifting occasions, or whenever you need a quick, impressive treat. Sharing is caring, and this recipe is definitely worth sharing with friends and family who appreciate simple yet elegant homemade goodies!