
The Ultimate Guide to Baking Soft, Fluffy Homemade Dinner Rolls
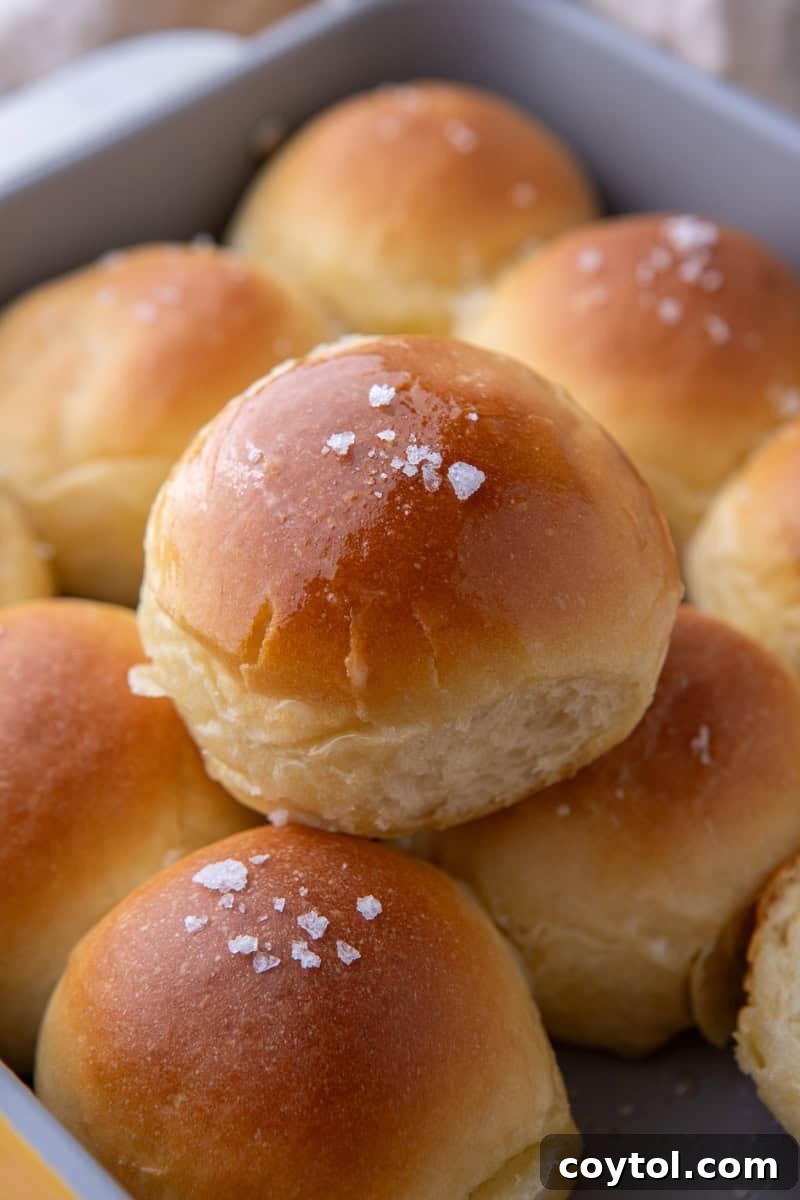
There’s nothing quite like the comforting aroma of freshly baked bread filling your home, especially when it comes to the holidays. These soft dinner rolls are more than just a side dish; they are a celebration in themselves. Pillowy, golden, and undeniably buttery, they are designed to melt in your mouth and elevate any meal. Forget those dense, dry store-bought options – mastering this easy homemade dinner roll recipe will transform your table and earn you endless praise. Perfect for soaking up rich gravy, complementing a succulent roasted turkey, or simply enjoyed warm with a generous smear of butter and a drizzle of honey, these rolls are a true game-changer for any occasion.
Crafting these extraordinary rolls from scratch is surprisingly straightforward, forgiving, and incredibly rewarding. What’s even better? This recipe is designed to be make-ahead friendly, allowing you to enjoy fresh, warm rolls without the last-minute stress on busy cooking days. They consistently bake up light and fluffy, disappearing from the table almost as quickly as they emerge from the oven. Don’t be surprised if your family requests a double batch – they’re that good and are sure to become a cherished family tradition!
If you’re as passionate about easy, delicious bread as we are, you might also love our homemade sourdough bagel recipe, our buttery flaky biscuits, and these delightful small batch pumpkin biscuits for other occasions.
My Enduring Love Affair with Baking Bread
Bread holds a truly special place in my heart. From a very young age, I’ve been utterly obsessed with the magic that happens in the kitchen, and baking bread was the spark that ignited this lifelong passion. The profound joy I discovered in bread-making stemmed from its inherent simplicity. It didn’t demand a plethora of fancy ingredients or specialized, expensive tools. Instead, it relied on just the basics – flour, water, yeast, salt – staples that were always readily available in our home. This accessibility meant I didn’t have to constantly beg my mom to buy anything extra, making the entire process feel more independent and deeply rewarding.
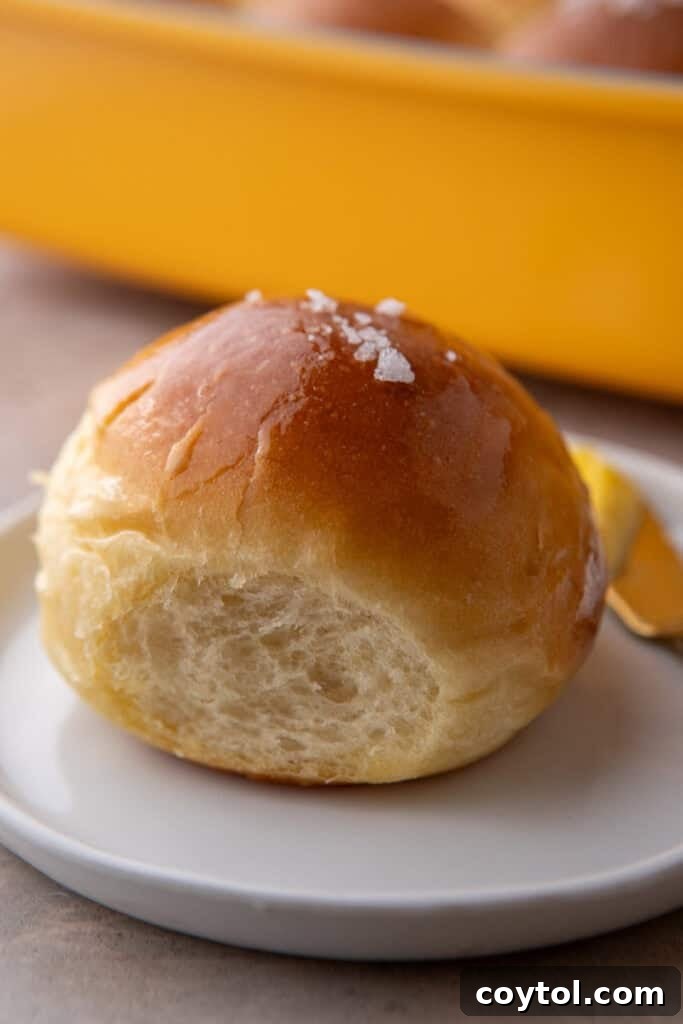
And let me tell you, there’s nothing quite like the intoxicating scent of freshly baked bread wafting through the house. It’s a comforting, nostalgic aroma that instantly transforms any kitchen into a warm, inviting haven. But the true peak of happiness comes just an hour or two later, when you can finally tear into those exquisitely soft, tender homemade rolls. That moment of warmth, texture, and pure deliciousness is unparalleled, a sensory experience that brings immense satisfaction.
Perhaps that’s precisely why I’m so passionate about creating and sharing recipes like these soft dinner rolls. They do more than just nourish; they evoke cherished memories, carry a comforting, nostalgic vibe, and possess an almost magical ability to make any holiday table feel exceptionally special and complete. It’s about more than just food; it’s about crafting moments and building traditions, one perfectly baked, buttery roll at a time.
The Irresistible Appeal of Homemade Dinner Rolls
In our fast-paced world, opting to bake your own dinner rolls might seem like an extra commitment, but the profound rewards far outweigh the minimal effort. Homemade rolls offer a depth of flavor, an unparalleled texture, and a freshness that simply cannot be replicated by even the best store-bought alternatives. Each bite is a sublime experience – a testament to the simple joy and artistry of baking from scratch. Beyond the incredible taste, there’s a unique sense of pride and warmth that emanates from serving something you’ve lovingly created with your own hands. This particular recipe is meticulously crafted to deliver rolls that embody perfection:
- Pillowy Soft: Achieve that coveted, cloud-like texture that makes every bite feel utterly luxurious and truly heavenly.
- Buttery Rich: Infused with a luscious, deep butter flavor that provides the perfect complement to virtually any main course or side dish.
- Perfectly Golden: Boasting a beautifully browned exterior that hints at the tender, moist crumb nestled within.
- Effortlessly Easy: Designed with home bakers of all skill levels in mind, featuring clear, concise, and simple steps to ensure success.
- Make-Ahead Friendly: An ideal solution for efficient holiday meal preparation, significantly reducing last-minute stress on your busiest cooking days.
- Versatile Pairing: Whether accompanying a festive feast, a comforting weeknight meal, or even as a base for mini sandwiches, these rolls adapt beautifully.
Essential Ingredients for Your Soft and Fluffy Dinner Rolls
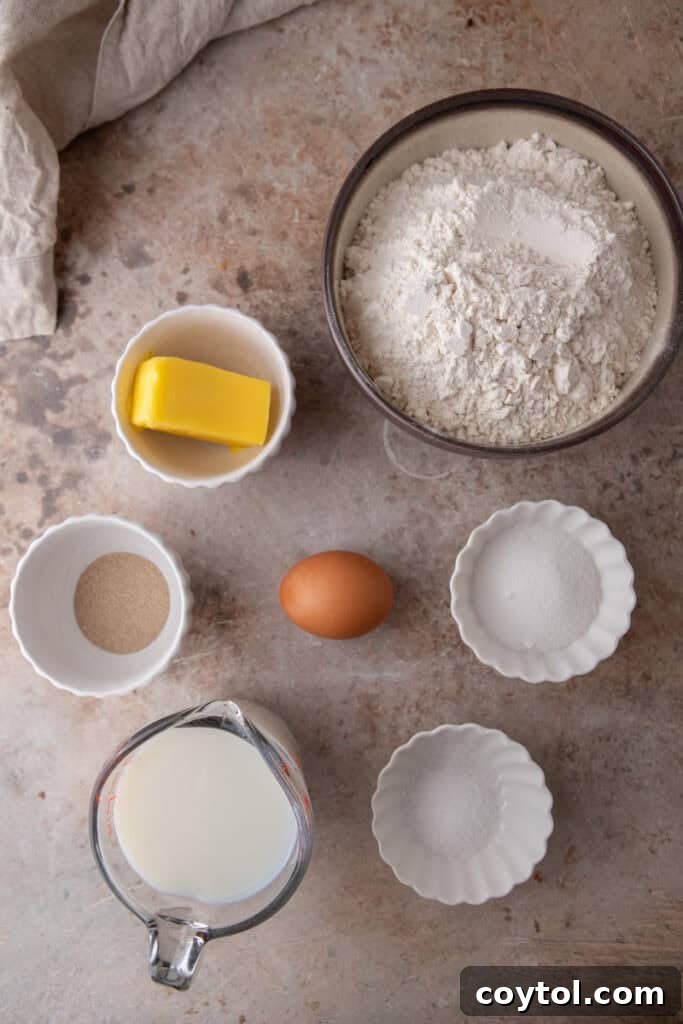
Crafting truly exceptional soft dinner rolls begins with selecting a handful of quality, foundational ingredients. Each component plays a crucial and distinct role in developing that coveted pillowy texture, rich flavor, and beautiful golden hue. Here’s a comprehensive look at what you’ll need to make these buttery yeast rolls from scratch, along with a detailed explanation of their purpose:
- Whole Milk: This liquid is the cornerstone of your dough, providing essential moisture and imbuing the rolls with a desirable richness. It’s vital to use it warm, around 110°F (43°C), as this temperature is optimal for activating the yeast without scalding it. The higher fat content of whole milk contributes significantly to the final tenderness and luxurious feel of the rolls.
- Instant Yeast or Active Dry Yeast: The magical leavening agent responsible for creating those delightful air pockets and ensuring the rolls achieve their characteristic light and airy rise. Instant yeast offers convenience as it can be mixed directly with dry ingredients. Active dry yeast, on the other hand, typically requires a preliminary proofing stage in warm liquid to ensure it’s alive and active. Both types will yield wonderfully fluffy results when handled correctly.
- Granulated Sugar: Beyond merely adding a touch of sweetness, sugar serves as vital nourishment for the yeast, accelerating fermentation and contributing significantly to the rolls’ gorgeous golden-brown crust during baking. It also provides a subtle sweetness that perfectly balances the savory notes of the butter and milk.
- Egg: A truly indispensable ingredient that provides richness, structural integrity, and enhanced flavor to your dinner rolls. The egg’s fat and protein content work together to create a more tender, flavorful crumb and impart a beautiful, inviting golden color to the baked rolls. Always ensure your egg is at room temperature for better, more uniform incorporation into the dough.
- Unsalted Butter: This is where a significant portion of the rolls’ incredible flavor and melt-in-your-mouth tenderness originates. Softened unsalted butter ensures a soft, pliable dough that is easy to work with and results in an incredibly rich, delicate texture in the finished product. Using unsalted butter grants you complete control over the overall saltiness of your rolls.
- Bread Flour: The superior choice for this recipe, thanks to its higher protein content. This higher protein level allows for more robust gluten development, which is crucial for giving the rolls their structural backbone and a satisfying, desirable chewiness. While you can certainly use all-purpose flour in a pinch for your homemade yeast rolls, be aware that bread flour truly elevates the texture, making them noticeably chewier and more resilient.
- Salt: A critical, often underestimated ingredient. Salt is essential for balancing the sweetness from the sugar, enhancing the natural buttery flavors, and, crucially, regulating the activity of the yeast. It ensures an even and controlled rise, preventing the dough from over-fermenting too quickly and contributing to a well-structured final product.
These wonderfully versatile buttery dinner rolls are so delicious, they can even serve as the perfect, soft bun for homemade burgers, making them a fantastic addition to any meal, not just holidays!
Step-by-Step Guide to Baking Soft Dinner Rolls from Scratch
Baking homemade dinner rolls doesn’t have to be intimidating. This easy-to-follow recipe will guide you through each stage, ensuring you achieve perfect, fluffy results every time. Each step is designed for clarity, with additional tips to help you master the art of baking with yeast. Remember to scroll down to the full recipe card at the end of this post for precise oven temperatures, detailed rise times, and exact bake times.
- Warm the Milk to Perfection: Gently heat your whole milk to a precise temperature of 110°F (43°C). The use of a kitchen thermometer is highly recommended here for absolute accuracy. The milk should feel warm to the touch – akin to bathwater – but never hot, as excessively high temperatures will kill the yeast, preventing your rolls from rising. Lukewarm is the gold standard for optimal yeast activation.
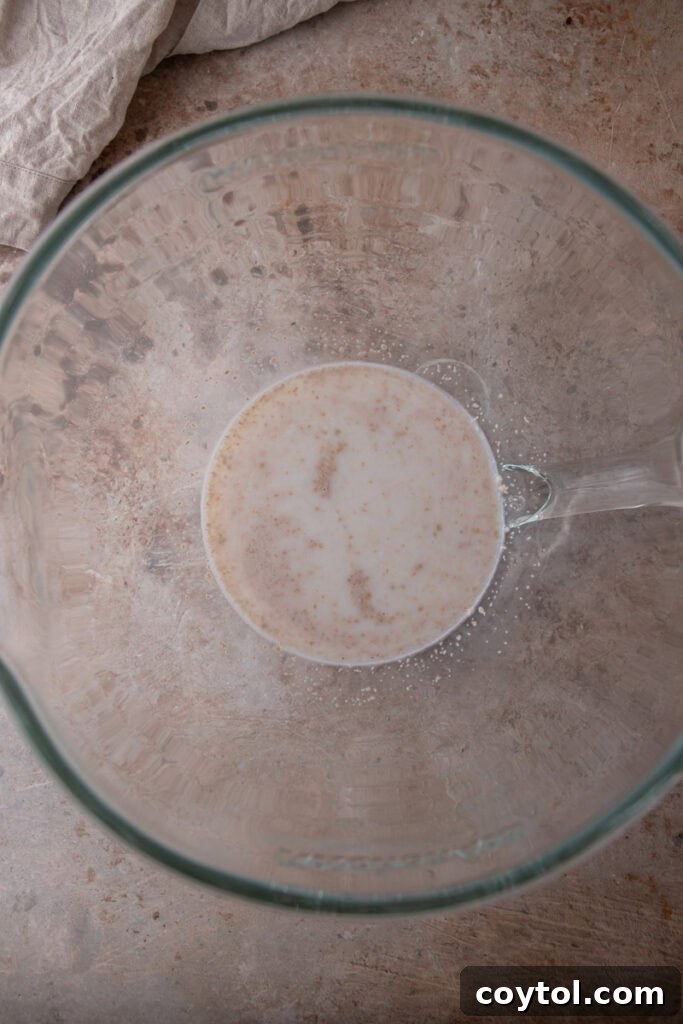
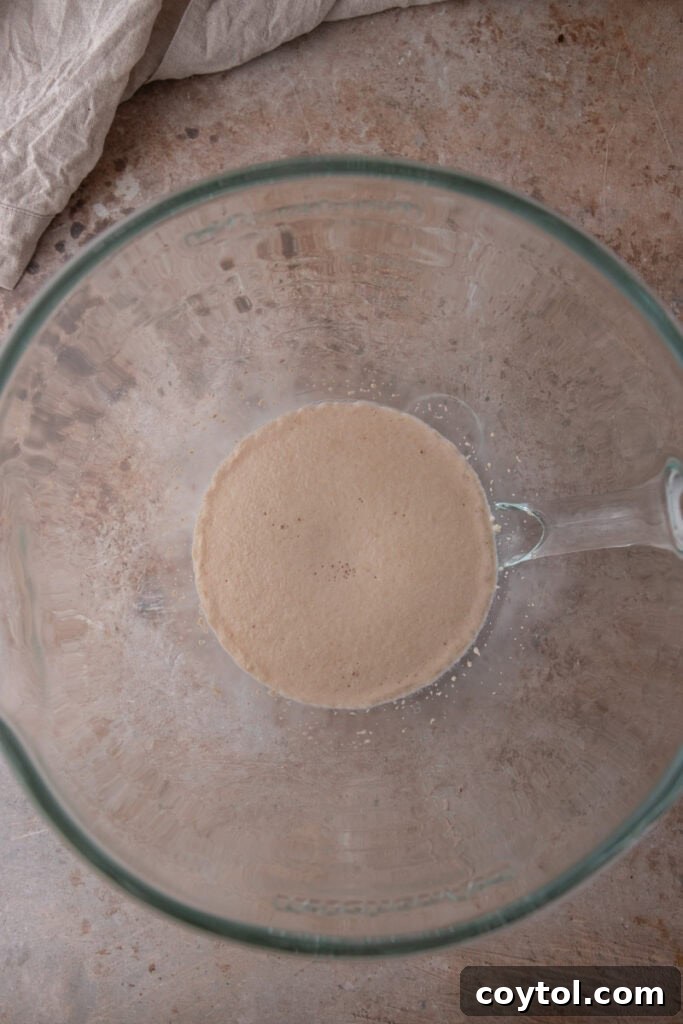
- Proof the Yeast (Crucial for Active Dry Yeast): If you are working with active dry yeast, pour the warmed milk into a spacious mixing bowl. Incorporate the yeast along with a spoonful of the granulated sugar. Allow this mixture to rest undisturbed for 5 to 10 minutes. During this period, you should observe a delicate, foamy layer forming on the surface, which is a clear indicator that your yeast is alive, active, and eager to work its magic. If you’ve chosen instant yeast, you can conveniently bypass this proofing step and proceed directly to mixing your wet ingredients.
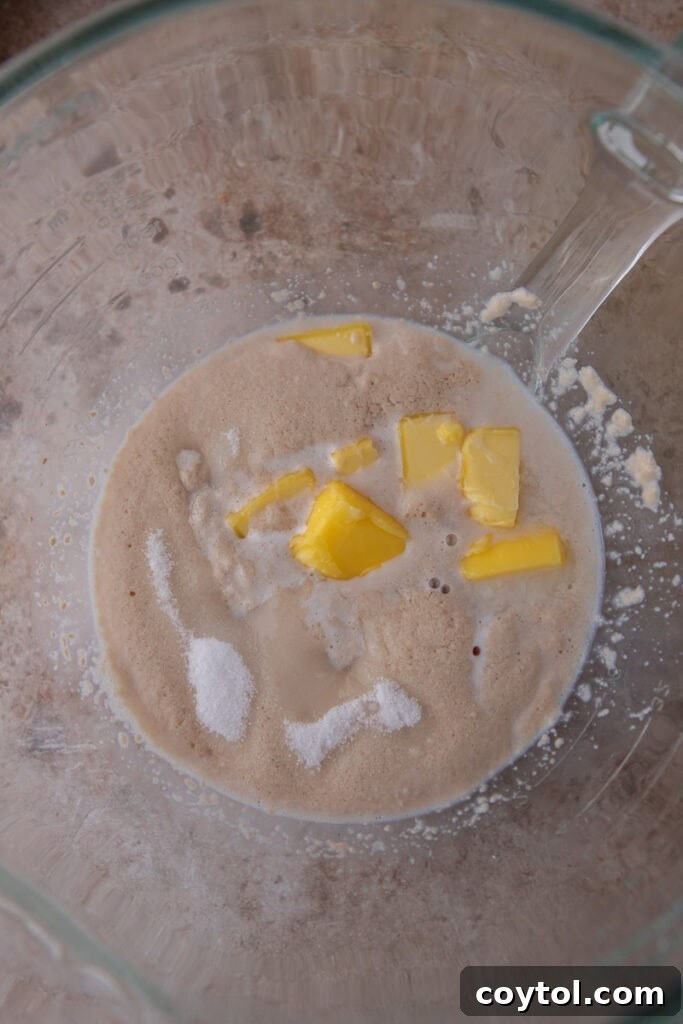
- Combine the Wet Ingredients: In the same large mixing bowl (or the bowl of your stand mixer, securely fitted with a dough hook attachment), introduce the remaining granulated sugar, the room temperature egg, and the softened unsalted butter to your milk-yeast mixture. Stir these ingredients together just enough to ensure that the egg and sugar are thoroughly and evenly blended into the liquid components. Avoid overmixing at this initial stage.
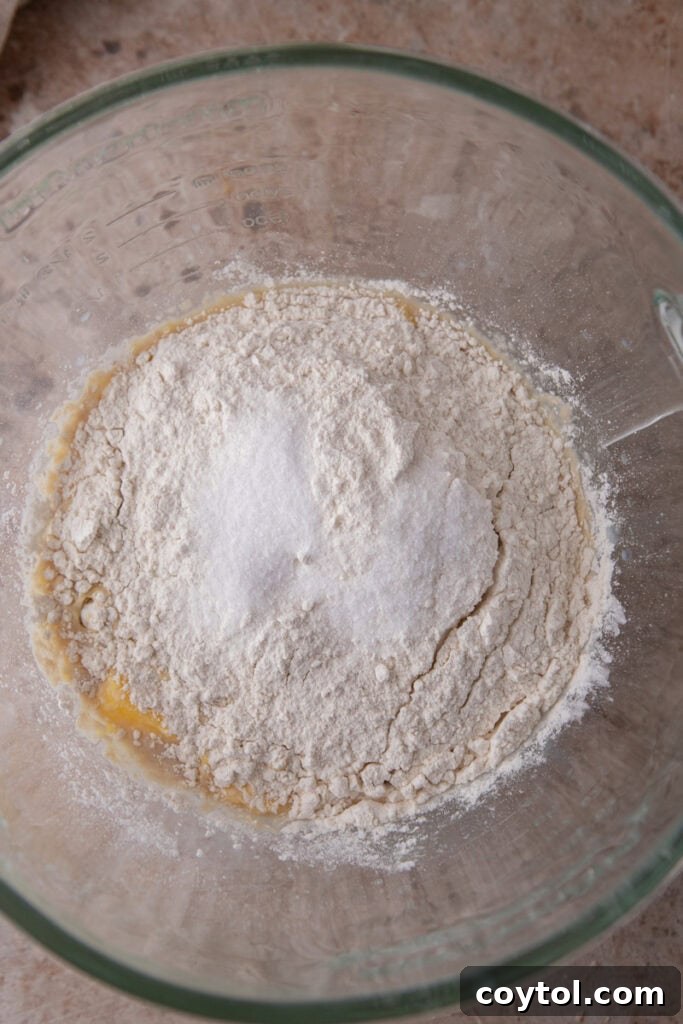
- Incorporate Dry Ingredients for Dough Formation: Gradually sprinkle in the bread flour and the salt. If you’re utilizing a stand mixer, commence mixing on a low speed initially to prevent any flour from escaping the bowl, then steadily increase the speed to medium. Continue mixing until all the ingredients are fully incorporated and coalesce to form a soft, cohesive dough ball. The dough should possess a slightly tacky quality but should not be excessively sticky or adhere aggressively to your hands or the bowl. Should the dough feel too sticky, incorporate a tiny bit more flour (a tablespoon at a time); if it appears too dry, add a small splash of warm milk.
- Knead for Optimal Gluten Development: This is a critically important stage for developing the gluten structure, which is fundamental to achieving that wonderfully elastic, chewy, and light texture in your finished rolls. Knead the dough vigorously, either by hand on a lightly floured surface or using your stand mixer with the dough hook on medium speed. Continue the kneading process for an optimal duration of 8-10 minutes. You’ll know the dough is perfectly kneaded when it feels smooth, highly elastic, and stretches effortlessly without tearing easily. A reliable indicator is the “windowpane test”: you should be able to gently stretch a small piece of dough thin enough to see light through it without it breaking.
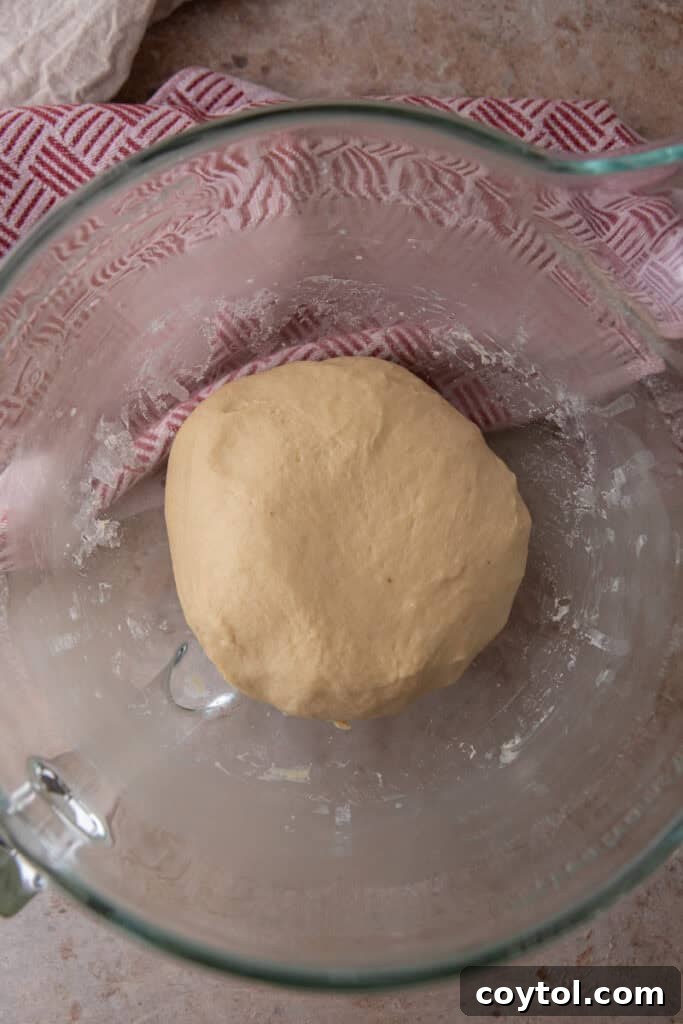
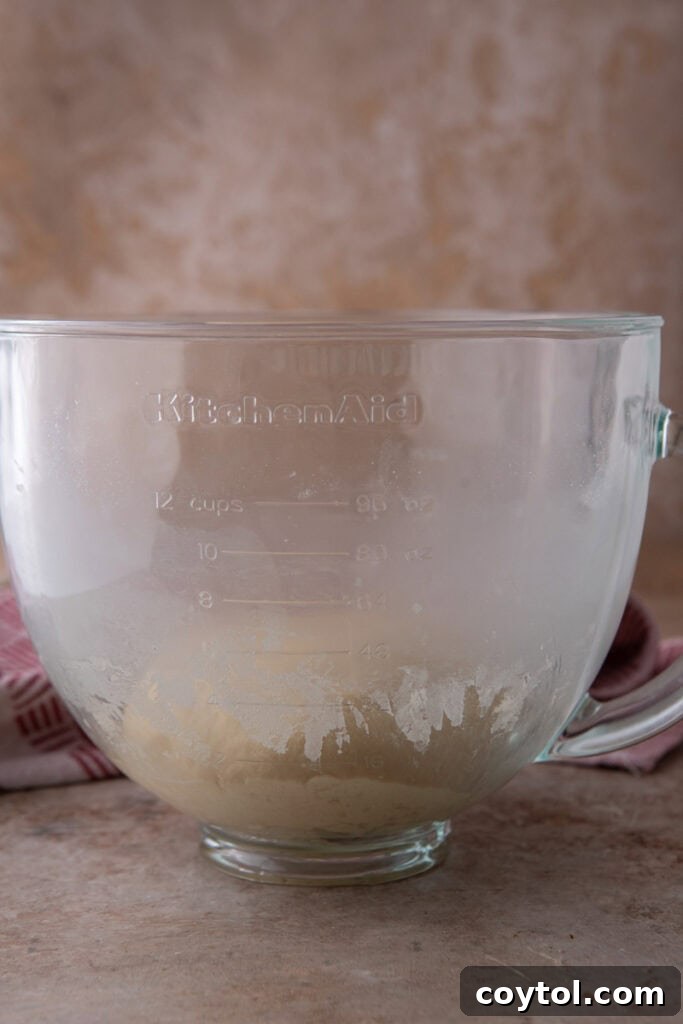
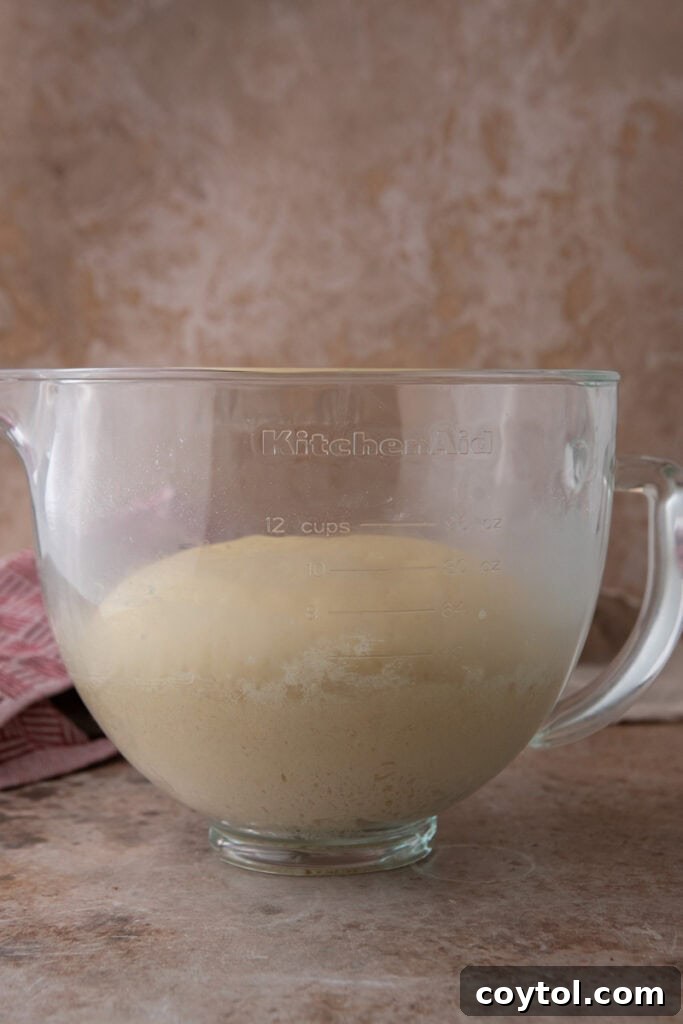
- First Rise (Bulk Fermentation for Flavor): Lightly grease a clean, generously sized bowl with a small amount of oil or melted butter. Carefully transfer the thoroughly kneaded dough into this bowl, turning it once to ensure it’s lightly coated on all sides. Securely cover the bowl with plastic wrap or a clean, damp kitchen towel and position it in a warm, draft-free environment. Allow the dough to undergo its first rise until it has visibly doubled in its original size. This process typically takes approximately 1 to 1.5 hours, though the exact duration can vary depending on your ambient room temperature. This initial rise is crucial for developing complex flavors and further strengthening the gluten structure.
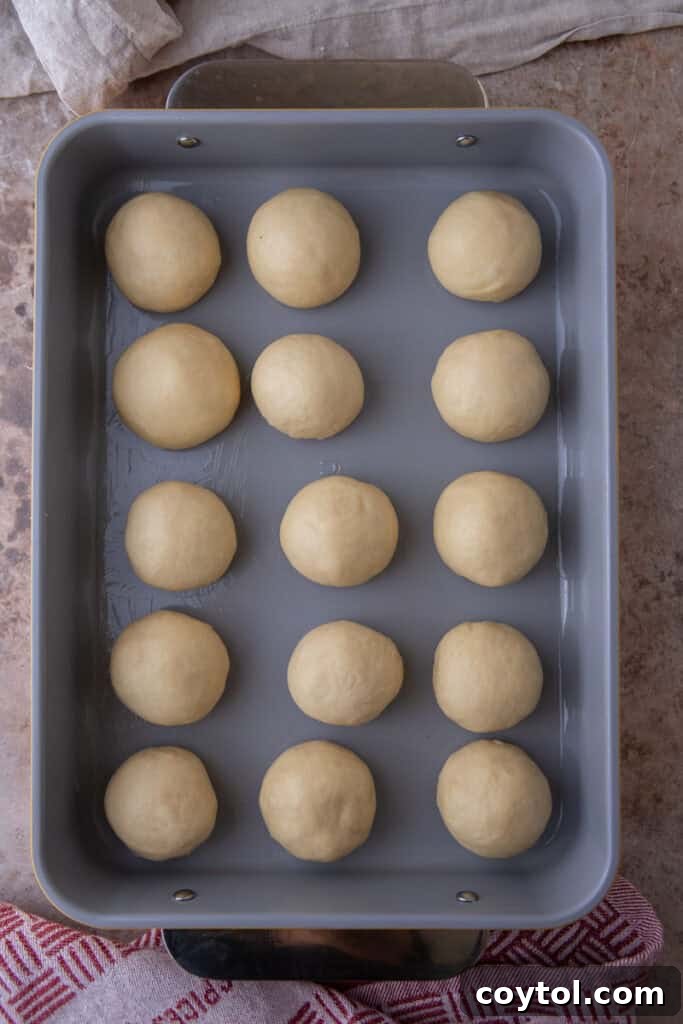
- Divide and Expertly Shape Your Rolls: Once the dough has proudly doubled in size, gently punch it down to release the accumulated gases. Transfer the dough mass to a lightly floured work surface and proceed to divide it into 15 equal-sized pieces. For utmost consistency in baking and appearance, I highly recommend employing a kitchen scale; each individual piece of dough should ideally weigh between 50-55 grams. Take each portion and skillfully roll it into a smooth, tight dough ball. This precise shaping technique is key to achieving that perfectly round and appealing aesthetic in your finished dinner rolls.
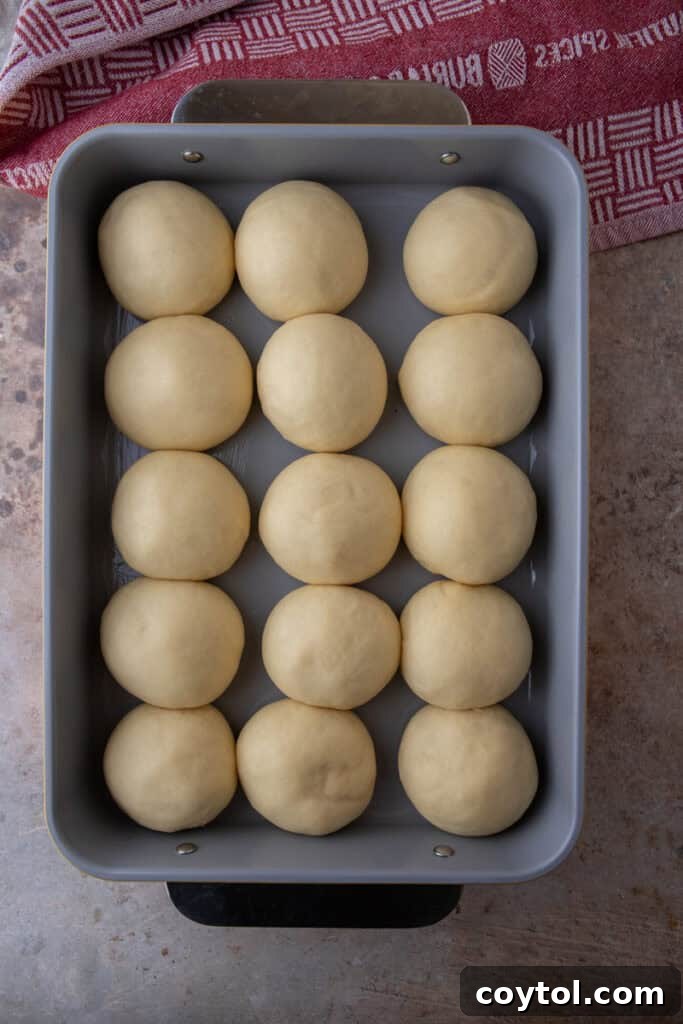
- Second Rise (Proofing for Fluffiness): Meticulously arrange the uniformly shaped dough balls evenly within a greased 9×13-inch baking dish. Strategically place them in three neat rows of five rolls. Once again, cover the baking pan securely with plastic wrap or a clean kitchen towel and allow the rolls to undergo their crucial second proof in a warm spot. They should become noticeably puffy and expand to almost double their initial size, a process that typically spans 30-45 minutes. As this second rise nears completion, begin the important step of preheating your oven to the specified temperature.
- Bake to Golden Perfection: Carefully transfer the baking pan into your preheated oven. Bake the rolls for the specified time (check the recipe card for exact duration), until their tops achieve a gorgeous, inviting golden brown color and they are thoroughly baked through to the center. To ensure an extra rich and deep golden crust, you can optionally brush the tops of the rolls with a small amount of melted butter just before they enter the oven.
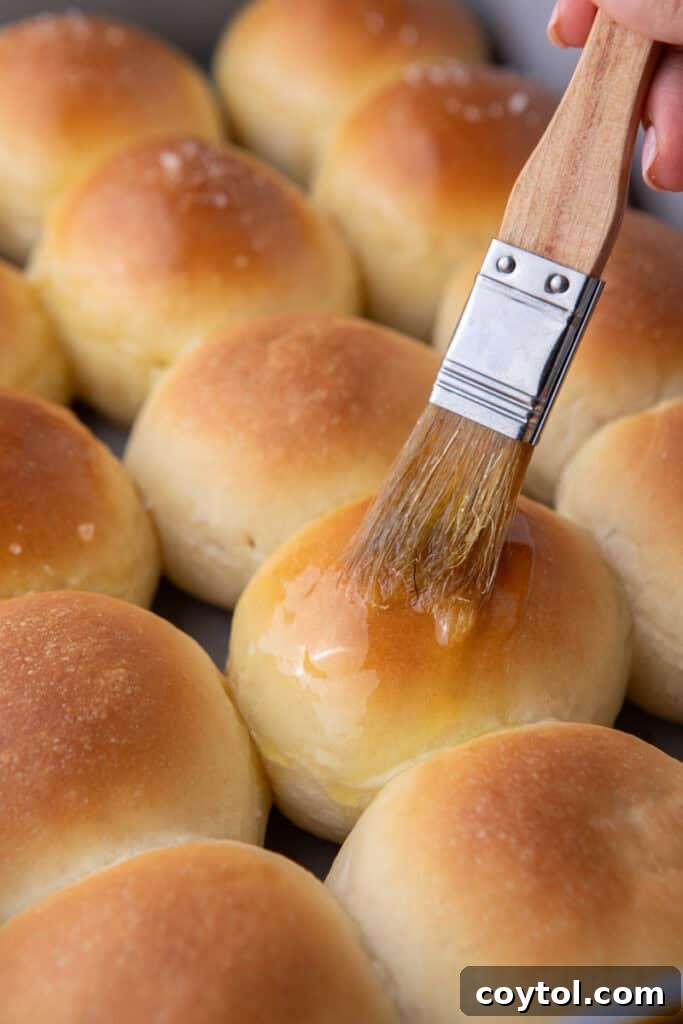
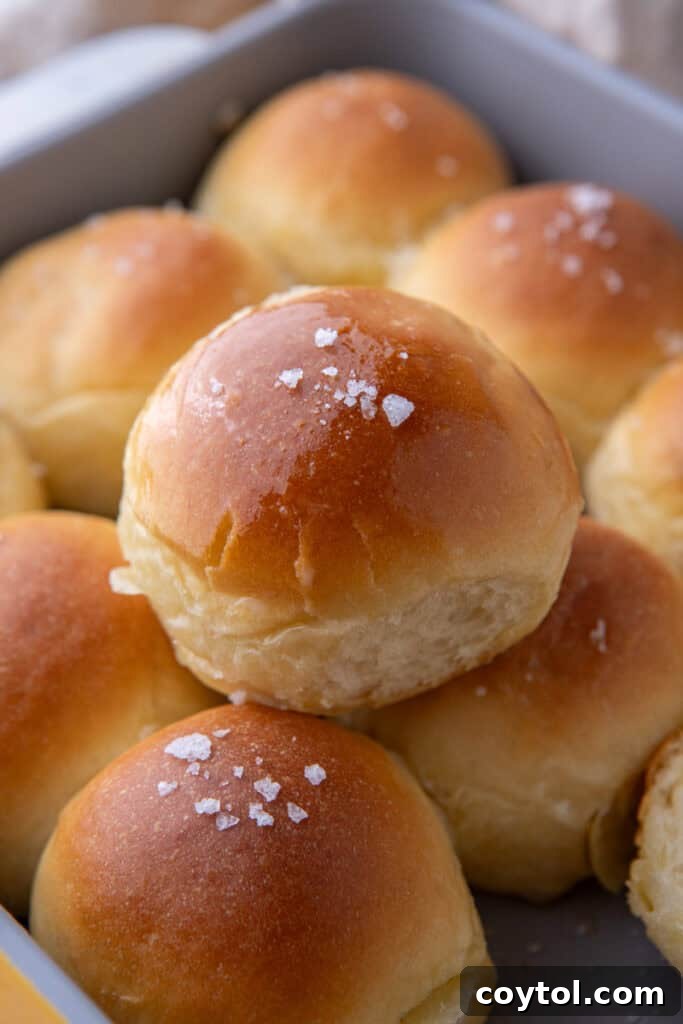
- The Irresistible Finishing Touch: The moment your magnificent rolls emerge from the oven, while they are still piping hot, immediately brush their tops generously with additional melted unsalted butter. This vital step creates an irresistible glossy sheen, locks in moisture, and imparts yet another layer of decadent buttery flavor. For an added gourmet flourish and a delightful textural contrast, consider sprinkling them with a pinch of flaky sea salt. This simple, final touch truly elevates the experience and is guaranteed to impress your guests, making your homemade dinner rolls truly unforgettable.
Expert Tips and Tricks for Extra Soft and Fluffy Dinner Rolls
Achieving bakery-quality soft and fluffy dinner rolls at home is entirely within your reach, especially with these invaluable insider tips and techniques:
- Precision Weighing of Ingredients is Key: For the most consistent and accurate results, particularly in baking, always prioritize using a kitchen scale to weigh your dry ingredients (such as flour) instead of relying solely on volumetric measuring cups. This method prevents the common pitfall of adding too much flour, which is a leading cause of dense, heavy rolls.
- Embrace Room Temperature Ingredients: Ensure that both your egg and butter are brought to room temperature before you commence the mixing process. Room temperature ingredients emulsify and blend together far more effectively, resulting in a smoother, more uniform dough and significantly contributing to a finer, more tender crumb structure in the finished rolls.
- Sift Dry Ingredients for Uniformity: To eliminate any potential lumps and guarantee an even distribution of ingredients throughout the dough, consider passing your dry ingredients (flour, salt, and sugar if adding directly) through a fine-mesh sieve before incorporating them into the wet mixture. This simple step helps create a lighter, more consistent dough.
- Mastering Dough Consistency: Understanding your dough’s texture is paramount. The ideal dough should feel soft and slightly tacky to the touch, but critically, it should not be sticky enough to cling aggressively to your hands or the mixing bowl. If your dough feels overly dry and stiff, introduce a teaspoon of warm milk (or water) at a time, incorporating it fully until the desired pliability is achieved. Conversely, if it’s too sticky, dust with a small amount of flour. Learning to “read” your dough by feel is a valuable skill for any baker.
- Uniform Shaping Ensures Even Baking: When you reach the stage of dividing the dough, make a point to weigh each piece to ensure they are all roughly 50-55 grams. Rolls that are uniformly sized will bake at a consistent rate, effectively preventing some from becoming overdone or dry while others remain underbaked in the center.
- Create a Warm, Draft-Free Environment for Rising: Yeast thrives in warmth! If your kitchen happens to be on the cooler side, you can easily create a makeshift proofing box. Briefly turn your oven on to its absolute lowest setting for just a few minutes, then switch it off. Place your covered dough inside (leaving the oven light on can also provide a gentle, consistent warmth) until it has successfully doubled in size. Avoid extremely hot environments, as this can over-proof the dough or kill the yeast.
- Avoid the Pitfall of Overbaking: Overbaking is the arch-nemesis of soft rolls. The moment the tops achieve a beautiful golden brown and an instant-read thermometer inserted into the center registers between 190-200°F (88-93°C), promptly remove them from the oven. Rolls will continue to cook slightly from residual heat, and pulling them out at the right time ensures maximum tenderness and moisture.
Why These Soft Dinner Rolls Are a Must-Bake Recipe
There are countless compelling reasons to incorporate this homemade dinner roll recipe into your baking repertoire, particularly when preparing for special gatherings and holiday feasts. Here’s why these incredibly soft, delightfully fluffy, and irresistibly buttery rolls consistently stand out from the crowd:
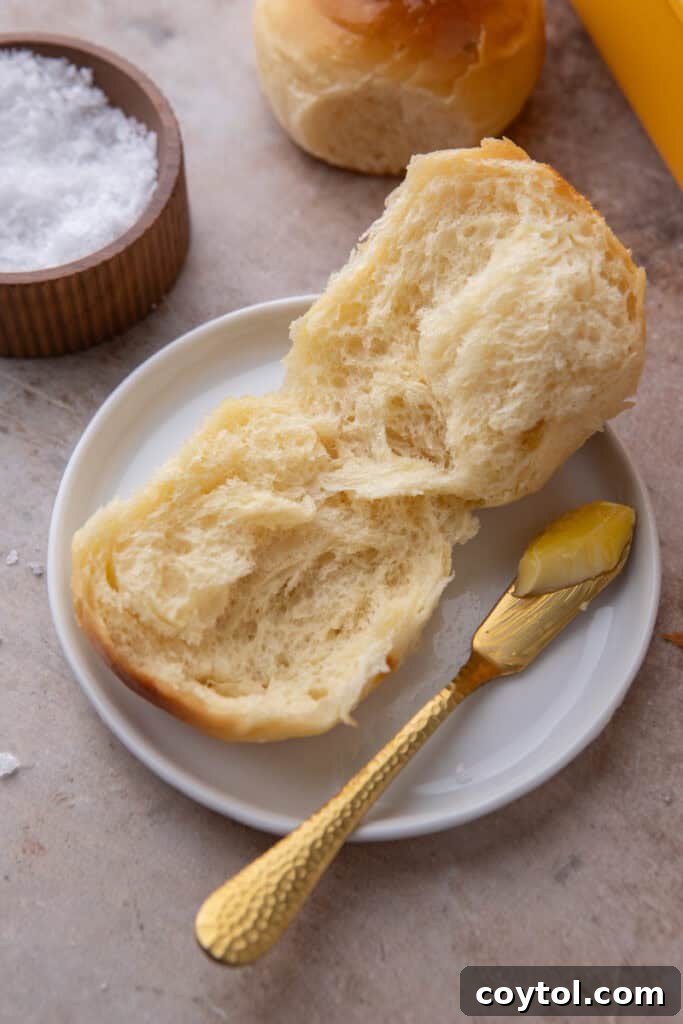
- Unforgettable Texture: Each roll boasts a dreamily pillowy soft interior that practically melts in your mouth, enveloped by a delicately crisp, golden crust. This combination creates a truly delightful and superior eating experience that far surpasses any store-bought alternative.
- Rich, Buttery Flavor Profile: These rolls are deeply infused with a luscious butteriness that makes them the perfect, versatile accompaniment to virtually any main course or side dish. From robust, savory stews to elegantly roasted meats, their rich flavor enhances every plate.
- The Quintessential Holiday Feast Essential: These rolls are an absolute showstopper and an indispensable component on any holiday table, be it Thanksgiving, Christmas dinner, or Easter brunch. They add a profound touch of homemade elegance, warmth, and comfort that elevates the entire dining experience.
- Incredibly Convenient Make-Ahead Option: One of the most significant advantages of this recipe is its make-ahead flexibility. The ability to prepare and shape these rolls the night before and then bake them fresh the next day is a tremendous time-saver, drastically reducing last-minute stress on already busy holiday mornings.
- Impressive Yet Effortlessly Simple: Despite their sophisticated appearance and gourmet taste, this recipe is remarkably straightforward, easy to follow, and forgiving. It makes it accessible even for novice bakers, guaranteeing that everyone will be asking for your secret recipe (and seconds!).
- Boost Your Baking Confidence: If you’re new to the wonderful world of baking with yeast, this recipe is an ideal starting point. It offers a gentle introduction to fundamental yeast bread techniques, providing a rewarding way to build confidence and experience the immense satisfaction of creating delicious bread from scratch.
Frequently Asked Questions About Homemade Dinner Rolls
Absolutely. While whole milk consistently delivers the best texture due to its higher fat content, which contributes to a richer and more tender roll, you can certainly use 2% milk with good results. For those seeking dairy-free alternatives, unsweetened almond milk or soy milk can also be successfully employed, though it’s worth noting they might yield a slightly different texture and a subtly altered flavor profile compared to whole milk.
Yes, you certainly can! Many experienced bakers regularly make this swap, depending on what they have readily available. Since the exact amount of salt in various brands of salted butter can differ, and the overall quantity used in this particular recipe is relatively small, you generally won’t need to adjust the amount of added salt in the recipe. Simply use it as you would the unsalted butter.
This recipe is wonderfully versatile and perfectly suited for make-ahead preparation! After you’ve shaped the rolls and neatly arranged them in the baking pan, cover the pan tightly with plastic wrap. Immediately transfer them to the refrigerator. The cold temperature will significantly slow down the rising process, allowing them to undergo a slow, controlled proof overnight (they can comfortably stay in the fridge for 12-18 hours). The next day, remove the pan from the refrigerator and let the rolls gradually come to room temperature while completing their final rise (until they are visibly puffy and nearly doubled in size) before baking them as directed. This final proof typically takes anywhere from 1 to 2 hours, depending on the ambient temperature of your kitchen.
Your dinner rolls are perfectly ready when their tops achieve a beautiful, inviting golden brown color. Another reliable indicator is to lightly tap the bottom of the baking pan; it should produce a hollow sound. For the ultimate precision, insert an instant-read thermometer into the center of one of the rolls; it should register an internal temperature between 190–200°F (88-93°C). This ensures they are thoroughly cooked through without becoming dry or overbaked.
Once your rolls have completely cooled, store any leftovers in an airtight container or a resealable bag at room temperature for up to 3 days. For extended freshness, they can be stored in the refrigerator for up to 5 days. For best results and to prevent any potential sogginess, you can place a piece of paper towel inside the container to absorb excess moisture. To miraculously revive day-old rolls and make them taste as if they were freshly baked, simply wrap them individually or collectively in aluminum foil and warm them in a preheated oven at 300°F (150°C) for approximately 10 minutes. They will emerge wonderfully soft, warm, and utterly delicious!
Dense rolls are a common issue that can typically stem from a few key factors in the baking process. One primary cause might be that your yeast wasn’t sufficiently active (always ensure your milk is at the correct temperature and check the yeast’s expiration date). Both over-kneading and under-kneading can also adversely affect the final density; under-kneaded dough won’t develop enough gluten to create a light, airy structure, while over-kneaded dough can become tough and consequently dense. Lastly, not allowing the dough sufficient time to rise during both the first and second proofing stages will invariably result in a heavier, denser crumb. Always look for proper doubling in size as an indicator.
Dough consistency is absolutely paramount for successful bread baking. If you find your dough is excessively sticky and difficult to handle, add flour a tablespoon at a time, incorporating it fully before adding more, until the dough reaches a soft, pliable texture that is no longer aggressively sticky. Conversely, if your dough is too dry and stiff, add warm milk or water a teaspoon at a time until it achieves a soft, elastic consistency. The humidity levels in your kitchen and even subtle variations in how you measure flour can significantly impact the dough’s hydration, so trust your judgment and rely on the feel of the dough.
Delicious Ways to Serve Your Soft Dinner Rolls
These magnificent soft, buttery, and pillowy dinner rolls are incredibly versatile, making them the perfect accompaniment for almost any meal, especially during festive holidays or for a cozy family dinner. Their delicate flavor and tender texture make them adaptable to a wide range of culinary pairings. Here are some delightful and creative ideas for serving them:
- The Quintessential Holiday Pairing: Serve them gloriously warm alongside traditional Thanksgiving or Christmas dishes such as succulent roasted turkey, velvety mashed potatoes, savory herb stuffing, and rich, homemade gravy. They are absolutely perfect for soaking up every last drop of deliciousness on your plate.
- A Simple Indulgence with Butter and Honey: For a truly comforting and sweetly decadent treat, generously brush the warm rolls with extra melted butter and drizzle them lavishly with honey, maple syrup, or even a touch of agave nectar. A delicate sprinkle of flaky sea salt can add a wonderful, unexpected contrast.
- Gourmet Mini Sandwiches and Sliders: Their inherently soft texture and ideal size make them the perfect canvas for crafting elegant mini sandwiches or sliders. Fill them with gourmet delights like leftover holiday turkey or ham, tender pulled chicken, classic ham and cheese, or even small, flavorful burger patties for a crowd-pleasing appetizer or a delightful light meal.
- Perfect for Dipping and Spreading: These rolls are exquisitely suited for dipping into hearty, slow-cooked soups, rich and flavorful stews, thick chili, or creamy chowders. They also pair beautifully with sophisticated creamy dips, a high-quality olive oil infused with balsamic vinegar, or your favorite artisan cheese spreads. Their unparalleled ability to gracefully absorb sauces is truly remarkable.
- An Instant Garlic Bread Twist: For a quick and irresistible side, gently slice them in half horizontally. Spread generously with a rich garlic butter, sprinkle with freshly grated Parmesan cheese, and broil briefly until golden and fragrant. You’ll have instant gourmet garlic bread.
- A Sweet Breakfast or Brunch Treat: Repurpose any leftover rolls into a delightful morning indulgence. Gently split them, lightly toast them, and serve with a dollop of your favorite fruit jam, sweet preserves, or a decadent cinnamon-sugar butter for an elevated breakfast or brunch item.
Pro Tip: For the absolute maximum “wow” factor and an unforgettable culinary experience, always strive to serve these soft dinner rolls directly from the oven. The irresistible, comforting aroma alone will make your entire meal feel extraordinarily special and absolutely out of this world! There’s no substitute for fresh-baked warmth.

Thanksgiving Soft & Fluffy Dinner Rolls Recipe
Print Recipe
Equipment
Ingredients
- 1 cup whole milk, warm (about 110°F / 43°C)
- 2 ¼ tsp instant yeast (1 packet instant yeast)
- 2 tbsp granulated sugar
- 1 large egg (room temp)
- ¼ cup unsalted butter (softened)
- 3 & ¼ cups bread flour (can use all-purpose flour if in a pinch)
- 1 ½ tsp salt
For topping:
- 3 Tbsp unsalted butter (melted, for brushing after baking)
- Flaky salt (optional)
Instructions
-
Warm your milk to 110°F (43°C) using either a microwave or stove. Always use a thermometer for precise temperature control.1 cup whole milk, warm
-
If using active dry yeast, stir it into the warm milk with 1 Tbsp of the sugar and let sit for 5–10 minutes until a foamy layer appears on top, indicating it’s active.2 ¼ tsp instant yeast, 2 tbsp granulated sugar
-
If using instant yeast, you can skip the proofing step and proceed to the next instruction.
-
In a large mixing bowl (or the bowl of a stand mixer with a dough hook attachment), combine the milk-yeast mixture, remaining sugar, room temperature egg, and softened butter. Stir briefly until the egg and sugar are fully incorporated into the liquids.1 large egg, ¼ cup unsalted butter
-
Gradually add the bread flour and salt to the wet ingredients. Mix on medium speed (if using a mixer) until the dough comes together into a soft ball. It should be slightly tacky but not excessively sticky. If needed, you can add up to ¼ cup more flour, a tablespoon at a time, to reach the right consistency.3 & ¼ cups bread flour, 1 ½ tsp salt
-
Knead the dough by hand on a lightly floured surface or with a stand mixer on medium speed for 8–10 minutes. Continue until the dough is smooth, elastic, and passes the windowpane test (stretches without tearing).
-
Lightly grease a clean bowl, place the dough in it, cover with plastic wrap or a kitchen towel, and let rise in a warm spot until it has doubled in size, typically 1–1 ½ hours.
-
Gently punch down the risen dough to release air. Transfer to a lightly floured surface and divide into 15 equal pieces (approximately 50-55g each, using a kitchen scale for accuracy). Roll each piece into a smooth, tight dough ball. Arrange these dough balls evenly in a greased 9×13-inch baking pan, creating three rows of five.
-
Cover the baking pan again and allow the rolls to undergo their second rise until they are noticeably puffy and almost doubled in size, which should take about 30-45 minutes. Towards the end of this period, preheat your oven to 350°F (175°C).
-
Bake the rolls in the preheated oven for 17-18 minutes, or until the tops are golden brown and the rolls are cooked through. An internal temperature of 190-200°F (88-93°C) indicates doneness.
-
Immediately upon removing from the oven, brush the warm rolls generously with melted unsalted butter. If desired, sprinkle with flaky sea salt for an enhanced flavor and presentation. Serve warm and enjoy!3 Tbsp unsalted butter, Flaky salt
Nutrition
Nutrition information is automatically calculated, so should only be used as an approximation.