
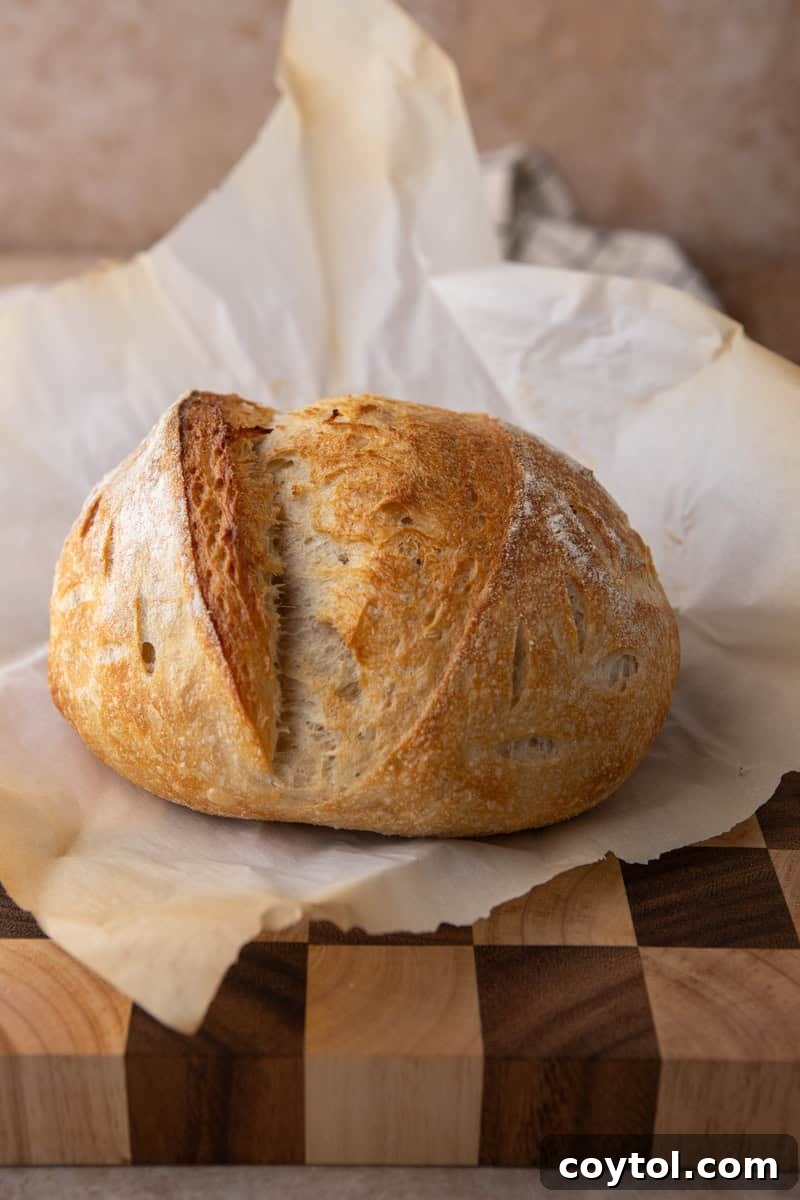
Welcome to the ultimate guide for crafting the most exquisite Same Day Sourdough Bread! If you’ve ever dreamt of pulling a warm, crusty loaf of artisanal sourdough from your oven without the traditional overnight wait, this recipe is your dream come true. This revolutionary method condenses the complex sourdough process into a single day, making fresh, homemade bread accessible whenever the craving strikes. No more waiting 24 hours or more; now you can enjoy that irresistible tangy flavor and chewy texture, fast. Whether you’re a seasoned baker looking for a quicker alternative or a beginner eager to dive into the world of sourdough, this comprehensive guide will walk you through every step to achieve a truly impressive loaf.
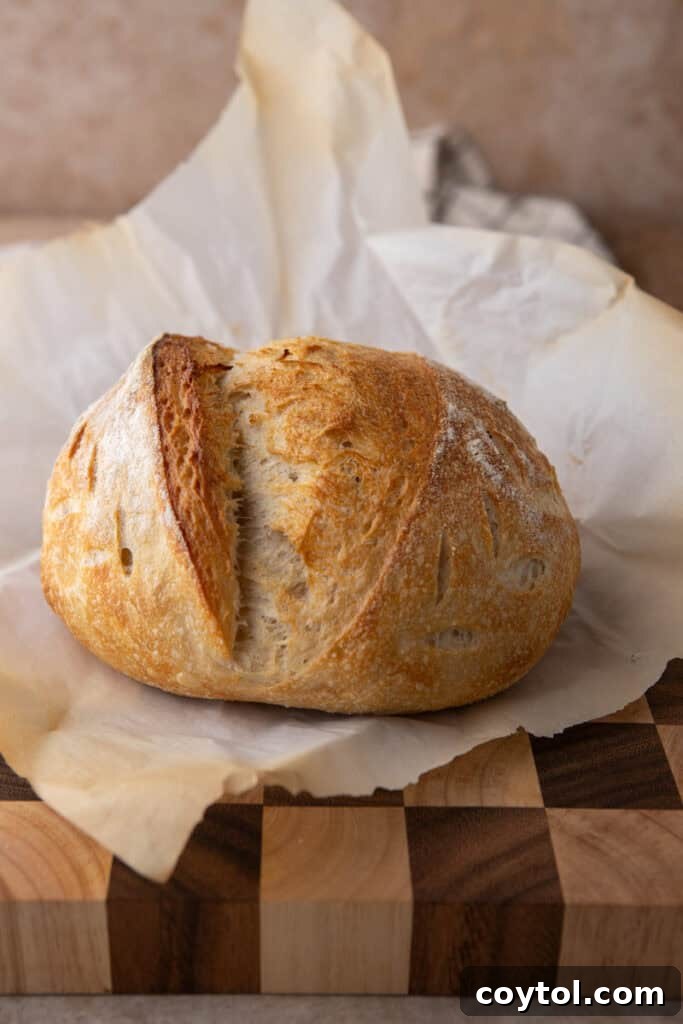
The Magic Behind Same Day Sourdough: How It Works
Traditional sourdough baking is renowned for its long fermentation periods, often spanning 12 to 24 hours, or even longer with cold proofing. This extended time allows for deep flavor development and robust gluten formation. However, this Same Day Sourdough Bread recipe employs a clever adaptation to significantly accelerate the process without compromising quality. We achieve this by utilizing a much shorter bulk fermentation and optimizing environmental factors to encourage rapid yeast activity.
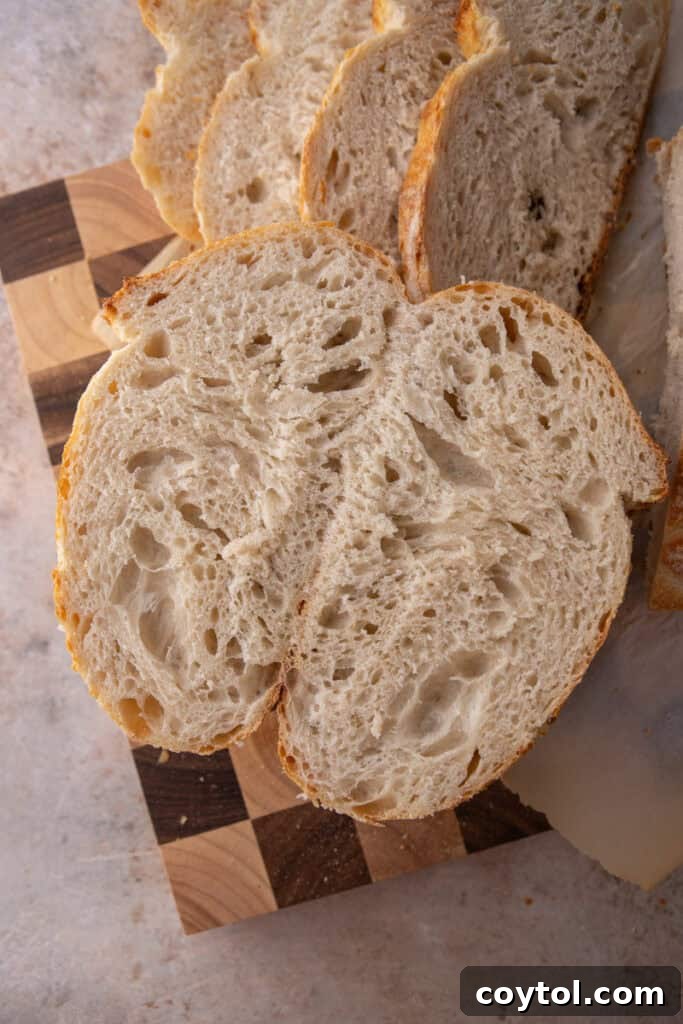
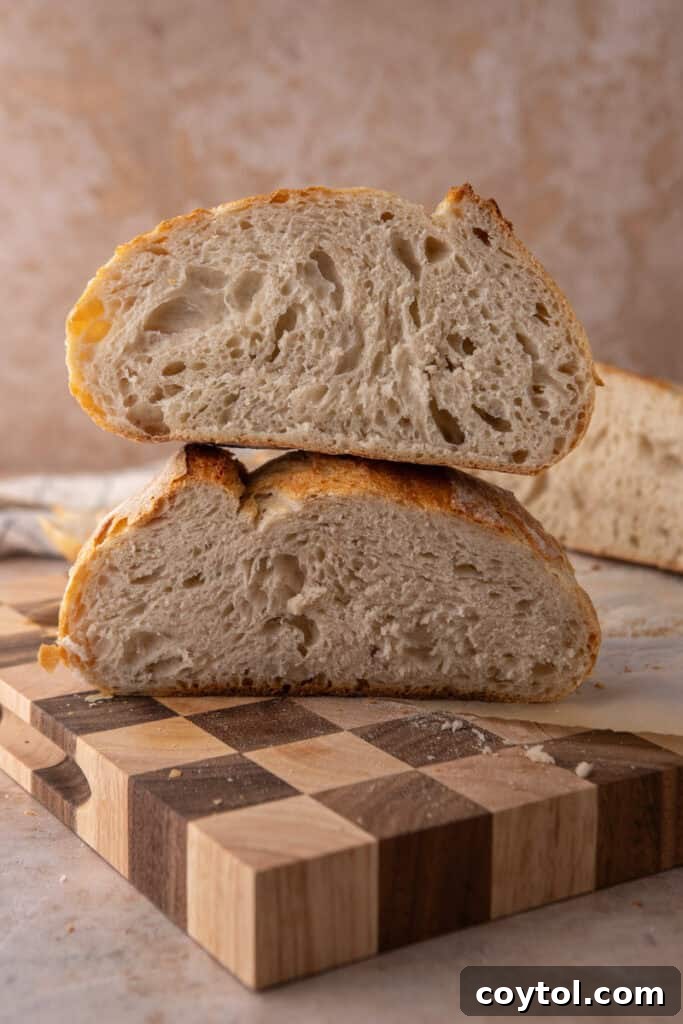
Essentially, this recipe is a streamlined version of the classic technique. While an overnight fermentation contributes to a more pronounced sour flavor, our accelerated approach still delivers a wonderfully tangy loaf with an incredible crumb structure and signature air bubbles. The secret lies in using a very active, well-fed sourdough starter and maintaining optimal dough temperatures. By providing a warm environment for your dough, the wild yeasts and bacteria in your starter work more efficiently, speeding up the fermentation process considerably. You’ll be amazed at how quickly your dough develops strength and elasticity, resulting in a beautiful, bouncy loaf that rivals its slow-fermented counterparts.
Why You Need This Quick Sourdough Recipe in Your Life
The appeal of freshly baked bread is undeniable, but the commitment of traditional sourdough can often deter even enthusiastic home bakers. This quick sourdough recipe changes everything. Imagine waking up with a sudden craving for warm, crusty bread, knowing you can have a loaf ready for dinner. Or perhaps you have an unexpected gathering and want to impress your guests with a homemade, artisan-style bread that appears effortlessly made.
This 8-hour sourdough recipe is a game-changer for several reasons:
- Unmatched Convenience: Say goodbye to planning a day or two in advance. This recipe allows for spontaneous baking, fitting perfectly into a busy schedule.
- Instant Gratification: From mixing to baking, the entire process takes less than a day, offering almost immediate rewards for your efforts.
- Impressive Results: Despite the shorter timeline, this sourdough bread boasts a gorgeous golden crust, a soft and airy interior, and that unmistakable tangy flavor that will wow anyone who tries it.
- Health Benefits: Sourdough, made with natural wild yeast, is often easier to digest and offers enhanced nutrient absorption compared to breads made with commercial yeast.
- Pure Ingredients: This recipe calls for just four simple, wholesome ingredients, ensuring you know exactly what goes into your family’s bread.
If you’re as passionate about sourdough as we are, you might also enjoy exploring other delightful recipes. Check out this Starbucks Grilled Cheese Sandwich Copycat, this aromatic rosemary sourdough bread, a classic Dutch Apple Pie with Crumb Topping, a spectacular Family Style Dutch Baby Pancake Recipe, a Healthy no Sugar Added Banana Bread, or learn how to make your own sourdough starter.
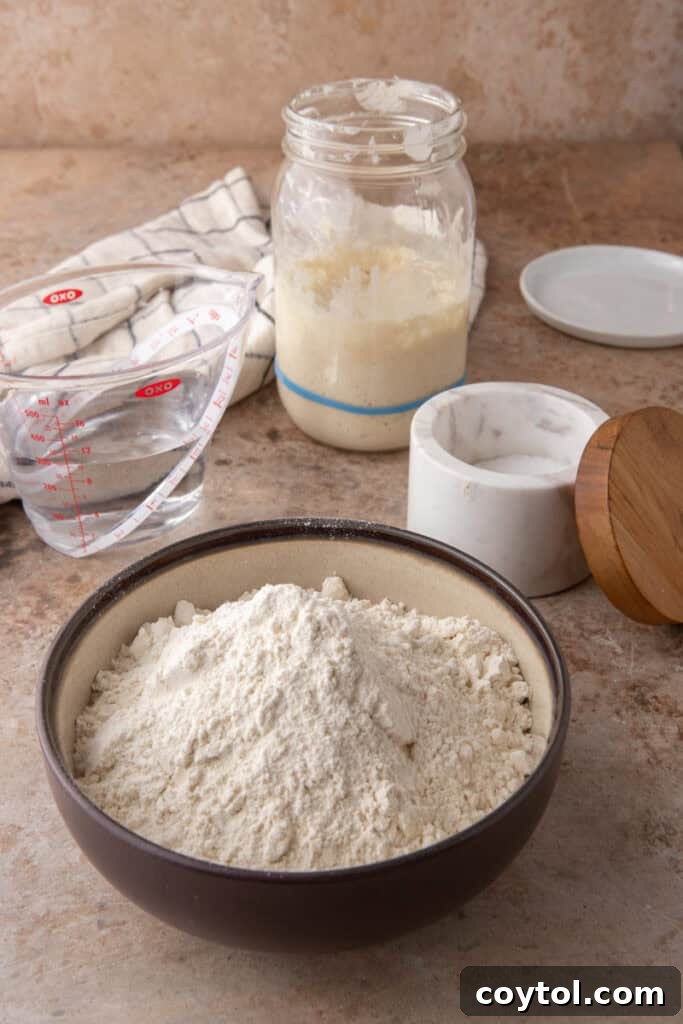
Essential Ingredients for Your 8-Hour Sourdough Loaf
Crafting exceptional Same Day Sourdough Bread requires only a handful of quality ingredients. Each component plays a crucial role in achieving the desired texture, rise, and flavor. For precise measurements, please refer to the recipe card towards the end of this article.
- Bread Flour: This is arguably the most critical ingredient. Bread flour has a higher protein content (typically 12-14%) compared to all-purpose flour. This high protein level is essential for developing a strong gluten network, which provides the dough with elasticity, structure, and the ability to trap gas produced during fermentation. A robust gluten structure is what gives sourdough its characteristic chewiness and open crumb with large air pockets. For this accelerated same day sourdough, strong gluten development is paramount for a successful rise. We highly recommend using a high-quality bread flour like this one for optimal results.
- Water (Room Temperature & Filtered): Water not only hydrates the flour to activate gluten development but also provides the necessary environment for your sourdough starter’s microorganisms to thrive. Using filtered water is crucial as chlorine or other chemicals often found in tap water can inhibit the activity of the wild yeast and bacteria in your starter. Room temperature water (around 70-75°F or 21-24°C) is ideal, as it helps regulate the dough’s overall temperature, contributing to consistent and predictable fermentation, especially in a faster process.
- Active Sourdough Starter: The heart and soul of your sourdough. An active starter is a natural leavening agent responsible for the bread’s rise and its signature tangy flavor. To ensure your starter is ready, it should be fed 4-8 hours prior to baking, look bubbly and active, and pass the float test (a small spoonful should float in water). A 100% hydration starter (fed with equal parts flour and water by weight) is typically used for this recipe. If you’re new to sourdough and want to cultivate your own vibrant starter, be sure to check out my comprehensive guide on how to make your own sourdough starter.
- Salt: More than just a flavor enhancer, salt plays a vital role in sourdough baking. It strengthens the gluten network, helping the dough maintain its structure and preventing it from becoming overly sticky or spreading too much. Furthermore, salt helps regulate the fermentation rate, slowing down yeast activity slightly to allow for more controlled flavor development. Without it, your bread would taste bland and likely have a less desirable texture.
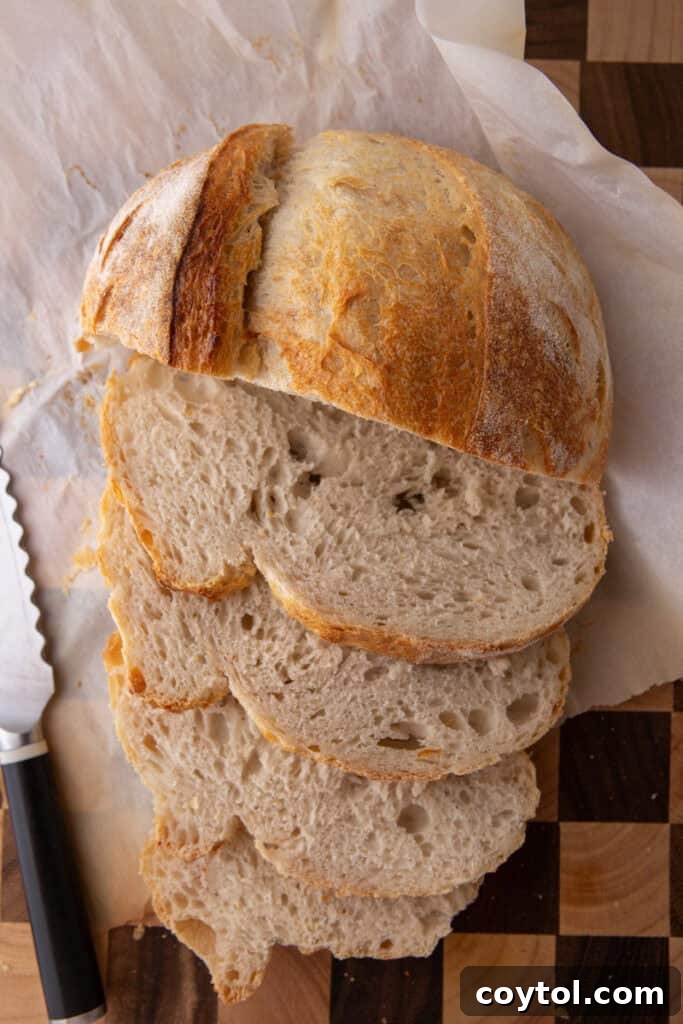
Step-by-Step Guide: How to Bake Same Day Sourdough Bread
Making delicious Same Day Sourdough Bread is a rewarding process. Follow these detailed steps for an 8-hour sourdough journey, leading to a perfectly baked loaf. Remember to refer to the recipe card at the end of this post for precise oven temperatures, baking times, and ingredient measurements.
Phase 1: Mix & Rest (Fermentolyse) – (Approx. 30-40 minutes)
This initial stage, often called fermentolyse, combines autolyse (flour and water rest) with the immediate introduction of the starter to kickstart fermentation early. This is crucial for our accelerated timeline.
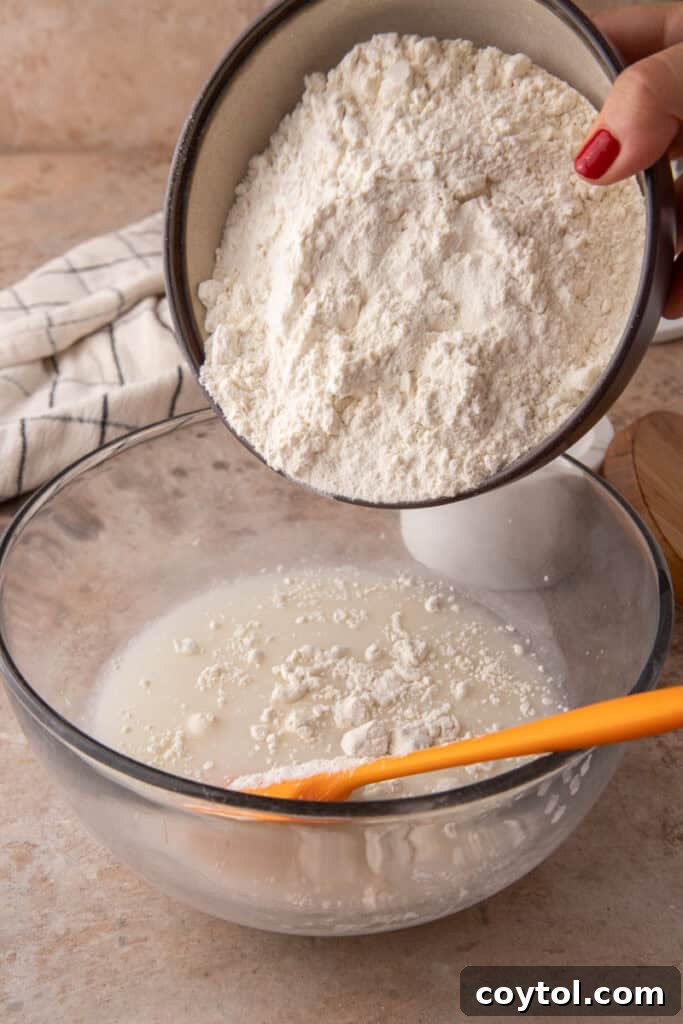
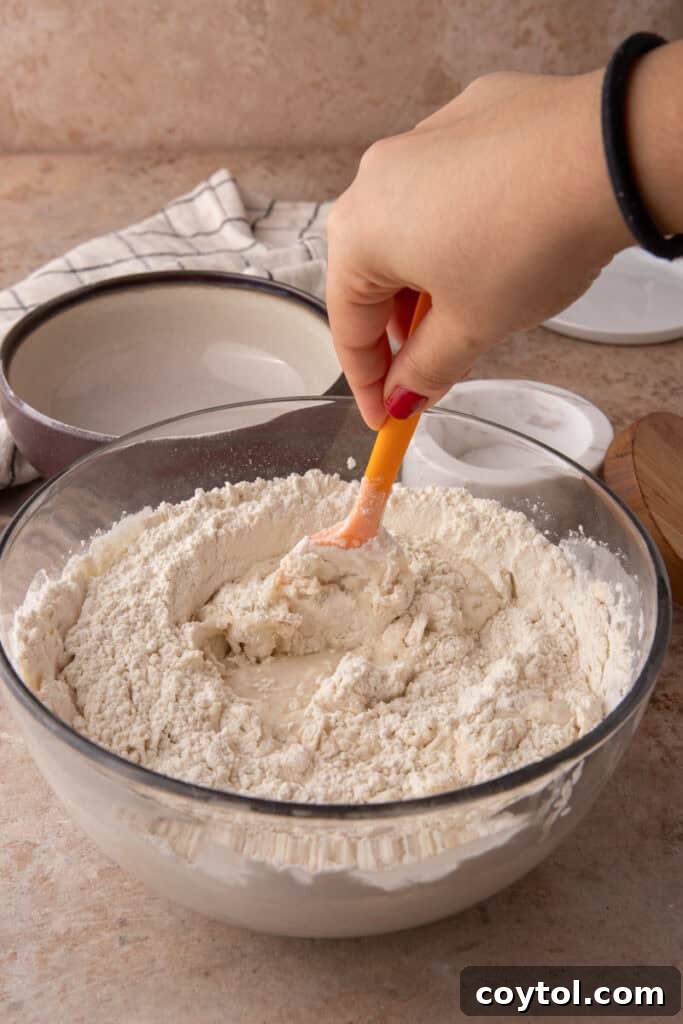
- In a large mixing bowl, combine the measured bread flour, room temperature filtered water, and your active sourdough starter. Stir the mixture thoroughly with a wooden spoon or your hands until all the dry spots of flour are fully hydrated and incorporated. The dough will be shaggy and sticky at this point.
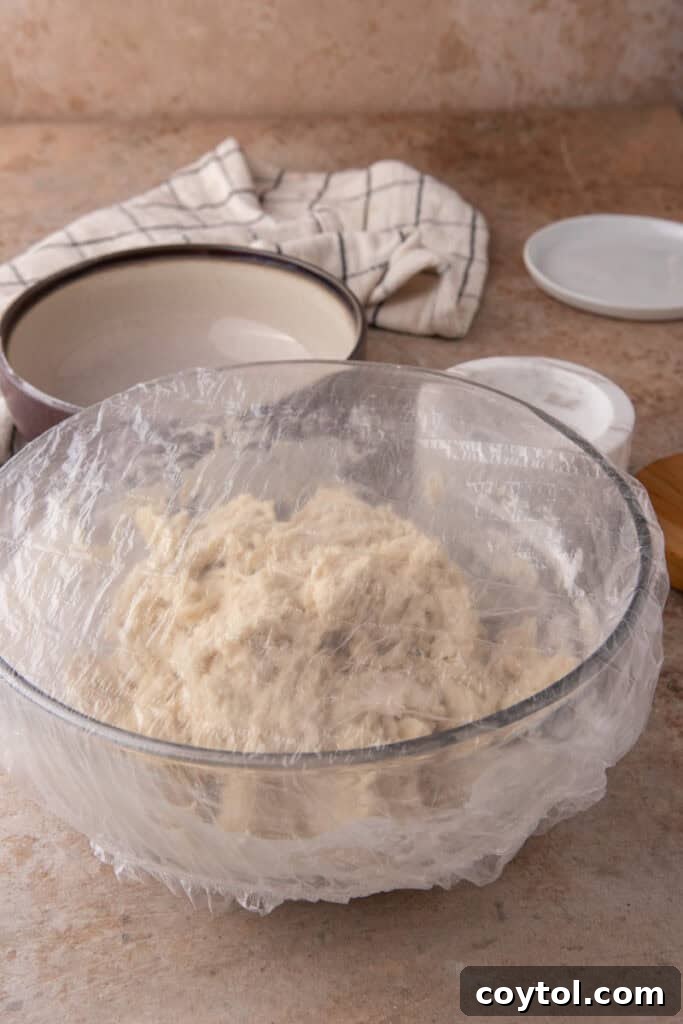
- Cover the bowl tightly with a damp kitchen towel or plastic wrap to prevent the dough from drying out. Let this mixture rest at room temperature for 30 minutes. This crucial resting period allows the flour to fully absorb the water, initiating enzyme activity (protease and amylase) that begins to break down starches into sugars and starts gluten formation. This process is vital for improving the dough’s extensibility and elasticity, setting the stage for easier handling and a better crumb later.
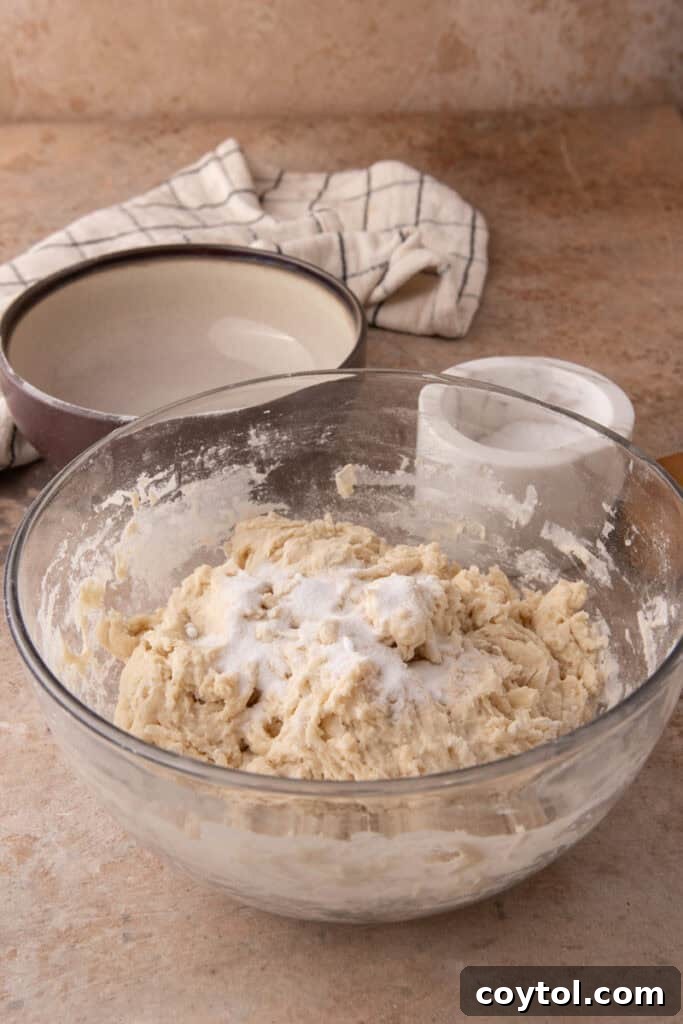
- After the 30-minute rest, evenly scatter the salt over the surface of the dough. With wet hands, gently incorporate the salt by using a “pinch-and-fold” or “stretch-and-fold” method for a few minutes. The goal is to fully dissolve and integrate the salt without tearing the developing gluten network. Allow the dough to rest for another 10 minutes, covered, to ensure the salt is completely absorbed and starts strengthening the gluten.
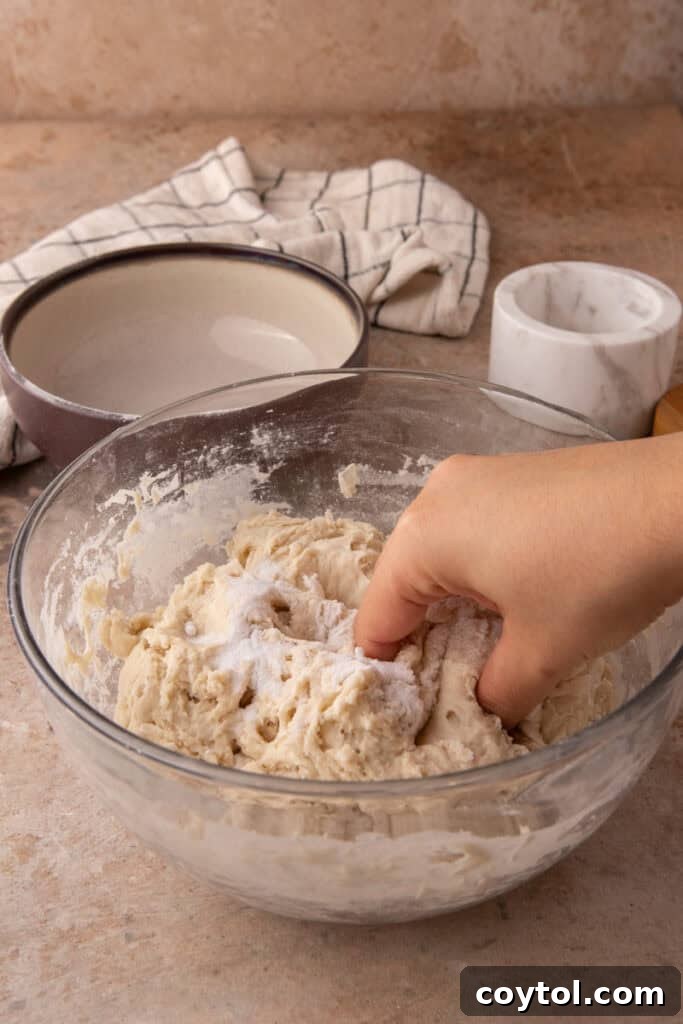
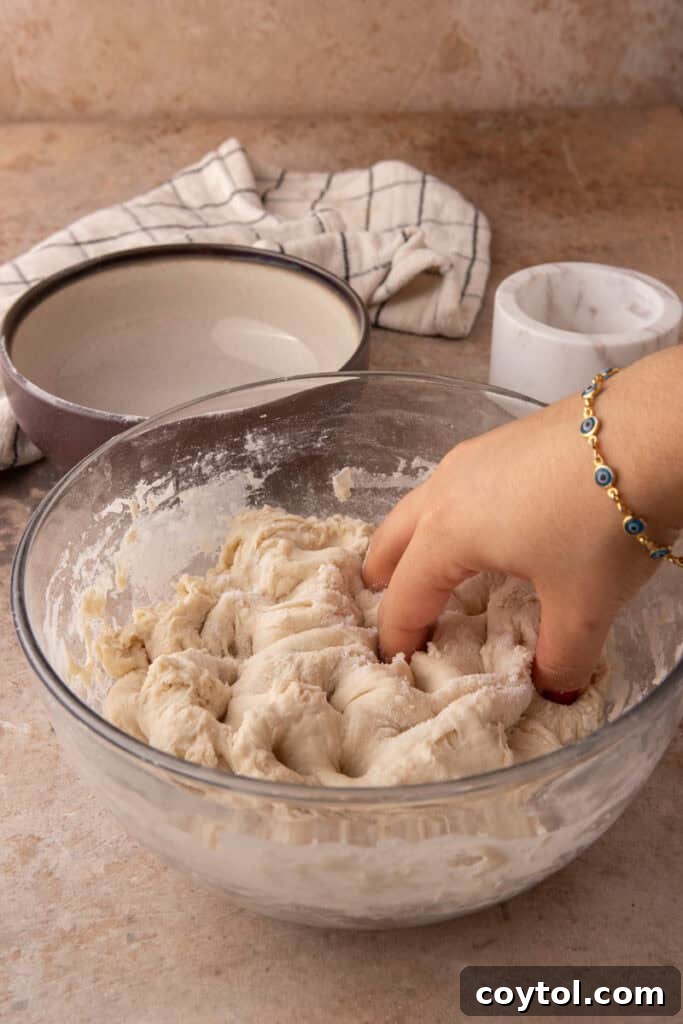
Phase 2: Bulk Fermentation – (Approx. 3.5 to 4 hours)
This is where the magic of yeast activity truly takes off, building strength, flavor, and airiness in your dough. Throughout this step, keep your dough covered in a warm place (ideally 75-80°F or 24-27°C) to encourage rapid fermentation. A turned-off oven with the light on, or a proofing box, can be excellent options.
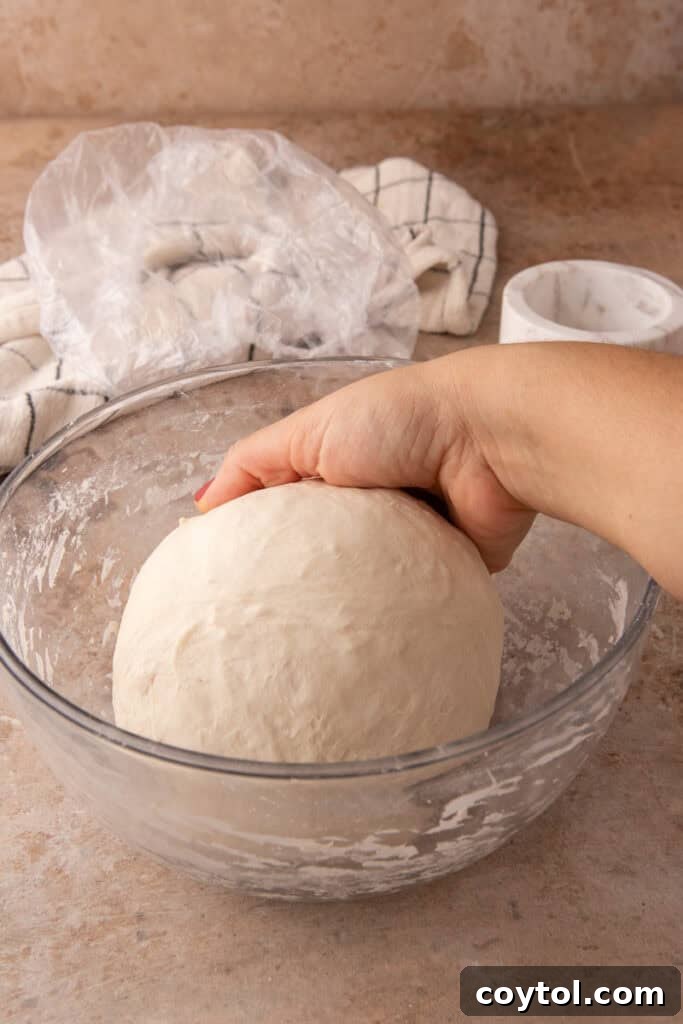
- For the first 90 minutes of bulk fermentation, you will perform three rounds of “stretch and folds” at 30-minute intervals. To do this, moisten your hands slightly to prevent sticking. Gently grab a portion of the dough from one side (imagine north, south, east, and west points on a compass), lift it high, and fold it over towards the center of the dough. Rotate the bowl a quarter turn and repeat this action 3-4 times until all sides have been stretched and folded. This technique builds gluten strength and evenly distributes the yeast, creating a more cohesive and extensible dough.
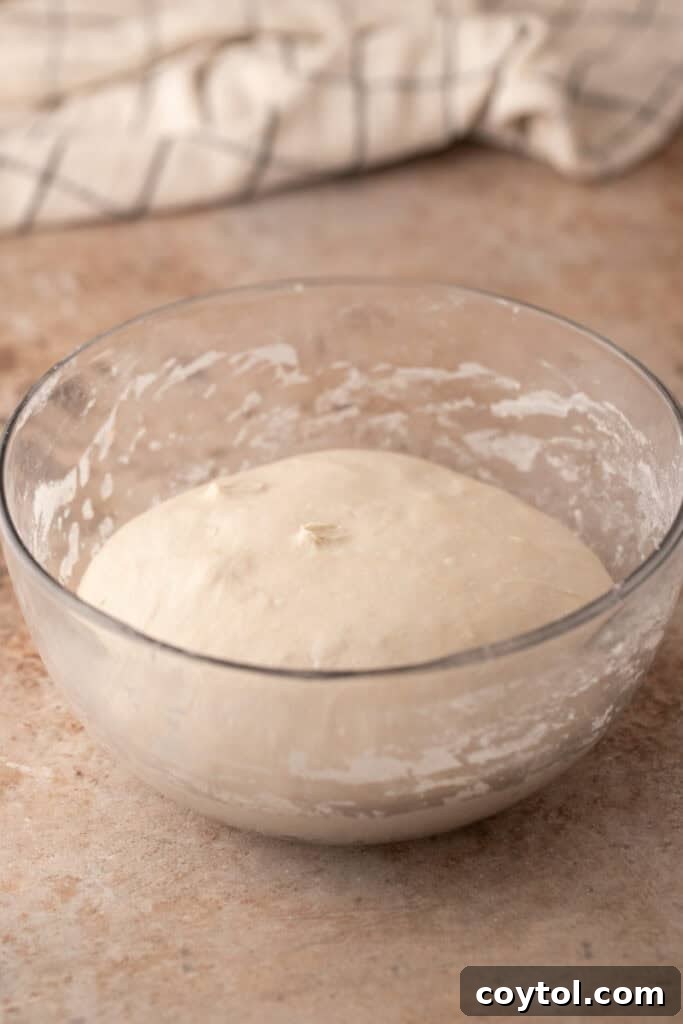
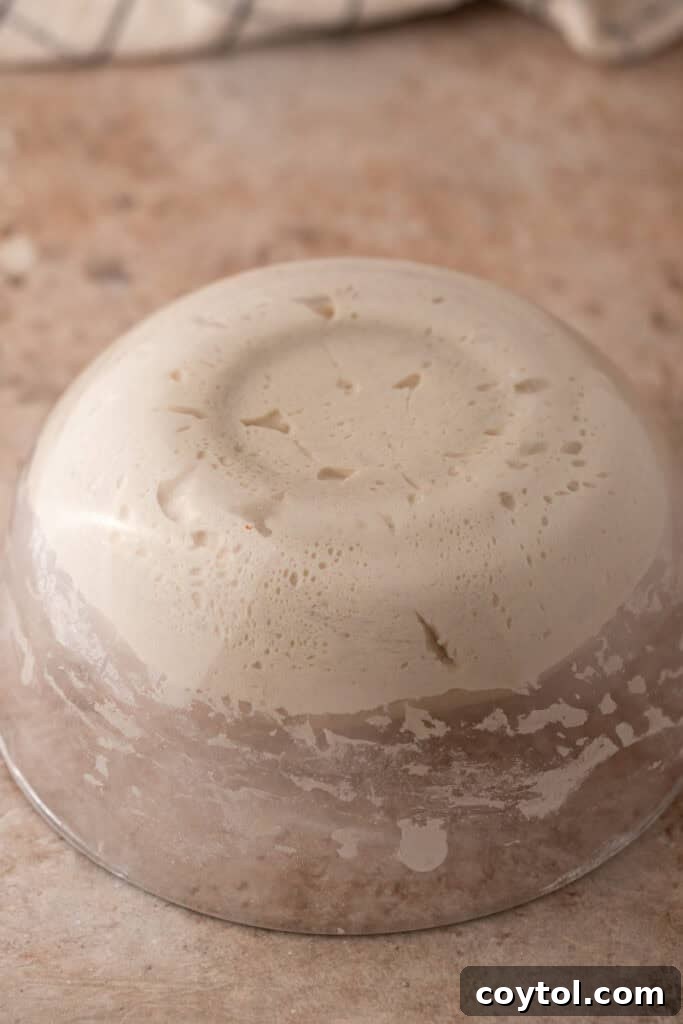
- After completing the three sets of stretch and folds, cover the bowl again and let the dough continue to rise undisturbed for another 1 to 2 hours. During this period, the dough should become noticeably airy, bubbly, and expand by approximately 50% in volume. Observe the dough closely; it should have a domed appearance and a jiggly, soft texture. The exact time will depend heavily on your kitchen temperature and the vigor of your starter.
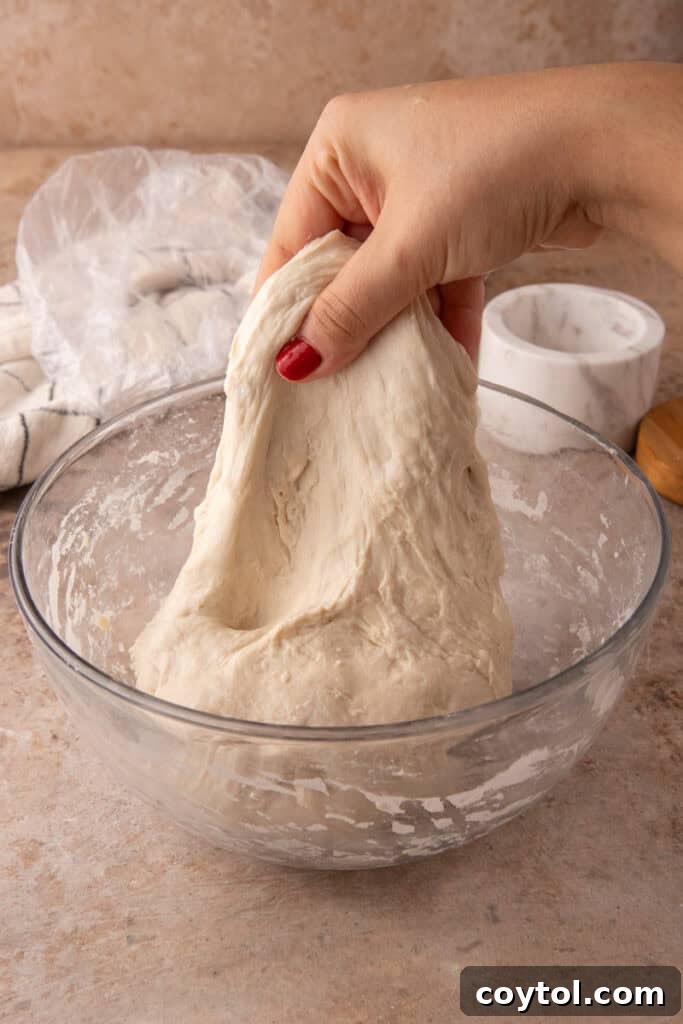
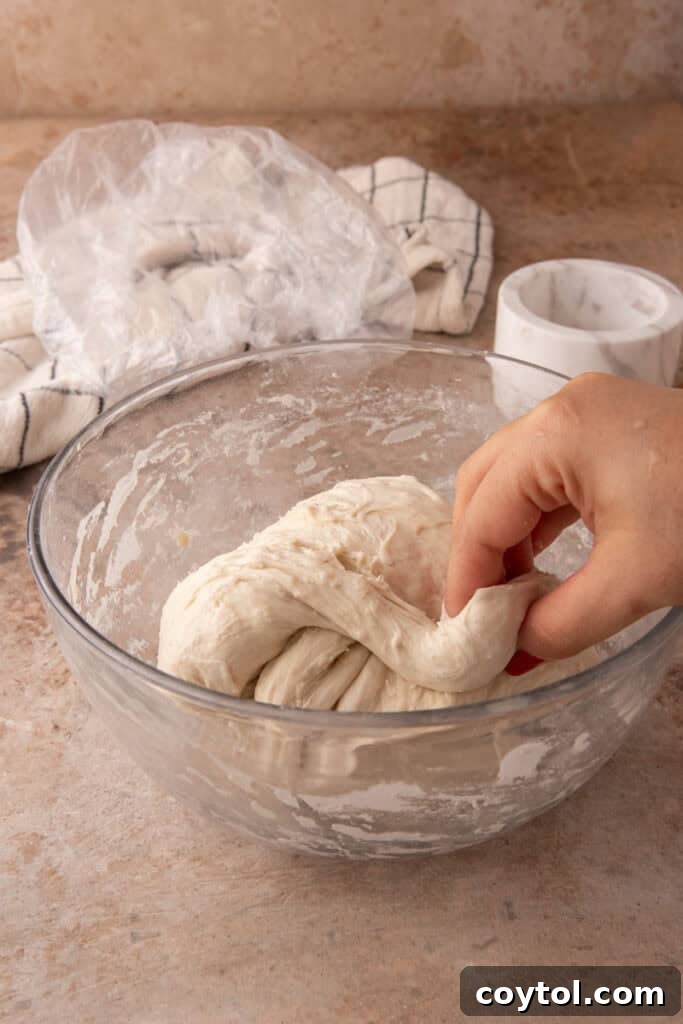
Phase 3: Pre-shape & Bench Rest – (Approx. 30 minutes)
Pre-shaping is an intermediate step that helps prepare the dough for its final form, creating initial surface tension and making final shaping easier.
- Gently turn the fermented dough out onto a lightly floured work surface. Be careful not to deflate it too much, preserving the precious air bubbles.
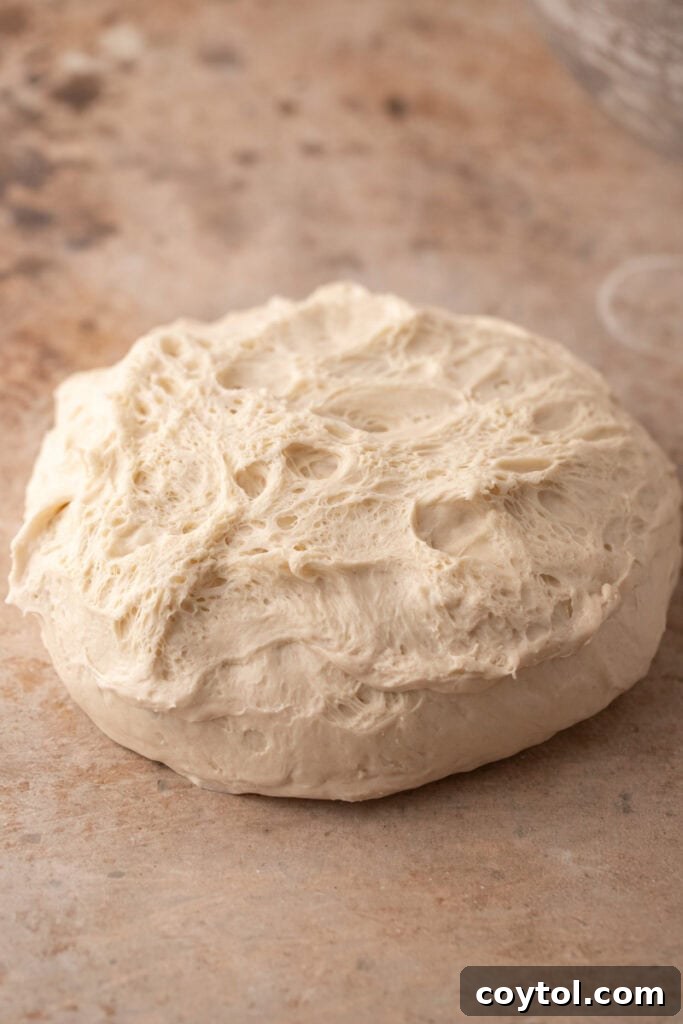
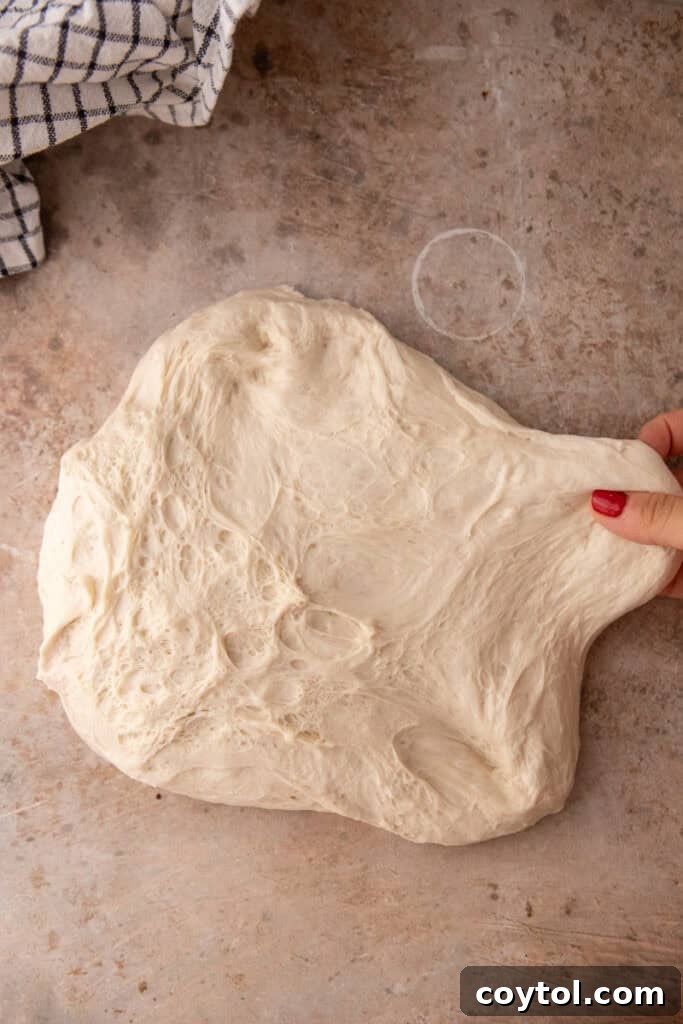
- To pre-shape into a boule (round loaf), lightly stretch the dough into a rough rectangle. Then, fold the bottom third up to the middle, and the top third down over that, creating a horizontal fold. Next, roll the dough up from left to right, creating a cylinder, then cup your hands around it and gently pull it towards you to create some tension on the surface. A bench scraper can be very helpful here to gather and shape the dough without excessive handling. The goal is to create a loose ball with some surface tension.
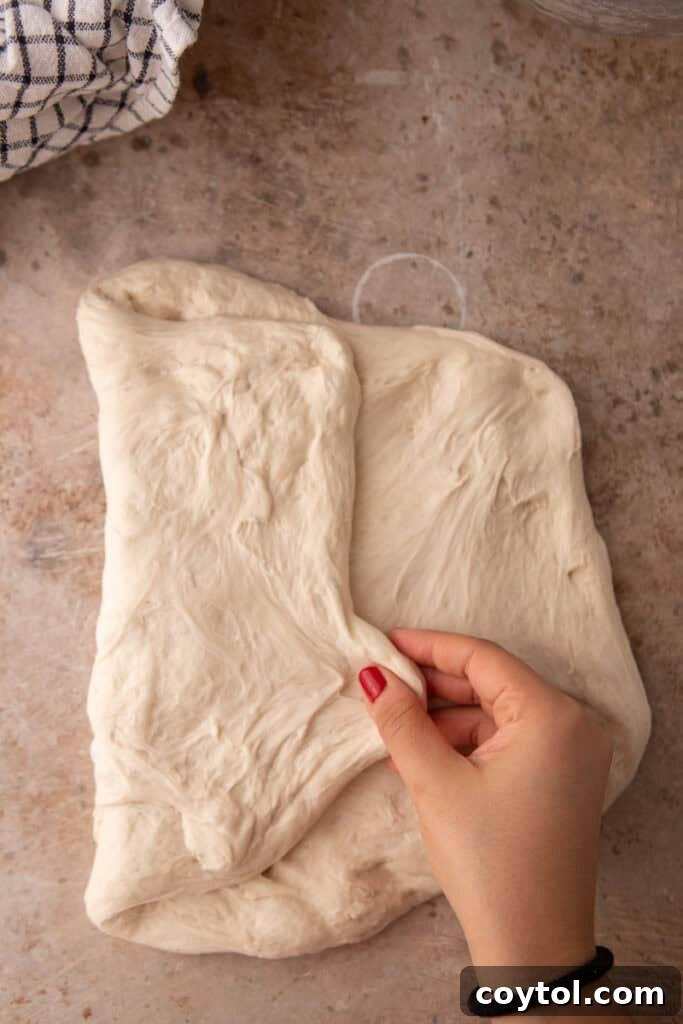
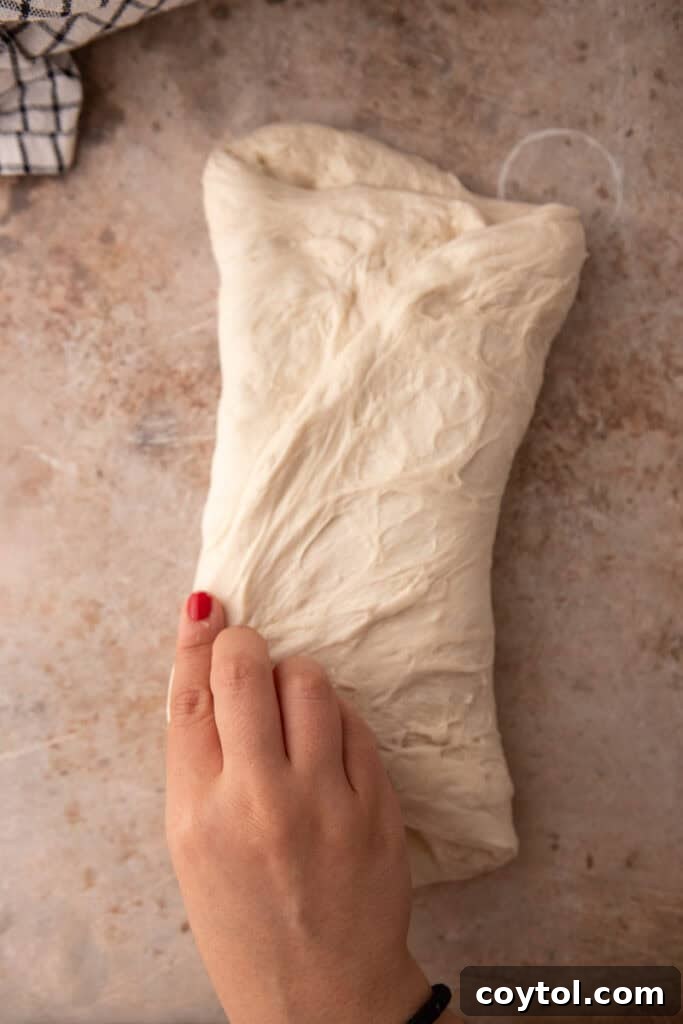
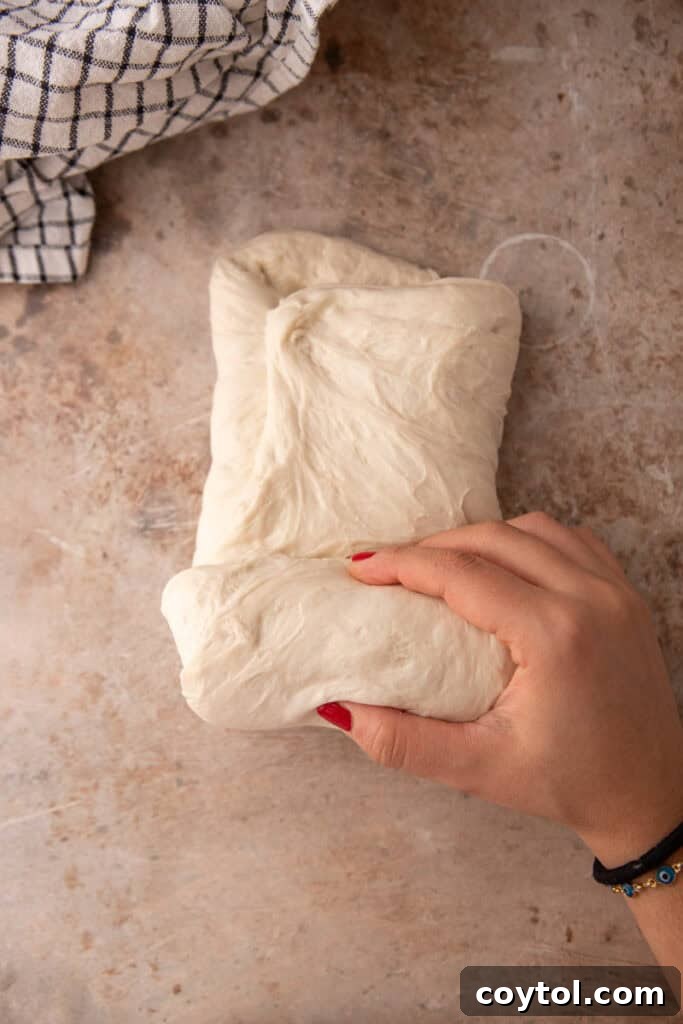
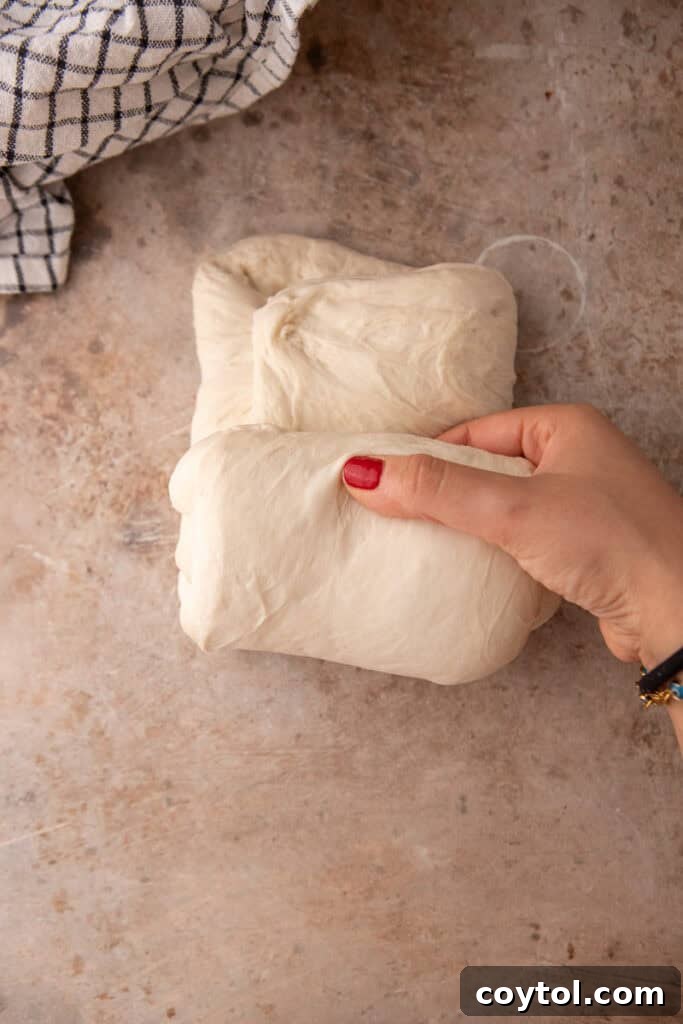
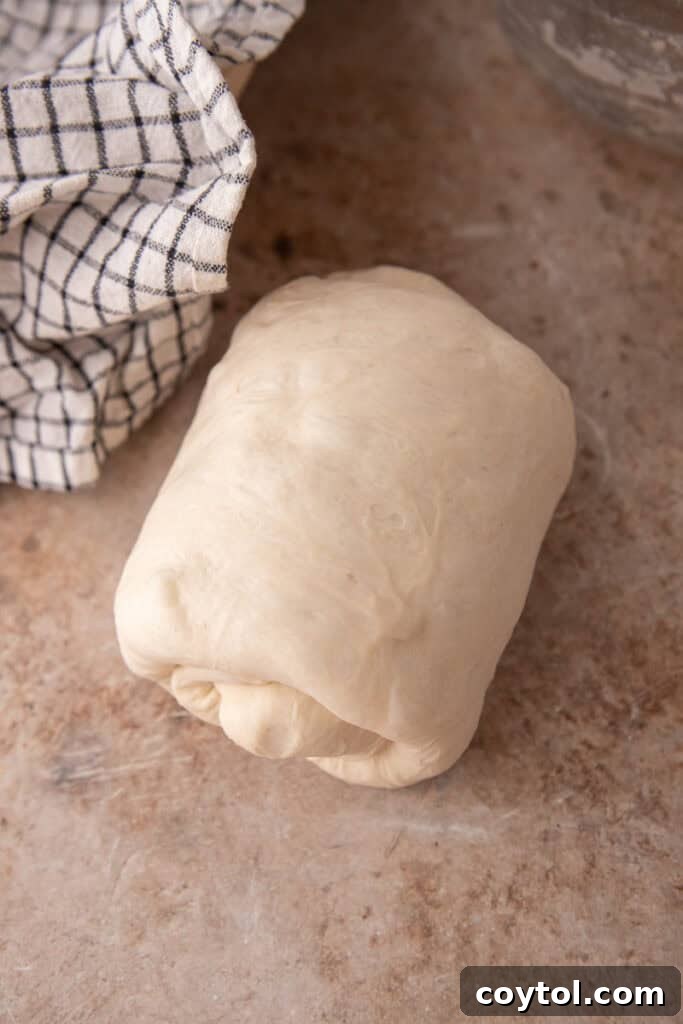
- Leave the pre-shaped dough seam-side down on the counter. Cover it loosely with a damp kitchen towel or an inverted bowl to prevent drying. Let it relax for 30 minutes. This bench rest allows the gluten to relax after handling, making the final shaping much easier and preventing the dough from fighting against you.
Phase 4: Final Shaping & Proofing – (Approx. 1.5 to 2 hours)
The final shape is crucial for creating the structure that will hold its form during baking, resulting in a beautiful loaf with excellent oven spring.
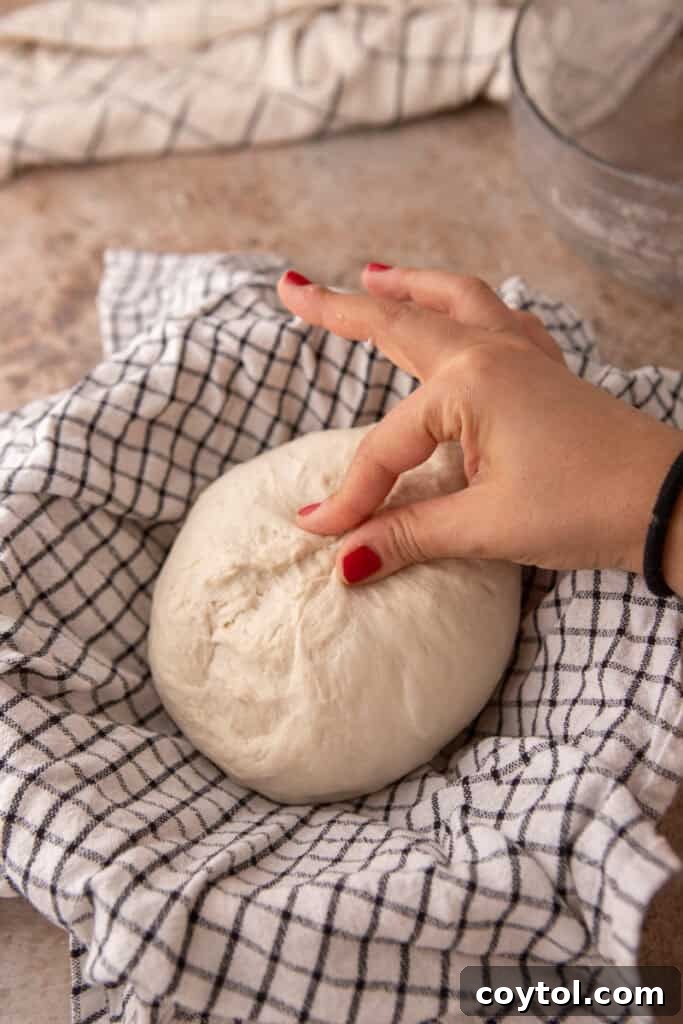
- After the bench rest, your dough will feel more relaxed. Now it’s time for the final shape, aiming for a tighter structure and maximum surface tension. Gently flip the dough over so the seam side is up. From the bottom, gently pull a section of the dough and fold it over to the middle. Rotate the dough a quarter turn and repeat, pulling and folding from the bottom to the middle. Continue this around the dough until you’ve created a tight ball with a smooth, taut surface. The goal is to create as much tension as possible on the outside, which will help the bread rise upwards rather than spreading out during baking.
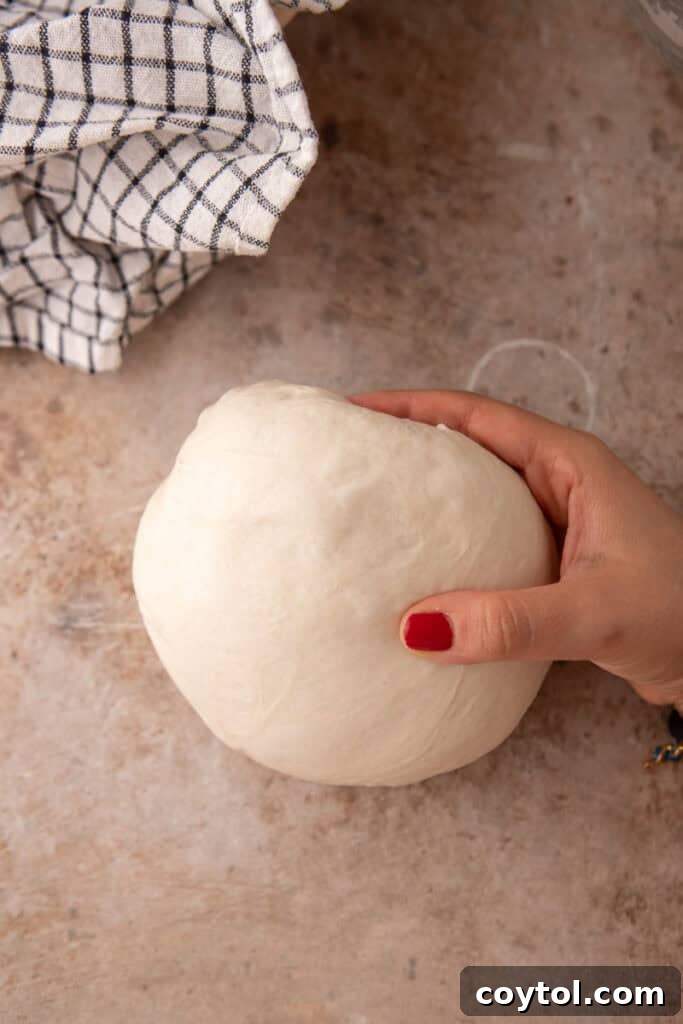
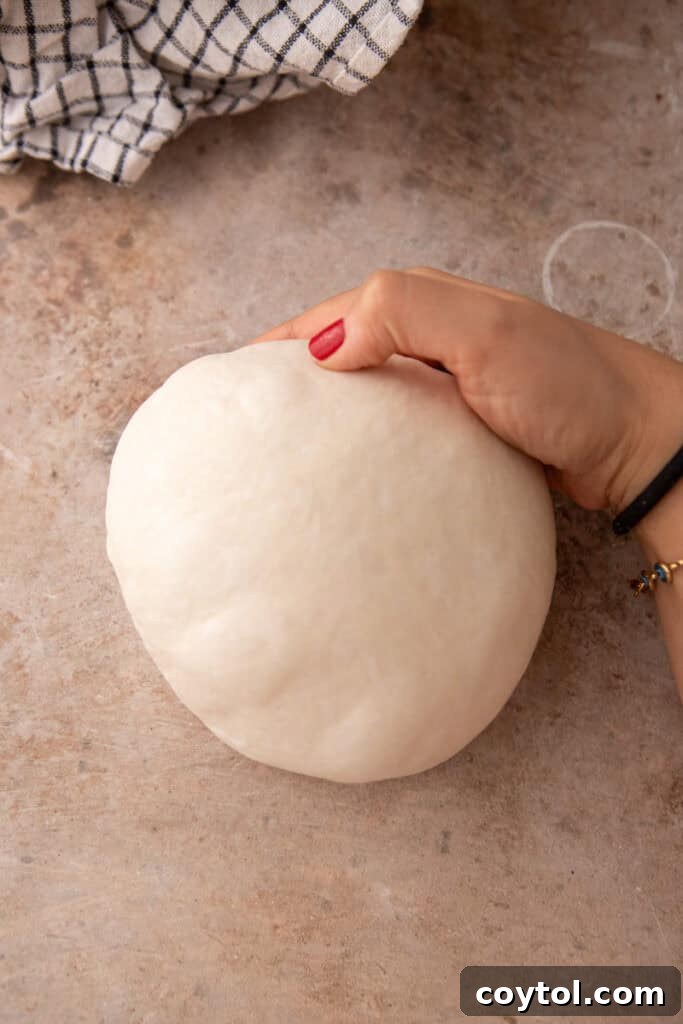
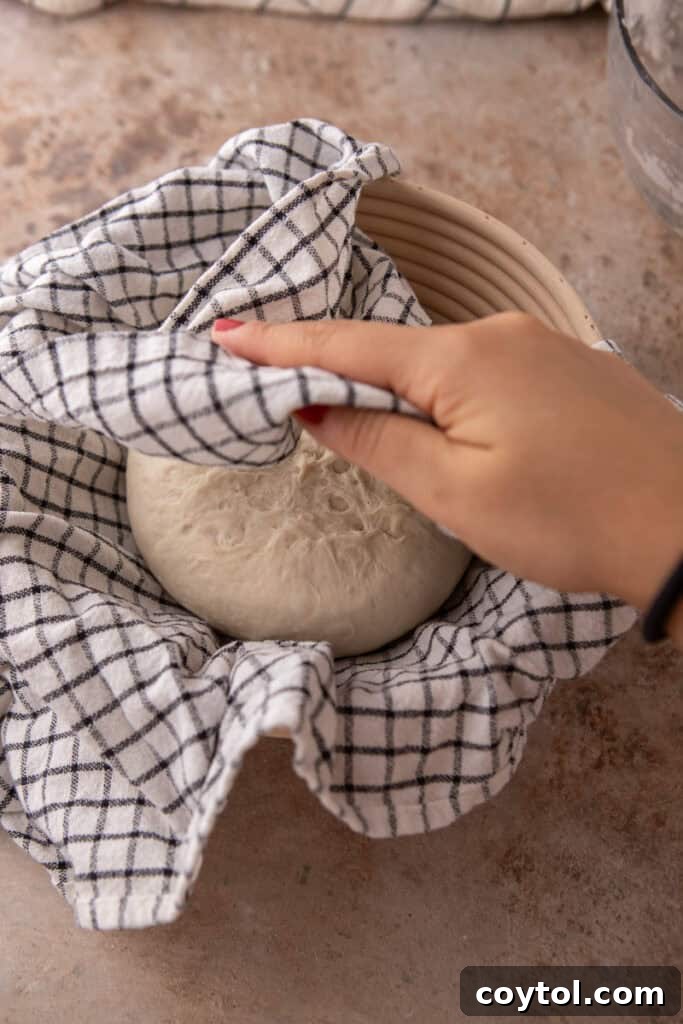
- Once shaped, carefully transfer the dough to a well-floured proofing basket (banneton) or a bowl lined with a floured cloth. Place it seam-side up. The flour prevents sticking, and the basket supports the dough’s shape during proofing.
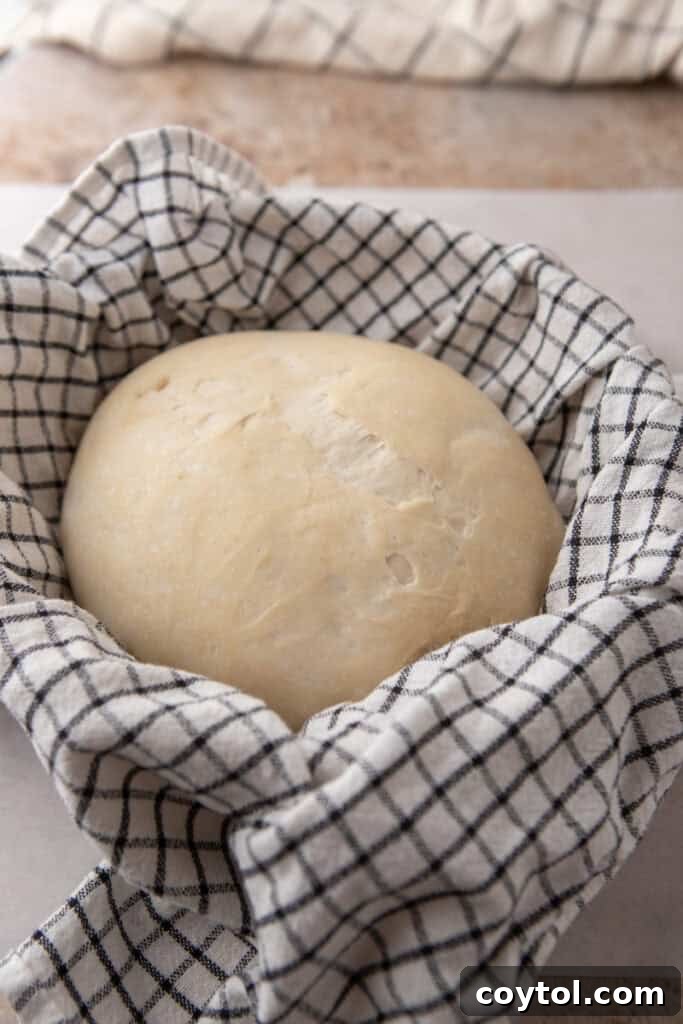
- Cover the basket or bowl and proof the dough in a warm spot on your kitchen counter. This final proof typically takes 1.5 to 2 hours. The dough should look puffed and have expanded by about 50-75%. To check for readiness, gently press the dough with a floured finger (the “poke test”). If it springs back slowly, leaving a slight indentation, it’s ready. If it springs back too quickly, it needs more time. If it doesn’t spring back at all and feels loose, it might be over-proofed.
Phase 5: Bake – (Approx. 40 minutes)
Baking sourdough at high temperatures with steam is key to achieving that signature crispy crust and open, airy crumb.
- Preheat your oven to 450°F (232°C) with a Dutch oven (or equivalent lidded baking vessel) inside. Allow it to preheat for at least 30-45 minutes to ensure it’s scorching hot. This radiant heat is vital for a good oven spring.
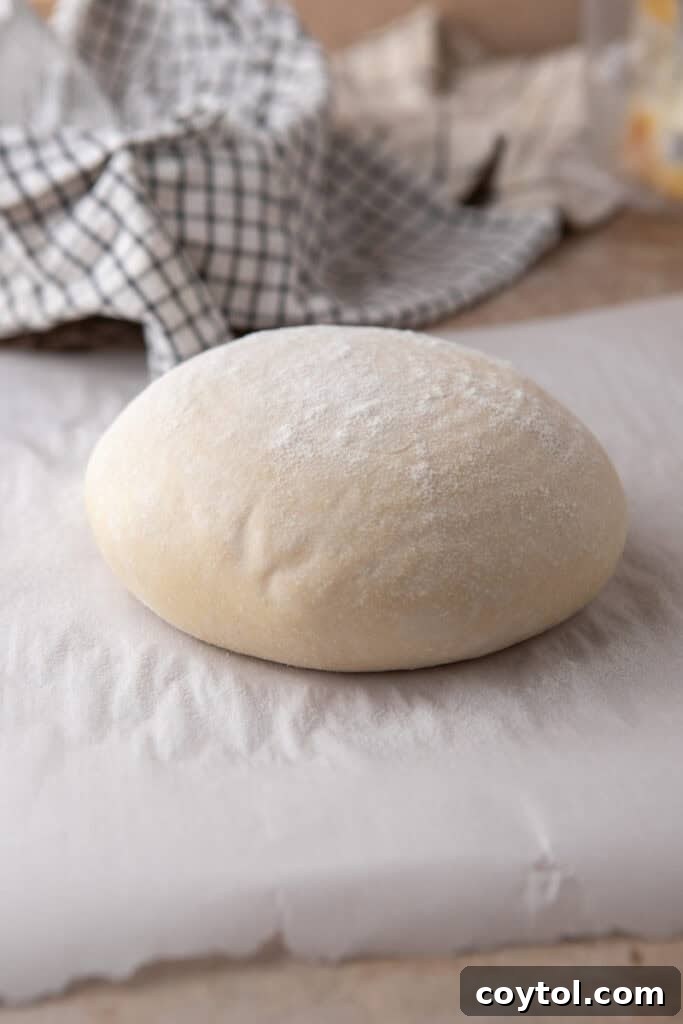
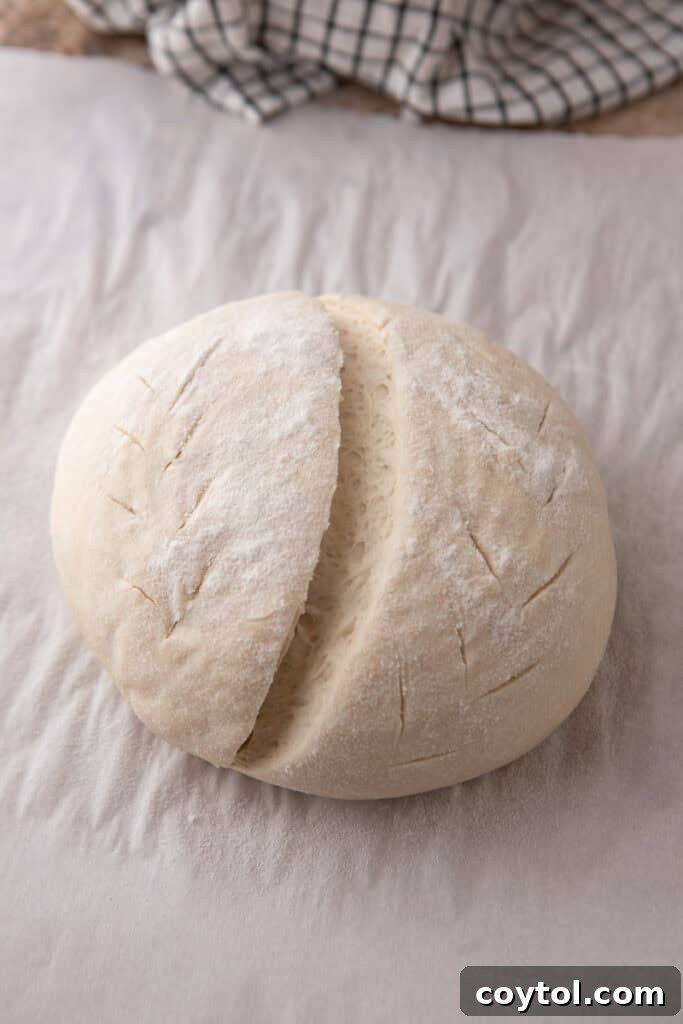
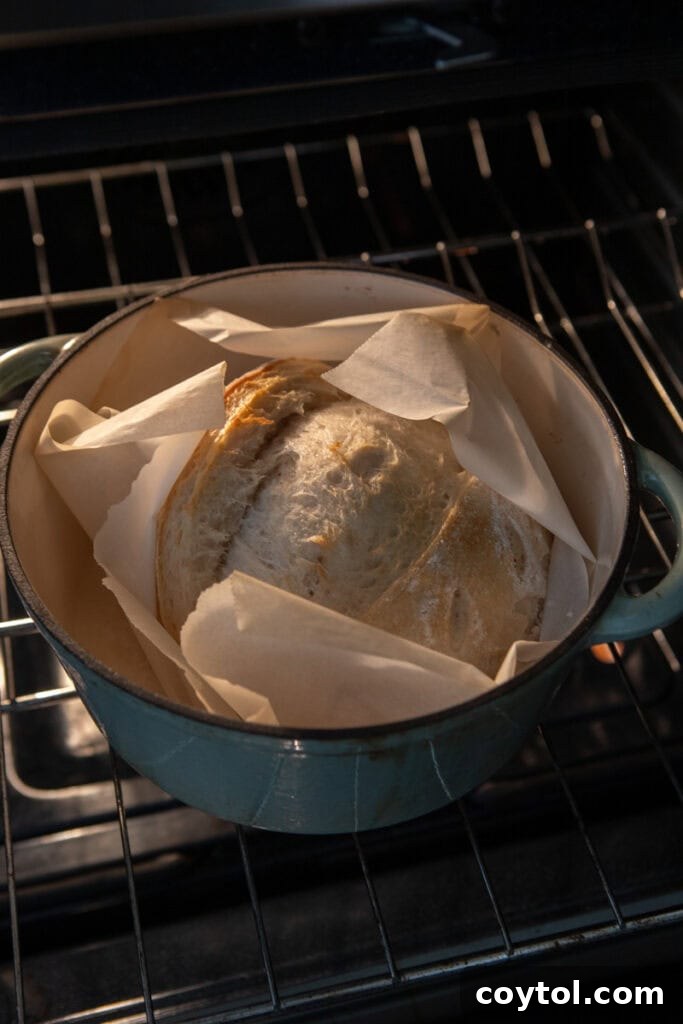
- Carefully remove the hot Dutch oven from the oven. Gently flip the proofed dough onto a piece of parchment paper. Using a razor blade or a very sharp knife (a “lame” is ideal), score the top of the dough. A single deep slash or a decorative pattern allows the bread to expand predictably in the oven. Using a silicone bread sling or the parchment paper itself, carefully lower the dough into the preheated Dutch oven.
- Cover the Dutch oven with its lid and bake for 20 minutes. The lid traps steam released by the dough, creating a humid environment that keeps the crust soft, allowing for maximum expansion (oven spring) before it sets. After 20 minutes, remove the lid, reduce the oven temperature to 390°F (199°C), and continue baking for another 15-20 minutes, or until the crust achieves a deep, golden brown color. This uncovered baking period allows the crust to crisp up and develop its rich hue.
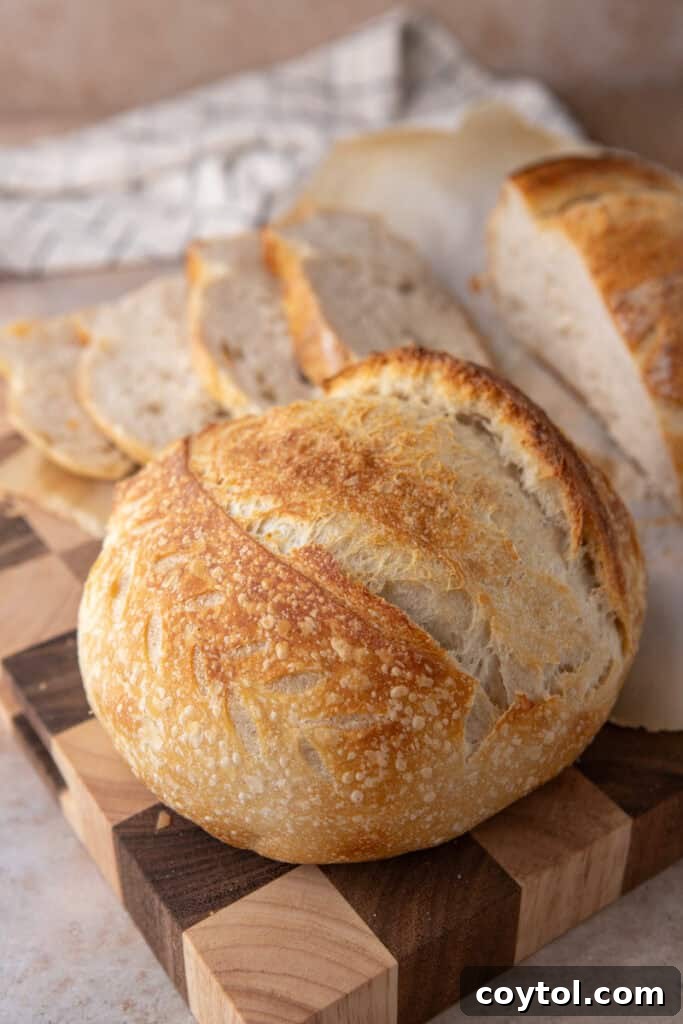
- Once baked, carefully remove the loaf from the Dutch oven and transfer it to a wire rack to cool completely. This is perhaps the hardest step for many bakers! Resist the urge to slice into it immediately. Cooling allows the internal structure of the bread to set and the moisture to redistribute, which is essential for a soft, open crumb and optimal flavor. Slicing too early can result in a gummy texture.
Your Same-Day Sourdough Baking Schedule at a Glance
To help you plan your day, here’s a simplified, approximate schedule for making this Same Day Sourdough Bread. This timeline assumes you start in the morning to have fresh bread by dinner, but remember that flexibility is key in sourdough baking!
- 9:00 AM: Fermentolyse Begins – Mix flour, water, and active starter until thoroughly combined. Cover and rest for 30 minutes.
- 9:30 AM: Salt Incorporation – Add salt and gently mix it in using pinch-and-fold. Rest for 10 minutes.
- 9:45 AM: Bulk Fermentation Begins – Keep dough covered in a warm spot.
- 10:15 AM: First Set of Stretch and Folds – Perform 3-4 folds, then recover.
- 10:45 AM: Second Set of Stretch and Folds – Perform 3-4 folds, then recover.
- 11:15 AM: Third Set of Stretch and Folds – Perform 3-4 folds, then recover.
- 11:15 AM – 1:15 PM: Final Rest for Bulk Fermentation – Allow dough to rise undisturbed until it has expanded by about 50%.
- 1:15 PM: Pre-shape & Bench Rest – Gently turn dough onto a lightly floured surface, pre-shape, cover, and rest on the counter for 30 minutes.
- 1:45 PM: Final Shape & Proof – Reshape tightly and transfer to a floured banneton basket or bowl, seam-side up.
- 1:45 PM – 3:15 PM: Final Proof at Room Temperature – Cover and let dough proof until it passes the poke test (50-75% rise).
- 2:45 PM: Preheat Oven – Preheat oven to 450°F (232°C) with your Dutch oven inside.
- 3:30 PM: Score and Bake – Carefully flip dough, score the top, and transfer to the hot Dutch oven. Bake covered for 20 minutes.
- 3:50 PM: Uncovered Bake – Remove Dutch oven lid, reduce temperature to 390°F (199°C), and bake for another 15-20 minutes until golden brown.
- 4:15 PM – 4:30 PM: Cool Down – Remove from oven and let cool completely on a wire rack for at least 1-2 hours before slicing.
Please note that these times are approximate estimates. Actual fermentation and proofing times will vary based on several factors, including the activity of your sourdough starter, the temperature of your kitchen, and even the temperature of your ingredients. Keeping a notepad nearby or using your phone to record your exact start and end times for each phase can be incredibly helpful for tracking your progress and understanding how these variables affect your bake.
Once your beautiful loaf has cooled, enjoy it simply with some fresh butter, or pair it with a comforting, warm bowl of chicken and cabbage soup for a truly satisfying meal.
Expert Tips & Tricks for the Best Same Day Sourdough Results
Achieving a perfect loaf of Same Day Sourdough Bread is highly rewarding. Here are some indispensable tips and tricks to ensure your success:
- Ensure Adequate Steam During Baking: Steam is paramount in the initial phase of baking sourdough. It keeps the crust soft and pliable, allowing the loaf to expand fully (known as “oven spring”) before the crust sets. If you are using a Dutch oven with a tight-fitting lid, you’re all set, as the lid effectively traps the steam released by the dough. If you don’t have a Dutch oven, don’t despair! You can create a steamy environment by placing a tray of boiling water on the bottom rack of your oven during the first 20 minutes of baking. Remember to remove the water tray when you uncover the bread to allow the crust to crisp up.
- Embrace a Kitchen Scale for Precision: In baking, especially with sourdough, precision is key. Measuring ingredients by weight using a kitchen scale provides far greater accuracy than volume measurements (cups), which can vary wildly depending on how ingredients are scooped. Consistent measurements lead to consistent results, helping you fine-tune your recipe and achieve repeatable success.
- Use an Active, Bubbly Sourdough Starter: The vitality of your starter directly impacts the rise and texture of your bread, especially in a faster recipe. Before you begin, ensure your starter is well-fed, vigorous, and full of bubbles. It should look alive and be at its peak activity, typically 4-8 hours after feeding, to provide maximum leavening power for your same day sourdough. A strong starter is your best friend for a successful quick bake.
- Optimize Water Temperature for Fermentation: Temperature is a major factor influencing fermentation speed. Warmer water (around room temperature or slightly above, 70-75°F or 21-24°C) encourages faster yeast activity compared to cold water. If your kitchen tends to be on the cooler side, consider using slightly warmer water (up to 80-85°F or 27-30°C) to help maintain the dough’s temperature and keep fermentation on track. Always use clean, filtered water to avoid any chemicals that might harm your starter.
- Handle Dough Gently During Stretch and Folds: When performing stretch and folds, always use wet hands to prevent the dough from sticking. More importantly, be gentle. The goal is to build strength in the gluten network without tearing it. Tearing the dough can release precious gases and hinder its ability to rise. Aim for a smooth, controlled stretch and fold motion.
- Master Surface Tension During Shaping: The final shaping step is critical for a beautiful, well-risen loaf. The aim is to create significant surface tension on the dough. This means pulling and tucking the dough tightly underneath itself, creating a smooth, taut “skin” on top. This tension acts like a natural corset, helping the bread rise upwards in the oven rather than spreading out into a flatter disk. Practice makes perfect with shaping, so don’t be discouraged if it takes a few attempts to get it just right.
- Consider Your Kitchen’s Ambient Temperature: Since this is a same day sourdough, ambient temperature plays a significant role in fermentation times. If your kitchen is cool, your dough will take longer to rise. You can create a warmer environment by placing the dough in an unheated oven with just the light on, or near a warm appliance. Conversely, on a very hot day, you might need to use slightly cooler water or reduce fermentation times slightly.
Why Choose This Same Day Sourdough Recipe?
Among the myriad of bread recipes available, this Same Day Sourdough Bread stands out as a truly exceptional choice, offering a unique blend of convenience, quality, and versatility. Here’s a deeper look at why this recipe should be your go-to for homemade bread:
- Perfect for Beginner Bakers: If you’re new to the world of sourdough, the traditional multi-day process can feel daunting. This easy sourdough recipe provides a fantastic entry point, allowing you to experience the full satisfaction of baking an artisan loaf without the extended commitment, building your confidence with each successful bake.
- Fresh Bread on Demand: The most compelling reason is the sheer speed. No longer do you need to meticulously plan 24-48 hours ahead. This recipe empowers you to make hot, fresh sourdough bread from scratch in under 8 hours, perfect for spontaneous meals or unexpected guests.
- Elevate Your Home Baking: The ability to produce a warm, impressive, artisan-style loaf from your own oven in such a short timeframe is truly remarkable. It’s an ideal way to elevate any meal or event and will undoubtedly leave a lasting impression on anyone who experiences its fresh-from-the-oven goodness.
- Simple, Wholesome Ingredients: With just four clean, basic ingredients – flour, water, active starter, and salt – you’re creating a pure, unadulterated bread. This simplicity means you’re in control of what goes into your food, avoiding preservatives or artificial additives often found in store-bought options.
- Superior Flavor and Texture: Unlike many other quick homemade breads that rely on commercial yeast, this sourdough loaf utilizes wild yeast, which cultivates a far richer, more complex flavor profile and a more appealing, chewy texture with an open crumb. It’s a healthier and more flavorful alternative.
- Endless Customization Possibilities: This base recipe is a blank canvas for your culinary creativity. You can effortlessly customize the flavor with a wide array of mix-ins, transforming a simple loaf into a gourmet delight tailored to your preferences. Imagine the possibilities!
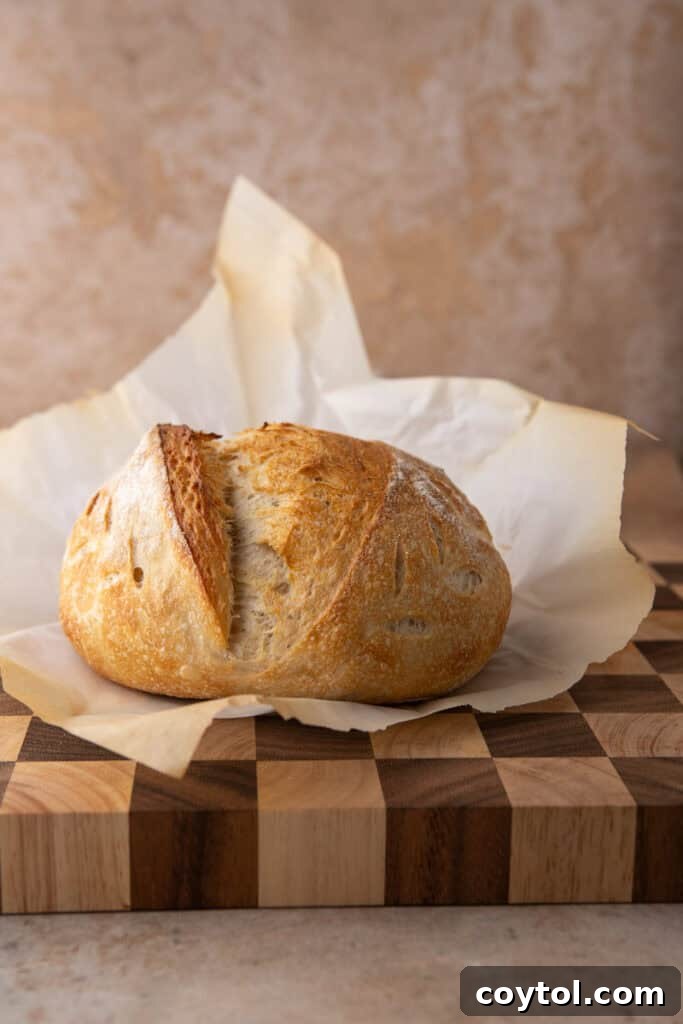
Frequently Asked Questions – FAQ
Here are some common questions about making Same Day Sourdough Bread, with detailed answers to help you on your baking journey.
How long does this Same Day Sourdough Bread take from start to finish?
The entire process for this efficient same day sourdough recipe, from mixing your ingredients to pulling a cooled, ready-to-slice loaf from the oven, typically takes about 8 hours. To best fit this into your day, I recommend starting by 10 AM at the latest. This schedule allows the bread to be fully baked and cooled by approximately 6 PM, making it perfectly timed for a delicious dinner centerpiece. There’s truly nothing quite like serving fresh, warm sourdough at your evening meal!
Why is bread flour recommended for this recipe?
Bread flour is a crucial component for this recipe due to its significantly higher protein content compared to all-purpose flour. This higher protein level directly translates to superior gluten development. As you mix and work the dough, these proteins form a strong, elastic network. This robust gluten is essential for trapping the carbon dioxide gas produced by the sourdough starter during fermentation, allowing the bread to achieve an impressive rise and an open, airy internal structure with desirable large air pockets. The result is a wonderfully chewy bite and an overall more enjoyable texture, which is particularly important in an accelerated sourdough process where gluten needs to develop efficiently.
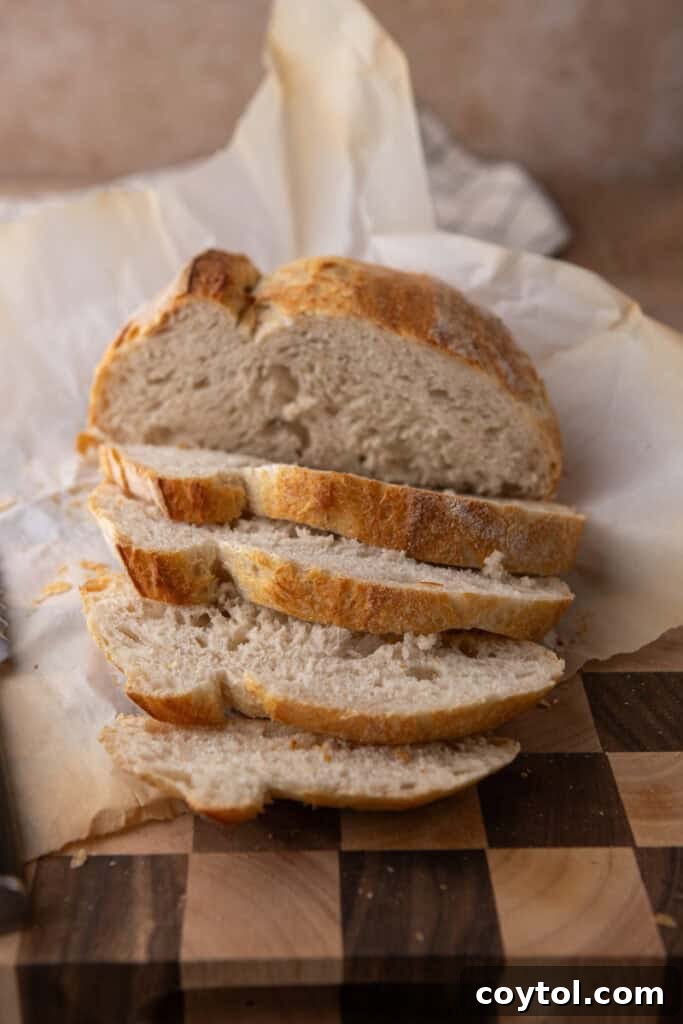
Can I use all-purpose flour instead for this Same Day Sourdough Bread?
While all-purpose flour can certainly work and will produce a decent loaf, bread flour is strongly recommended, especially for this quick sourdough recipe. All-purpose flour has a lower protein content, which means less gluten development. In a standard, longer sourdough process, the extended fermentation can compensate somewhat for the lower protein. However, for a same day sourdough where fermentation is accelerated, the higher protein in bread flour is vital for rapid and robust gluten formation. This quick development contributes significantly to a better rise, more structure, and a superior texture. If you’re aiming for the best possible results with this accelerated method, investing in bread flour is definitely worthwhile.
Why is my dough not rising during the bulk fermentation?
The most common culprit for a lack of rise during bulk fermentation is temperature. Sourdough starter thrives in warmth, ideally between 75°F and 80°F (24-27°C). If your kitchen is too cool, the yeast activity will slow down significantly, leading to sluggish or minimal rising. To troubleshoot, ensure your dough is in a warm environment. You can place the bowl in a turned-off oven with just the oven light on, or near a warm appliance (like a refrigerator motor or water heater). A dedicated proofing box also works wonders. Additionally, double-check that your sourdough starter was truly active and bubbly before you began the recipe, as a weak starter will also struggle to leaven the dough.
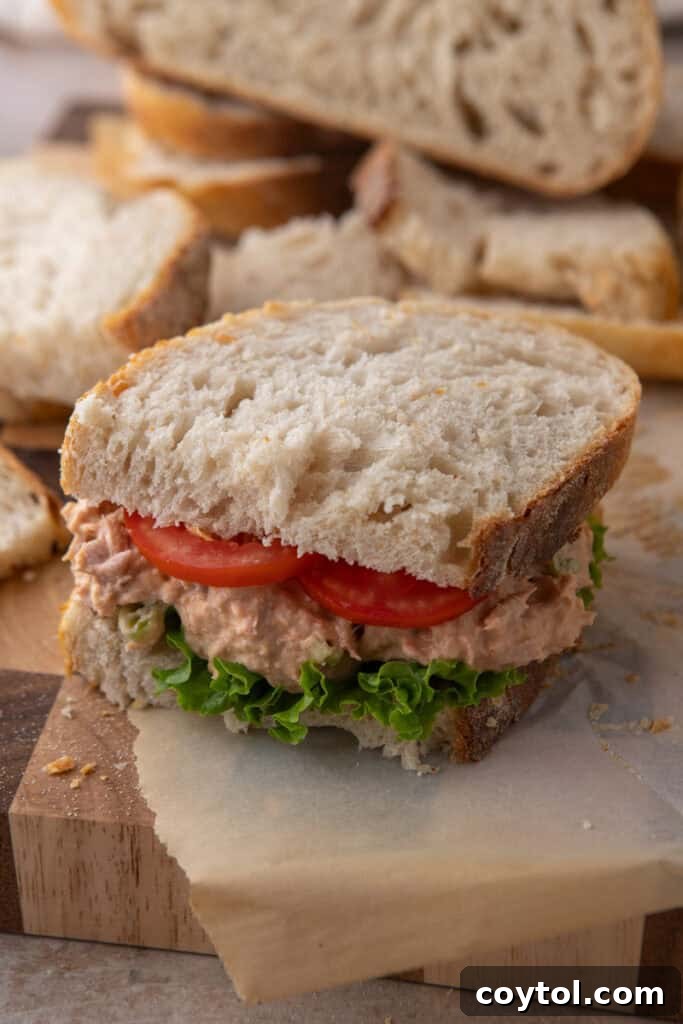
How do I know when the dough is ready to bake after final proofing?
Knowing when your dough is perfectly proofed is a key skill in sourdough baking. During the final proof, your dough should appear noticeably puffed up and larger. The best way to confirm its readiness is by performing the “poke test.” Gently flour your finger and lightly press it into the surface of the dough about half an inch deep. If the indentation slowly springs back halfway, your dough is perfectly proofed and ready to bake. If the indentation springs back very quickly, it needs a bit more time. If the indentation remains completely and the dough feels deflated, it might be over-proofed, which can lead to a dense crumb and less oven spring.
Do I have to use a Dutch oven for the Same Day Sourdough Bread?
While not strictly mandatory, using a Dutch oven is by far the easiest and most reliable method to achieve professional-quality results for home bakers, especially with this same day sourdough. The Dutch oven acts like a miniature oven within your oven, trapping steam released by the dough during the initial baking phase. This trapped steam is crucial for keeping the crust soft and pliable, allowing the loaf to expand fully (known as “oven spring”) and preventing it from hardening prematurely. This results in that desirable open crumb and thin, crispy crust.
Without a Dutch oven, you’d need to create a similar steamy environment, which can be more challenging. Methods include using a preheated baking steel or stone and placing a pan of boiling water (or lava rocks with water) at the bottom of your oven. While these alternative methods can work, they often require more effort and are harder to get right consistently for most home bakers. The Dutch oven simplifies the process significantly, making successful sourdough baking much more accessible and reliable.
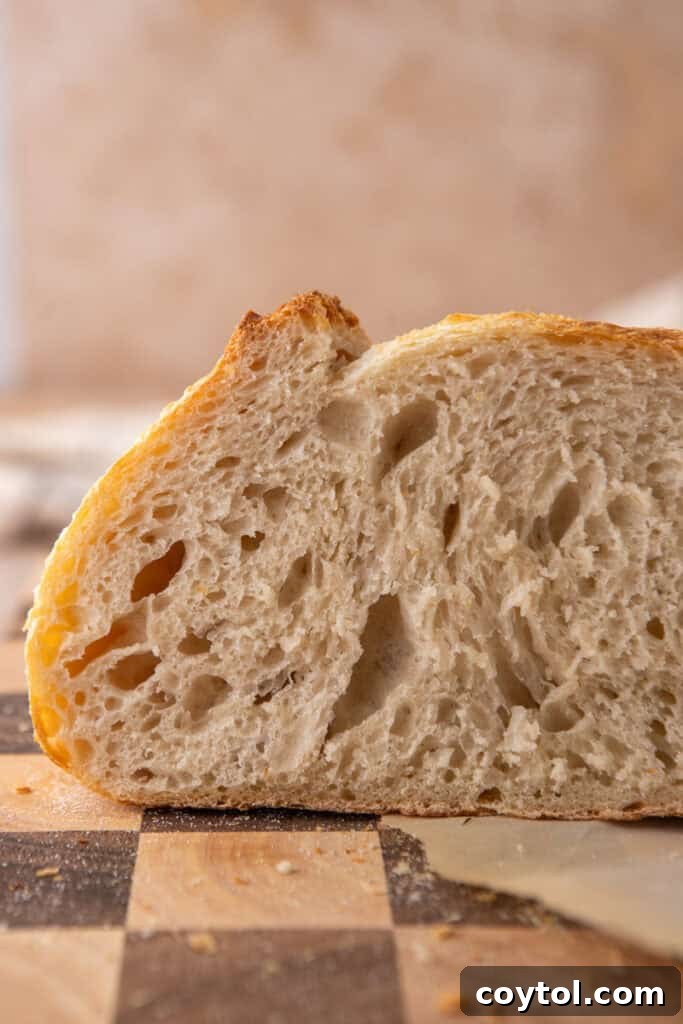
How do I store my leftover Same Day Sourdough Bread?
Proper storage is key to maintaining the freshness and quality of your homemade Same Day Sourdough Bread. For short-term storage, you can keep the loaf at room temperature, ideally wrapped in a paper bag or a clean kitchen towel to allow for some air circulation while preventing it from drying out too quickly. It will stay fresh for about 2-3 days this way. If you need to store it for a bit longer, placing it in an airtight plastic bag or container in the refrigerator can extend its freshness up to a week. For longer storage, the freezer is your best friend. Slice the cooled loaf and then wrap individual slices or portions tightly in a layer of plastic wrap, followed by aluminum foil. This double layer helps prevent freezer burn and keeps the bread fresh for about 1-2 months. Thaw slices as needed, and for best results, refresh them in a toaster or oven before serving.
Can I add flavors to the Same Day Sourdough Bread?
Absolutely! One of the most delightful aspects of this Same Day Sourdough Bread recipe is its incredible versatility and the freedom it offers to experiment with different flavors. The basic sourdough loaf provides a wonderful canvas for a myriad of delicious additions. To infuse your bread with extra flavor, consider mixing in ingredients such as finely minced garlic, caramelized onion bits, chopped Kalamata olives, shredded cheese (like cheddar or Gruyere), or a variety of nuts like pecans or walnuts. Fresh or dried herbs such as rosemary or thyme are also fantastic choices.
The ideal time to incorporate these mix-ins is during the first set of stretch and folds. This allows them to be evenly distributed throughout the dough as you perform the subsequent folds, ensuring every slice of your flavored sourdough bread is bursting with taste.

Same-Day Sourdough Bread Recipe
Fresh sourdough in a day! This same-day recipe skips the long wait and delivers a crusty, flavorful loaf fast. A must-have for every baker!
Cook: 40 mins
Total: 7 hrs 40 mins
Servings: 1 loaf
Print Recipe
Ingredients
- 400 g Bread flour
- 280 g Water (filtered)
- 80 g Sourdough starter (active, 100% hydration)
- 8 g Salt
Instructions
Fermentolyse – 30 minutes
- In a large bowl, mix the flour, water, and starter together until no dry bits remain. Cover and let rest for 30 minutes. This activates enzymes, begins gluten development, and kickstarts fermentation.
- Sprinkle the salt over the dough and knead it in gently using a stretch-and-fold motion or pinch method. Rest for 10 minutes to allow full absorption.
Bulk Fermentation (3.5 to 4 hours)
Keep the dough covered at warm room temp throughout this step (75–80°F if possible).
- Perform 3 sets of stretch and folds every 30 minutes for the first 1.5 hours. Pull each side of the dough up and fold over the center (north, south, east, west).
- Let the dough rest for the remainder of the bulk rise until it appears puffy and expanded by ~50%.
Pre-shape & Bench Rest (30 minutes)
- Turn dough out onto a lightly floured surface. Shape into a round (boule) or oval (batard). Cover and let rest 30 minutes on the counter, seam-side down.
Final Shape & Proof (1.5 to 2 hours)
- Shape again tightly. Place into a floured proofing basket or bowl (seam-side up).
- Cover and proof at room temperature until the dough springs back slowly when poked. Should rise by 50–75%.
Bake
Optional: Chill the dough in the fridge for a little before scoring it. (Makes it much easier to do!)
- Preheat oven to 450°F (232°C) with a Dutch oven inside. Flip the dough onto parchment paper, score, and carefully transfer to the hot Dutch oven.
- Bake covered for 20 minutes, then uncovered at 390°F (199°C) for 15-20 minutes until deep golden brown. The internal temperature should be between 200°F-210°F (93-99°C).
- Cool completely before slicing to preserve crumb structure.
Notes
Check the blog post for a sample time sheet.
- You can bump hydration to 72–75% (290–300g water) for a more open crumb if you’re comfortable handling wetter dough.
- If your kitchen is cooler, let the dough proof a bit longer or place near a warm appliance.
- Optional add-ins (mix in during first few folds): roasted garlic, olives, herbs, cheese.
Nutrition
Calories: 1517 Calories |
Carbohydrates: 305g |
Protein: 50g |
Fat: 7g |
Saturated Fat: 1g |
Polyunsaturated Fat: 3g |
Monounsaturated Fat: 1g |
Sodium: 3124mg |
Potassium: 401mg |
Fiber: 10g |
Sugar: 1g |
Vitamin A: 8IU |
Calcium: 70mg |
Iron: 4mg
Nutrition information is automatically calculated, so should only be used as an approximation.
Like this? Leave a comment below!