
Delight in the enchanting simplicity of these easy Hershey’s Red Velvet Blossom Cookies. A festive twist on classic thumbprint cookies, these vibrant red treats feature a luscious Hershey’s Kiss chocolate at their heart instead of traditional jam or curd. Their striking color and irresistible flavor make them the perfect indulgence for Valentine’s Day, Christmas, or any occasion that calls for a touch of sweet charm. Imagine sinking your teeth into a soft, chewy cookie, bursting with a subtle cocoa flavor, perfectly complemented by a melting chocolate center. These are more than just cookies; they’re tiny expressions of joy, ideal for gifting, sharing, or simply savoring a moment of pure bliss.
Searching for more delightful holiday dessert ideas? Explore these Valentine’s Day Muddy Buddies /Puppy Chow, discover the rich layers of Cheesecake Swirled Red Velvet Brownies, indulge in Chewy Valentine’s Day Crinkle Chocolate Cookies with Sprinkles, and find inspiration with The Best 18 Valentine’s Day Cookie Ideas. Each recipe offers a unique way to celebrate and enjoy the festive spirit!

This past Valentine’s Day, I challenged myself to step outside my usual baking repertoire and create truly memorable, adorable treats for my friends and family. The goal was to craft something visually stunning and incredibly delicious, perfect for sharing the love during the holidays. Among the many requests, one stood out: a beautiful, bright red velvet Hershey’s Kisses blossom cookie. This particular creation proved to be a delightful departure from traditional red velvet desserts, which are typically crowned with cream cheese frosting. Instead, these cookies offer a unique textural and flavor experience, blending the tender crumb of a cookie with the soft, melty embrace of a chocolate kiss.
Red velvet, with its intriguing balance of vanilla and a hint of cocoa, paired with its signature vibrant hue, has always held a special place in the dessert world. But transforming it into a blossom cookie presented an exciting opportunity to explore new dimensions. The idea was to maintain that classic red velvet essence while introducing the joyful surprise of a Hershey’s Kiss. The journey to perfect this recipe involved meticulous testing, ensuring each cookie was not only visually appealing but also a symphony of flavors and textures. The result is a truly enchanting cookie that captivates both the eyes and the palate.
Discover the Best Red Velvet Blossom Cookies
After numerous attempts and careful adjustments, I finally achieved the ideal balance of ingredients, resulting in red velvet blossom cookies that are undeniably soft, wonderfully delicious, and exceptionally pretty. The secret lies in the precise ratio of sugars, the tenderizing power of egg yolk, and the careful integration of just the right amount of cocoa. Each ingredient plays a crucial role in creating a cookie that is moist, chewy, and holds its beautiful shape throughout the baking process. The subtle cocoa notes are perfectly balanced by the vanilla, creating that iconic red velvet flavor profile that everyone adores.
One critical aspect of perfecting these cookies was choosing the right coating. I experimented with both plain granulated sugar and vibrant red glittery sanding sugar. The difference was remarkable. While granulated sugar yielded a tasty cookie, the red glittery sugar truly elevated the aesthetic, transforming each cookie into a sparkling, festive masterpiece. The shimmering crystals not only add a delightful crunch but also enhance the cookie’s bright red color, making it an absolute showstopper on any dessert platter. It’s these small details that make these red velvet blossom cookies truly exceptional and a definite crowd-pleaser for any celebration.

Why You Absolutely Must Bake These Red Velvet Blossom Cookies!
- Perfect for the Holidays: These cookies are more than just a treat; they’re a celebration in themselves. Their striking red hue makes them an irresistible addition to any holiday table, from the romantic warmth of Valentine’s Day to the festive cheer of Christmas. They make thoughtful homemade gifts, perfect for spreading joy to friends, family, and colleagues, or simply bringing a vibrant touch to holiday parties and gatherings.
- Extremely Easy to Make: Don’t let their elegant appearance fool you – this recipe is designed for simplicity. With straightforward steps and common pantry ingredients, even novice bakers can achieve impressive results. There are no complicated techniques or extensive chilling times, making them a fantastic choice for last-minute baking or a fun weekend project.
- A Fun Activity with Kids: Baking these blossom cookies offers a wonderful opportunity for family bonding. Children will love helping with various steps, from mixing the ingredients (under supervision) to rolling the cookie dough in colorful sanding sugar, and especially the exciting part of unwrapping and pressing the Hershey’s Kisses into the warm cookies. It’s a sweet way to create lasting memories in the kitchen.
- Customizable Hershey’s Kisses: One of the best features of this recipe is its versatility. While classic milk chocolate Hershey’s Kisses are delightful, feel free to experiment with different varieties to suit your taste or theme. Imagine using dark chocolate Kisses for a richer flavor, white chocolate Kisses for a creamier contrast, or even flavored Kisses (like mint or caramel) for an adventurous twist. Seasonal Kisses can also add an extra layer of holiday fun.
- Ideal for Smaller Batches: If you’re not looking to bake dozens upon dozens of cookies, this recipe is perfectly portioned to yield about 18 delicious treats. This smaller batch is perfect for intimate gatherings, a cozy night in, or when you simply want to enjoy freshly baked cookies without the commitment of a large production. It means less waste, quicker baking, and more opportunities to enjoy them warm from the oven.
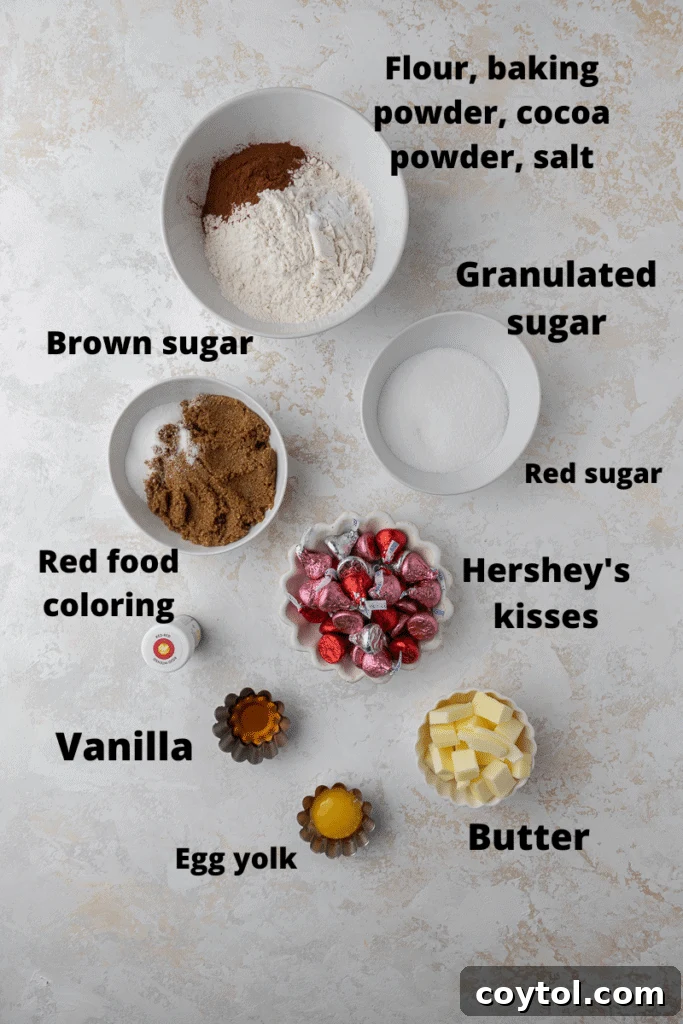
Essential Ingredients for These Irresistible Red Velvet Blossom Cookies
Crafting these delectable red velvet blossoms requires a few key ingredients, each playing a vital role in achieving their perfect taste and texture. Below is a comprehensive list, but for precise measurements and detailed instructions, remember to refer to the full recipe card further down this page.
- Butter: You’ll need softened butter, which can be either salted or unsalted. Softened butter is crucial for creaming effectively with the sugars, creating a light and airy base for your cookie dough. It also contributes significantly to the tender crumb and rich flavor of the final cookie.
- Brown & Granulated Sugar: This recipe utilizes a harmonious blend of both brown and granulated sugars. Brown sugar adds moisture, contributing to a chewier texture and a deeper, more caramel-like flavor. Granulated sugar, on the other hand, helps with crispness and ensures the cookies spread just enough during baking. The combination provides an ideal balance of sweetness and texture.
- Egg Yolk: The egg yolk acts as a powerful binding agent, holding the cookie dough together while adding richness and essential fat. This extra fat content is key to keeping the cookies incredibly moist and tender, preventing them from drying out during baking and ensuring a melt-in-your-mouth experience.
- Vanilla Extract: A generous splash of pure vanilla extract is indispensable. It infuses the cookies with a warm, aromatic depth of flavor that complements the subtle cocoa, making these red velvet blossoms truly irresistible. Don’t skip this essential flavor enhancer!
- All-Purpose Flour: Standard all-purpose (AP) flour is the backbone of these cookies, providing structure without making them tough. It’s important to measure your flour correctly, preferably by weight, or by spooning it into the measuring cup and leveling it off, to avoid dense cookies.
- Cocoa Powder: Red velvet is, at its core, a subtly flavored chocolate dessert. A small but crucial amount of unsweetened cocoa powder is included to provide that characteristic hint of chocolate and to interact with the red food coloring, giving these cookies their signature deep red hue. Both natural and Dutch-processed cocoa can work, but natural cocoa tends to enhance the red color more.
- Salt: A touch of salt is a secret weapon in baking. It not only balances the sweetness of the sugars and chocolate but also enhances all the other flavors, making each bite more vibrant and memorable.
- Baking Powder: As a leavening agent, baking powder is responsible for giving these cookies a slight lift and a tender, soft interior. It helps them achieve that delightful “blossom” shape without becoming flat or too dense.
- Red Food Coloring: To achieve that iconic, rich red velvet color, we’ll be using red gel food coloring. Gel coloring is highly concentrated, allowing you to achieve a vibrant hue with just a small amount, without altering the dough’s consistency. Wilton red gel is highly recommended for its intense pigment.
- Red Sanding Sugar: Before baking, the cookie dough balls are rolled in sparkling red sanding sugar. This not only adds a beautiful, festive visual appeal but also provides a delightful coarse, crunchy texture on the exterior, contrasting beautifully with the soft interior. It truly makes these cookies pop!
- Hershey Kisses: The crowning glory of these blossom cookies! Regular milk chocolate Hershey Kisses are classic, but feel free to get creative. White chocolate Kisses, dark chocolate Kisses, or even special holiday-themed Kisses can be used to customize your treats and add an extra layer of flavor and fun. They melt perfectly into the warm cookie, creating that signature “blossom” effect.
Step-by-Step Guide: How to Make Red Velvet Blossom Cookies
Creating these charming red velvet blossom cookies is a straightforward and rewarding process. Follow these detailed steps to achieve perfect results every time. For the most precise instructions and measurements, please refer to the complete recipe card below.
- Prepare Your Baking Environment: Begin by preheating your oven to 350°F (175°C). While the oven heats, line a large baking sheet with parchment paper. This non-stick surface will ensure your cookies bake evenly and release easily without sticking. Set the prepared baking sheet aside.
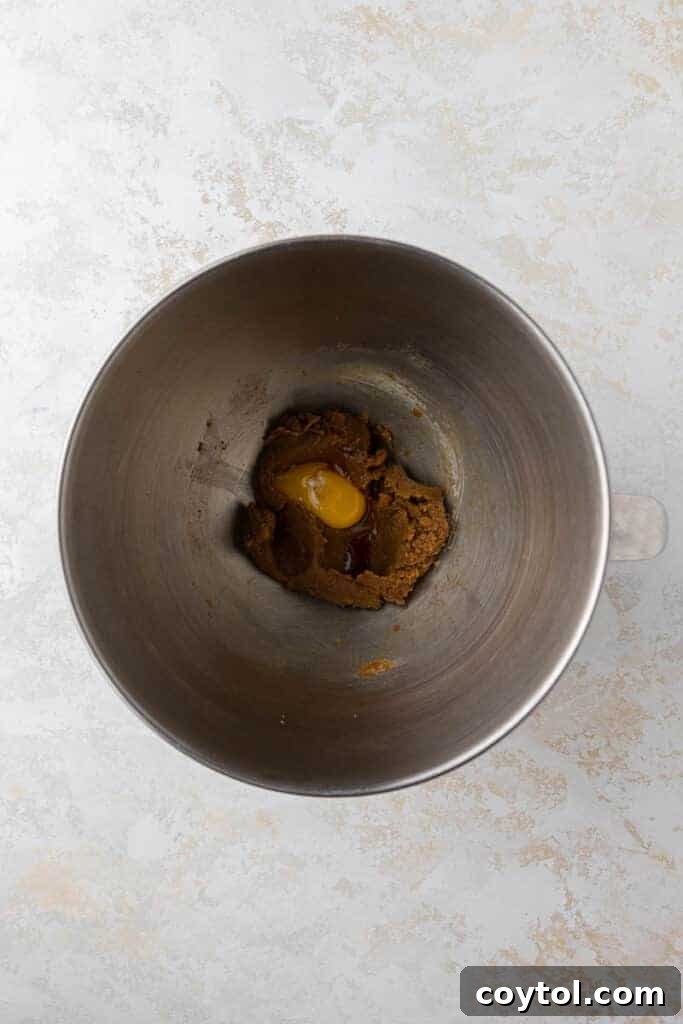
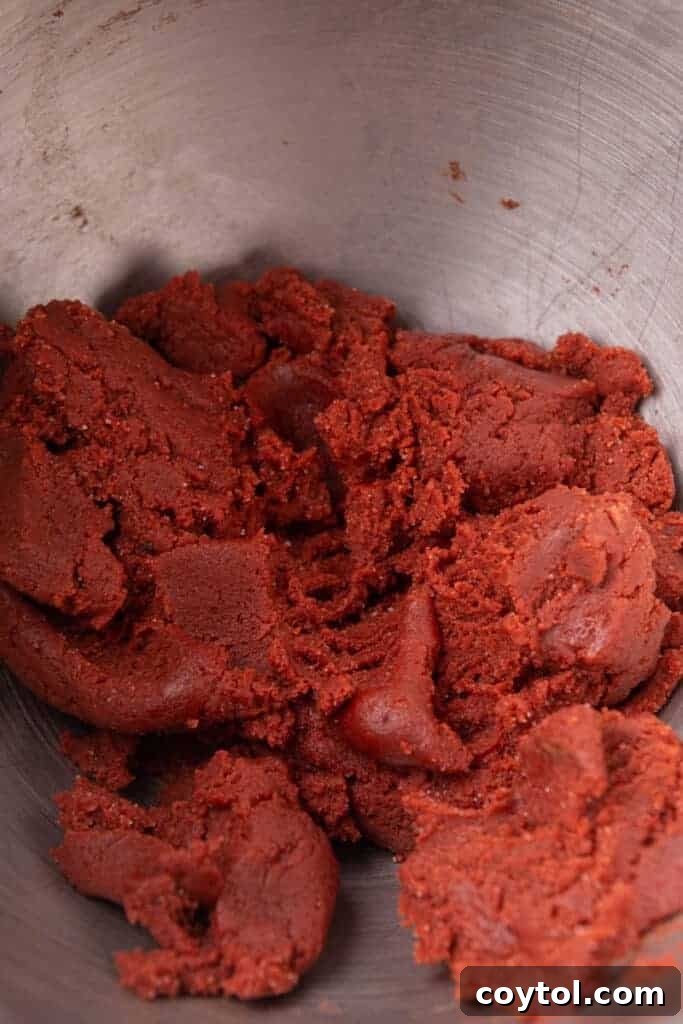
- Cream Wet Ingredients: In the bowl of a stand mixer fitted with the paddle attachment, or using a large bowl and a hand mixer, combine the softened butter, brown sugar, and granulated sugar. Beat them together on medium speed until the mixture is light, fluffy, and visibly smooth. This creaming process incorporates air, which contributes to the cookies’ tender texture. Next, add the egg yolk, vanilla extract, and the red food coloring. Continue mixing until all ingredients are thoroughly combined and the dough has achieved a uniform, vibrant red color. Scrape down the sides of the bowl as needed to ensure everything is incorporated.
- Incorporate Dry Ingredients: To the wet mixture, gradually add the all-purpose flour, cocoa powder, baking powder, and salt. Mix on low speed just until the dry ingredients are fully incorporated and no streaks of flour remain. Be careful not to overmix the dough, as overworking the gluten can lead to tough cookies. As soon as the flour mixture disappears, stop mixing.
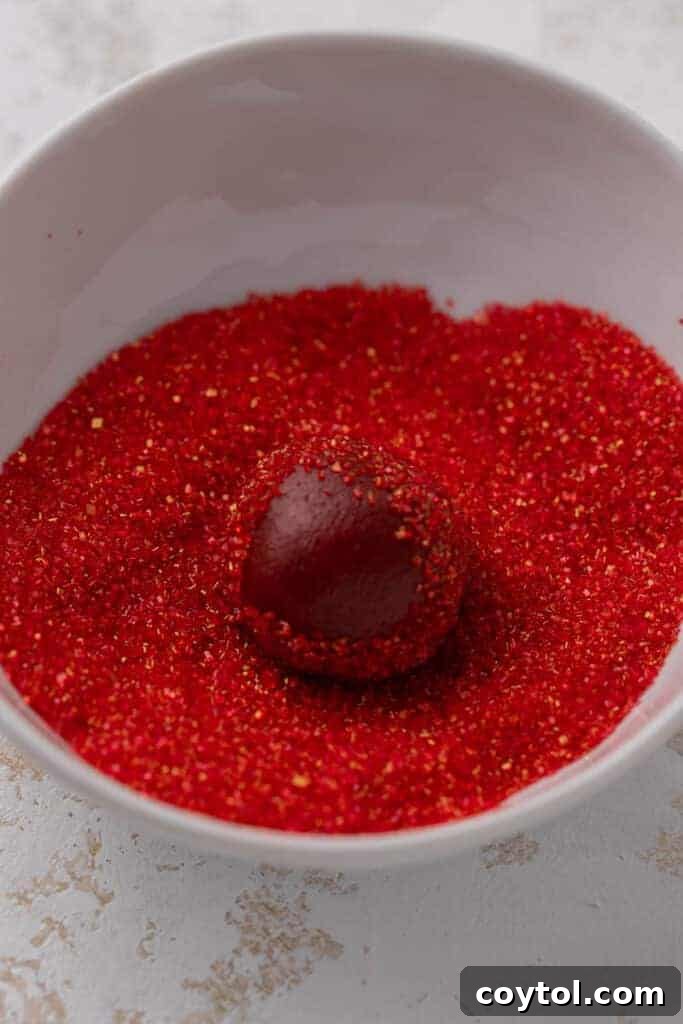
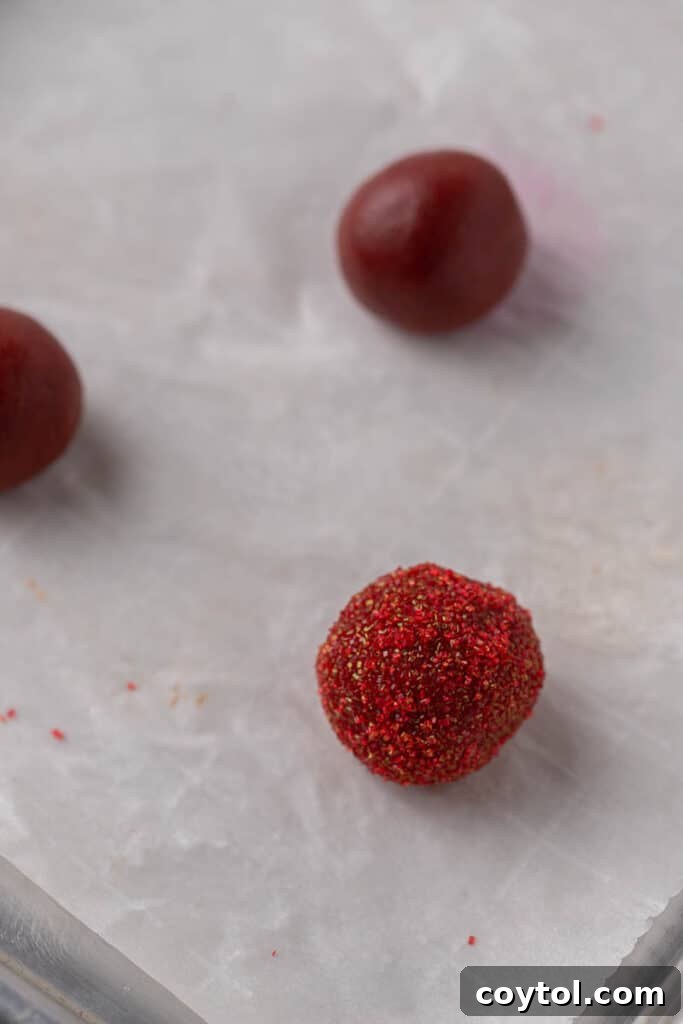
- Portion, Coat, and Bake: Using a 1-tablespoon cookie scoop, portion out 18 equally sized cookie dough balls. Roll each ball smoothly between the palms of your hands to create a uniform sphere. Then, generously roll each dough ball in the red sanding sugar until it is completely coated. Place the coated cookie balls onto your prepared baking sheet, leaving about 2 inches between each to allow for spreading. Bake in the preheated oven for approximately 10 minutes. The cookies should look set around the edges but may still appear slightly soft in the center – this is perfect for a chewy texture.
- Add Hershey’s Kisses: As soon as you remove the baking sheet from the oven, immediately take an unwrapped Hershey’s Kiss and gently press it into the center of each warm cookie. The residual heat from the freshly baked cookie will slightly melt the chocolate, allowing it to adhere beautifully and create that classic blossom shape. Let the cookies cool on the baking sheet for an additional 10 minutes to set before carefully transferring them to a wire cooling rack to cool completely. This prevents them from breaking and allows the chocolate to firm up just enough.

Frequently Asked Questions (FAQ) About Red Velvet Blossom Cookies
How to Store Red Velvet Blossoms?
To keep your red velvet blossom cookies fresh and delicious, store them in an airtight container at room temperature for up to 3 days. For a slightly longer shelf life, you can refrigerate them in an airtight container for up to a week. When storing in the fridge, the Hershey’s Kisses might firm up slightly more. Before enjoying, allow them to come back to room temperature for the best texture and flavor. If you prefer a warm, gooey chocolate center, you can even pop them in the microwave for a few seconds (5-10 seconds) before serving. For longer storage, these cookies also freeze beautifully for up to 2-3 months in a freezer-safe airtight container.
To freeze, first ensure the cookies are completely cooled. Place them in a single layer on a baking sheet and freeze until solid (about 1-2 hours). Once frozen, transfer them to a freezer-safe bag or container, separating layers with parchment paper to prevent sticking. Thaw at room temperature when ready to enjoy.

What Can I Use Instead of Red Sanding Sugar?
If you don’t have red sanding sugar on hand, don’t worry – you still have options! Regular granulated sugar can be used as a substitute, although the visual sparkle won’t be as prominent. For the best textural contrast, aim for a thicker granulated sugar rather than a very fine one. Another excellent alternative is turbinado sugar, which has larger crystals and a lovely amber color that could add a rustic charm. While the red color will be less intense without the sanding sugar, the flavor will remain just as delicious.
We absolutely adore this recipe for its adaptability! You can easily customize the color of the sanding sugar to match various events and holidays. Imagine using black sanding sugar for spooky Halloween-inspired cookies, vibrant green for festive Christmas treats, or a mix of blue and white for a winter wonderland theme. The possibilities are endless, allowing you to personalize these delightful cookies for any special occasion.
How Do These Cookies Really Taste? Unpacking the Red Velvet Flavor
Red velvet is often described as a culinary enigma, a flavor that hints at chocolate but isn’t quite chocolate, and boasts a unique tang. In short, these cookies offer a delightful buttery treat with a delicate balance of cocoa and vanilla notes. This particular recipe uses just enough cocoa powder to give it that signature depth without overpowering the other flavors. The red food coloring doesn’t add flavor but creates the iconic visual appeal.
The essence of red velvet in these blossoms is that rich, moist cookie base with a subtle cocoa background, perfectly complemented by the sweetness of the vanilla. The soft, melty Hershey’s Kiss in the center adds a creamy, decadent touch, creating a beautiful contrast in texture and flavor. For an even more “red velvet” experience that mimics the traditional cream cheese frosting, I highly recommend trying these with white chocolate Hershey’s Kisses – their creamy texture and sweet flavor would be an amazing complement to the cookie base!
Can I Use Whole Eggs Instead of Just Egg Yolks?
While you technically *could* use a whole egg, it’s not recommended for achieving the optimal texture in these red velvet blossoms. The recipe specifically calls for an egg yolk because the yolk adds richness, moisture, and acts as a strong binding agent without introducing extra liquid (from the egg white). This results in a more tender, chewier cookie. Using a whole egg might make the cookies a bit tougher or drier, as the white can make them spread more and bake up crispier. For the best results, stick to just the egg yolk.
Can I Prepare the Dough Ahead of Time?
Absolutely! This recipe is excellent for make-ahead baking. You can prepare the cookie dough and store it in the refrigerator. Simply wrap the dough tightly in plastic wrap and refrigerate for up to 3-4 days. When you’re ready to bake, let the dough sit at room temperature for about 15-20 minutes to soften slightly, then proceed with scooping, rolling in sugar, and baking as instructed. This is a great tip for holiday baking when you want to get a head start!

Hershey’s Red Velvet Blossom Cookies Recipe
If you’ve had the pleasure of making these delightful Hershey’s Red Velvet Blossoms and enjoyed them, please consider leaving a 5-star review below. Your feedback truly helps!

Hershey’s Red Velvet Blossom Cookies
These red velvet blossom cookies are soft, delightfully chewy, and boast just the right amount of Hershey’s chocolate in the center. A festive treat perfect for any occasion!
Print Recipe
Ingredients
- 7 tbsp butter, salted or unsalted, softened
- 1/2 cup brown sugar, packed
- 2 tbsp granulated sugar
- 1 tsp vanilla extract
- 1 large egg yolk
- 1/4 tsp red food coloring gel
- 1 cup all-purpose (AP) flour
- 1 tbsp cocoa powder, unsweetened
- 1/2 tsp baking powder
- 1/4 tsp salt
- 1/4 cup red sanding sugar
- 18 Hershey chocolate kisses, unwrapped
Instructions
- Preheat Oven & Prepare Pan: Preheat your oven to 350°F (175°C). Line a large baking sheet with parchment paper and set aside.
- Cream Butter & Sugars: In a stand mixer or with a hand mixer, cream together the softened butter, brown sugar, and granulated sugar until the mixture is light, fluffy, and smooth. Beat in the egg yolk, vanilla extract, and red food coloring until well combined and the dough is a vibrant red.
- Add Dry Ingredients: Gradually add the all-purpose flour, cocoa powder, baking powder, and salt to the wet mixture. Mix on low speed just until the dry ingredients are fully incorporated and no streaks of flour remain. Be careful not to overmix.
- Scoop, Roll, and Bake: Using a 1-tablespoon cookie scoop, form 18 equally sized cookie dough balls. Roll each ball smoothly between your palms, then roll them in the red sanding sugar until fully coated. Place the coated cookie balls onto the prepared baking sheet, ensuring adequate space between them. Bake for 10 minutes.
- Add Hershey’s Kisses: As soon as you pull the cookies out of the oven, immediately press a Hershey’s Kiss chocolate gently into the center of each warm cookie. Allow the cookies to cool on the baking sheet for 10 minutes before transferring them to a wire cooling rack to cool completely.
Notes
How to store red velvet blossoms: You can store these cookies in an airtight container at room temperature for up to 3 days. For longer storage, keep them in an airtight container in the fridge for up to 7 days. Allow them to return to room temperature before enjoying for best results.
Nutrition Information (Approximate Per Cookie)
Calories: 134 Calories | Carbohydrates: 17g | Protein: 2g | Fat: 7g | Saturated Fat: 4g | Polyunsaturated Fat: 1g | Monounsaturated Fat: 2g | Trans Fat: 1g | Cholesterol: 23mg | Sodium: 147mg | Potassium: 35mg | Fiber: 1g | Sugar: 10g | Vitamin A: 150IU | Calcium: 38mg | Iron: 1mg
Nutrition information is automatically calculated and should only be used as an approximation.
Thank you for journeying through this recipe and making it all the way down here! Your interest in baking these delightful cookies means the world.
If you’ve enjoyed preparing and tasting these Hershey’s Red Velvet Blossoms, please don’t hesitate to share your thoughts and experiences in the comments section below! Your feedback is invaluable and truly helps our community of bakers. In the meantime, for more delicious recipes and baking inspiration, don’t forget to follow me on Instagram!

Shop Ingredients and Tools for This Recipe
This post may contain affiliate links, meaning that at no additional cost to you, I will earn a small commission if you make a purchase through these links. Your support helps keep this blog running!
If You Enjoyed This Hershey’s Red Velvet Blossom Cookies Recipe, Be Sure to Pin It for Later!
Don’t let this delightful recipe get lost in your bookmarks! Pin it to your favorite Pinterest board so you can easily find it again for your next baking adventure, holiday celebration, or simply when a craving for red velvet strikes. Sharing is caring, and pinning helps spread the joy of these beautiful blossom cookies to fellow bakers!