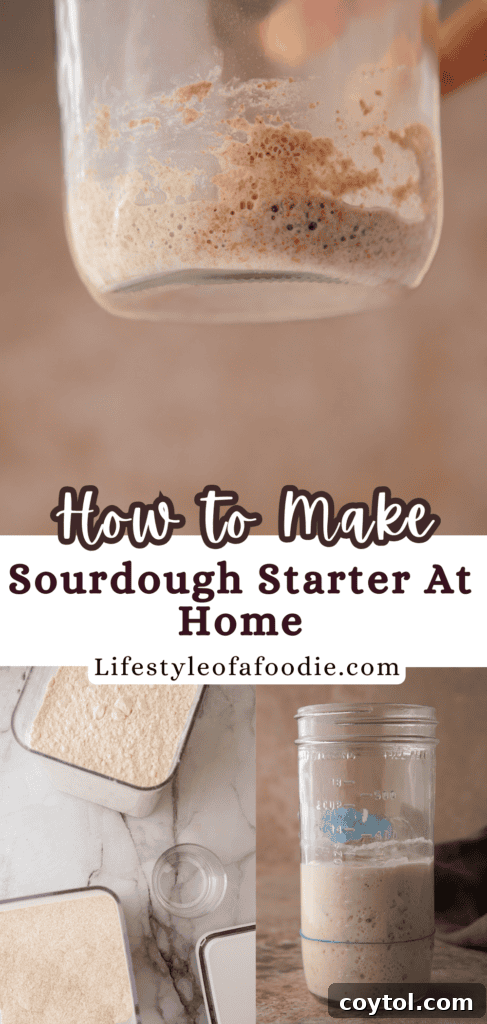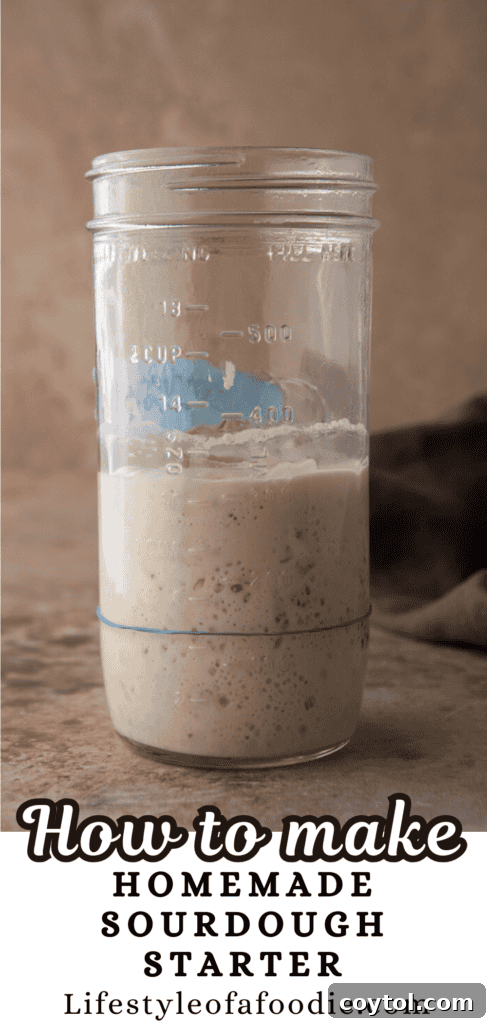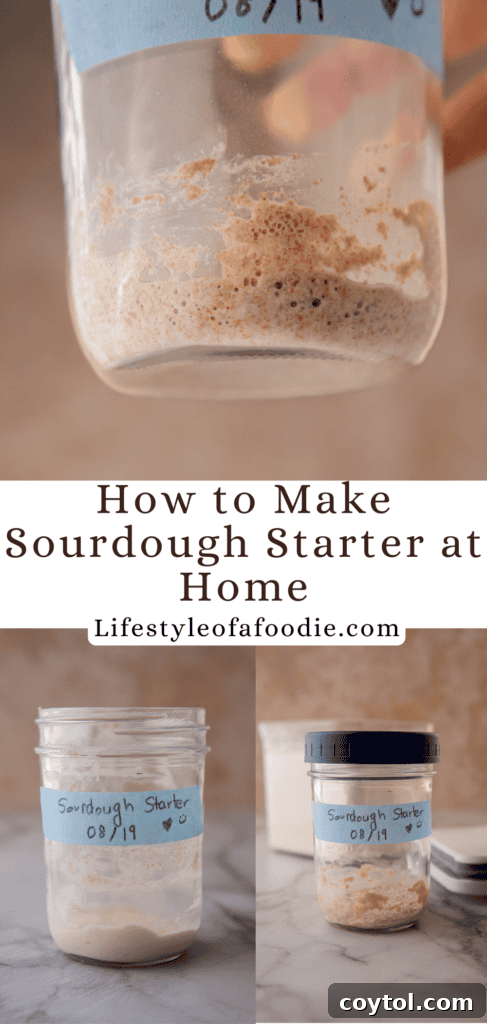
Embarking on the journey of making your own sourdough starter is an incredibly rewarding and delicious adventure! It’s the foundational element, the very heart, of the entire sourdough baking world. Whether you’re a seasoned baker looking to refine your starter, or a complete novice eager to bake your very first tangy, crusty loaf, this guide is designed to empower you every step of the way. With a little patience and the right techniques, you’ll soon have a thriving, active starter ready to transform your baking.
While the jump-to-recipe button is here for convenience, especially if you’re a returning baker, first-time sourdough makers are strongly encouraged to read the entire article. Understanding the science, tips, and troubleshooting advice will significantly increase your chances of success and enjoyment on this exciting baking journey!
The idea of creating your own sourdough starter at home can initially seem daunting, but it absolutely doesn’t have to be. That coveted result—those exquisitely tangy, crusty loaves adorned with massive air bubbles you’ve admired across social media—all begins with a robust and active sourdough starter. If you’re new to this fascinating craft, please rest assured: everyone starts from the beginning, and I’m here to provide clear, actionable guidance that will demystify the process for you.
In this comprehensive guide, I will walk you through the entire process of cultivating your very own sourdough starter from scratch. We’ll explore the easiest and most effective methods, ensuring you build a strong, resilient culture. By the time you reach the end of this article, you will be equipped with a bubbly, active sourdough starter, primed and ready to unleash its magic in your kitchen. Get ready to bake seriously flavorful bread, pizza crusts, pancakes, and a myriad of other sourdough delights whenever the craving strikes. Let’s embark on this wonderful journey together!
Should you find yourself here primarily searching for ways to utilize sourdough discard rather than creating a new starter, fret not! I have an array of fantastic recipes for you to explore. Check out my irresistible sourdough discard drop biscuits, this comforting sourdough discard cinnamon roll recipe, and for a sweet treat, these delightful sourdough discard chocolate chip cookies. These recipes are perfect for minimizing waste and maximizing flavor!
Why Should You Make Your Own Sourdough Starter?
Creating your own sourdough starter isn’t just a culinary endeavor; it’s a rewarding journey into the heart of traditional baking that offers a multitude of benefits:
- Superior Flavor Profile: Experience a depth of flavor unparalleled by commercially produced bread. The natural fermentation process, driven by wild yeasts and beneficial bacteria, imparts an amazingly tangy, complex, and nuanced taste to your bread that evolves with each bake. This unique taste cannot be replicated by commercial yeast, offering a truly artisanal experience.
- Enhanced Health Benefits: Sourdough bread is often easier to digest compared to conventional bread. The prolonged fermentation breaks down gluten and phytic acid, making the nutrients more bioavailable. Furthermore, sourdough generally has a lower glycemic index, which means it causes a slower, more stable rise in blood sugar levels, making it a better choice for many, including those managing blood sugar concerns.
- Remarkably Cost-Effective: Once established, maintaining a sourdough starter is incredibly economical. Your primary ingredients are simply flour and water. This means you can produce endless loaves of premium, artisanal bread right at home without incurring significant ongoing costs, offering substantial savings over time compared to buying specialty breads.
- Unleash Creative Control: Cultivating your own starter grants you complete artistic license over your bread’s flavor and texture. From the hydration level of your dough to the types of grains used, you dictate every aspect. I’ve personally experimented with adding various cheeses, nuts, seeds, and olives to my loaves, always yielding delicious and unique results. The possibilities for culinary innovation are truly boundless, allowing you to tailor your bakes to your exact preferences.
- Connect with Ancient Tradition: Sourdough baking boasts a rich history spanning thousands of years, predating commercial yeast. By engaging in this practice, you’re not just baking; you’re tapping into an ancient, sustainable food tradition. It’s a delightful way to bring a piece of culinary history into your modern kitchen, fostering a deeper connection to the food you create and the natural processes involved.
How Does a Sourdough Starter Work? The Science of Fermentation
At its heart, a sourdough starter is a dynamic, living culture—a vibrant community of wild yeast and lactic acid bacteria (LAB). These microscopic powerhouses are naturally present in the very flour you use and are abundant in our surrounding environment. When you combine flour and water, you create a hospitable environment for these microorganisms to awaken and begin their crucial work of fermentation.
The wild yeast, a key player in this symbiotic relationship, feeds on the complex sugars found within the flour. As it metabolizes these sugars, it produces carbon dioxide gas. This gas becomes trapped within the gluten network of your bread dough, creating those characteristic air bubbles and causing the dough to rise, giving sourdough its airy crumb. Simultaneously, the lactic acid bacteria get to work, producing various organic acids, primarily lactic and acetic acid. These acids are responsible for sourdough’s distinctive tangy flavor and play a vital role in strengthening the gluten structure of the dough, contributing to its chewiness and overall texture, as well as preserving the bread naturally.
When you incorporate this active starter into your bread dough, the yeast and bacteria continue their collaborative fermentation process. This extended fermentation is what not only leavens the dough but also meticulously develops the complex, nuanced flavors that define exceptional sourdough bread. It’s a slow, magical process that transforms simple ingredients into something truly extraordinary, making your bread both flavorful and uniquely digestible.
Essential Ingredients for Your Beginner Sourdough Starter Recipe
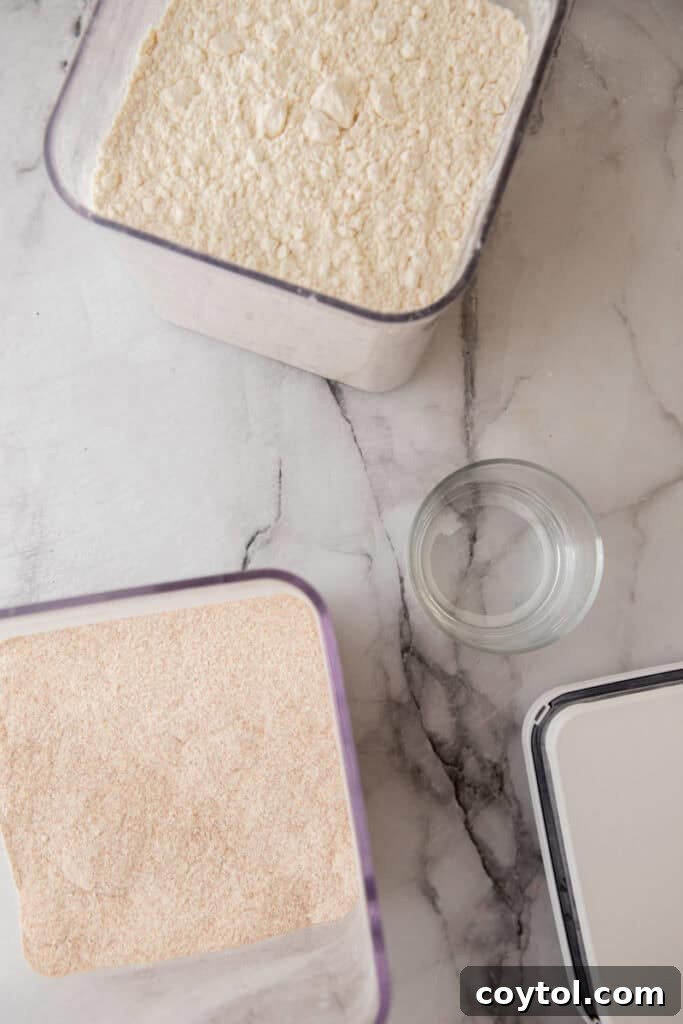
Crafting your own sourdough starter requires remarkably few ingredients, highlighting the simplicity and natural beauty of this ancient process. The core components are incredibly straightforward: equal parts flour and water. While the quantities can be adjusted to make as much or as little starter as you desire, for this beginner-friendly recipe, we’ll start with small, manageable amounts – typically a tablespoon of each – to make the initial stages easier to handle, observe, and avoid excessive waste as your starter develops.
- Unbleached Whole Wheat Flour (for Day 1): This is a critical ingredient for kickstarting your starter’s life. It’s imperative to use unbleached flour because trace amounts of chlorine found in bleached flour can be detrimental, potentially killing the delicate live cultures and necessary bacteria essential for successful fermentation and leavening. Whole wheat flour is particularly rich in nutrients, enzymes, and natural wild yeasts, providing a powerful initial boost to activate your starter by giving the microorganisms an abundant food source.
- Filtered Water: Just as important as the right flour is the quality of your water. Using filtered water is an absolute must for cultivating a healthy and vigorous sourdough starter. Standard tap water often contains chlorine or chloramine, chemicals added for purification, which can inhibit or even kill the wild yeasts and beneficial bacteria trying to establish themselves. Filtered water provides a cleaner, more natural, and friendlier environment, allowing these vital microorganisms to grow and thrive without interference, leading to a more active and robust starter.
- Unbleached All-Purpose Flour (for subsequent feedings): After the initial activation with whole wheat flour, we transition to using unbleached all-purpose flour for continuous feedings. This strategic switch helps maintain the starter’s activity and strength while also making the process more consistent and less wasteful. All-purpose flour is still nutritious enough to sustain the starter once established, and it creates a more manageable consistency for most bakers. We’ll delve deeper into the rationale behind this transition later in the article.
What If I Don’t Have Filtered Water? Practical Alternatives
While filtered water is highly recommended, not having it shouldn’t deter you from starting your sourdough journey. Here are some effective alternatives to ensure your starter gets the best possible start:
- Spring Water: An excellent natural alternative, as it typically contains beneficial minerals that can further nourish and support the growth of your starter. Always check the label to ensure it’s natural spring water and doesn’t have any added chlorine or chemicals.
- Boiled and Cooled Tap Water: If spring water isn’t an option, you can easily remove chlorine from tap water by boiling it vigorously for 10-15 minutes. This process allows the chlorine to evaporate. Crucially, allow the water to cool completely to room temperature before using it, as hot water can severely harm or kill the delicate yeast and bacteria in your starter.
- Distilled Water with Added Minerals: Distilled water is incredibly pure, meaning it’s free of impurities but also lacks beneficial minerals. If this is your only option, you’ll need to reintroduce some nutrients. Add a tiny pinch of non-iodized sea salt (avoid table salt, which often contains anti-caking agents and iodine that can interfere with fermentation) or a few drops of food-grade mineral supplements. This introduces essential nutrients that your starter needs to flourish.
Taking this simple step to ensure your water is chlorine-free and ideally mineral-rich will significantly contribute to creating the best possible conditions for your sourdough starter to thrive, leading to a more active, reliable, and vigorous culture.
Step-by-Step: How to Make a Beginner Sourdough Starter
Making your own sourdough starter is a gratifying process that unfolds over several days. Each day brings new observations and changes as your mixture of flour and water transforms into a vibrant, living culture. Follow these detailed daily instructions to cultivate a strong and active starter. Remember, patience is your most valuable ingredient, and consistent care will lead to success!
Day 1: The Genesis – Getting Started with Your Sourdough Starter
Preparing to create your sourdough starter is simpler than you might imagine. All you truly need are a few basic ingredients, some standard kitchen tools, and a healthy dose of patience. Over the next week to ten days, you’ll witness a remarkable transformation as your starter comes to life, bubbling and growing as the fermentation process takes hold. This initial phase sets the foundation for a strong, active starter that will eventually yield the most delicious homemade bread you’ve ever tasted. Pay close attention to the specific steps for each day, as the requirements will evolve with your starter’s development. Let’s begin this exciting first step!
These are the foundational step-by-step instructions to create your easy sourdough bread starter. Continue reading beyond these initial steps to learn how to properly care for and maintain it once it’s established.
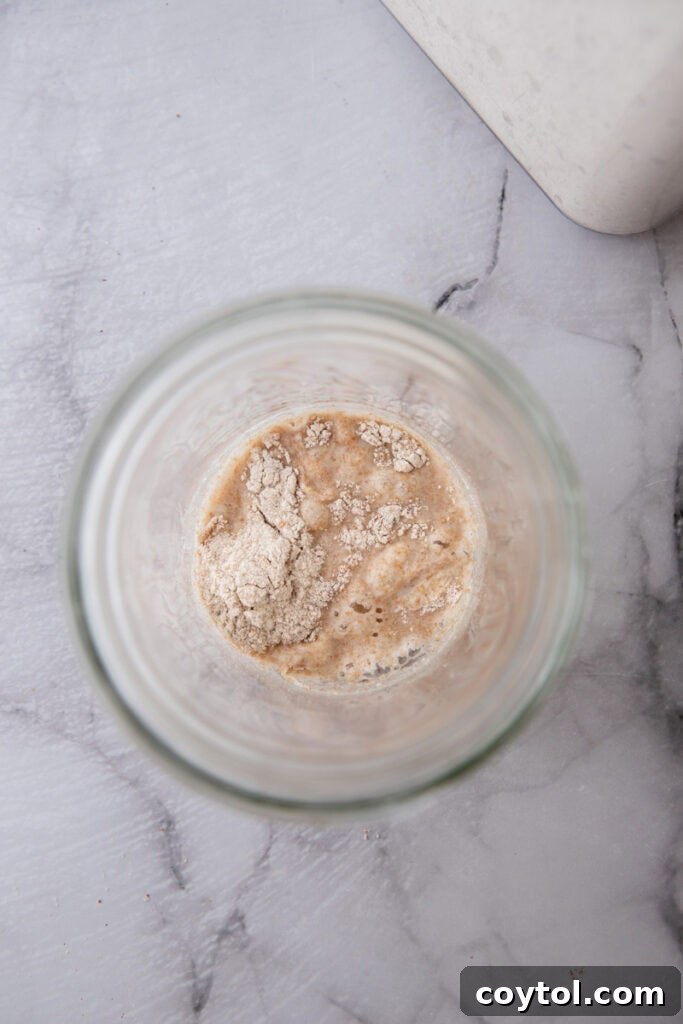
- Combine Ingredients: In a small, very clean glass jar or non-reactive container (a 16-24 oz Mason jar is ideal), combine 1 tablespoon (approximately 15 grams or 0.5 ounces) of unbleached whole wheat flour with 1 tablespoon (approximately 15 grams or 15 milliliters) of filtered or dechlorinated water.
- Mix Thoroughly: Stir the mixture vigorously with a clean non-metal utensil (a spoon or spatula works well) until there are absolutely no dry spots of flour remaining. You should achieve a thick, smooth, paste-like consistency, similar to a thick pancake batter or fresh glue.
- Cover Loosely: Cover the jar loosely. This is crucial for allowing air to circulate, which is necessary for the initial stages of yeast activity, and for gases produced by fermentation to escape, preventing pressure buildup. Simultaneously, it protects your starter from airborne contaminants. A coffee filter, secured over the mouth of the jar with a rubber band, works perfectly. Alternatively, you can use a clean breathable cloth or simply place the lid gently on top without sealing it tightly.
- Find a Warm Spot: Place your covered jar in a consistently warm spot in your kitchen. An ideal temperature range for rapid activation is between 70-75°F (21-24°C). This warmth is vital for encouraging the wild yeast and beneficial bacterial activity to kick off fermentation.
Expert Tip for Day 1: If your home tends to be cooler than the ideal temperature range, don’t despair! You can easily create a warmer microclimate for your starter. One effective method is to place the jar inside your oven with only the oven light turned on (ensure the oven itself remains OFF). The low wattage of the oven light generates just enough gentle warmth to foster activity. Another simple trick is to wrap the jar snugly with a kitchen towel or blanket to help insulate it and retain warmth, simulating a cozier environment.
Days 2-3: First Signs of Life – Observing and Feeding Your Starter
The next couple of days are exciting as you’ll begin to see the first tangible signs that your starter is coming to life! While activity may still be subtle, these early indicators are positive steps towards a vibrant culture.
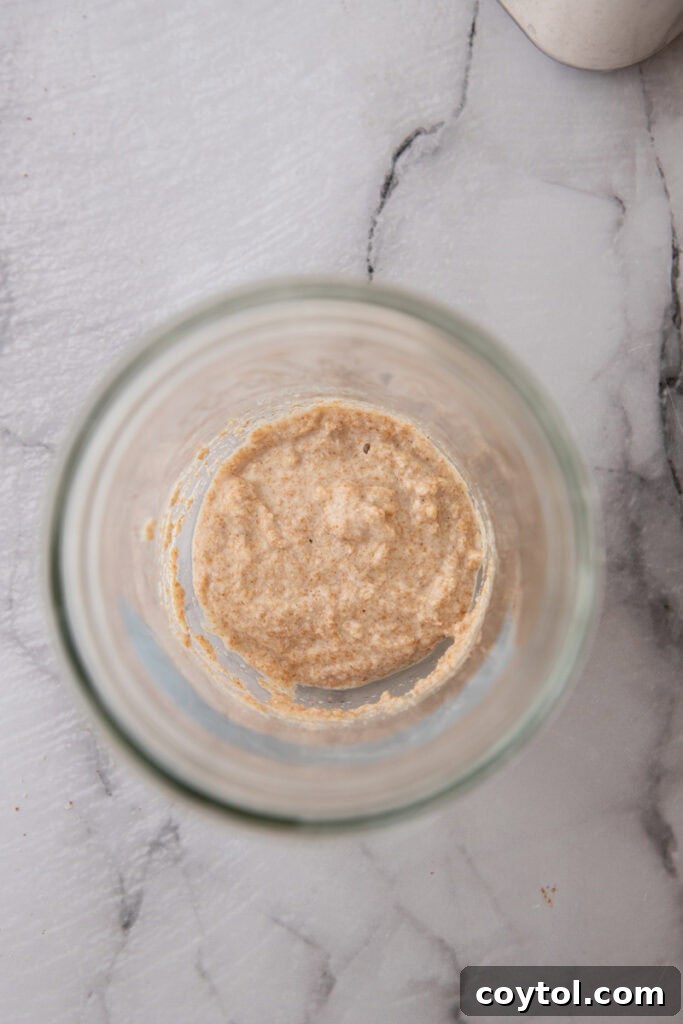
- Check for Bubbles: After approximately 24 hours from your initial mixing (on Day 2), carefully inspect the surface and sides of your starter for tiny bubbles. These effervescent pockets are excellent indicators of initial fermentation activity by the wild yeasts and bacteria. Don’t worry if there aren’t many yet, or if they appear only sporadically; any signs are positive and show your starter is awakening!
- Time for Feeding: It’s now time for the first feeding. First, discard about half of the starter mixture (roughly 1 tablespoon or 15 grams). This step might feel wasteful initially, but it’s essential to manage the volume of your starter, prevent it from becoming overly acidic, and concentrate the beneficial microorganisms, ensuring they have fresh food and a competitive advantage.
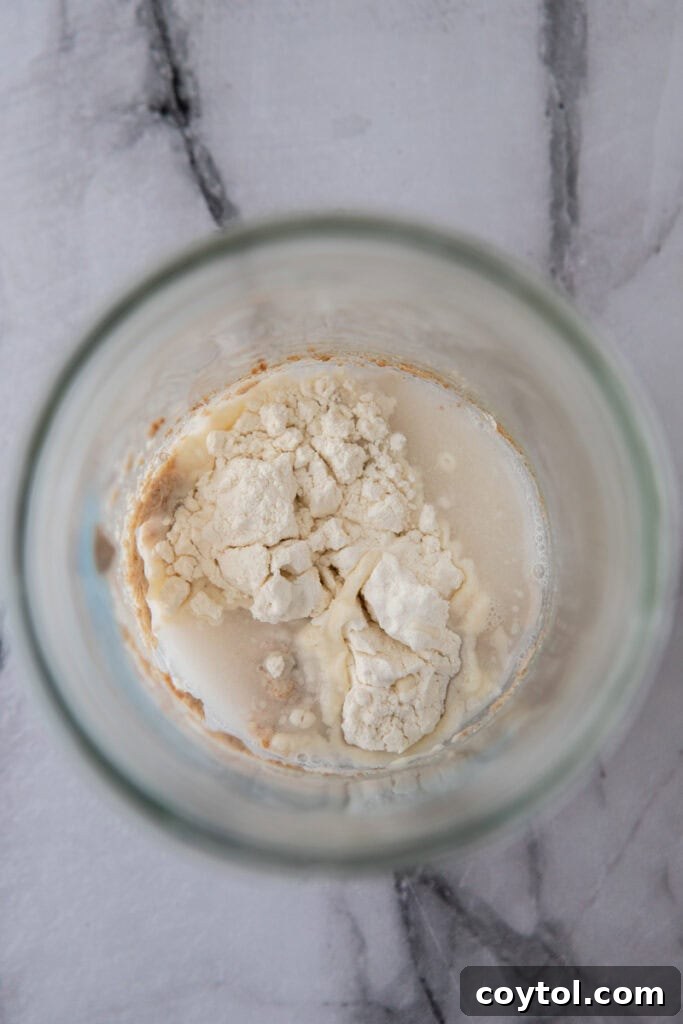
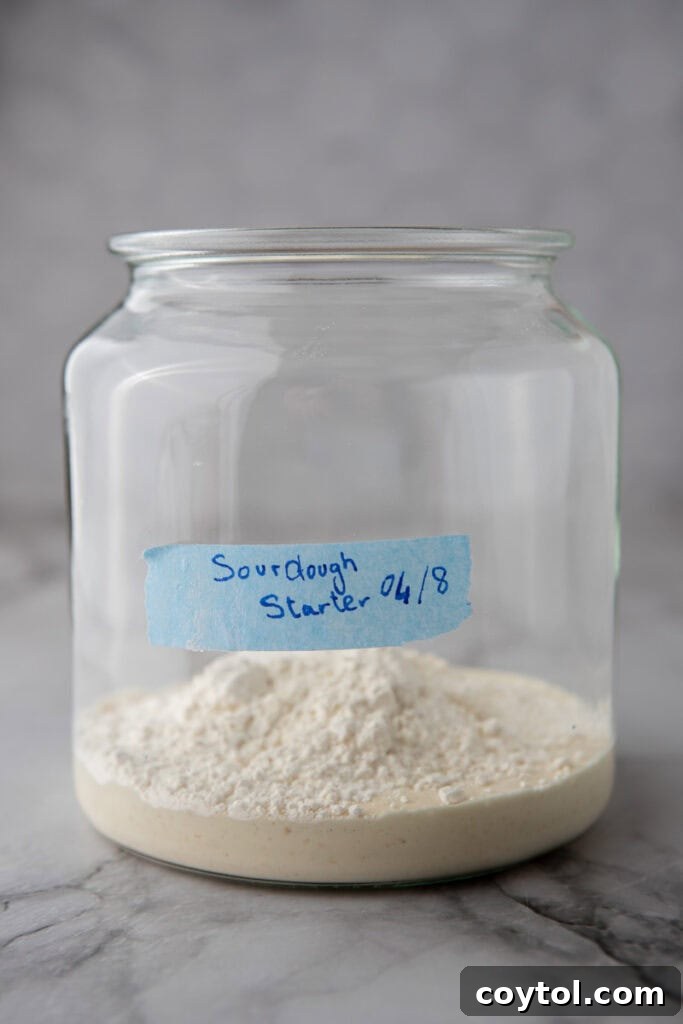
- Add New Flour and Water: To the remaining starter, add 1 tablespoon (15g / 0.5 oz) of unbleached all-purpose flour and 1 tablespoon (15g / 15ml) of filtered water. Stir everything thoroughly with a clean utensil until well combined and smooth, ensuring no dry clumps remain.
- Cover and Return: Cover the jar loosely again (using your coffee filter or cloth) and place it back in its warm spot on the kitchen counter.
- Repeat for Day 3: Perform the same exact feeding routine (discard half, feed with 1 tbsp unbleached all-purpose flour and 1 tbsp water) after another 24 hours (on Day 3). Ensure your starter remains in a nice, cozy environment to encourage its continued growth and activity.
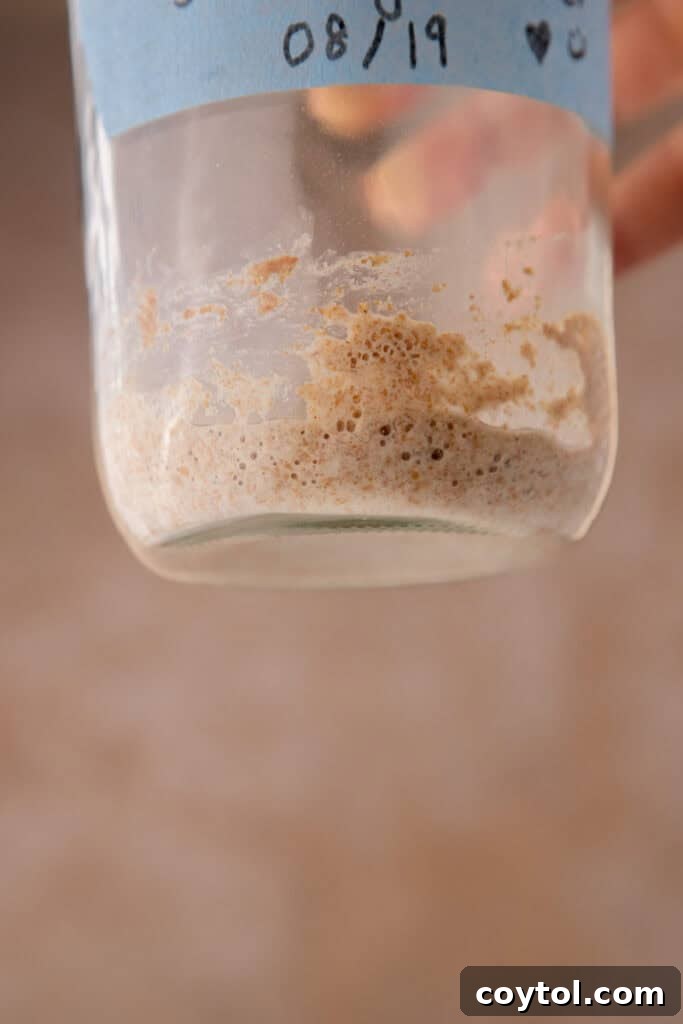
Important Note for Days 2-3: At this stage, you might notice a thin layer of darker liquid forming on top of your starter. This liquid, often called “hooch,” is a natural byproduct of fermentation and typically indicates that your starter is hungry and has consumed most of its food. Don’t be alarmed; hooch can range from clear to dark brown. Simply stir it back into the mixture before discarding half and feeding it again. Hooch signals that your starter needs more food to thrive and is a normal part of the process, especially in early stages or if feedings are slightly delayed.
Days 4-5: Building Strength and Observing Aroma Changes
As your starter matures through Days 4 and 5, you’ll observe increasing activity and the development of its unique, evolving aroma. This is a crucial period for consolidating its strength.
- Consistent Daily Feeding: Continue the daily routine without fail: every 24 hours, discard half of your starter and then feed it with 1 tablespoon (15g / 0.5 oz) of unbleached all-purpose flour and 1 tablespoon (15g / 15ml) of lukewarm filtered water. Using lukewarm water (around 75°F / 24°C) can help stimulate yeast and bacterial activity without shocking the culture, especially if your kitchen is a bit cooler.
- Stir, Cover, and Rest: Stir the mixture exceptionally well to incorporate the new flour and water fully, cover it loosely, and return it to the same warm, stable spot at room temperature. Consistency in temperature and feeding schedule is paramount for steady and robust development at this stage.
Key Observations for Days 4-5: You should notice a significant increase in bubbles, and your starter might begin to show a slight but noticeable rise in volume after feeding, before eventually falling back down. This ‘rise and fall’ cycle, even if subtle, is an excellent sign of increasing vitality and a healthy microbial population. Furthermore, the aroma of your starter will continue to evolve dramatically. You may initially detect a very strong, pungent, or even slightly putrid sour smell – resembling anything from dirty socks to strong cheese or nail polish remover. Don’t be alarmed; this is completely normal during the early stages as various bacteria compete, establish themselves, and produce different metabolic byproducts. With continued consistent feeding, this less pleasant odor will gradually dissipate and be replaced by a more appealing, distinctly tangy, yeasty, and even slightly fruity aroma. Trust the process and keep feeding!
Days 6-7: Consistency and Accelerated Growth – Twice Daily Feedings
By now, your starter should be quite active and vigorous, ready for more frequent feedings to rapidly build its strength and readiness for baking. This phase is about accelerating its metabolism.
- Transition to Twice Daily Feedings: At this stage, your starter is likely quite hungry and active, consuming its food more quickly. Begin feeding it twice a day – once in the morning and once in the evening. Aim for roughly 10-12 hours between each feeding to keep it consistently nourished.
- Discard and Feed Each Time: With each feeding (both morning and evening), discard half of the mixture, then add 1 tablespoon (15g / 0.5 oz) of unbleached all-purpose flour and 1 tablespoon (15g / 15ml) of filtered water. Maintain the 1:1:1 ratio (starter:flour:water) by weight if using a scale for optimal results.
- Stir, Cover, and Warm Spot: Stir thoroughly, ensuring no dry spots, cover loosely, and place it back in its warm environment. Continue to ensure consistent warmth.
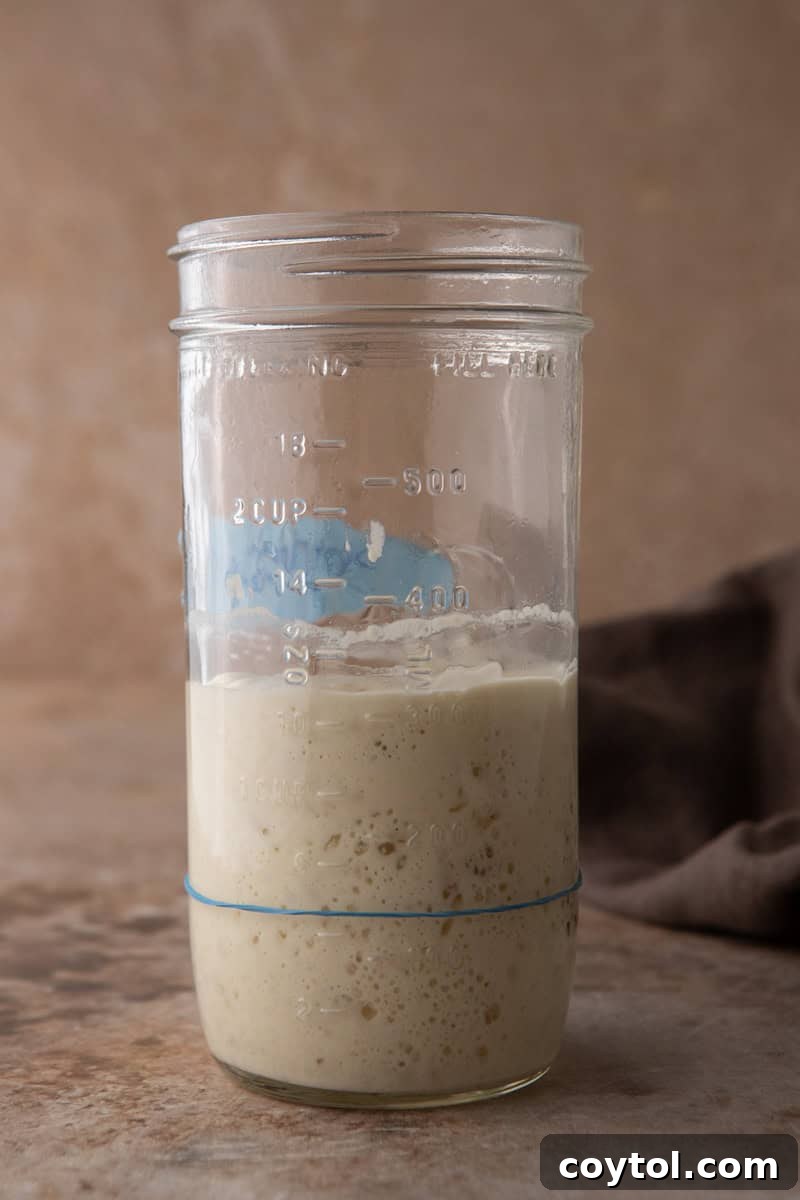
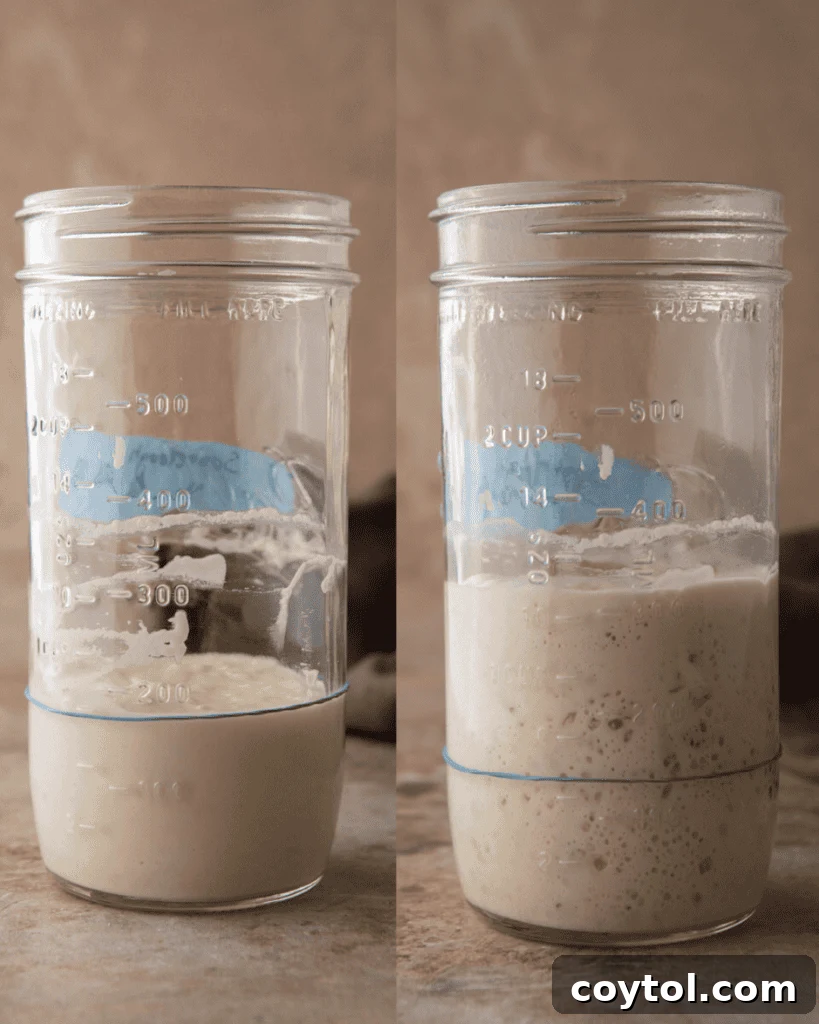
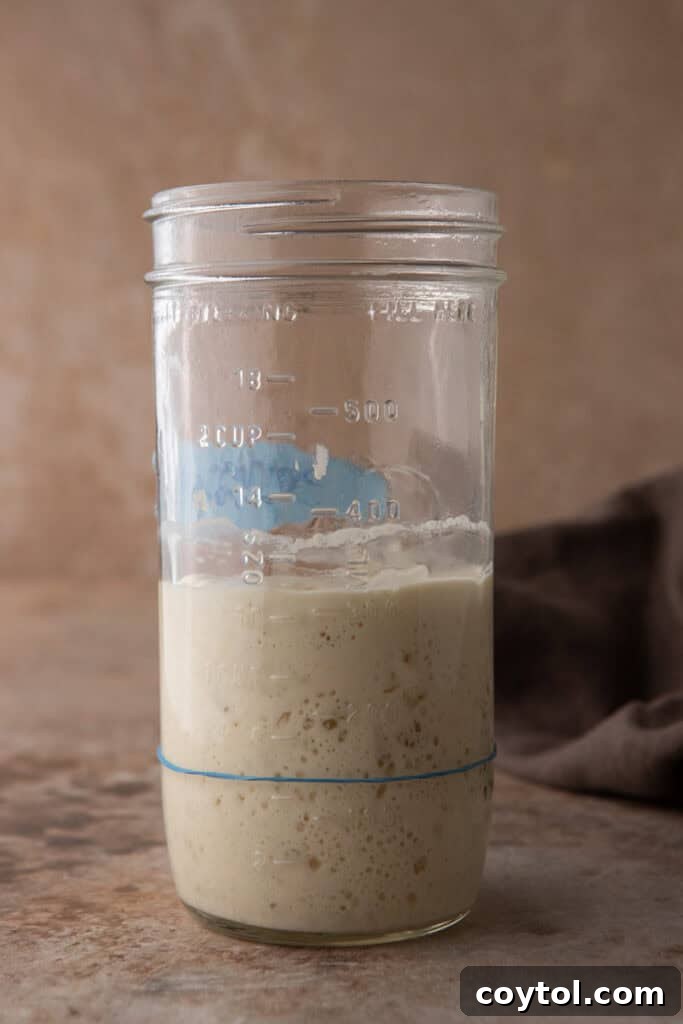
Crucial Tip for Days 6-7: As your starter becomes genuinely active and robust, it should reliably double in size within 4-6 hours after each feeding. To easily track its growth and observe this crucial indicator, place a rubber band around the jar at the level of the starter immediately after feeding. This allows you to visually observe how much it rises before it begins to fall back down, indicating it has peaked and is ready for its next meal. Consistent doubling is a key sign of readiness for baking.
Days 8-10: The Final Stage – Your Starter is Ready to Use!
Congratulations! By this point, your sourdough starter should be consistently exhibiting all the signs of a mature, robust, and highly active culture. This is the culmination of your patience and consistent care.
- Verify Readiness: Your starter should now be reliably doubling or even tripling in size within 4-6 hours of each feeding. It should possess a distinctly pleasant, tangy, and slightly sweet sour aroma (no more off-putting smells!). Furthermore, it should be visibly teeming with bubbles throughout its structure, indicating strong carbon dioxide production. A light, airy, and spongy texture when stirred is also a great sign.
- Ready for Baking!: Once these characteristics are consistently observed over a few feeding cycles, your robust sourdough starter is officially ready to be incorporated into your favorite baking recipes! It has developed the strength and flavor necessary to leaven bread beautifully.
While the 8-10 days mentioned serve as a general estimate for a mature starter, the actual timeline can vary. Factors like the ambient temperature in your kitchen, the specific microbial activity in your environment, and even the flour brand can influence how quickly your starter matures. It might take anywhere from 1 to 2 weeks for your starter to reach peak strength and consistency. As long as your sourdough starter doesn’t show any signs of spoilage (like fuzzy mold), continue with your regular discarding and feeding routine. The longer you feed and nurture it, the stronger, more resilient, and more flavor-rich it will become. You will definitively know your starter is ready to use when you consistently observe it doubling in size after feeding and then gradually falling back down, indicating a healthy, vigorous rise-and-fall cycle. A successful “float test” (described in the FAQ section) is also a strong confirmation.
Troubleshooting Tips & Frequently Asked Questions for Your Sourdough Starter
Even with careful attention, sourdough starters are living organisms and can present a few quirks or challenges. Don’t be discouraged! Here’s a comprehensive guide to common issues and their effective solutions, ensuring your starter stays healthy, active, and productive for years to come.
Why Start with Whole Wheat Flour and Then Switch to All-Purpose Flour?
This method is a common and highly effective strategy for cultivating a strong sourdough starter, especially for beginners. The rationale is quite simple and scientific, leveraging the strengths of different flours:
- Jumpstarting with Whole Wheat Flour: On Day 1, we utilize unbleached whole wheat flour because it contains a significantly higher concentration of nutrients, particularly bran and germ, compared to refined all-purpose flour. These additional components act as a powerful “super-food” for the naturally occurring wild yeasts and bacteria, providing them with an abundance of energy and diverse food sources to rapidly kickstart the fermentation process. This initial boost helps establish a robust and diverse microbial community quickly, giving your starter a strong foundation.
- Transitioning to All-Purpose Flour: After the initial activation phase with whole wheat, we strategically switch to feeding the starter with unbleached all-purpose flour. This transition serves several practical purposes: it helps to maintain a consistent activity level and predictable behavior, prevents the starter from becoming overly dense or sticky (which can happen with continuous whole wheat use), and is generally more cost-effective for ongoing maintenance. While whole wheat flour is excellent for initial vigor, all-purpose flour provides a steady and reliable food source for the established culture, leading to a strong, active, and manageable starter without excessive waste.
So, to reiterate the recommended feeding schedule:
- Day 1: Use unbleached whole wheat flour exclusively for the initial mix.
- Days 2-10 (and beyond): Use unbleached all-purpose flour for all subsequent daily feedings.
This combination strategy ensures you develop a healthy and active starter with minimal fuss and waste, benefiting from the rapid activation of whole wheat and the consistent maintenance of all-purpose. If you wish to further strengthen your starter, impart deeper flavors, or explore different flour characteristics, you can certainly continue feeding it with whole wheat flour, or experiment with a blend of flours. A common and highly effective approach for a quicker activation and a deeper, more complex flavor is to use a 1:1 ratio (by weight) of unbleached all-purpose flour to unbleached whole wheat flour for your regular feedings. When you’re ready, you can gradually transition back to feeding your starter exclusively with unbleached all-purpose flour if you prefer a lighter crumb in your bread or wish to avoid the specific characteristics of whole wheat in your final bake.
Experimenting with Different Flours Once Your Starter is Active
Once your sourdough starter has achieved consistent activity and strength, the fun truly begins with experimenting! Introducing different types of flour can dramatically alter the flavor, texture, and fermentation characteristics of your starter and, consequently, your baked goods. This allows for endless customization and flavor exploration. Here’s how to approach it:
- Gradual Transition is Key
- Start Small: Never make a drastic change all at once. Begin by replacing only a small percentage (e.g., 10-20%) of your usual feeding flour (e.g., all-purpose) with the new flour. For instance, if you typically feed your starter with 50g of all-purpose flour and 50g of water, try using 40g all-purpose, 10g of the new flour (e.g., rye), and 50g water.
- Observe and Adjust: Closely monitor your starter’s response over a few feedings. How quickly does it rise? What is the texture like? Does the aroma change? If you like the results and your starter adapts well, you can gradually increase the proportion of the new flour over several subsequent feedings, allowing your starter to adapt gently without shock.
- Creating Flour Blends
- Combine for Complexity: Don’t feel limited to a single flour type. Many experienced bakers achieve incredible results by blending different flours. A mix of whole wheat and all-purpose flour, for example, can impart a beautiful nutty depth and increased robustness while maintaining a manageable consistency.
- Play with Ratios: Experiment with various ratios. A 50/50 blend of two different flours is a popular starting point, but you might find a 70% all-purpose/30% rye or another specific combination works best for your specific starter and desired outcome. Each blend will yield unique characteristics in both starter activity and final bread flavor.
- Exploring Unique Flour Varieties
- Rye Flour: A favorite among sourdough enthusiasts! Rye flour is incredibly rich in enzymes, nutrients, and natural wild yeasts, which often leads to very vigorous and fast-fermenting starters. Even a small addition of rye (e.g., 10-20% of your feeding flour) can significantly boost your starter’s activity and contribute a distinctively earthy, robust, and complex flavor to your bread. Rye starters tend to be wetter and stickier.
- Whole Wheat Flour: Beyond its initial activation role, regularly feeding with whole wheat flour can make your starter incredibly robust, add a pronounced nutty, deeper flavor profile, and often a denser crumb to your bread. It’s a powerhouse for nutrition for your starter.
- Ancient Grains (Spelt, Kamut, Einkorn): These flours offer a fascinating array of unique flavors and textures that can elevate your sourdough. They can sometimes be more challenging to work with due to different gluten structures compared to modern wheat, but can result in loaves with wonderfully complex and distinct profiles. Spelt, for instance, often contributes a slightly sweet, mild, and nutty flavor.
- Gluten-Free Flours: For those interested in gluten-free baking, establishing a gluten-free sourdough starter is entirely possible! Flours like brown rice, sorghum, buckwheat, or a gluten-free all-purpose blend can be used. Be aware that these flours behave very differently from wheat-based flours, often requiring different hydration levels and offering unique textures and fermentation characteristics. For a comprehensive guide, I highly recommend consulting specialized resources like this how-to-make gluten-free sourdough starter guide.
- Always Monitor Hydration Levels
- Adjust Water as Needed: Different flours have varying absorption rates. Whole grain flours, such as whole wheat and rye, typically require more water than refined all-purpose flour to achieve the same consistency. Always pay close attention to your starter’s texture after feeding. If it seems too thick and stiff, add a little more water (5-10g at a time); if it’s too runny, incorporate a touch more flour until you reach a consistency similar to thick pancake batter. Consistency is key for consistent results.
- Document Your Discoveries
- Keep Detailed Notes: The best way to learn and master sourdough, especially during experimentation, is to keep a baking journal. Record the types of flour you use, the precise ratios (by weight!), the water temperature, ambient kitchen temperature, and how your starter responds (e.g., rise time, bubble activity, aroma, texture). This data is invaluable for future reference.
- Evaluate Baking Results: Don’t forget to track how these flour changes ultimately affect your final baked bread in terms of flavor, texture, and crumb structure. This iterative process will help you discover your favorite combinations and continually refine your sourdough technique.
- Consider a Separate Starter for Testing
- Mitigate Risk: If you plan to make a dramatic shift (e.g., converting your entire wheat-based starter to a gluten-free one, or trying a very experimental flour), it’s always wise to take a small portion of your established, reliable starter and create a new, separate one with the new flour. This way, you can experiment freely without jeopardizing your original, well-loved starter.
Experimenting with various flours is not only an excellent way to customize your sourdough to perfectly suit your preferences but also a fantastic avenue to broaden your baking repertoire and explore an exciting world of flavors and textures in your homemade bread.
Sourdough Starter Hydration: Suggested Ratios for Different Flours
Maintaining the correct hydration level is fundamental to a healthy and active sourdough starter. Hydration refers to the ratio of water to flour, typically measured by weight, not volume. Different flours absorb water at different rates due to their composition (e.g., protein, fiber content), so adjusting your ratio is key to achieving the ideal consistency for optimal fermentation. Here are some commonly suggested ratios for active starters:
- All-Purpose Flour: Aim for a 1:1 ratio of flour to water by weight (e.g., 50g flour + 50g water). This typically yields a smooth, thick pancake-batter-like consistency, which is ideal for most applications and easy to work with.
- Whole Wheat Flour: Whole wheat flour is more absorbent due to its bran and germ content, which soak up more water. Start with a slightly higher hydration ratio, such as 1:1.1 (e.g., 50g flour + 55g water), to ensure it’s not too stiff or dry. Depending on the specific brand and grind, you might even go up to 1:1.2.
- Rye Flour: Rye flour is exceptionally absorbent and also ferments very quickly. For a looser, well-hydrated, and active rye starter, aim for a 1:1.2 or even 1:1.3 ratio (e.g., 50g flour + 60g water). Rye starters tend to be stickier and less cohesive than wheat starters, so a higher hydration helps with manageability and activity.
Practical Hydration Tips:
- If your starter consistently feels too thick and stiff, hindering its ability to rise and bubble effectively, gradually add a small amount of water (5-10g at a time) during feedings until it achieves the desired looser consistency. A very stiff starter can make it difficult for gas to escape, resulting in less observable activity.
- Conversely, if your starter is too runny, indicating an excess of water (which can dilute the flour’s nutrients), mix in a little more flour during your next feeding until it thickens to a consistency that resembles thick batter. Adjustments should always be made incrementally.
| Type of Flour | Common Hydration Needs | Example (by weight) | Notes |
|---|---|---|---|
| All-Purpose Flour | 1:1 (equal flour to water) | 50g flour + 50g water | Produces a smooth, thick pancake-batter-like consistency. Ideal for a balanced starter. |
| Whole Wheat Flour | 1:1.1 (slightly more water) | 50g flour + 55g water | Whole wheat absorbs more water due to its bran and germ; this ratio ensures the right consistency. |
| Rye Flour | 1:1.2 (even more water) | 50g flour + 60g water | Rye flour is very absorbent and ferments faster, often creating a looser, stickier starter. |
Additional Important Hydration Tips for Success:
- Begin with All-Purpose and Whole Wheat: Especially when first establishing your starter, it’s best to stick with unbleached all-purpose and unbleached whole wheat flours. These are generally easier to manage and less temperamental, allowing you to get a feel for the process. You can confidently experiment with more unique flours once your starter is well-established and consistently active.
- Always Use a Kitchen Scale: Precision is paramount in sourdough baking and starter maintenance. Volume measurements (like cups and tablespoons) can be highly inaccurate due to differences in flour density, how tightly packed it is, and even humidity. A digital kitchen scale ensures consistent and accurate flour-to-water ratios, which is absolutely crucial for a healthy, predictable, and robust starter.
- Mind Your Water Temperature: Lukewarm water (ideally around 75°F / 24°C) is best for feeding your starter. Water that’s too cold will significantly slow down yeast activity and fermentation, while water that’s too hot can kill the delicate microorganisms in your starter, effectively halting fermentation. Think of it as creating a comfortable bath for your microscopic friends.
Why Does My Sourdough Starter Not Have Bubbles? Common Causes and Solutions
A lack of bubbles can be disheartening, especially for new sourdough bakers who eagerly await signs of life. However, it’s a common challenge, and usually, there’s a straightforward explanation. Here are the most frequent reasons your starter might be sluggish and how to encourage it to perk up:
- Insufficient Temperature: Sourdough starters are living cultures that thrive in warmth. If your kitchen environment is too cold (typically below 70°F/21°C), the wild yeast and bacteria will become dormant and inactive, leading to minimal or no bubble production. Cold temperatures significantly slow down their metabolism.
- Solution: Relocate your starter to a consistently warmer spot. Ideal locations include near a sunny window (but out of direct, intense sunlight which can overheat it), on top of your refrigerator (where heat from the motor rises), or even inside a turned-off oven with just the oven light on to provide gentle warmth. Consider wrapping the jar in a towel or placing it in a proofing box for insulation.
- Inconsistent Feeding Schedule or Underfeeding: Your starter needs regular nourishment to stay active and productive. If it’s not being fed frequently enough (e.g., you miss a day) or with adequate amounts of fresh flour, the yeast will consume all available sugars and go dormant, ceasing bubble production. A hungry starter will be less active.
- Solution: Ensure you are feeding your starter consistently according to the daily schedule outlined in the recipe. For a new starter, this means every 24 hours. If it’s still sluggish after a few days, try increasing feedings to every 12 hours. Always feed with equal parts (by weight) fresh flour and water.
- Incorrect Flour Type: The type of flour profoundly affects starter activity. Whole-grain flours (like unbleached whole wheat or rye) contain more nutrients, enzymes, and beneficial microorganisms, making them ferment more quickly and vigorously. Refined white flours have less of these initial boosters.
- Solution: Always use unbleached flour. If you’re using only white all-purpose flour and seeing no bubbles in the early stages, try switching to unbleached whole wheat or a mix of whole wheat and all-purpose for a few feedings to give it a powerful boost.
- Poor Water Quality: Tap water in many regions contains chlorine or chloramine, chemicals added to purify water, but which are detrimental to the sensitive wild yeasts and bacteria in your starter. These chemicals can inhibit or kill the microorganisms.
- Solution: Switch to filtered water, bottled spring water, or tap water that has been boiled and allowed to cool completely to room temperature. This effectively removes chlorine and creates a more hospitable environment for your starter to thrive.
- Patience is Key: Sometimes, a new starter simply requires more time to develop its robust microbial population. It can take up to a week, or even slightly longer in cooler environments, for a new starter to become fully active and consistently bubbly. Early stages often show little visible activity.
- Solution: Be patient! Maintain a consistent feeding schedule and optimal temperature. Continue nurturing it, and eventually, you will see results. Every starter develops at its own pace.
- Lack of Air Circulation: While you don’t want contaminants, completely airtight sealing can sometimes hinder fermentation by creating an overly anaerobic environment or trapping unwanted gases. Oxygen is initially beneficial for yeast growth.
- Solution: Ensure your jar is covered loosely (e.g., with a coffee filter and rubber band or a lid simply resting on top, not sealed). Also, try giving your starter a good stir before feeding; this can help incorporate oxygen, which is beneficial for the initial stages of yeast growth, and redistribute nutrients.
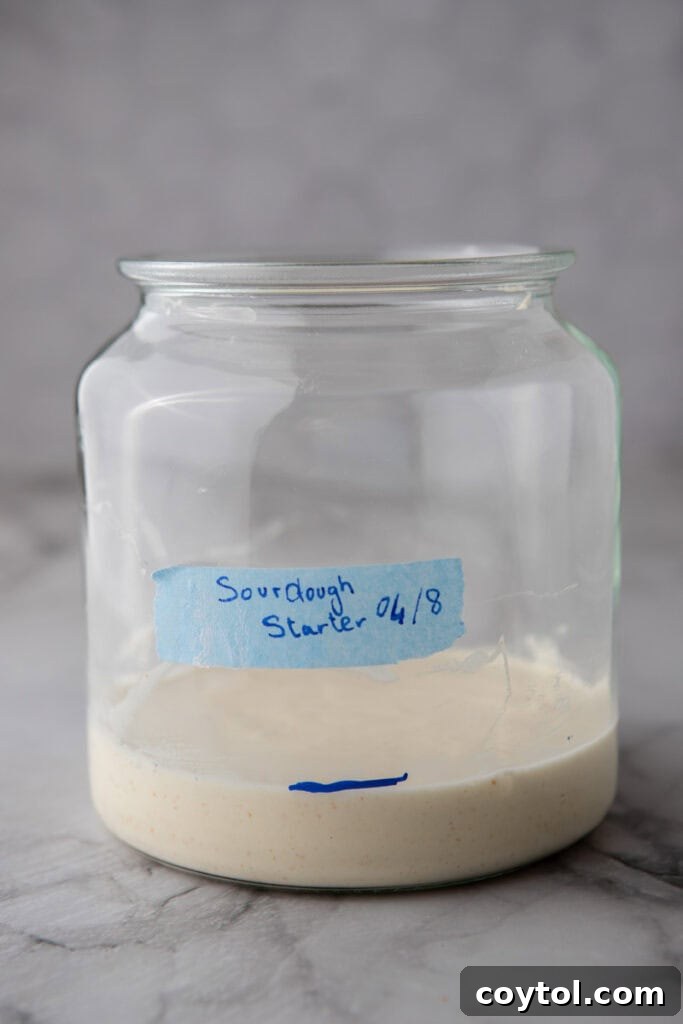
Why is My Sourdough Starter Too Runny? Solutions for Over-Hydration
If your sourdough starter consistently appears too thin or watery after feeding, it’s a common issue that often indicates an imbalance or environmental factor at play. A runny starter can be less effective at leavening bread. Here’s how to address it:
- Incorrect Flour-to-Water Ratio: This is the most prevalent cause. A healthy, standard starter (often referred to as 100% hydration) should have equal parts flour and water by weight. If you’re relying solely on volume measurements (like measuring cups), it’s incredibly easy to inadvertently add more water than flour, leading to a runny consistency. Flour packs differently than water pours.
- Solution: Invest in and consistently use a digital kitchen scale for precise measurements of both flour and water. Adjust your next feeding by adding slightly more flour than water (e.g., 55g flour to 50g water) until the consistency thickens to that of a thick pancake batter.
- Type of Flour Used: Different flours have distinct absorption rates. Low-protein or highly refined flours (like some bleached white flours) absorb less water than whole-grain or high-protein flours. If you’re using a flour with lower absorption capabilities, your starter will naturally be thinner with a 1:1 ratio.
- Solution: Consider incorporating a small amount of higher-protein flour, like unbleached bread flour, or mixing in a bit of whole wheat or rye flour, which are naturally more absorbent, to help thicken your starter and improve its structure.
- Excessively Warm Environment: A very warm kitchen can accelerate fermentation, causing the yeast and bacteria to consume the flour sugars too rapidly. This rapid breakdown of flour and the increased production of acids can lead to a thinner, more liquid consistency, indicating a “hungry” starter that’s peaking and then falling quickly.
- Solution: If your kitchen is particularly hot, try moving your starter to a slightly cooler location (e.g., a pantry or a cooler spot on the counter). You might also need to increase your feeding frequency to keep up with its heightened metabolism, preventing it from becoming too liquid before its next meal.
- Hungry Starter (Peak Activity & Collapse): An active starter will rise significantly after feeding, reaching a peak, and then gradually thin out and collapse as it consumes its food supply and gets hungry again. This thinning is a natural part of its cycle and indicates it’s ready for another feeding.
- Solution: If you consistently observe your starter peaking and then becoming very runny within a few hours, it’s a strong sign it needs more frequent feedings. Transition to feeding it twice a day (every 12 hours) to keep it consistently strong, active, and at its optimal consistency, catching it closer to its peak.
Why is My Sourdough Starter Too Thick? Solutions for Under-Hydration
Conversely, if your sourdough starter feels overly dense, stiff, or paste-like after feeding, it typically indicates insufficient hydration or a slower metabolic rate. A starter that is too thick can hinder bubble formation and rise, making it less effective for baking. Here’s how to address a thick starter:
- Incorrect Flour-to-Water Ratio: The primary reason for a thick starter is too much flour relative to water. A properly hydrated starter (at 100% hydration) should resemble a thick, yet pourable, pancake batter, not a stiff dough. Using volume measurements instead of a kitchen scale often leads to accidentally adding more flour than water, making the starter too thick.
- Solution: Utilize a digital kitchen scale for accurate measurements. During your next feeding, add slightly more water (5-10g at a time) than flour (e.g., 50g flour to 55g water) until you achieve the desired consistency. Adjust gradually until it’s just right.
- Type of Flour Used: Certain flours, particularly whole grain varieties like whole wheat or rye, are naturally more absorbent and require more water. If you’re using these without adjusting the water content, your starter will appear thicker than one made with all-purpose flour.
- Solution: When feeding with highly absorbent flours, increase the water content slightly (as per the hydration ratio table above) to maintain the optimal consistency. For example, use a 1:1.1 or 1:1.2 ratio for whole wheat or rye, respectively, to ensure adequate hydration.
- Cooler Ambient Temperature: In cooler environments, the fermentation process slows down considerably. This reduced activity can result in a denser, less bubbly texture, making the starter appear thicker than it actually is, as the yeast isn’t producing as much gas to lighten the mixture.
- Solution: Move your starter to a warmer spot (e.g., on top of the fridge, in a warm oven with the light on). Providing a consistent, warmer environment will encourage more vigorous fermentation and a lighter, more active, and less dense starter.
Why Does My Sourdough Starter Have Mold? Identifying and Addressing Contamination
Discovering mold in your sourdough starter is a clear sign that external contaminants have taken hold or that your starter’s environment or care routine needs immediate attention. Mold is a serious issue that should not be taken lightly, as it can be harmful. Here are the common culprits and preventative measures:
- Contaminated Environment or Utensils: Mold spores are ubiquitous in the air. If your starter jar, its lid, or any utensils used for mixing or feeding are not scrupulously clean, you risk introducing mold spores directly into your starter, allowing them to colonize.
- Solution: Always use thoroughly cleaned and dried jars and utensils. Sterilize jars periodically by boiling them for 5 minutes or running them through a hot dishwasher cycle. Use separate, clean utensils exclusively for your starter.
- Improper Feeding Schedule or Neglect: An underfed or neglected starter weakens its microbial defenses. If left unfed for too long, the pH balance can shift dramatically, creating an environment that is more hospitable to mold growth than to beneficial yeast and bacteria. A weak starter cannot effectively compete with mold.
- Solution: Maintain a consistent feeding schedule (every 12-24 hours for an active starter at room temperature). Ensure your starter always has enough fresh flour to consume, preventing it from becoming overly acidic or weak.
- Temperature and Humidity Issues: Mold thrives in warm, humid, and stagnant conditions. An overly warm and stagnant environment around your starter can promote its growth, especially if combined with lack of airflow.
- Solution: Keep your starter in a stable, consistent environment, ideally around 70-75°F (21-24°C). Ensure there’s some airflow around the jar, and avoid excessively humid spots. A loosely covered jar is key.
- Airtight Sealing: While you want to protect your starter, completely sealing it airtight can sometimes trap excessive moisture and create an anaerobic environment that can encourage certain types of mold. It also doesn’t allow fermentation gases to escape.
- Solution: Always use a loosely fitting lid, a coffee filter, or a breathable cloth secured with a rubber band. This allows for essential gas exchange (oxygen in, CO2 out) while still preventing contaminants.
- Water Quality (Chlorine): As mentioned previously, chlorine and chloramines in tap water can inhibit beneficial microbial growth, weakening your starter’s natural defenses and making it more vulnerable to mold or undesirable bacterial growth.
- Solution: Exclusively use filtered, spring, or boiled-and-cooled tap water to ensure no chemicals are interfering with your starter’s health.
What to Do If You See Mold on Your Sourdough Starter
If you observe any fuzzy, discolored patches—typically green, blue, black, pink, or orange—on the surface or within your sourdough starter, it is unequivocally mold. In such cases, the safest and only recommended course of action is to discard the entire batch immediately. Mold can penetrate much deeper into the starter than what is visible on the surface, making it impossible to salvage safely without potential health risks. Do not try to scrape it off or mix it in. To begin anew, thoroughly clean and sterilize your jar (or use a fresh one), and then start a completely new batch with fresh, uncontaminated flour and water. This vigilance ensures your health and the success of future sourdough endeavors.
Pro Tip: Streamline Your Sourdough Feedings with a Kitchen Scale
To ensure unparalleled precision and simplify your feeding routine, use this expert tip: before you begin your starter, weigh your empty glass jar and note its weight directly on the bottom with a permanent marker, or keep a dedicated note (e.g., “Jar A: 300g”). This tare weight allows you to easily calculate the exact amount of starter you have at any given time, making it incredibly simple to determine precisely how much flour and water to add for each feeding, ensuring consistency, preventing waste, and simplifying your calculations, especially if you scale up your starter.
How Do I Store My Sourdough Starter?
Once your sourdough starter is a bustling, bubbly hive of activity, knowing how to store it correctly is crucial for maintaining its health and ensuring it’s always ready for your next baking project. Different storage methods suit varying baking frequencies and personal schedules:
1. Short-Term Storage (for Regular, Daily, or Bi-Daily Baking)
- Room Temperature: If you plan to bake frequently—daily or every other day—your starter can happily reside at room temperature on your kitchen counter. This keeps it highly active and ready to use with minimal preparation.
- Feeding Schedule: At room temperature, your starter is highly active and hungry. It will require daily feedings with equal parts flour and water by weight (e.g., 1:1:1 starter:flour:water ratio) to remain vigorous and prevent it from becoming overly acidic or consuming all its food too quickly.
- Container: Keep it in a glass jar or container covered loosely (with a coffee filter, cloth, or loose lid). This allows fermentation gases to escape and fresh air to enter, which is beneficial, while still protecting it from dust and other airborne contaminants.
2. Long-Term Storage (for Infrequent Baking)
- Refrigeration: For bakers who only bake once a week or less frequently, storing your starter in the refrigerator is the most practical and low-maintenance solution. The cold temperature significantly slows down the metabolic activity of the yeast and bacteria, putting them into a semi-dormant state.
- Feeding Schedule: When refrigerated, your starter will need feeding much less often, typically once every 1–2 weeks. A feeding consists of removing it, discarding a portion, and feeding with fresh flour and water before returning it to the fridge.
- Preparation for Use: To reactivate a refrigerated starter for baking, remove it from the fridge, discard or use a significant portion (this is where sourdough discard recipes come in handy to minimize waste!), and then feed it at least once, preferably twice (12 hours apart), at room temperature. Allow it to become bubbly, rise, and show consistent activity before incorporating it into your dough.
3. Freezing for Extended Breaks or Backup
- Freezing: If you anticipate taking a very long break from baking (several weeks to months), or simply want a reliable backup in case something happens to your active starter, freezing is an excellent option.
- Process: After feeding your starter and allowing it to become active and bubbly, place a portion of it (about 50-100g) into a freezer-safe container or a thick freezer bag. Label it with the date. Freezing can keep it viable for many months.
- To Reactivate: When you’re ready to bake again, thaw the frozen starter gradually in the refrigerator overnight. Once thawed, transfer it to a clean jar and begin regular room-temperature feedings (perhaps twice daily) for several days until it regains its full activity and shows consistent doubling. It may take a few days to fully revive.
4. Drying for Emergency Backup Storage
- Drying: For the ultimate emergency backup, sharing with friends, or taking on travels, drying your starter is a robust and highly shelf-stable method.
- Process: Take a portion of active, fed starter and spread a very thin layer (about 1-2mm thick) onto a sheet of parchment paper or a silicone mat. Allow it to air dry completely at room temperature for 1-2 days until it becomes brittle, hard, and easily breaks into flakes or powder. Ensure it’s bone dry to prevent mold. Store these dried flakes in an airtight container in a cool, dark place. This can last for years!
- To Reactivate: To revive, rehydrate the flakes by soaking them in a small amount of filtered water (e.g., 10g flakes with 10g water) until they soften. Then, begin feeding them with fresh flour and water over several days (just like you started your original starter) until the starter becomes active and bubbly again.
Additional Sourdough Storage & Maintenance Tips:
- Labeling is Essential: Always label your container with the date of the last feeding. This is especially crucial for refrigerated or frozen starters to help you keep track of their feeding schedule and health status.
- Maintain Cleanliness: Regularly clean the sides of your jar, particularly around the top rim, to prevent dried starter residue from accumulating, which can harbor unwanted bacteria or mold. A clean environment is a healthy environment for your starter.
- Managing Hooch: If a dark liquid layer (hooch) forms on top of your starter, particularly after refrigeration or a missed feeding, it’s generally a sign that your starter is hungry. Hooch can range in color from light amber to dark brown. You can either stir it back in (which will impart a more intense, acidic flavor to your bread) or pour it off before feeding. It’s not a sign of spoilage unless accompanied by fuzzy mold.
By implementing these proper storage and maintenance techniques, you will ensure that you always have a lively, robust, and reliable sourdough starter ready to fuel your countless delicious and satisfying baking adventures, making homemade bread a consistent joy!
How Do I Know If My Sourdough Starter is Ready to Use?
Determining if your starter has reached its peak activity and is truly ready for baking is a crucial step to ensure successful sourdough loaves. Look for these crucial indicators, ideally consistently over several feeding cycles:
- Consistent Doubling in Size: After being fed, your starter should reliably double, or even triple, in size within 4-6 hours. This vigorous rise indicates strong, active yeast activity and ample carbon dioxide production. Use a rubber band on the jar to mark its initial height.
- Pleasant, Tangy Aroma: A mature, healthy starter will have a distinct, appealing aroma—clean, tangy, slightly yeasty, and reminiscent of ripe fruit, good quality yogurt, or mild vinegar. It should absolutely not smell overly acidic like strong nail polish remover (acetone), foul, or frankly unpleasant in a rotten way.
- Bubbly and Spongy Texture: The entire starter, not just the surface, should be visibly full of active bubbles. When gently stirred, it should have a light, airy, and spongy consistency, indicating a strong internal network of gas.
- The “Float Test” (Optional but Highly Recommended): This is a classic and highly reliable test to confirm your starter’s readiness. Take a small spoonful of your starter when it’s at its peak (meaning it has risen significantly after feeding, ideally within that 4-6 hour window), and gently drop it into a glass of room-temperature water. If the starter floats to the surface, it’s full of carbon dioxide gas and is potent enough to be used for baking! If it sinks, it may need another feeding or a bit more time to build strength before it’s ready to lift your dough effectively.
Do I Need to Use Organic Flour in This Sourdough Starter Recipe?
Using organic flour isn’t strictly necessary for creating a functional and active sourdough starter, and you can certainly achieve great results with conventional unbleached flour. However, many bakers choose organic for good reason. Organic flours are generally free from pesticides, herbicides, and other chemical treatments often used in conventional farming. These chemicals can potentially inhibit the delicate and beneficial microorganisms (wild yeasts and bacteria) that your starter relies upon. Therefore, starting with organic flour may contain a greater abundance of naturally occurring wild yeasts and beneficial bacteria, potentially giving your starter an initial boost, helping it activate more quickly and vigorously. The most important factor, regardless of organic status, is always to use unbleached flour to avoid chlorine.
My Starter Smells Off, Is That Normal?
Yes, especially during the initial stages of development (Days 1-5), it is entirely normal for your sourdough starter to emit some rather unusual or even unpleasant odors. You might notice smells resembling strong vinegar, nail polish remover (acetone), alcohol (like cheap beer), or even a slightly cheesy or putrid aroma (it sounds gross, I know, but trust the process!). These temporary smells are perfectly normal indicators that various bacteria and yeasts are actively developing, competing, and establishing themselves within the culture, producing different metabolic byproducts as they feed. As your starter matures and stabilizes with consistent feedings, these less pleasant odors will gradually dissipate and be replaced by a more appealing, distinctly tangy, and yeasty fragrance, often with a hint of fruitiness or sour milk. This evolution of smell is a positive sign of a healthy, developing starter transitioning into its mature state.
What If I Miss a Feeding?
Life happens, and sometimes a feeding gets missed – don’t panic! Your sourdough starter is remarkably resilient. If you miss just one feeding, it’s usually not a cause for alarm. Simply resume your regular feeding schedule as soon as you remember. Your starter will quickly bounce back. If, however, your starter has been left unfed for more than a few days (e.g., 2-3 days or more, especially at room temperature), you will likely observe a dark, often brownish, grayish, or even blackish liquid layer forming on top. This liquid is known as “hooch.” Hooch is essentially alcohol produced by the yeast when it runs out of readily available food, indicating extreme hunger. You have two options: you can either stir the hooch back into the starter (which will impart a more intense, acidic, and sometimes bitter flavor to your bread) or pour it off before feeding the starter again (for a milder flavor). After managing the hooch, proceed with a regular feeding, and your starter should perk back up within a couple of cycles, regaining its strength and activity.
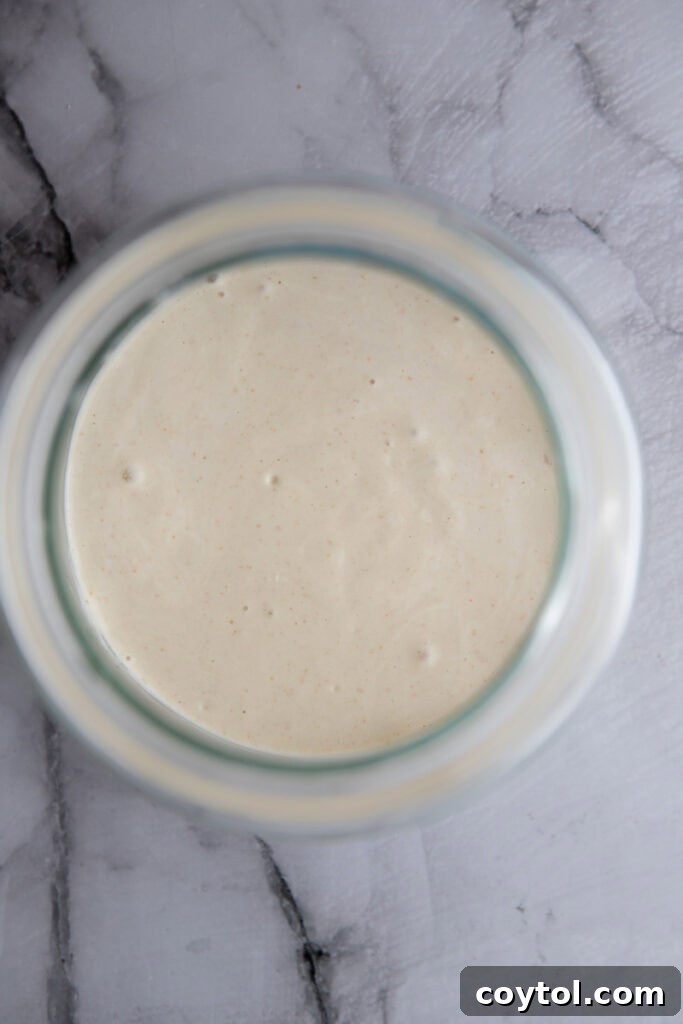
Beginner Sourdough Starter Recipe: Your Path to Homemade Bread
Beginner Sourdough Starter Recipe
Creating a sourdough starter from scratch is an incredibly rewarding experience that deepens your connection to the ancient art of bread-making. With just a few simple, natural ingredients and a little patience, you’ll successfully cultivate a bubbly, active starter. This living culture will be your key to baking wonderfully tangy, crusty loaves of bread, alongside a host of other delightful sourdough creations. Follow these clear, step-by-step instructions to ensure your sourdough journey is a resounding success!
1 active starter
Print Recipe
Equipment Needed
- A small, clean glass jar or non-reactive container (e.g., a 16-24 oz Mason jar)
- Stirring utensil (spoon or spatula)
- Coffee filter or breathable cloth (e.g., cheesecloth)
- Rubber band (to secure cover)
- Digital Kitchen Scale (highly recommended for precision, but optional for this tablespoon-based recipe)
Ingredients
- 1 tablespoon (15g) Unbleached Whole Wheat Flour (for Day 1 only)
- Unbleached All-Purpose Flour (for all feedings on Days 2-10 and beyond)
- Filtered Water (1 tablespoon / 15g per feeding)
Alternatives for Filtered Water:
- Spring Water: Naturally contains minerals that can nourish your starter.
- Boiled and Cooled Tap Water: Boil tap water for a few minutes and let it cool completely to room temperature to remove chlorine.
- Distilled Water + Minerals: If using distilled water, add a tiny pinch of non-iodized sea salt or a few drops of mineral supplements to introduce essential nutrients.
Instructions
Day 1: Initiating Your Starter
- In a very clean glass jar, combine 1 tablespoon (15g) of unbleached whole wheat flour with 1 tablespoon (15g/ml) of filtered water.
- Stir thoroughly until a smooth paste forms and there are no dry spots of flour remaining. The consistency should resemble thick pancake batter.
- Cover the jar loosely with a coffee filter or a clean cloth, securing it with a rubber band to allow airflow while protecting the mixture.
- Place the jar in a warm spot in your kitchen, ideally between 70-75°F (21-24°C). If your home is cooler, you can use a turned-off oven with the light on, or wrap the jar in a kitchen towel for insulation.
Days 2-3: First Signs of Fermentation & Initial Feedings
- After 24 hours (on Day 2), check your starter for tiny bubbles on the surface or sides of the jar, which are positive signs of initial fermentation.
- Discard about half of your starter mixture (roughly 1 tablespoon or 15g). This step helps to manage volume and concentrate the active cultures.
- Add 1 tablespoon (15g) of unbleached all-purpose flour and 1 tablespoon (15g/ml) of filtered water to the remaining starter.
- Stir well until combined, cover loosely, and return the jar to its warm spot.
- Repeat this exact feeding process (discard half, feed with 1 tbsp all-purpose flour and 1 tbsp water) on Day 3, after another 24 hours. If you see a dark liquid (hooch) on top, stir it in or pour it off before feeding.
Days 4-5: Building Robust Strength
- Continue your consistent daily routine: every 24 hours, discard half of the starter and feed it with 1 tablespoon (15g) of unbleached all-purpose flour and 1 tablespoon (15g/ml) of lukewarm filtered water.
- Stir thoroughly, cover loosely, and allow it to rest in its warm location. You should observe more vigorous bubbling, a noticeable rise after feeding, and an evolving sour aroma (which will become more pleasant).
Days 6-7: Accelerating Growth with Twice Daily Feedings
- By now, your starter should be quite active. Transition to feeding it twice daily: once in the morning and once in the evening, aiming for roughly 10-12 hours between feedings.
- Each time, discard half of the starter, then feed it with 1 tablespoon (15g) of unbleached all-purpose flour and 1 tablespoon (15g/ml) of water.
- Stir, cover loosely, and place it back in its warm spot. Use a rubber band on the jar to visibly track its doubling in size within 4-6 hours after feeding.
Days 8-10: Final Readiness Check – Your Starter is Baked!
- At this stage, your starter should consistently double in size within 4-6 hours post-feeding, have a delightful tangy-sour aroma, and be visibly full of active bubbles throughout.
- Once these signs are consistent, your sourdough starter is ready to use for baking! If it’s not quite there yet, continue with regular twice-daily feedings until it reaches this strong and active state. Remember, patience yields the best results.
Chef’s Notes & Pro-Tips for Success:
- Why Whole Wheat First? Unbleached whole wheat flour is rich in nutrients and wild yeasts, providing an excellent initial boost to kickstart fermentation. Transitioning to all-purpose flour after Day 1 helps maintain consistency and manage starter volume efficiently.
- Understanding “Hooch”: If a dark liquid layer forms on top of your starter, it’s called hooch—a sign your starter is very hungry. You can either stir it back in (for a more intense sour flavor) or pour it off before feeding. It’s usually harmless unless accompanied by mold.
- Experimenting with Flours: Once your starter is strong, feel free to experiment with other flours. Rye flour can significantly boost activity and add earthy notes, while spelt flour contributes a mild, nutty sweetness. Introduce new flours gradually to observe their effects.
- Effective Storage Strategies:
- Short-Term (Counter): For daily or every-other-day baking, keep your starter at room temperature and feed it once a day.
- Long-Term (Refrigerator): For infrequent baking (once a week or less), store your starter in the fridge and feed it every 1-2 weeks. Reactivate with 1-2 room-temperature feedings before use.
- Emergency Backup (Freezing/Drying): Freeze a portion for long breaks or dry flakes for a very long-term, shelf-stable backup. Both require several feedings to reactivate fully.
Congratulations on successfully creating your sourdough starter! With consistent care and regular feeding, this living culture will thrive indefinitely, fueling countless delicious and satisfying baking adventures. Happy baking!
Nutrition information provided is an approximation, typically calculated automatically, and should be used as a general guide only.
Enjoyed crafting your own starter? Leave a comment below and share your experience!
If you enjoyed this how-to-make sourdough starter recipe and want to save it for later, make sure to pin it!