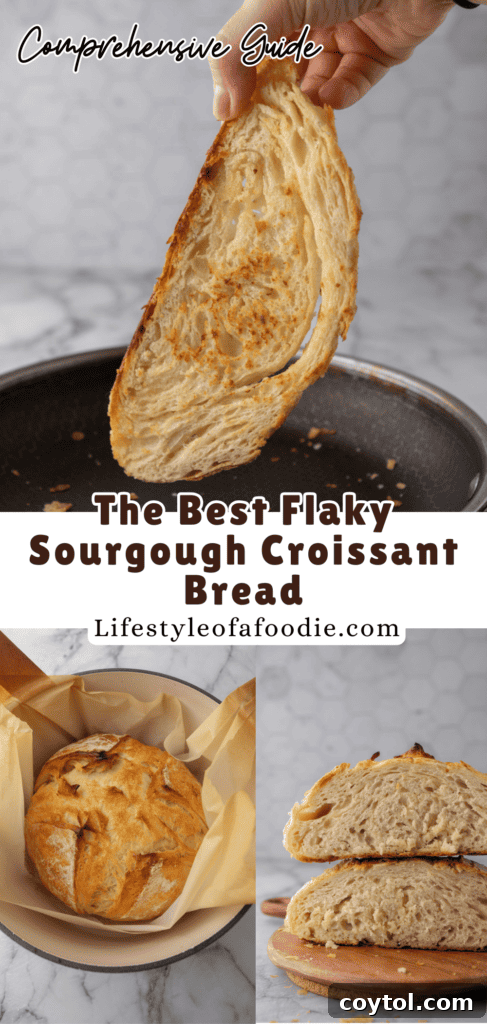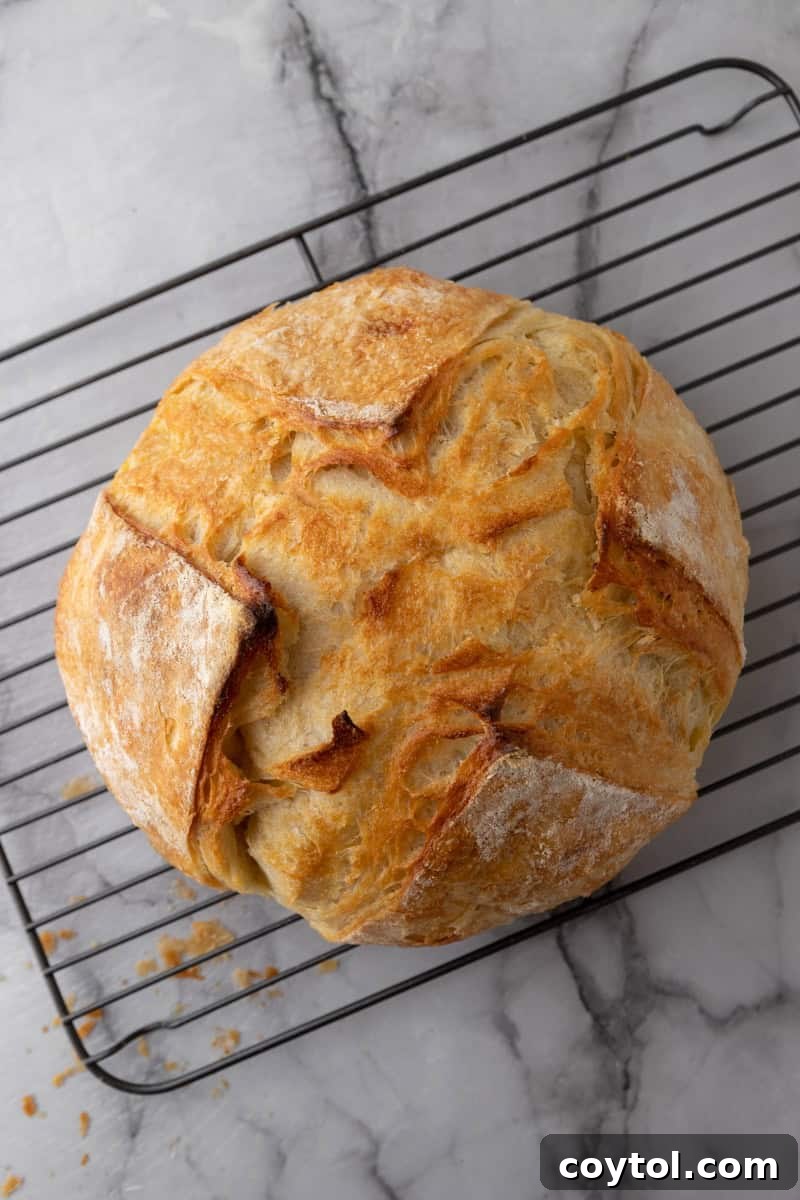
Welcome to the latest culinary sensation for every aspiring and seasoned baker: the Sourdough Croissant Bread. This exquisite loaf perfectly marries the tangy depth of sourdough with the irresistible flakiness of a classic croissant. Crafted with patience, passion, and a few fundamental ingredients, each slice reveals buttery layers that simply melt in your mouth. Get ready to elevate your baking repertoire and impress with this unique hybrid creation.
Sourdough Croissant Bread: The Ultimate Buttery, Flaky Loaf
Imagine starting your day with a breakfast toast that’s both wonderfully sweet and delightfully savory. Or perhaps, elevating your lunch sandwich into an unforgettable gourmet experience. The Sourdough Croissant Bread is precisely that game-changer your meals have been missing. Its distinct, subtle tang from the sourdough starter perfectly complements the rich, luxurious butter that permeates every delicate layer. Whether paired with creamy soups, decadent sauces, sweet jams, robust meats, or artisan cheeses, this bread enhances every flavor, making each bite a truly memorable one.
While the idea of creating such an impressive loaf might seem daunting, rest assured, it’s far more accessible than you think. This recipe primarily demands two things: patience and a commitment to keeping your ingredients, especially the butter, consistently cold. Master these two simple principles, and you’ll soon be pulling a loaf from your oven that looks and tastes like it came straight from a Parisian boulangerie, earning you accolades as a true baking maestro.
If you’re as passionate about sourdough as we are, be sure to explore some of our other beloved recipes. Dive into the fundamentals with our Simple Sourdough Starter Recipe for Beginners, perfect your everyday bake with the Small Batch Sourdough Bread Recipe, or try your hand at shaping with our Sourdough Bagels Recipe. Each offers a unique way to enjoy the magic of sourdough.
What to Expect: The Unforgettable Taste and Texture of Sourdough Croissant Bread
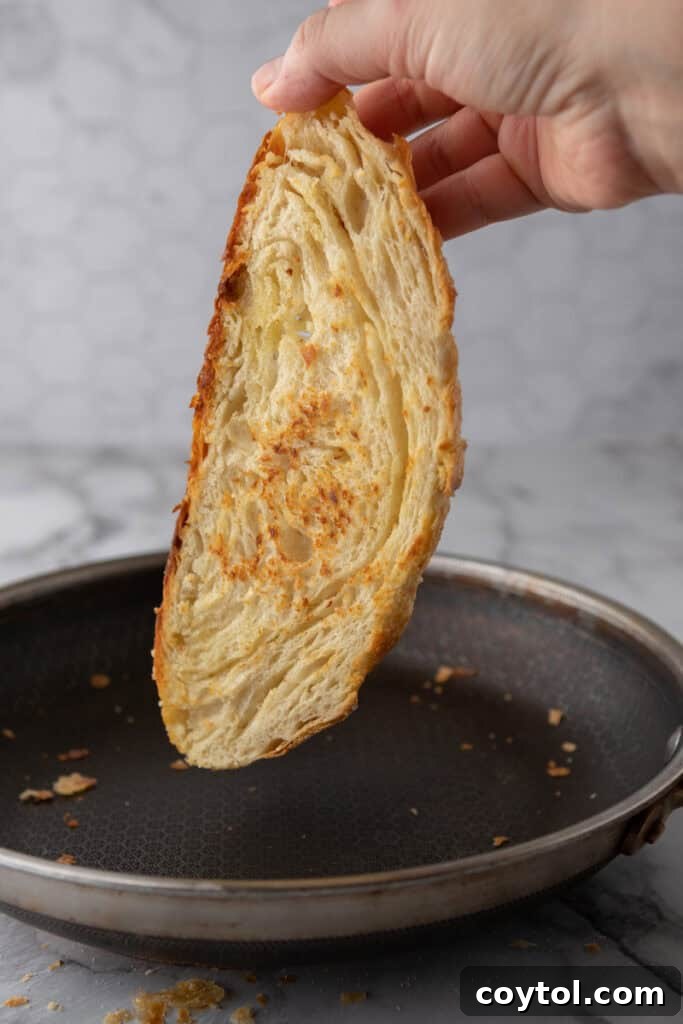
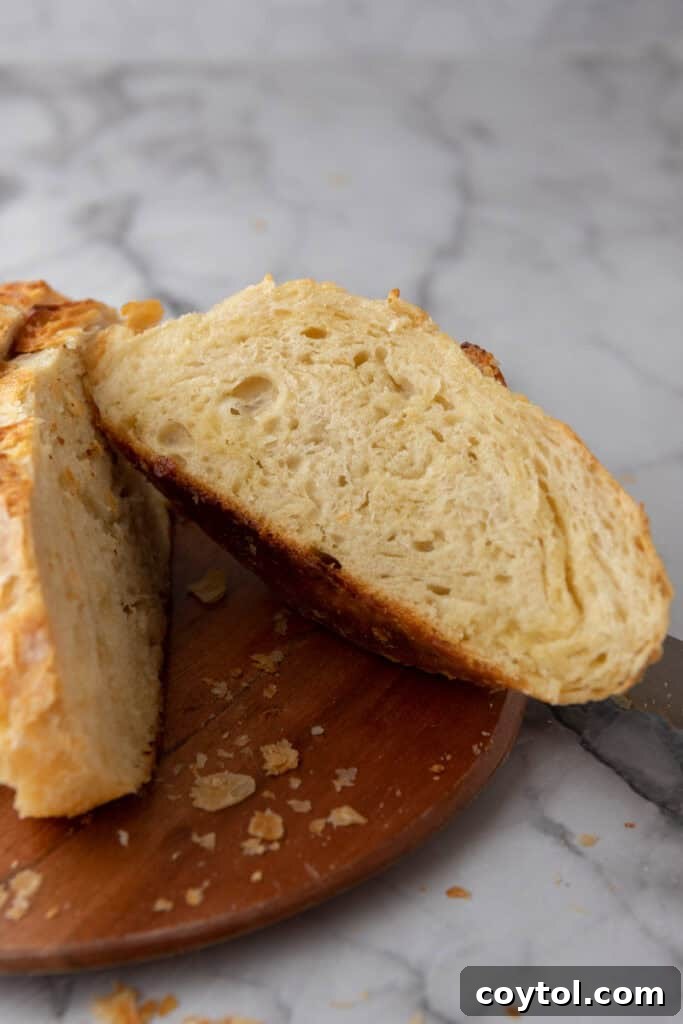
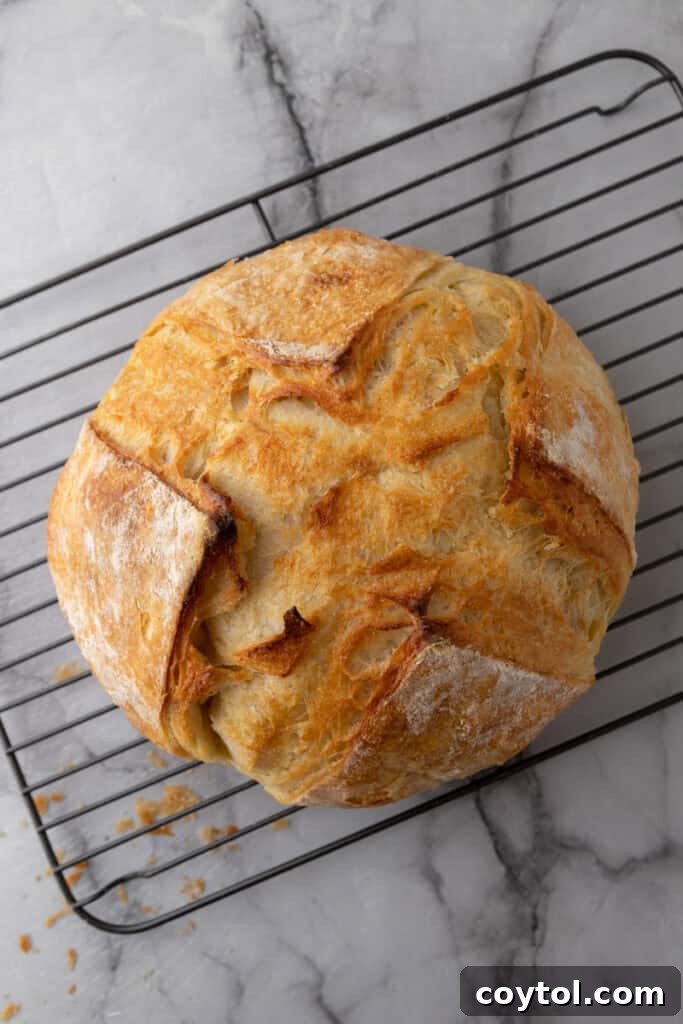
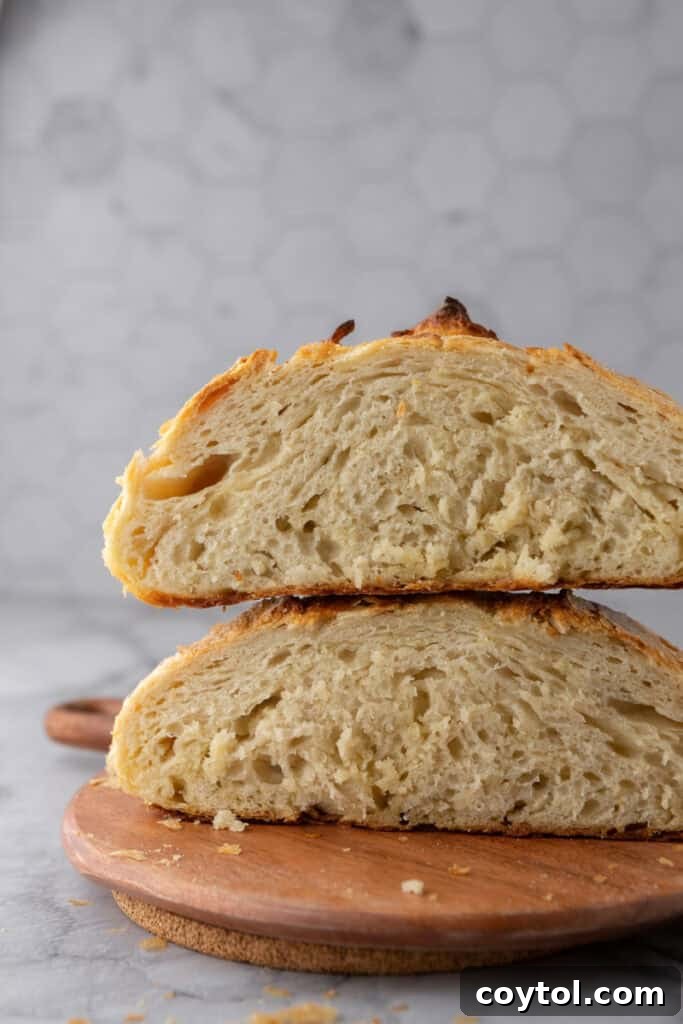
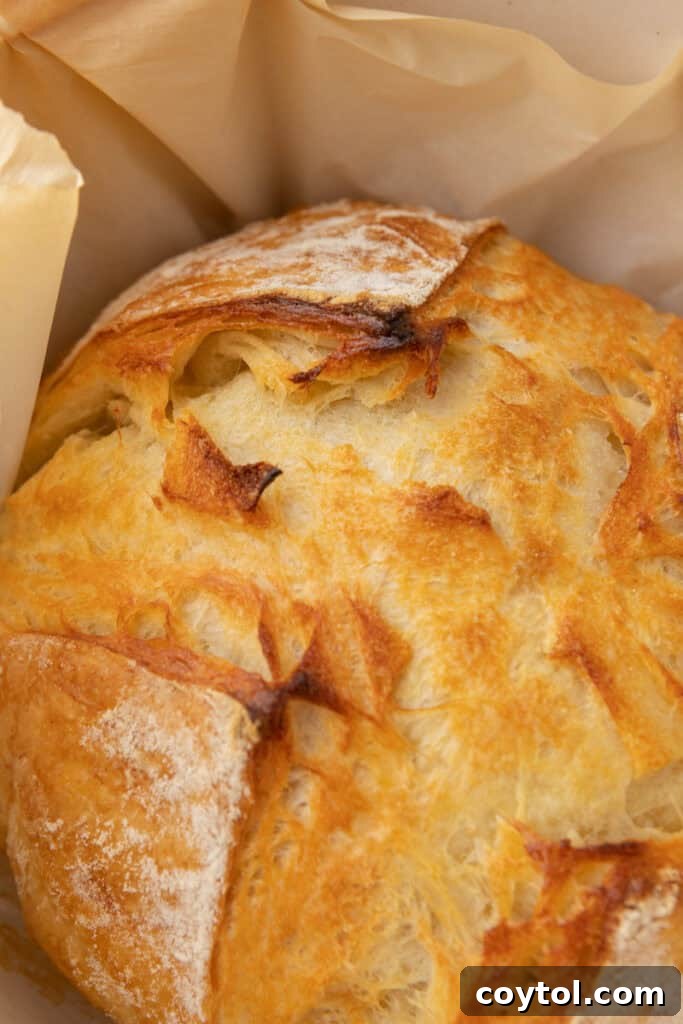
Prepare for a culinary revelation! This Sourdough Croissant Bread truly delivers a taste experience reminiscent of a high-quality croissant, but in loaf form. The exterior boasts an incredibly crisp and flaky crust, offering a delightful crunch with every bite. Slice into it, and you’ll discover a soft, tender, and intensely buttery interior, rich with those signature laminated layers. The intentional lamination process, similar to what gives traditional croissants their airy structure, imbues this bread with an unmistakable croissant-like flavor. Think of it as an elevated version of your favorite artisan croissant loaf, but with an added depth.
What sets this bread apart is the harmonious marriage between the rustic charm of sourdough and the elegant richness of a croissant. The subtle sourness and tang from the long-fermented sourdough starter create a stunning balance with the luxurious butter. This isn’t just bread; it’s a sensory journey, an unexpected fusion that offers a complex yet comforting flavor profile. It’s a truly surreal culinary experience that you can effortlessly recreate right in the warmth of your own kitchen.
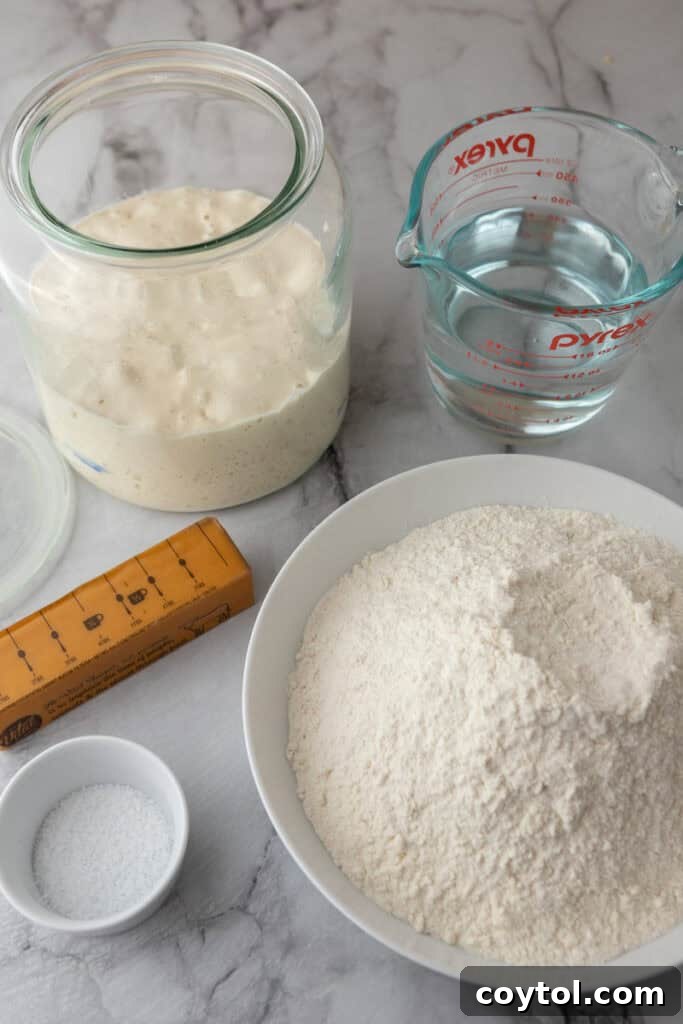
Essential Ingredients for Your Croissant Sourdough Bread
Crafting this remarkable Sourdough Croissant Bread requires a handful of high-quality ingredients. Each plays a crucial role in developing the unique flavor and texture of this loaf. Below is an overview of what you’ll need. For precise measurements and the full recipe, please refer to the detailed recipe card at the bottom of this page.
- Water: Essential for hydrating the flour and activating the gluten, water is the foundation of our dough’s structure and pliability.
- Active Sourdough Starter: The heart of this recipe, an active (100% hydration) sourdough starter acts as our natural leavening agent. It’s responsible for the bread’s rise, its signature airy crumb, and the complex, tangy flavor that beautifully complements the butter. No commercial yeast is needed here!
- Bread Flour: Chosen for its higher protein content compared to all-purpose flour, bread flour is key to developing strong gluten networks. This strength allows the dough to capture gases, resulting in a robust structure and a satisfying chew, while still maintaining delicate layers.
- Salt: Far more than just a seasoning, salt profoundly enhances the bread’s overall flavor. It also plays a vital role in regulating the sourdough starter’s activity and strengthening the gluten structure, contributing to a better crumb and crust.
- Unsalted Butter: The star of the show for its luxurious richness and ability to create those coveted flaky layers. Using high-quality unsalted butter is paramount, as it forms distinct pockets within the dough during the lamination process, yielding a texture reminiscent of authentic croissants.
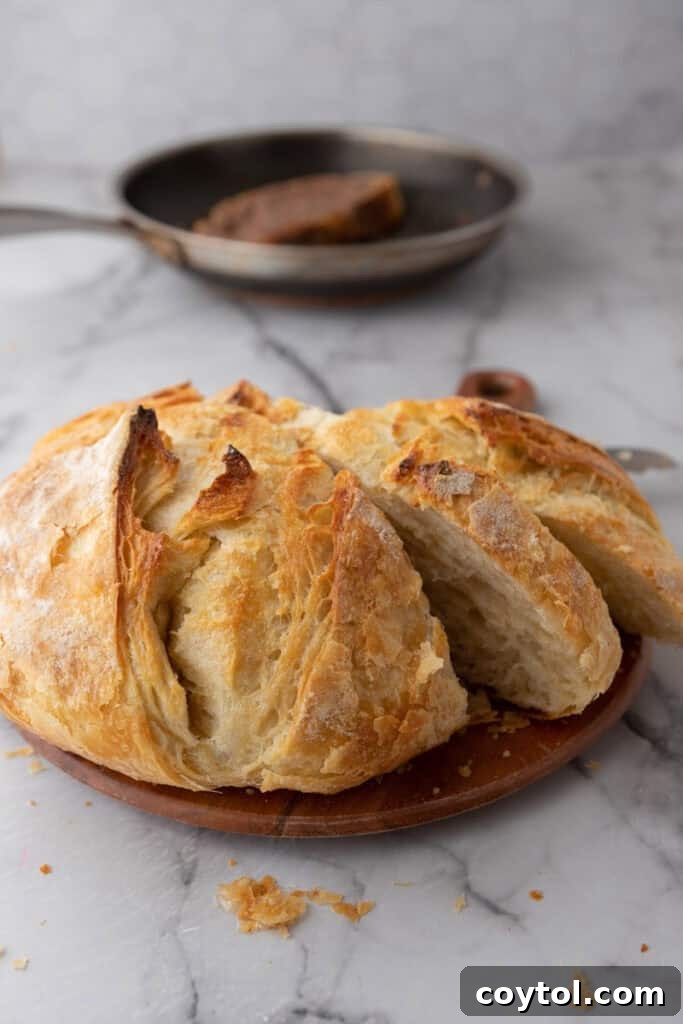
Step-by-Step: Crafting Your Sourdough Croissant Bread
Embark on the journey of creating a sourdough loaf with exquisite buttery layers. This detailed guide will walk you through each stage, ensuring a successful and delicious outcome. For precise oven temperatures, bake times, and comprehensive instructions, please refer to the complete recipe card at the conclusion of this post.
1. Mixing the Dough Ingredients
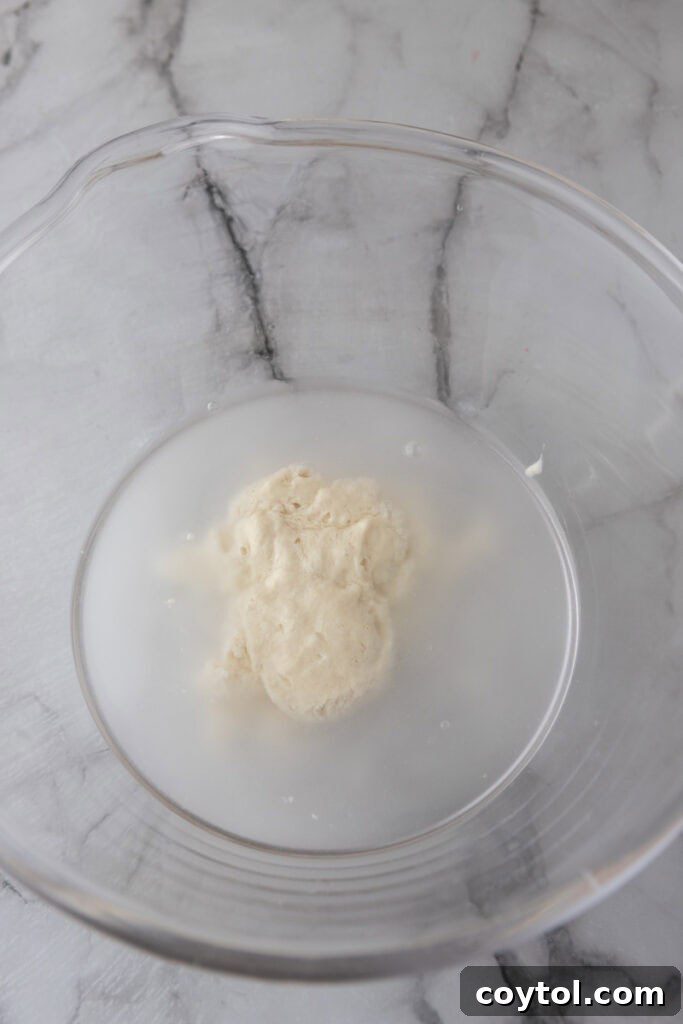
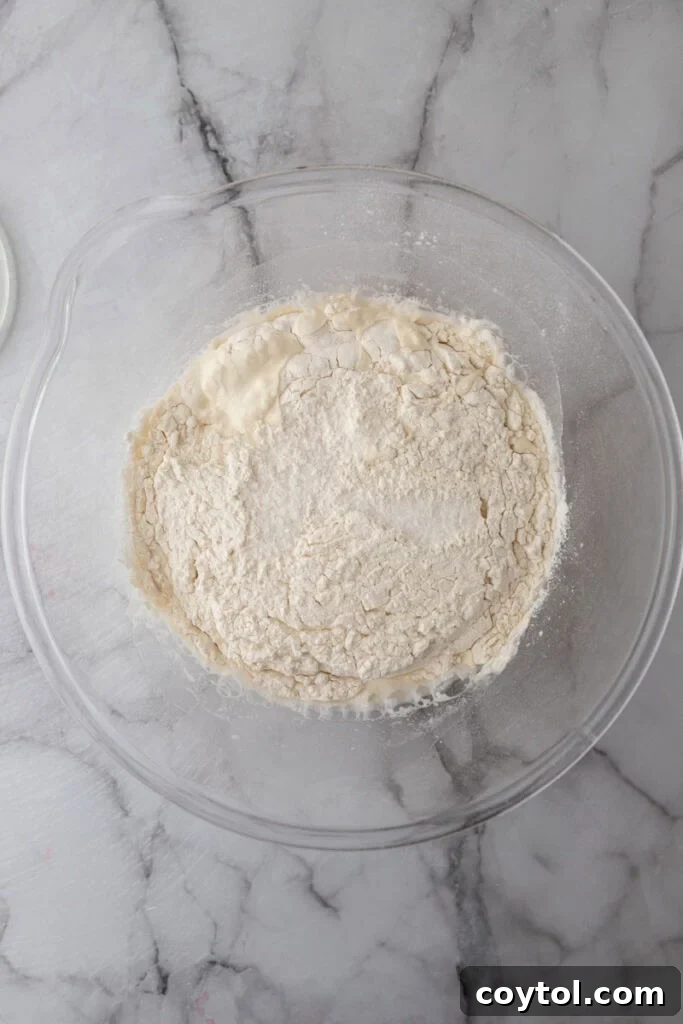
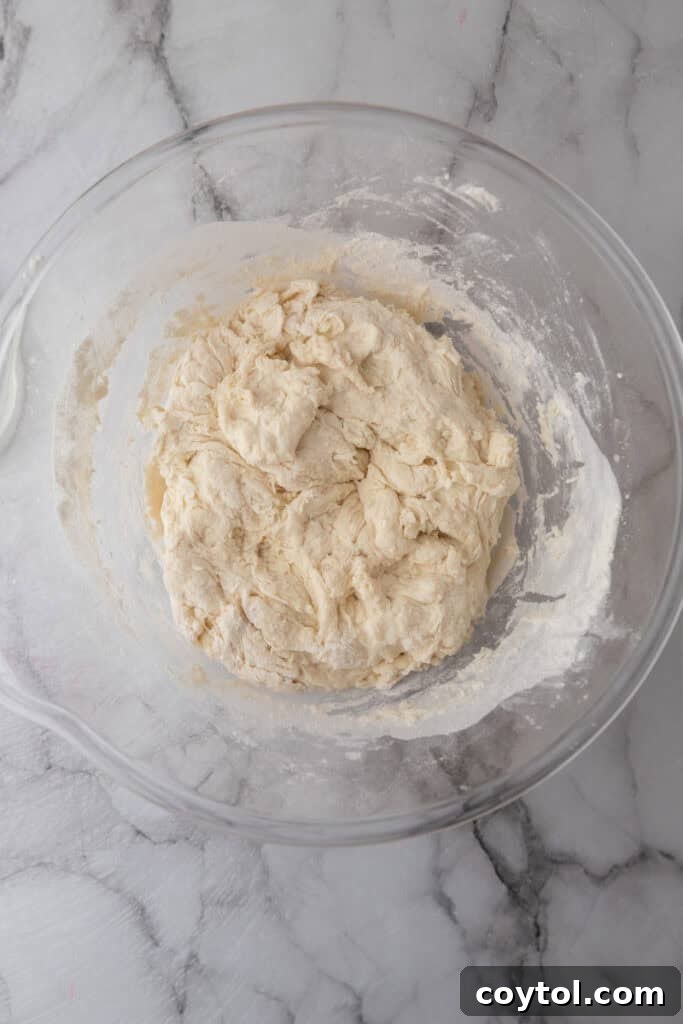
- In a spacious mixing bowl, combine the bread flour, water, active sourdough starter, and salt. Stir diligently until all ingredients are thoroughly incorporated and no dry spots remain.
- Cover the bowl with a clean, damp cloth and allow the dough to rest for 30 minutes. This crucial resting period, often referred to as autolyse, enables the flour to fully absorb the moisture, initiating gluten development and improving the dough’s elasticity.
Expert Tip: For enhanced elasticity and a superior dough texture, consider a longer autolyse. Combine the flour, 320g of water, and sourdough starter, allowing them to rest for 30-60 minutes before incorporating the salt and the remaining 30g of water. This initial hydration step significantly improves the dough’s workability and final crumb structure.

2. Stretch, Fold & Incorporate Butter
This stage is crucial for developing the dough’s strength and incorporating the butter for those signature flaky layers. You will perform a series of four stretch-and-folds, with each set spaced 30 minutes apart.
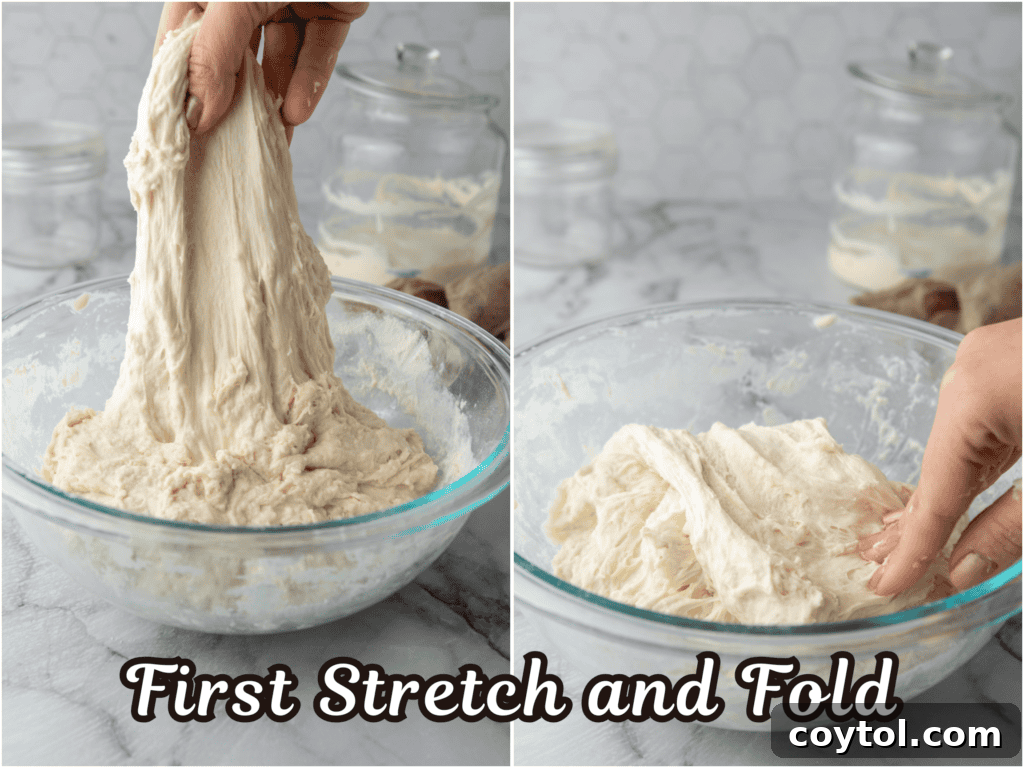
- Begin with the first stretch and fold, performed without any butter. This initial set helps to further smooth the dough and enhance its elasticity, preparing it for the butter inclusions that follow.
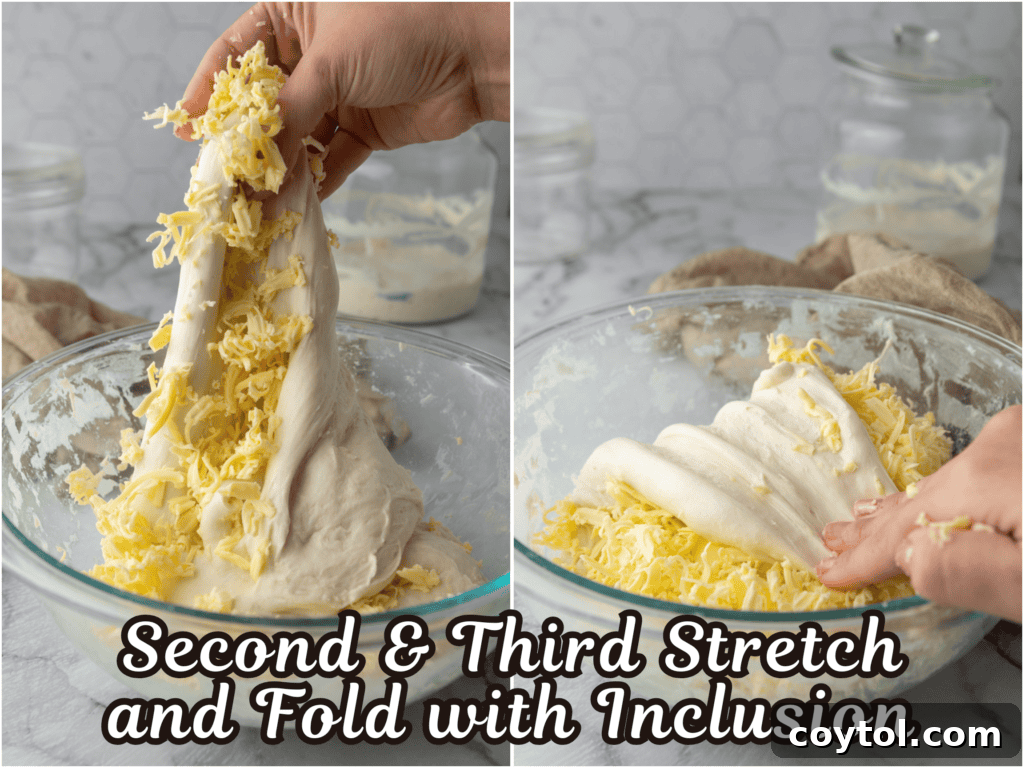
- For the second stretch and fold, gently grate half of your chilled, unsalted butter directly over the surface of the dough. Carefully fold the dough over itself to incorporate the butter. Once folded, cover the bowl and allow the dough to rest for another 30 minutes. Remember to return the remaining butter to the freezer to keep it firm.
- During the third stretch and fold, add the rest of the grated butter to the dough. Continue the folding motion, ensuring the butter is thoroughly integrated into the dough. Recover and let it rest for a final 30 minutes.
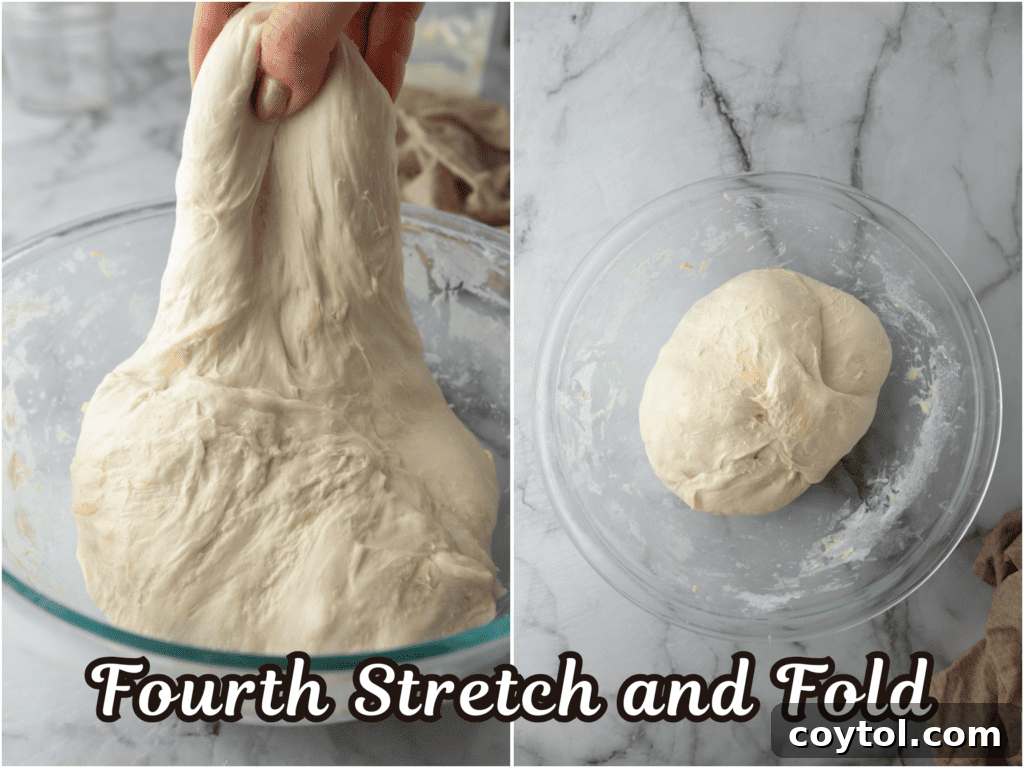
- The fourth and final stretch and fold follows the same gentle motion, but without adding any additional butter. This session is focused on refining the dough’s structure and ensuring the butter is evenly distributed within the layers.
Essential Tip: Maintaining the butter’s cold temperature is absolutely critical for successful lamination. Keep the butter chilled in the refrigerator or even the freezer between each stretch-and-fold session. If at any point the dough feels too warm, especially during warmer months, pop it back into the fridge for 15-20 minutes. This prevents the butter from melting and ensures those beautiful, distinct layers in your final loaf.
3. Bulk Fermentation
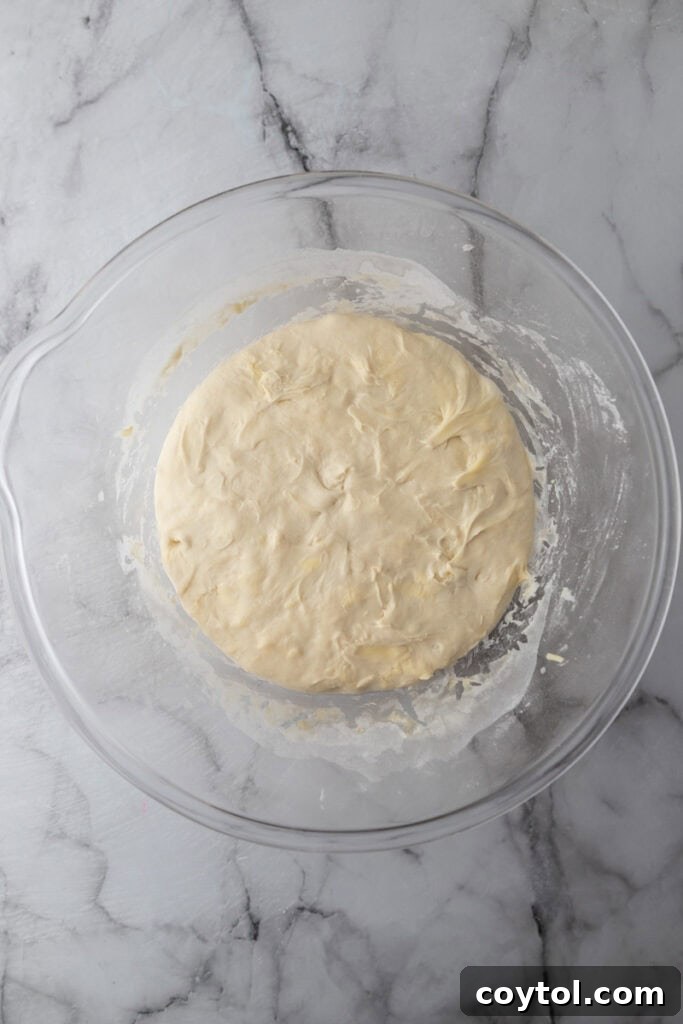
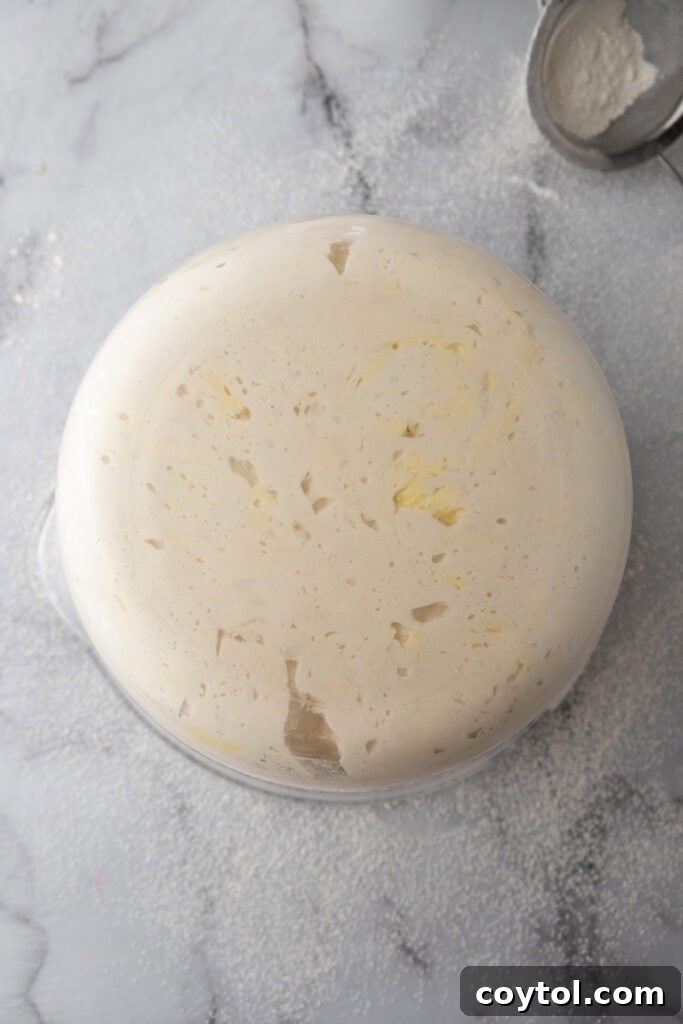
- After the stretch and folds, cover the dough and allow it to undergo bulk fermentation at a consistent room temperature, ideally between 70-72°F (21-22°C). This process typically takes 6-7 hours, or until the dough has noticeably expanded by about two-thirds of its original volume and displays numerous visible bubbles at the bottom of the bowl.
- It is vital to monitor the dough’s temperature regularly using a thermometer. Maintaining an optimal environment is key to proper fermentation without melting the incorporated butter.
Crucial Fermentation Tip: For optimal fermentation, aim for a consistent ambient temperature. Setting your home thermostat to 72°F for the duration of these 7 hours can be very beneficial. If your kitchen tends to be cooler, you may need to extend the bulk fermentation to 8-9 hours to achieve a deeper sourdough tang and sufficient rise. Conversely, in a warmer kitchen, begin checking the dough around 5-6 hours, rather than 7. If the dough doubles in size too rapidly, you might need to transfer it to the refrigerator sooner to slow down the process and protect the butter layers.
4. Pre-Shaping & Cold Proofing
Proper shaping is essential for the final structure and appearance of your loaf. Lightly dust your work surface with just enough flour to prevent sticking, but avoid excess, as too much flour can interfere with the dough’s ability to seal properly during shaping.
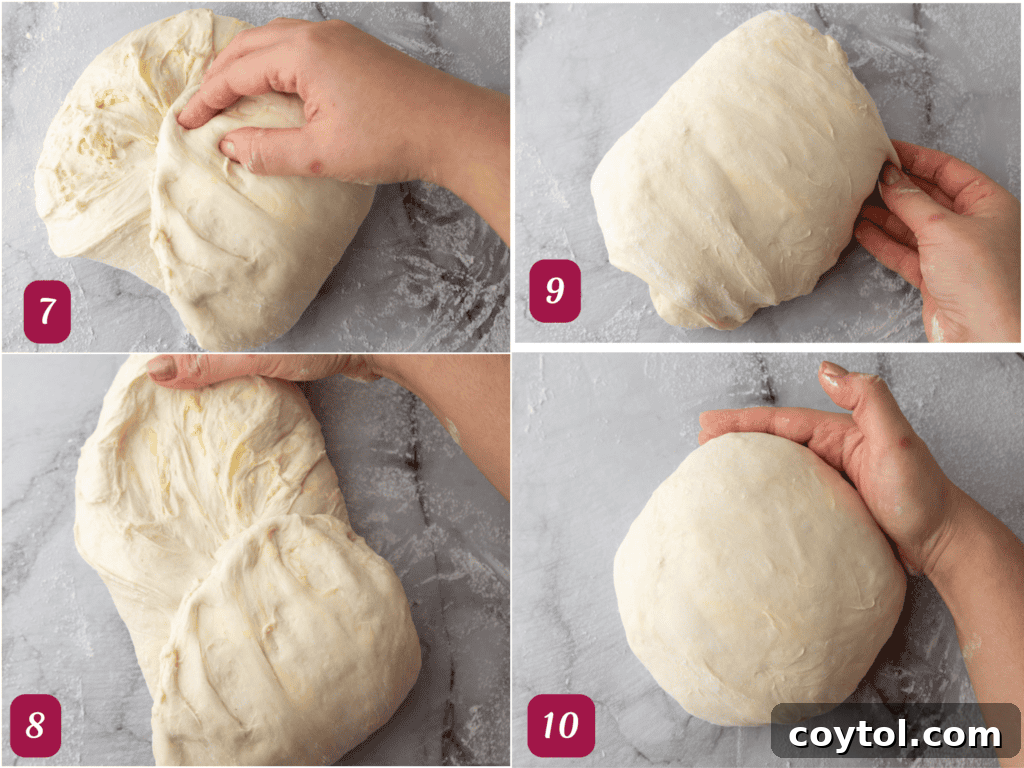
- Gently invert the dough from the bowl onto your lightly floured surface. Work carefully to avoid deflating the dough too much; preserving those precious air bubbles is key for a light and airy crumb.
- Delicately flatten the dough into a rough rectangular shape. Again, do not press too hard.
- Fold the top third of the rectangle down towards the center, similar to folding a letter.
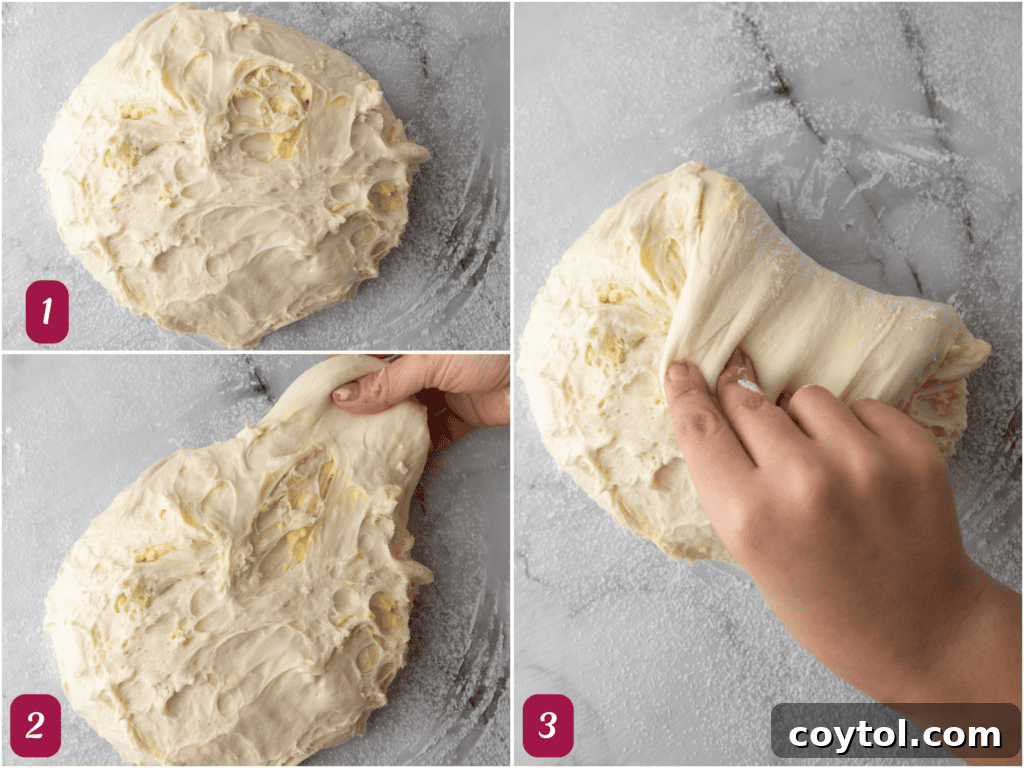
- Now, fold the bottom third of the dough up and over the previous fold, completing the letter fold.
- Rotate the dough 90 degrees. Gently pull the edges in toward the center, tucking them underneath to create surface tension, which is vital for a good rise.
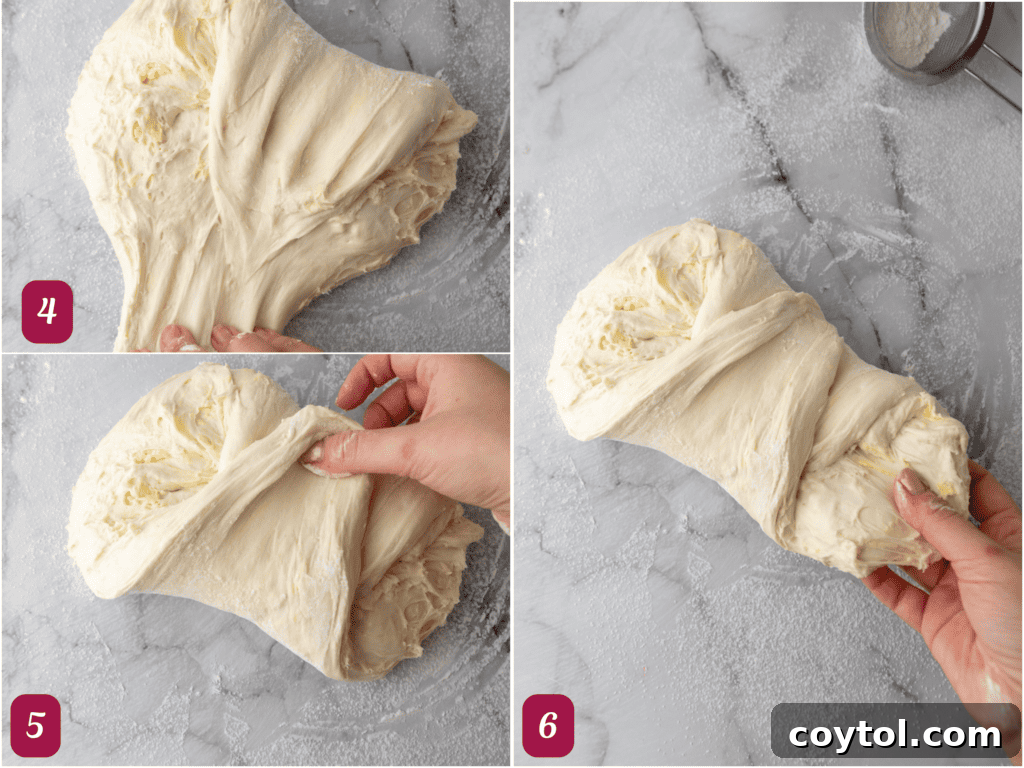
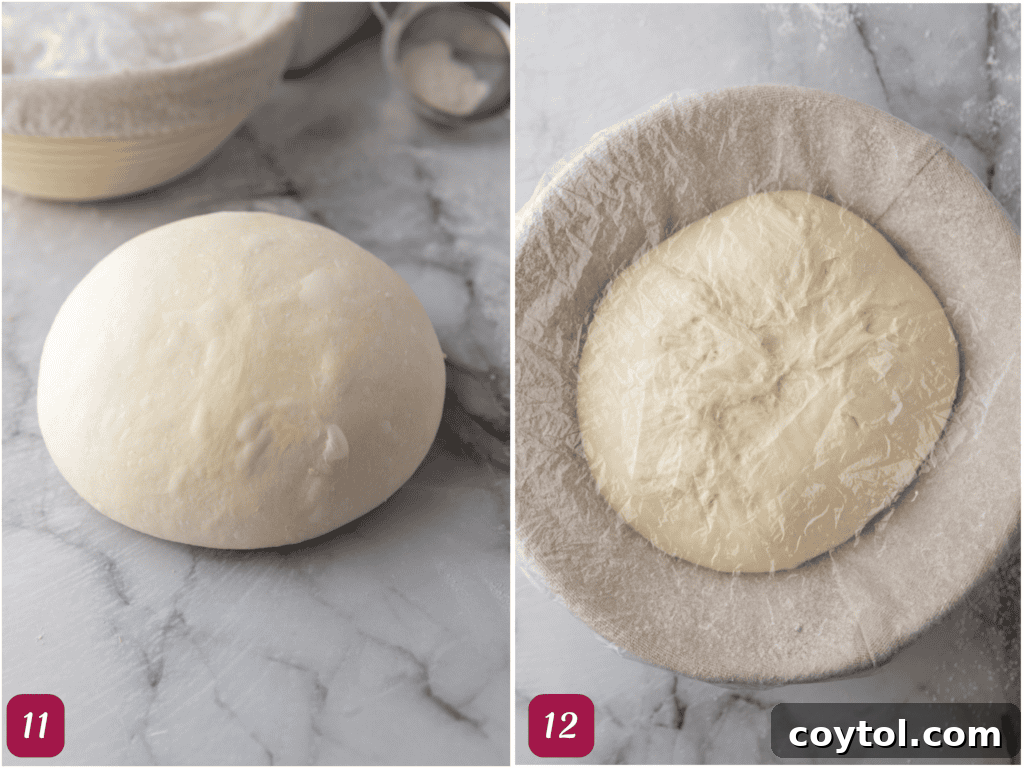
- To achieve a tight boule (ball shape), continue moving your hands in a “C” shape around the dough, rotating it gently to build surface tension. Once shaped, use a bench scraper to carefully transfer the dough, smooth side down, into a floured banneton.
- Allow the shaped dough to rest for 10-20 minutes at room temperature, then seal the top by pinching the seams before covering it tightly with plastic wrap. Refrigerate the dough overnight (8-12 hours) for a crucial cold proof. This extended cold proofing significantly enhances the bread’s flavor development and firms up the butter, making it easier to handle and ensuring better oven spring.
5. Scoring & Baking
- The following day, preheat your oven with a Dutch oven inside to 450°F (230°C) for at least 30 minutes. This ensures the Dutch oven is scorching hot, which is essential for a great crust and oven spring.
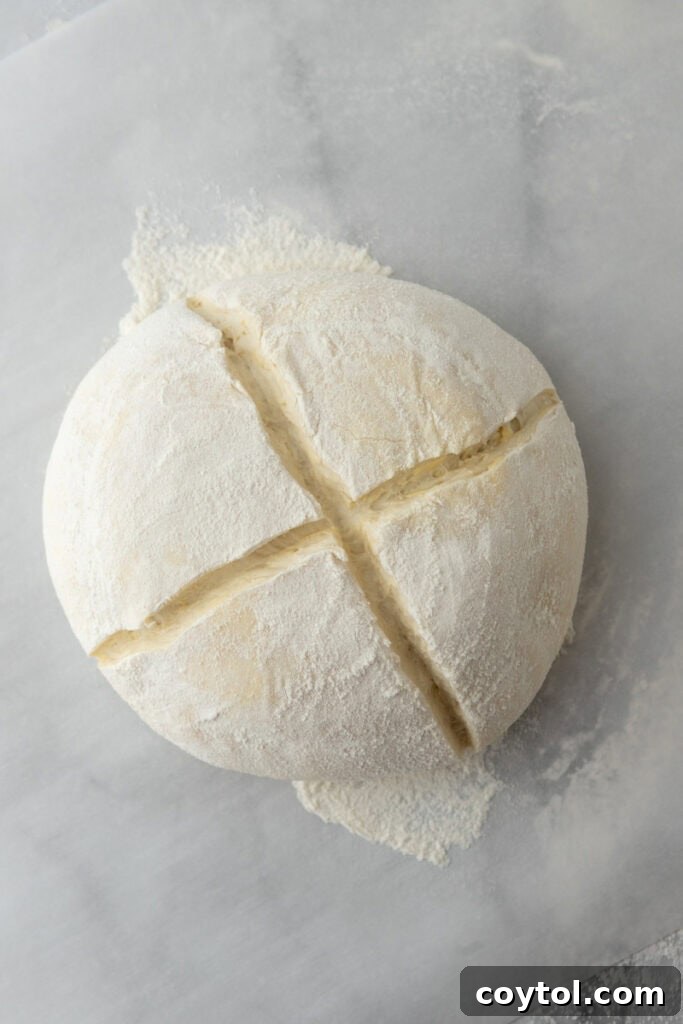
- Carefully remove your cold dough from the refrigerator. Gently transfer it onto a sheet of parchment paper. Using a sharp blade or razor, score the top of the dough. Scoring allows for controlled expansion, creating a beautiful design and preventing blowouts.
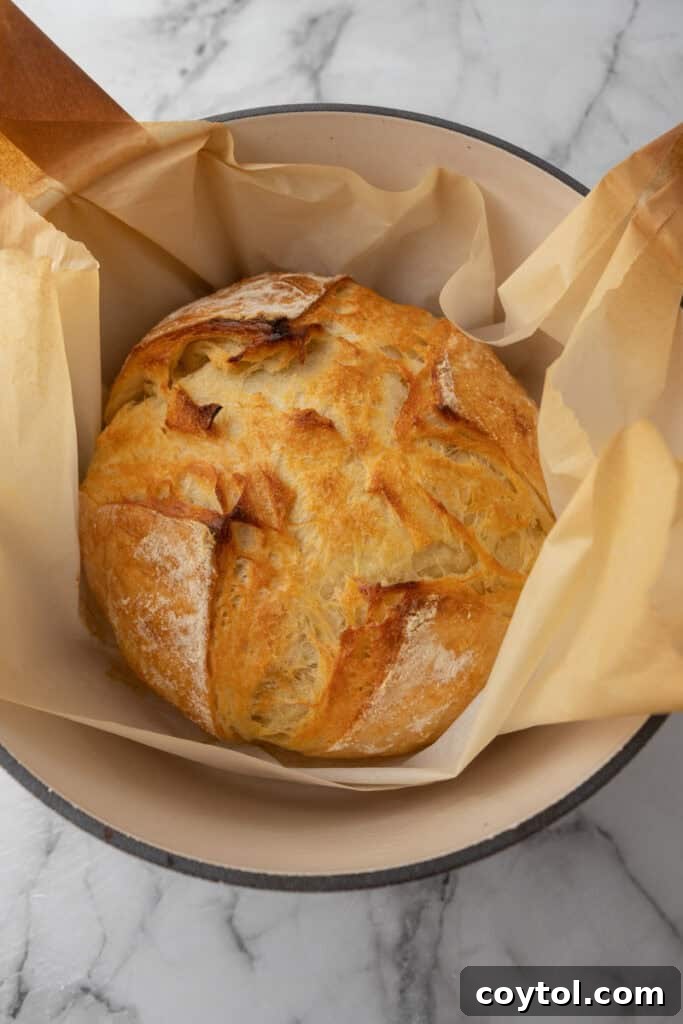
- With caution, transfer the scored dough, along with the parchment paper, into the preheated Dutch oven. To generate steam, place a few ice cubes on the outside of the parchment paper, between the dough and the Dutch oven wall. Promptly cover with the lid and bake for 30 minutes.
- After 30 minutes, remove the lid, reduce the oven temperature to 390°F (198°C), and continue baking for another 15-20 minutes. Bake until the crust develops a deep, rich golden brown color, and the internal temperature reaches 200-205°F (93-96°C) when measured with an instant-read thermometer.
- Once baked, immediately transfer the bread to a wire rack and allow it to cool completely before slicing. This allows the internal crumb to fully set, preventing a gummy texture.
Baking Wisdom: If your crust appears to be browning too quickly during the uncovered bake, slightly reduce the oven temperature for the final 10 minutes. Furthermore, resisting the urge to slice into your warm loaf is paramount. Cutting into the bread too soon can result in a gummy texture. For the best possible crumb and flavor, aim to let the loaf cool for at least one hour, ideally longer, before enjoying. Additionally, if your oven tends to run hot, placing an empty baking tray on the bottom rack can help shield the bottom of your Dutch oven, preventing the crust from burning or becoming overly hard.
Croissant Sourdough Bread: Expert Tips and Tricks for Optimal Results
Achieving a truly exceptional Sourdough Croissant Bread comes down to attention to detail and a few key strategies. Follow these expert tips to ensure your loaf turns out perfectly flaky, buttery, and full of flavor every time:
- Prioritize High-Quality Butter: The butter is central to this recipe’s success. Invest in the highest quality unsalted butter you can find. European butter, Amish butter, or other artisanal brands typically have a higher fat content and superior flavor, which will directly translate into a richer, more delicious loaf.
- Adjust Salt Levels with Care: If you opt to use salted butter instead of unsalted, remember to slightly reduce the amount of added salt in your dough. This prevents your bread from becoming overly salty and helps maintain a balanced flavor profile.
- Mind Your Dough’s Hydration: Different flours absorb water differently. Pay attention to your dough’s consistency. If it feels too dry and stiff, add a tiny splash more water, a teaspoon at a time. If it’s overly sticky and difficult to handle, let it rest for a few more minutes to allow the flour to fully hydrate before continuing.
- Maintain Cold Butter Throughout: This is arguably the most critical tip for achieving distinct, flaky layers. Work quickly when incorporating butter, and ensure it remains as cold as possible. If your dough starts to feel too warm (a common occurrence in humid or warm environments), don’t hesitate to place it in the refrigerator for 15-20 minutes to chill before resuming your work. This prevents the butter from melting into the dough, preserving those essential layers.
- Harness the Power of Steam for Crispiness: Steam is your ally for a beautifully crisp crust. If you’re not using a Dutch oven, place a small pan of boiling water in the bottom of your oven during the first 20 minutes of baking. Even when using a Dutch oven, adding a few ice cubes between the pot and the parchment paper before covering with the lid creates a burst of steam, further enhancing the crust’s development.
- Verify Doneness with a Thermometer: Remove the guesswork from baking! Your bread is perfectly baked when its internal temperature reaches between 200-205°F (93-96°C) at the center. An instant-read thermometer is an invaluable tool for this.
- Protect the Bottom Crust: Some ovens have hot spots or tend to heat more intensely from the bottom. To prevent the bottom of your sourdough bread from burning or becoming overly hard, place an empty baking tray on the bottom rack of your oven. This acts as a buffer, ensuring an evenly golden and tender bottom crust.
Why This Sourdough Croissant Bread Recipe is a Must-Try
Still contemplating whether to embark on this baking adventure? Let us convince you! This Sourdough Croissant Bread isn’t just another loaf; it’s an experience. Here’s why it deserves a spot in your baking rotation:
- The Best of Both Worlds: This recipe offers the ultimate fusion for enthusiasts of both tangy sourdough and the luxurious, flaky layers of croissant dough. It’s a truly unique combination that delivers on both flavor and texture.
- Unleash Your Inner Artisan: Creating this bread feels incredibly rewarding. The impressive lamination, the beautiful rise, and the golden crust will make you feel like a seasoned artisan baker, earning genuine admiration from anyone lucky enough to try it.
- Incredibly Versatile: From sweet spreads like jam and Nutella to savory companions like cheese and deli meats, this loaf is exceptionally versatile. It’s perfect for breakfast, brunch, lunch, or even as a sophisticated side dish for dinner.
- Simply Irresistible: Beyond all its technical merits, this bread simply tastes delicious. The rich butter, the subtle tang, the satisfying flakiness – it’s a combination that’s hard to resist. Give it a try; it might just become your new favorite obsession!
Frequently Asked Questions – FAQ
What type of flour should I use for this recipe?
For the best results, we highly recommend using a strong bread flour with a protein content of at least 12-13%. This higher protein level is crucial for developing a robust gluten structure, which in turn contributes to the bread’s characteristic chewy yet airy texture, and helps maintain the integrity of those delicate layers during baking.
How am I supposed to grate the butter?
Grating cold butter is a key technique for achieving the distinct layers in this croissant-sourdough hybrid. The best method is to freeze your block of butter beforehand. Frozen butter is much easier to grate, and crucially, it stays colder longer, preventing it from melting into the dough too soon. Keep the butter block in the freezer until the very moment you’re ready to grate and incorporate it. For the second butter addition during the third stretch and fold, ensure that portion of butter also remains in the freezer while your dough is resting.
Do I really have to let it proof overnight?
While this recipe spans multiple days and requires a degree of patience, the overnight cold proof in the refrigerator is absolutely worth it – and highly recommended! This slow, extended fermentation not only deepens the bread’s complex sourdough flavor but also firms up the butter within the dough. This makes the dough significantly easier to handle during final shaping and baking, contributing to a more impressive rise and flakier texture.
Why isn’t my dough rising during bulk fermentation?
If your dough isn’t rising as expected during bulk fermentation, there are a few common culprits. Firstly, your sourdough starter might not be sufficiently active. Ensure it has been recently fed and is consistently doubling in size within 4-6 hours before using it. If not, give it another feeding or two until it reaches peak activity. Secondly, your kitchen environment could be too cold. Sourdough thrives in warmth. Try placing your dough in a slightly warmer spot (around 70-74°F or 21-23°C) or consider extending the fermentation time.
For this specific recipe, balancing fermentation with keeping the butter cold can be a bit tricky. We prioritize keeping the butter from melting, which naturally slows down the bulk fermentation process. Don’t be alarmed if your dough rises slowly due to the lower temperature requirement. Be prepared to extend your bulk fermentation time to 9-10 hours, or even longer, as needed, to allow the dough to adequately rise and develop flavor.
Can I use all-purpose flour instead of bread flour for this Croissant Sourdough Bread Recipe?
Yes, you can substitute all-purpose (AP) flour for bread flour if it’s what you have on hand. However, be aware that AP flour has a lower protein content, which will result in a softer dough that may be slightly harder to handle and might not develop as strong a gluten structure. If you opt for AP flour, we recommend reducing the initial water content slightly to prevent the dough from becoming overly sticky and unmanageable.
Why is my Croissant Sourdough Bread dense instead of light and airy?
A dense crumb typically indicates under-fermentation. To avoid this, ensure your sourdough starter is robust and active, and allow sufficient time for both bulk fermentation and cold proofing. It’s crucial not to rush these stages. Additionally, be mindful of over-mixing or overly vigorous handling of the dough. We want to preserve as many of the fermentation gases as possible within the sourdough. Over-handling during shaping can easily knock out those precious air pockets. Gentle handling helps to maintain the dough’s delicate structure and promotes a light, airy result.
How do I store leftover bread?
To keep your leftover Sourdough Croissant Bread fresh, store it in a sealable plastic bag or any airtight container at room temperature for up to 3 days. For longer preservation, refrigerate it for up to a week. For maximum longevity, you can wrap the loaf or individual slices tightly in plastic wrap, followed by aluminum foil, and store them in the freezer for up to a month. When ready to enjoy, we highly recommend toasting, air frying, or gently reheating the bread in the oven to revive its crisp exterior and buttery layers for the full, delightful experience!
How can I serve and enjoy this croissant bread?
The versatility of this Sourdough Croissant Bread is one of its greatest assets! Here are an abundance of delicious ways we highly recommend you try:
- Fresh & Simple: When you first slice into the warm loaf, drizzle a little honey, sprinkle a touch of sea salt, or simply spread your favorite sweet or savory butter to enjoy its fresh, nuanced flavors.
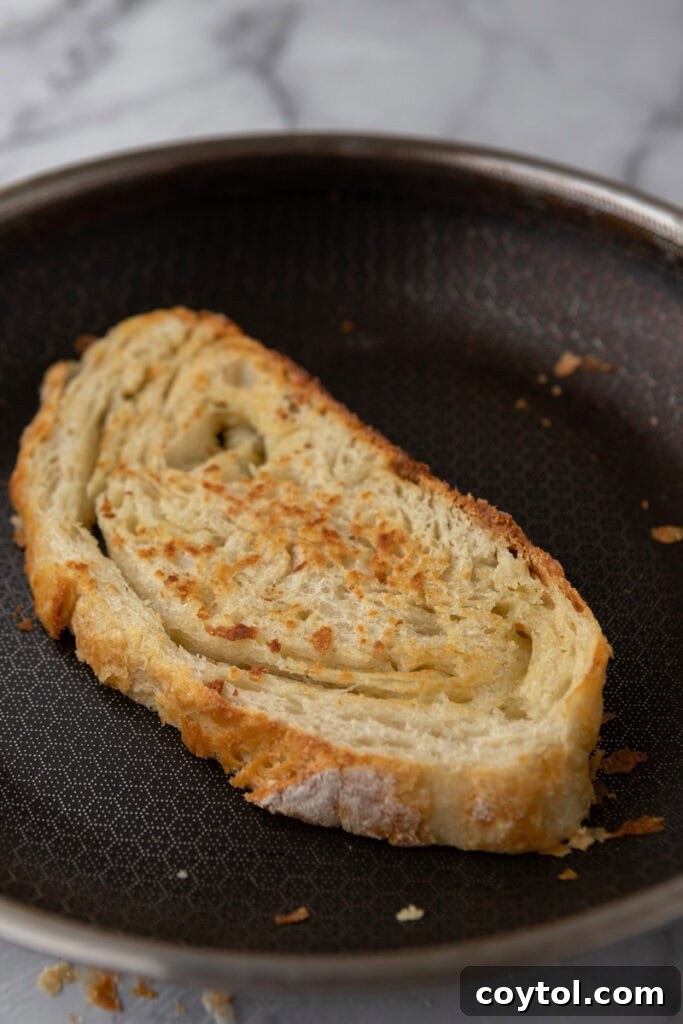
- The Classic Toast: Toast a slice to golden perfection and spread a generous dollop of butter. This truly highlights the homemade sourdough croissant experience.
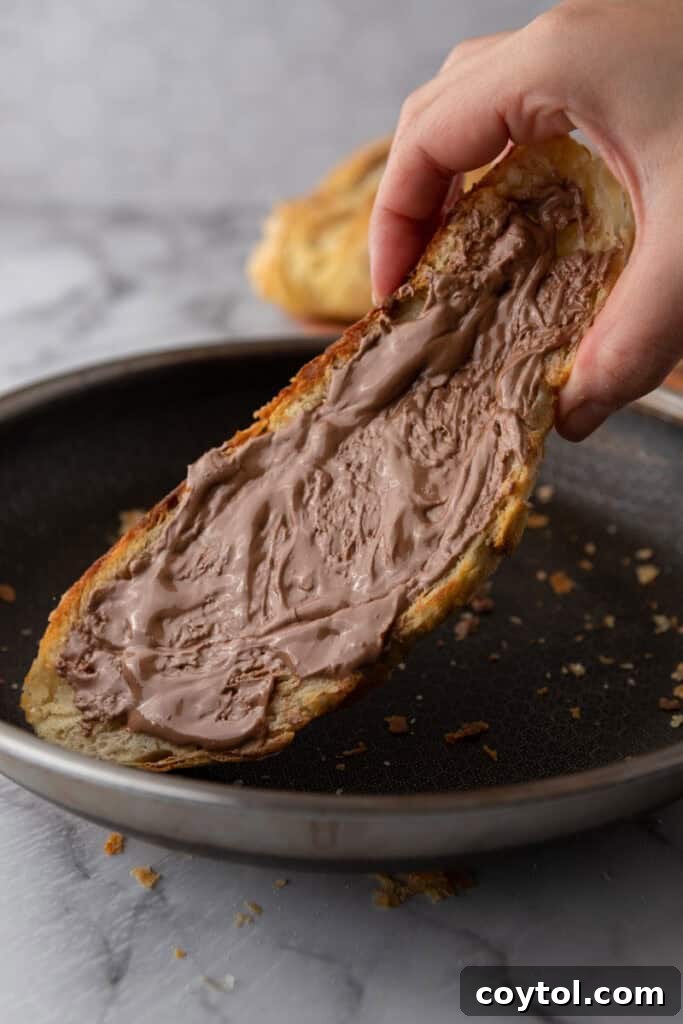
- Chocolate Croissant Vibes: After toasting, slather a slice with rich Nutella for an indulgent, chocolatey twist that mimics a pain au chocolat.
- Avocado Toast Reinvented: Elevate your next avocado breakfast toast by using a hearty slice of this flavorful bread as your base.
- Jam & Nut Butter Heaven: Enjoy it toasted with a variety of artisanal jams, fruit preserves, or creamy nut butters for a comforting treat.
- The Ultimate French Toast: Move over, brioche! This buttery, flaky bread makes an absolutely incredible base for French toast. Its rich texture and subtle tang will transform a simple breakfast into an extraordinary delight.
- Gourmet Sandwiches: Perfect for building your favorite peanut butter and jelly sandwiches or crafting sophisticated deli meat and cheese creations.
- Decadent Bread Pudding: Given its buttery and flaky nature, this bread is an ideal candidate for a rich and comforting bread pudding.
- Soup’s Best Friend: Serve it on the side of your favorite soup or cut it into cubes and toast to create gourmet croutons for added texture and flavor.

The Best Sourdough Croissant Bread Recipe

Sourdough Croissant Bread
A hybrid between a classic sourdough loaf and a croissant, this sourdough croissant bread is buttery, flaky, and rich in flavor. It follows the sourdough fermentation process while incorporating layers of butter for a laminated effect.
Ingredients
Dough:
- 350 g water (about 1 ½ cups minus 1 tbsp, room temperature)
- 100 g active sourdough starter (100% hydration, about ½ cup)
- 500 g bread flour (about 3 ¾ cups)
- 10 g salt (about 1 ¾ tsp, use less if you’re using salted butter)
Butter Layer:
- 113 g unsalted butter (cold from the freezer, grated, 1/2 cup)
Instructions
Step 1: Prepare the Dough
- In a large bowl, mix together flour, water, sourdough starter, and salt until fully combined.
- Cover with a damp towel and let it rest for 30 minutes to allow the flour to hydrate.
Step 2: Stretch & Folds with Butter Incorporation
- Perform four sets of stretch and folds every 30 minutes.
- Do the first stretch and fold without adding any butter, this is done to make the dough smoother and more elastic before the next step.
- During the second stretch and fold, grate half of the cold butter directly over the dough and fold it in. Cover and allow it to rest for 30 minutes. Place the rest of the butter back in the freezer.
- On the third stretch and fold, add the remaining butter and fold again. Continue folding until the butter is well incorporated. Cover and rest for another 30 minutes.
- On the fourth stretch and fold, just do the same step as the previous stretch and fold but without adding any more butter.
Step 3: Bulk Fermentation
- Cover and let the dough rise at room temperature (70-72°F) for 6-7 hours until it has risen about 2/3 of the way and has visible bubbles that you can see at the bottom of your glass bowl.
- If the dough gets too warm, refrigerate it for 20-30 minutes to keep the butter from melting. (It’s crucial to check your dough temperature every time you work with it, and every few hours to make sure it isn’t too hot).
Step 4: Pre-Shaping & Cold Proofing
- Lightly flour your work surface. Use just enough flour to prevent sticking, but not too much or it will affect how the dough seals.
- Gently turn out the dough. Place the dough upside down from the bowl onto the floured surface. Try not to deflate it too much; you want to keep the air bubbles intact.
- Gently flatten the dough into a rough rectangle (do not press too hard to keep air pockets intact). Fold the top third down toward the center, like folding a letter.
- Fold the bottom third up over the previous fold.
- Rotate 90° and gently pull the edges in toward the center, tucking them under to create surface tension. We are shaping it into a ball in this recipe, so keep moving your hand in a C shape to make a tight boule. Using a bench scraper, pick it up and place it smooth side down onto the floured banneton. Let it rest for 10-20 minutes then seal the top before covering it with plastic wrap and refrigerating overnight (8-12 hours) for better flavor.
Step 5: Scoring & Baking
- Preheat the oven to 450°F (230°C) with a Dutch oven inside for at least 30 minutes.
- Remove the dough from the fridge, place it on parchment paper, and score the top with a sharp blade.
- Transfer into the hot Dutch oven, cover, and bake for 30 minutes covered.
- Remove the lid, reduce the heat to 390F (198°C) and bake for another 15-20 minutes until deep golden brown and the internal temperature reaches 200°F (93°C).
Step 6: Cooling & Serving
- Transfer the bread to a cooling rack as soon as it comes out of the oven and let it cool for at least 1 hour before slicing to allow the crumb to set.
- Enjoy the flaky, buttery sourdough croissant bread with jam, honey, Nutella, or on its own!
Nutrition Information (Approximate per serving)
Nutrition information is automatically calculated, so should only be used as an approximation.
- Calories: 226
- Carbohydrates: 32g
- Protein: 5g
- Fat: 8g
- Saturated Fat: 5g
- Polyunsaturated Fat: 1g
- Monounsaturated Fat: 2g
- Trans Fat: 0.3g
- Cholesterol: 20mg
- Sodium: 326mg
- Potassium: 44mg
- Fiber: 1g
- Sugar: 0.1g
- Vitamin A: 236IU
- Calcium: 10mg
- Iron: 0.4mg
Enjoyed this recipe? Leave a comment below!
If you enjoyed this Croissant Sourdough Bread Recipe, make sure to pin it for later!