
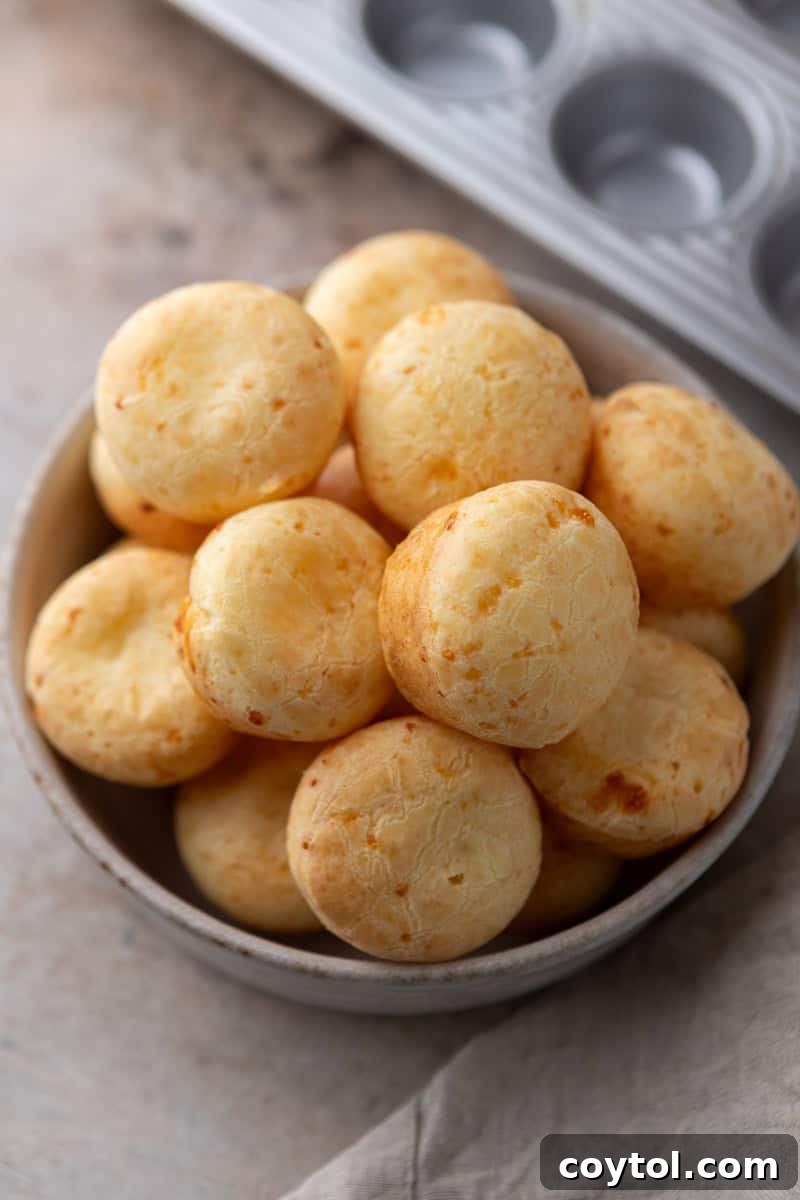
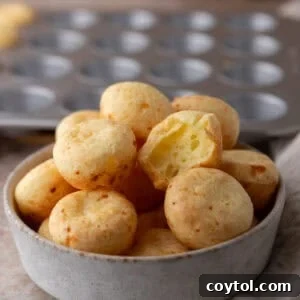
Step into the delightful world of Brazilian cuisine with these irresistible Brazilian Cheese Bread Bites, famously known as Pão de Queijo. This recipe delivers everything authentic pão de queijo should be: a perfectly crisp, golden-brown exterior that gives way to a wonderfully stretchy, chewy, and airy interior. Naturally gluten-free and astonishingly simple to make, these cheese puffs are so dangerously addictive, you’ll find yourself reaching for just one more, again and again.
Unlike traditional methods that often involve shaping individual balls by hand, our innovative approach bakes these savory treats in a mini muffin pan. This ingenious technique not only saves time and effort but also guarantees extra crispy edges and uniformly puffed centers, making each bite a miniature explosion of flavor and texture. It’s a foolproof method that promises a consistently perfect batch every time.
This recipe prides itself on being incredibly easy and pantry-friendly. You’ll only need a handful of basic ingredients: tapioca flour (or tapioca starch), whole milk, your preferred oil, a single egg, and a generous amount of grated cheese. Forget about yeast, complicated rising times, or specialized equipment like a blender. This is a straightforward “mix, scoop, and bake” affair, perfect for beginner bakers and seasoned pros alike.
These versatile cheese bread bites are perfect on their own as a snack, an appetizer, or a breakfast treat. For an elevated experience, consider serving them alongside a creamy Rotel Cheese Dip or even a savory Cottage Cheese Queso for an explosion of cheesy goodness.
Why This Pão de Queijo Recipe Will Become Your New Favorite
There are countless reasons why this particular Pão de Queijo recipe stands out and is destined to become a staple in your kitchen. It masterfully captures the essence of authentic Brazilian cheese bread while simplifying the process, making it accessible and enjoyable for everyone. Here’s why this recipe truly works wonders:
- The Magic of Tapioca Flour: Tapioca flour, derived from the cassava root, is the star ingredient. Its unique properties allow it to gelatinize when heated, creating that signature stretchy, almost mochi-like, chewy interior that is synonymous with traditional pão de queijo. It’s the secret to their incredible texture.
- Steam for Natural Lift: The high moisture content in the dough, combined with the quick baking in a hot oven, generates significant steam. This steam acts as a natural leavening agent, puffing up the bread beautifully without the need for yeast or any other chemical leaveners. This means no waiting for dough to rise!
- Mini Muffin Pan Perfection: Utilizing a mini muffin pan is a game-changer. Each cavity perfectly cradles a small portion of dough, promoting even baking and ensuring every single bite achieves maximum crispiness around the edges while maintaining a soft, airy center. This method also guarantees consistent sizing, making them ideal for entertaining or quick snacks.
- Naturally Gluten-Free: As tapioca starch is naturally gluten-free, this recipe is perfect for those with gluten sensitivities or anyone looking to enjoy a delicious, wholesome bread alternative. It’s a fantastic option for a wider audience.
- Effortless Preparation: This is a truly one-bowl, no-fuss recipe. There’s no complicated kneading, no extensive resting periods, and absolutely no need for a blender. The process is simple: combine ingredients, mix, scoop, and bake. You can have fresh, warm Pão de Queijo ready in under 30 minutes from start to finish.
A Personal Delight: My Obsession with Pão de Queijo
Let me tell you, I’ve whipped up these Pão de Queijo bites no less than five times in the past week, and that alone should speak volumes about their irresistible appeal. Once you master the distinct texture—which is surprisingly forgiving—this recipe becomes one you can make on autopilot. Whether it’s for an impromptu snack, a party spread, a treat for the kids, or, let’s be honest, simply to stand in the kitchen and devour them straight from the pan, they never disappoint.
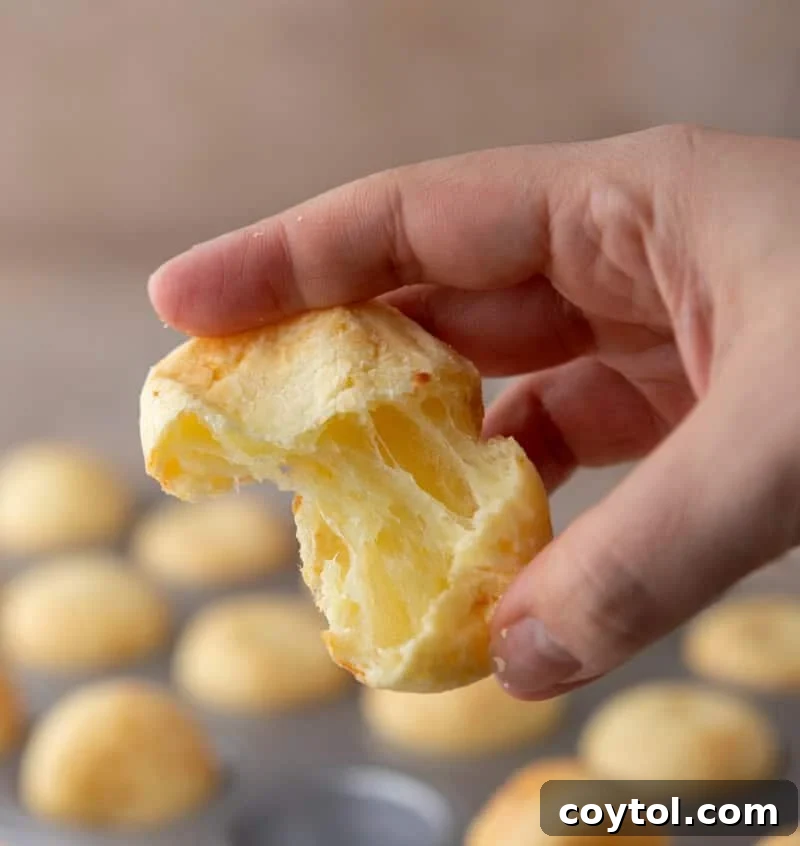
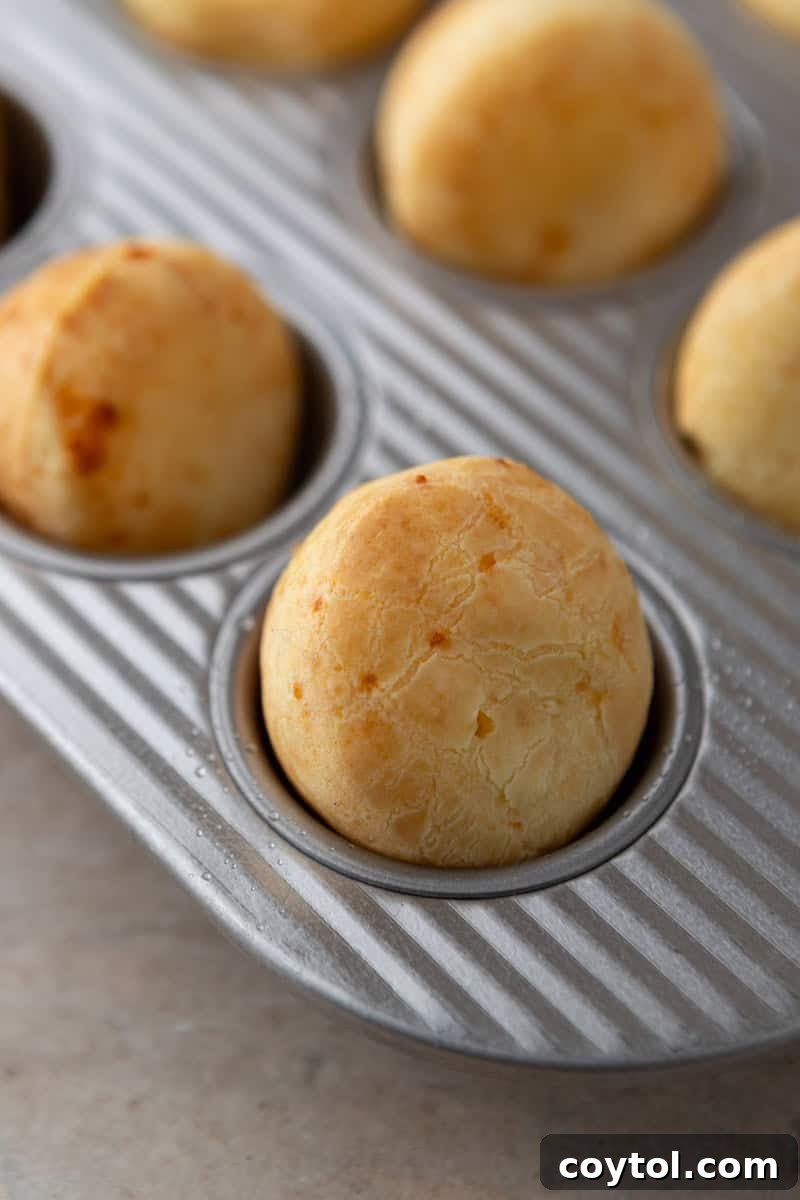
What I adore most about this recipe is how accommodating the dough is. At first glance, it might look a little peculiar—glossy, somewhat separated, and incredibly stretchy. However, with a bit of mixing, it miraculously transforms into a smooth, elastic, and perfectly scoopable batter. This magical batter then bakes up into the most satisfying little cheese popovers you could imagine. Witnessing them puff up dramatically in the oven is a joy, and as they cool, they deflate just slightly, leaving behind that iconic hollow center that makes authentic pão de queijo so beloved and recognizable.
If you’ve ever savored Brazilian cheese bread at a churrascaria (Brazilian steakhouse) or enjoyed a homemade batch shared by a Brazilian friend, and found yourself wondering if you could replicate that authentic flavor and texture in your own kitchen, I’m here to tell you that you absolutely can. And trust me, it’s far easier than you might think. Get ready to impress yourself and everyone you share them with!
Essential Ingredients for Perfect Pão de Queijo
Crafting these delicious Brazilian cheese bread bites requires only a few fundamental ingredients, most of which you likely already have in your pantry. Each plays a crucial role in achieving the signature taste and texture of pão de queijo. Here’s what you’ll need, along with some helpful tips:
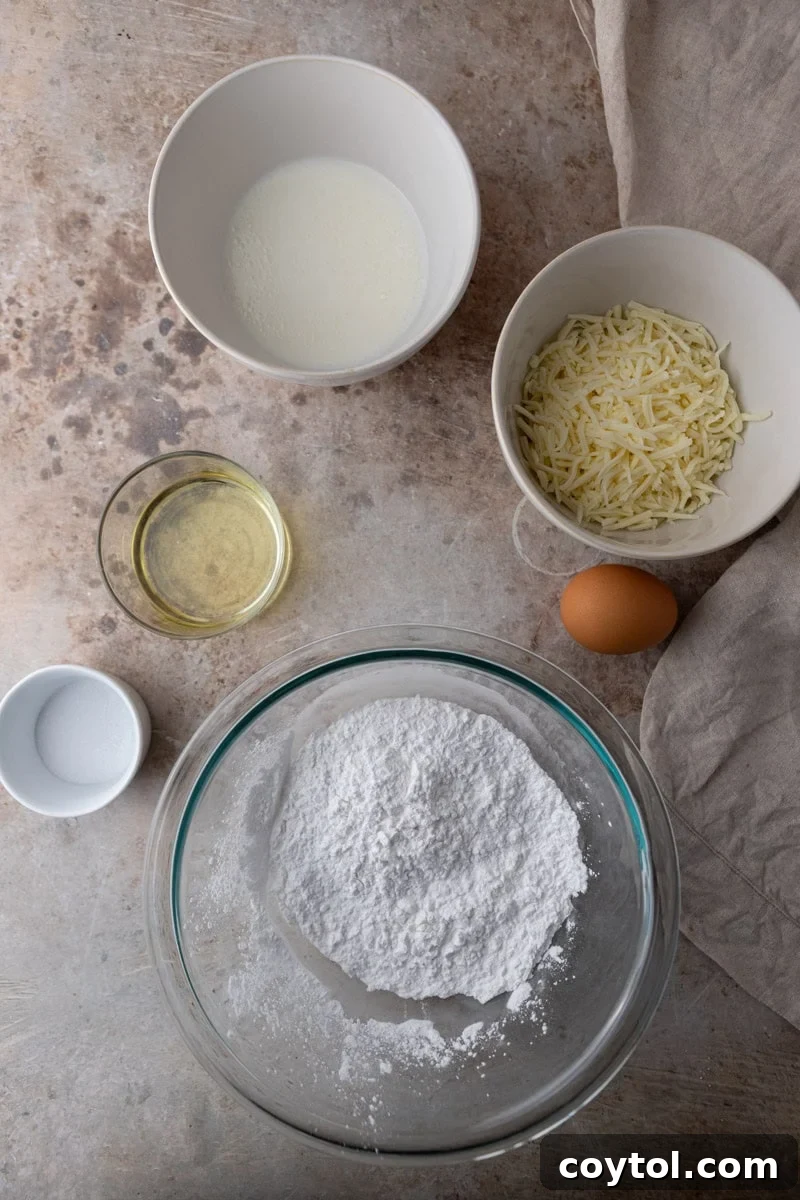
- Tapioca Starch (Tapioca Flour): This is the non-negotiable cornerstone of pão de queijo. It’s what gives the bread its distinct chewy, elastic texture and naturally makes it gluten-free. Ensure you use tapioca starch or tapioca flour (they are the same product) and not another type of flour.
- Whole Milk: Whole milk contributes to the richness and tender crumb of the cheese bread. You can use lower-fat milk, but whole milk will yield the best flavor and texture.
- Vegetable Oil (or Olive Oil): A neutral-flavored oil like vegetable, canola, or sunflower oil works perfectly. For a subtle flavor nuance, a light olive oil can also be used. The oil helps create the crisp exterior and contributes to the dough’s elasticity.
- Salt: Essential for balancing the flavors and enhancing the cheese. Adjust to your taste, but a good pinch goes a long way.
- Egg: The egg acts as a binder, adds structure, and contributes to the golden color and richness of the bread. Ensure it’s at room temperature for better incorporation into the dough.
- Grated Cheese: The soul of cheese bread! The type of cheese you choose significantly impacts the flavor and stretchiness. Freshly grated cheese is always recommended for superior melt and taste.
Choosing Your Perfect Cheese Blend
While you can experiment with various cheeses, a blend often yields the most balanced and authentic results. For that classic pão de queijo experience, we highly recommend:
- Parmesan Cheese: Finely grated Parmesan provides a sharp, savory depth of flavor and contributes to the bread’s structural integrity. Its saltiness perfectly complements the starchy tapioca.
- Mozzarella Cheese: Low-moisture mozzarella is fantastic for its incredible melt and stretch. It gives the pão de queijo that desirable gooey, pull-apart quality in the center. Avoid fresh mozzarella, as it contains too much moisture.
For those looking to explore, traditional Brazilian recipes often use “Minas cheese,” a semi-hard cheese from Brazil. If you can find it, it makes for an incredibly authentic flavor profile. Other good substitutes or additions could include Monterey Jack, cheddar, or even a touch of cream cheese for added richness.
Step-by-Step Guide: How to Make Brazilian Cheese Bread Bites
Making these delightful Pão de Queijo bites is surprisingly straightforward. Follow these simple steps to achieve perfect results every time:
- Prepare Your Oven and Pan: Begin by preheating your oven to 375°F (190°C). Crucially, generously grease all 24 cavities of your mini muffin pan. Don’t skimp on this step – proper greasing prevents sticking and ensures your cheese bread puffs release easily.
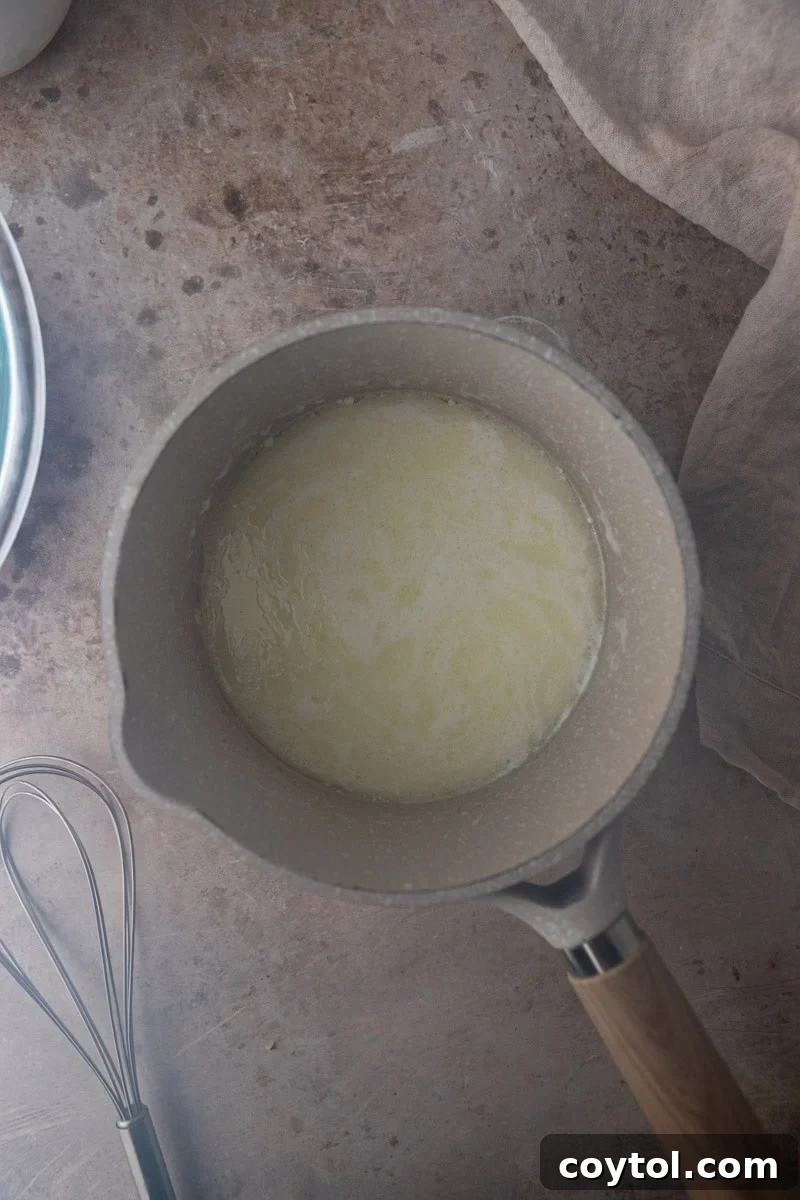
- Heat the Liquid Mixture: In a small saucepan, combine the whole milk, vegetable oil, and salt. Heat this mixture over medium heat until it just begins to simmer around the edges. It’s important not to bring it to a rolling boil, as you just want it hot enough to scald the tapioca flour.
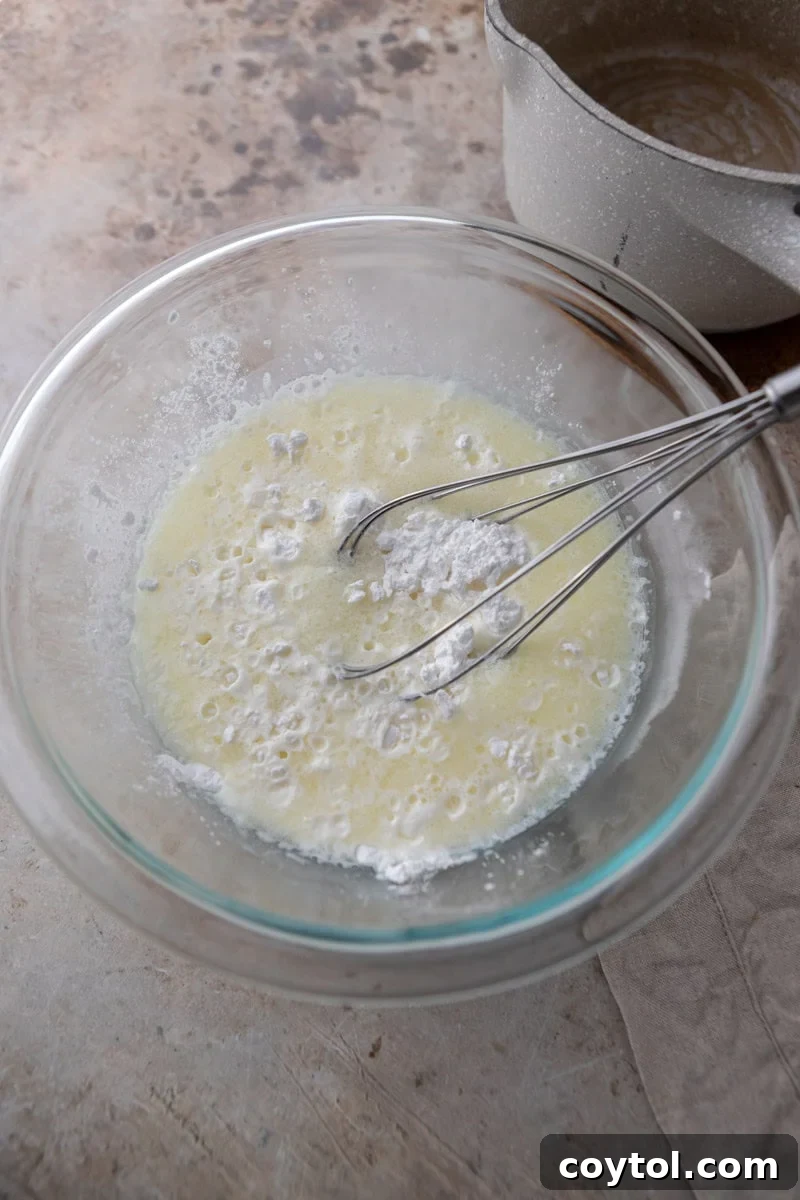
- Scald the Tapioca Flour: Place the tapioca flour in a large, heat-safe mixing bowl. Immediately pour the hot milk and oil mixture over the tapioca flour. Using a sturdy spoon or spatula, stir vigorously until the mixture comes together to form a thick, glossy dough. This process, known as scalding, helps hydrate the tapioca starch and starts the gelatinization process.
- Cool and Add Egg: Let the dough rest for approximately 2–3 minutes. It should be warm to the touch but not too hot, as you don’t want to cook the egg. Add the room-temperature egg to the warm dough. Whisk vigorously and continuously until the dough becomes smooth, elastic, and thoroughly combined. Don’t worry if it looks a bit separated at first; just keep mixing, and it will come together beautifully.
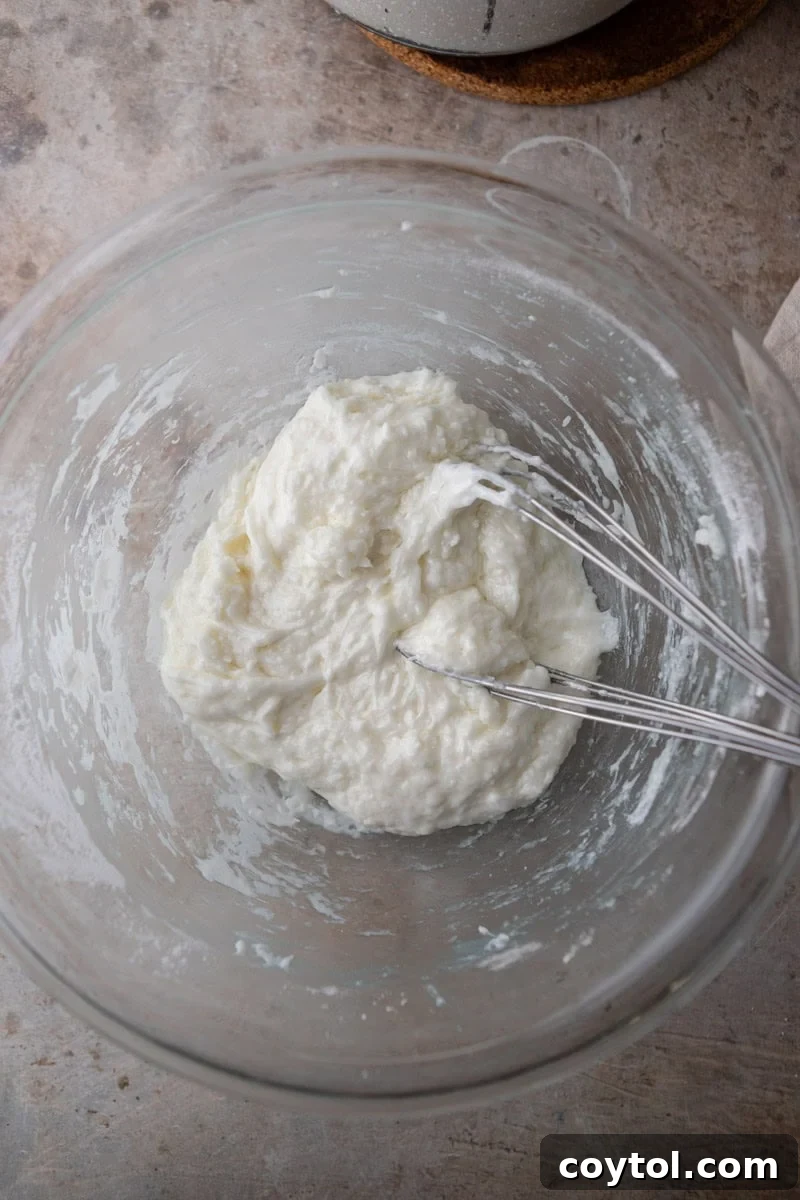
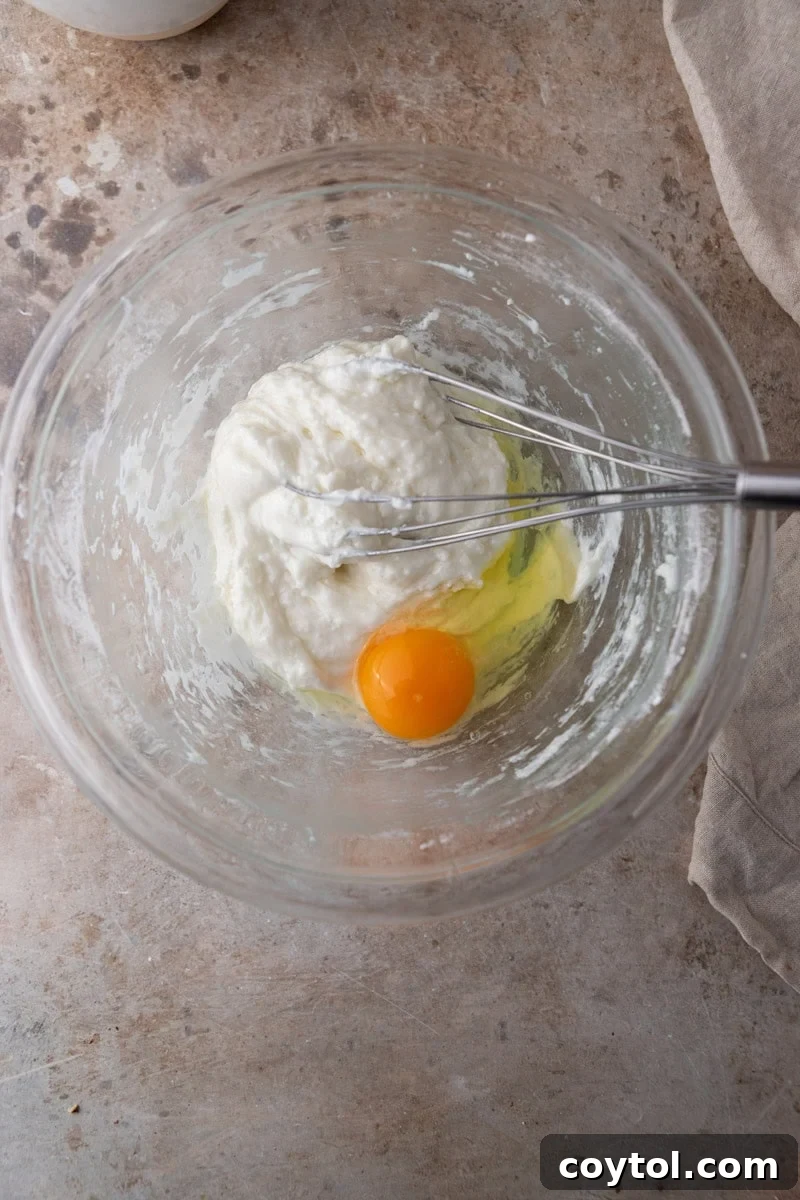
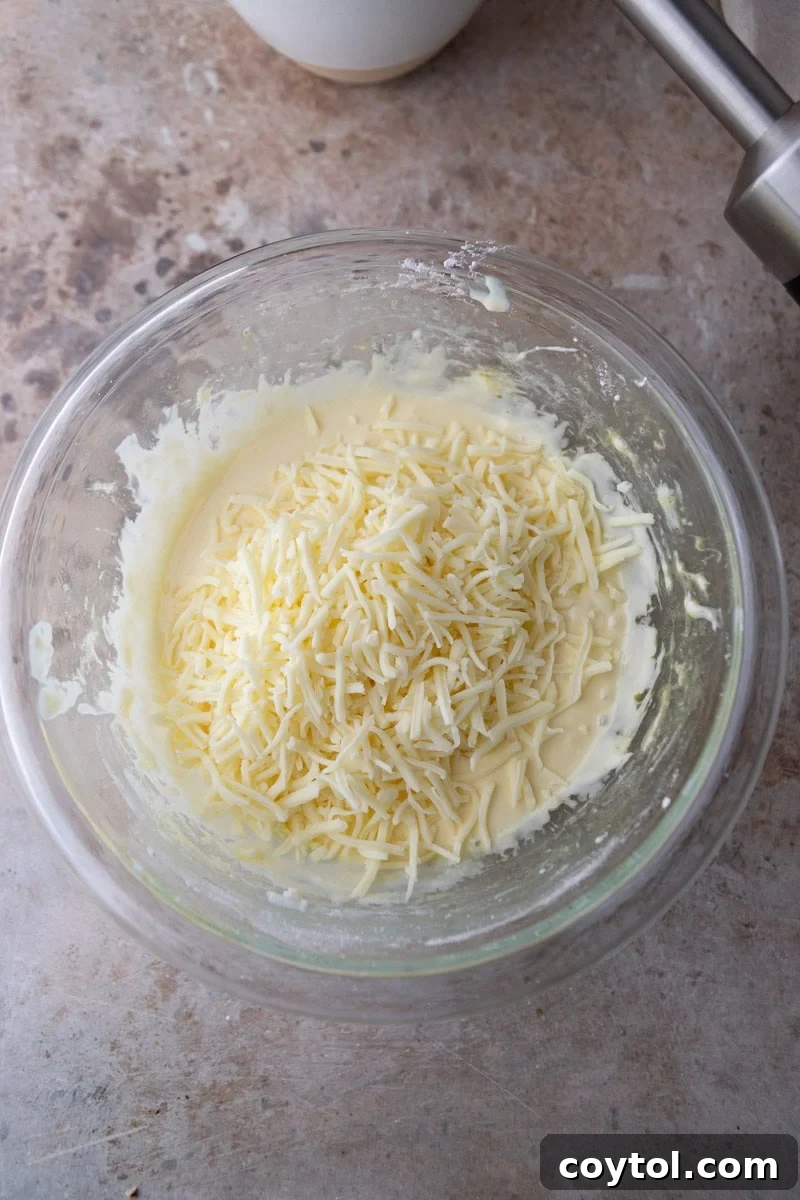
- Incorporate the Cheese: Gently fold in the grated cheese until it is evenly distributed throughout the dough. The final batter should be thick, noticeably stretchy, and scoopable—it will resemble a very sticky choux pastry.
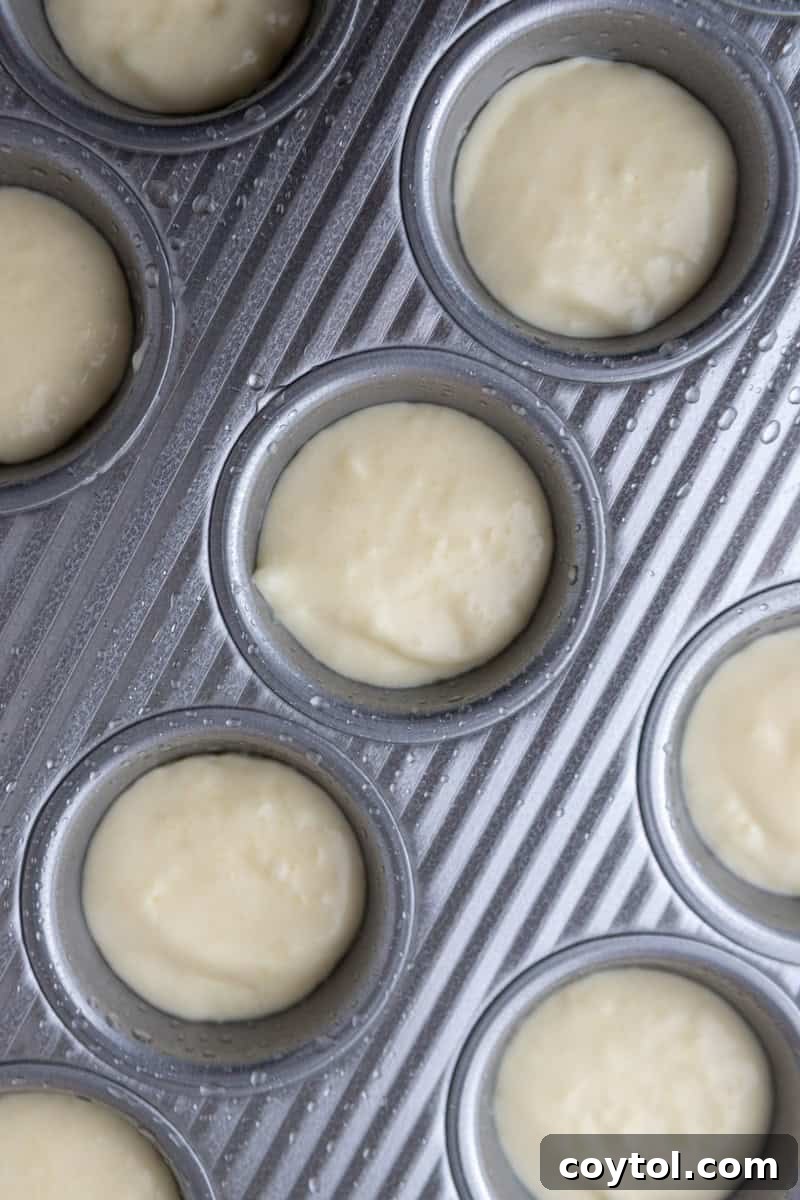
- Fill the Muffin Pan: Using a small spoon, a piping bag, or a mini ice cream scoop, fill each mini muffin cup about halfway with the cheese bread batter. Avoid overfilling, as they will puff up significantly in the oven.
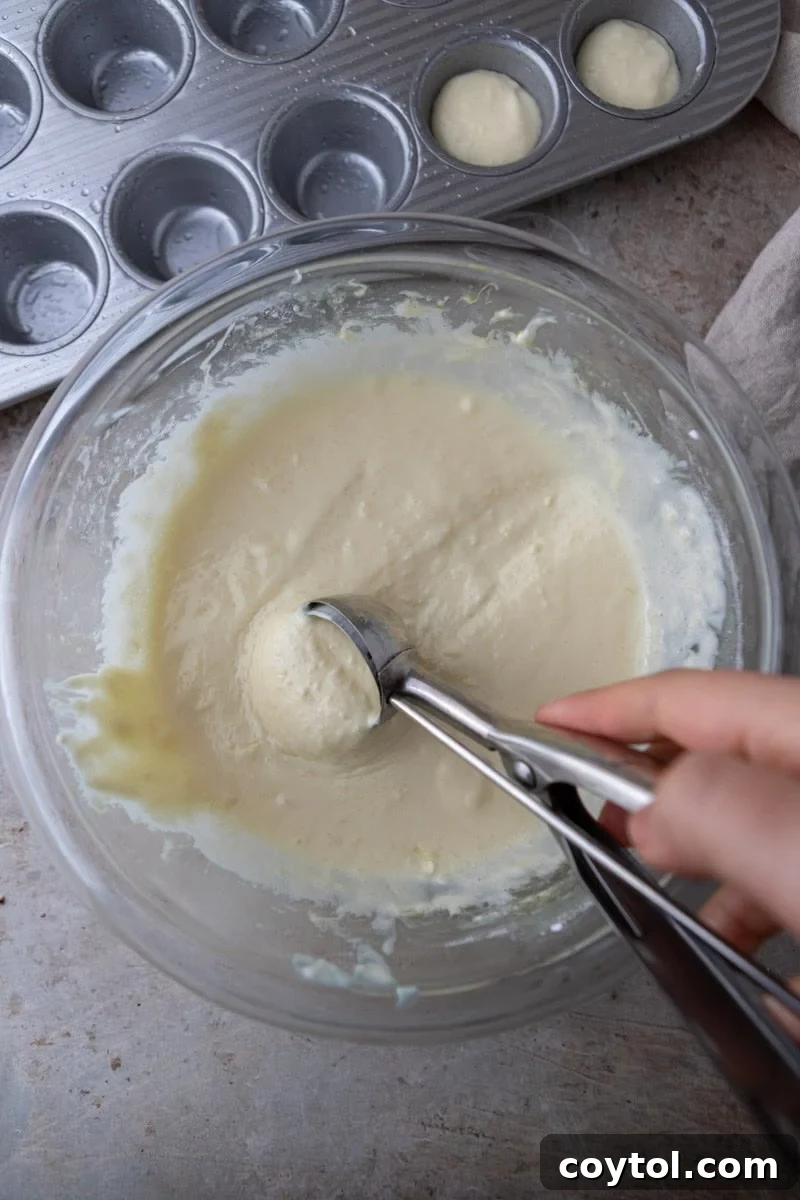
- Bake to Golden Perfection: Place the mini muffin pan in the preheated oven and bake for 16–18 minutes. The cheese bread bites are ready when they are beautifully puffed up, lightly golden brown on the outside, and set. If you prefer a deeper, more pronounced golden color, you can bake them for an additional 1–2 minutes, keeping a close eye on them to prevent burning.
- Rest Before Serving: Once baked, remove the pan from the oven and let the pão de queijo rest in the pan for 3–5 minutes. This crucial resting period allows them to firm up slightly as the steam escapes, making them easier to remove and preventing them from collapsing. Gently remove them from the pan and serve warm.
Tips for Perfection & Troubleshooting Common Issues
Achieving the perfect Pão de Queijo is simple, but a few pointers can ensure consistent success. Here are some tips and solutions to common questions, especially when using a mini muffin pan:
- For Extra Crispy Bottoms: If you love a super crisp base, try preheating your empty mini muffin pan in the oven for about 3 minutes before filling it with the batter. The hot metal will create a fantastic crust as soon as the batter touches it.
- Why are my Pão de Queijo flat or dense? This usually happens if the dough cooled down too much before baking, preventing the steam from creating enough lift. Ensure you add the egg and mix quickly after scalding, and get the batter into the hot pan and oven without delay. Another reason could be using an excessively heavy or wet cheese, which can weigh down the batter. Stick to finely grated, low-moisture cheeses.
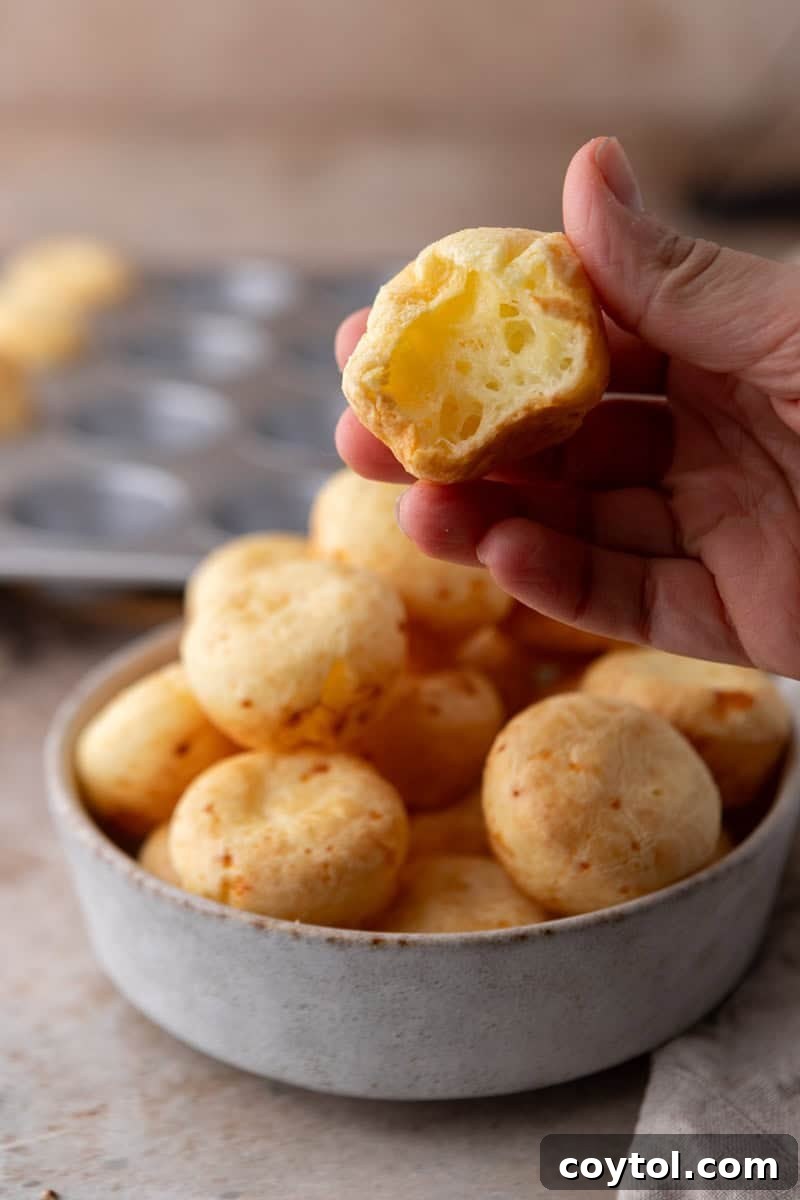
- Why is the inside hollow? A hollow interior is completely normal and, in fact, an authentic and desirable characteristic of traditional Brazilian cheese bread. It’s a sign of a well-puffed pão de queijo, created by the steam expanding rapidly during baking. Embrace the delightful air pocket!
- My cheese breads are sticking to the pan: This is a common issue if the pan wasn’t greased thoroughly enough. Be very generous with your non-stick spray or butter, making sure to coat every crevice of each muffin cup. Also, ensure you let the breads rest for 3–5 minutes in the pan after baking; they firm up as they cool slightly, making them easier to remove cleanly.
- The dough looks separated when I add the egg: Don’t panic! This is a completely normal phase. Keep whisking vigorously, and the tapioca starch will hydrate further, emulsifying with the egg and transforming into a smooth, elastic batter within a minute or two. Persistence is key here.
- My pão de queijo didn’t puff up much: Ensure your oven is fully preheated to the correct temperature. A strong burst of heat is crucial for the initial puff. Also, avoid opening the oven door too frequently during baking, as this can cause temperature drops and deflate your breads.
Exciting Flavor Variations to Explore
While the classic Pão de Queijo is incredibly delicious on its own, this recipe is also wonderfully adaptable to various flavor additions. Don’t hesitate to get creative and customize your cheese bread bites:
- Garlic Cheese Bread: For a savory kick, add ¼ teaspoon of garlic powder to the dry tapioca flour before scalding. You can also mix in a teaspoon of finely minced fresh garlic with the cheese.
- Herby Delights: Fold in 1-2 tablespoons of finely chopped fresh herbs like rosemary, chives, parsley, or oregano along with the cheese for a fragrant twist.
- Spicy Kick: If you enjoy a bit of heat, add a pinch of cayenne pepper, smoked paprika, or a tiny amount of finely diced jalapeño (seeds removed) to the batter with the cheese.
- Bacon & Chive: Cook and crumble some bacon, then fold it into the batter with finely chopped chives for a hearty and flavorful addition.
- Sun-Dried Tomato & Basil: Chop sun-dried tomatoes finely and mix them in with fresh basil for a Mediterranean-inspired version.
- Black Pepper & Parmesan: A simple yet sophisticated variation. Add extra freshly ground black pepper along with your Parmesan cheese for a pungent and peppery bite.
Make Ahead & Freezer-Friendly Options
Pão de Queijo is fantastic for meal prepping or preparing ahead of time, ensuring you always have a batch of these delicious bites ready for any occasion. Both baked and unbaked options store well:
- Freezing Unbaked Batter:
- Scoop the prepared batter into the greased mini muffin pan cavities as if you were going to bake them immediately.
- Place the entire muffin pan in the freezer until the individual portions of batter are completely solid (this usually takes 1-2 hours).
- Once solid, pop out the frozen portions and transfer them to a freezer-safe, airtight bag or container. They can be stored for up to 2-3 months.
- When ready to bake, preheat your oven to 375°F (190°C). Place the frozen pão de queijo portions directly into a greased mini muffin pan (no need to thaw). Bake for 20-22 minutes, or until puffed and golden.
- Storing Baked Pão de Queijo:
- Allow freshly baked cheese bread bites to cool completely.
- Store them in an airtight container at room temperature for up to 1 day, or in the refrigerator for up to 3 days.
- To reheat, place them in a preheated oven at 300°F (150°C) for about 5-7 minutes, or in an air fryer at 325°F (160°C) for 3-5 minutes, until warmed through and crispy again.
Frequently Asked Questions: Brazilian Cheese Bread (Pão de Queijo)
Pão de queijo is a beloved traditional Brazilian cheese bread, originating from the state of Minas Gerais. Its unique characteristic is that it’s made with tapioca flour (or starch) instead of wheat flour, making it naturally gluten-free. It’s cherished for its crisp exterior and distinctively chewy, stretchy, and hollow interior.
Yes, absolutely! Authentic Brazilian cheese bread is fundamentally made with tapioca starch (also known as tapioca flour), which is naturally derived from the cassava root. This means it contains no wheat, barley, or rye, making it a perfect, delicious option for individuals with celiac disease or gluten sensitivity.
While many pão de queijo recipes do call for a blender to mix the ingredients, this particular version skips the blender for better texture control, especially when incorporating the hot liquid and achieving that glossy dough by hand. However, if you prefer a quick shortcut, you can blend the milk, oil, salt, egg, tapioca flour, and cheese without warming the liquids first. The texture might vary slightly, but it will still be delicious.
Don’t be alarmed if your dough looks a bit separated, lumpy, or glossy after pouring in the hot liquid and adding the egg. This is a normal stage in the process. Simply continue mixing vigorously; the tapioca starch needs time to fully hydrate and emulsify with the other ingredients. Within a minute or two of continuous whisking, the batter will transform into a smooth, cohesive, and elastic consistency.
For the most authentic flavor and texture, a blend of cheeses is ideal. Finely grated Parmesan cheese adds a sharp, savory flavor and helps with structure, while low-moisture mozzarella contributes to the irresistible stretchiness and melt. If you have access to traditional Brazilian Minas cheese, it would be an excellent choice for an even more authentic taste. Other good options include Monterey Jack, or a sharp white cheddar.
Baked pão de queijo can be stored in an airtight container at room temperature for up to 1 day. For longer storage, keep them in an airtight container in the refrigerator for up to 3 days. For the best texture when reheating, pop them back into a preheated oven or an air fryer until they are warm throughout and the exterior crisps up again.
That distinctive hollow center is not a flaw; it’s a signature and highly desirable feature of authentic pão de queijo! It’s created by the rapid expansion of steam trapped within the dough during the high heat of baking. This hollow interior contributes to their light, airy texture and makes them so satisfyingly chewy.
Conclusion: A Must-Try Brazilian Delicacy
These Brazilian Cheese Bread Bites are more than just a snack; they are a culinary experience that brings a taste of Brazil right into your home. With their addictive crispy exterior, gooey, chewy interior, and effortless preparation, they’re guaranteed to become a beloved favorite. Whether you’re serving them for breakfast, as an appetizer, or simply enjoying them straight from the pan, Pão de Queijo offers a unique and satisfying treat. So gather your ingredients, follow these simple steps, and prepare to fall in love with this naturally gluten-free and incredibly delicious bread.
Brazilian Cheese Bread Bites (Mini Muffin Pan)
7 mins
16 mins
23 mins
24 servings
Print Recipe
Equipment
Ingredients (US Customary – 24 servings)
- 1 cup tapioca starch (tapioca flour)
- ½ cup whole milk
- ¼ cup oil (vegetable or olive)
- ½ tsp salt
- 1 large egg room temperature
- ¾ cup finely grated cheese
Best cheese blend: 1/2 cup finely grated Parmesan & 1/4 cup low-moisture mozzarella
Instructions
-
Preheat oven to 375°F (190°C). Generously grease all 24 mini muffin cups. (These cheese breads puff significantly and will stick if not adequately greased.)
-
In a small saucepan, combine the ½ cup whole milk, ¼ cup oil, and ½ tsp salt. Heat over medium heat until the mixture just begins to simmer around the edges (do not boil).
-
Place 1 cup tapioca starch in a heatproof bowl. Pour the hot milk mixture over it and stir immediately with a sturdy spoon or whisk until a thick, glossy dough forms. Let the dough rest for 2–3 minutes until it is warm to the touch but not hot. Then, add the 1 large room temperature egg and whisk vigorously until the dough is smooth, elastic, and well combined.
-
The dough might appear separated at first; continue mixing until it comes together into a cohesive, stretchy batter.
-
Fold in the ¾ cup finely grated cheese until it is evenly distributed throughout the batter. The final texture should be thick, elastic, and scoopable (resembling a very sticky choux pastry).
-
Using a small spoon or scoop, fill each mini muffin cup about halfway with the prepared batter. Do not overfill.
-
Bake for 16-18 minutes, or until the cheese breads are beautifully puffed, lightly golden brown, and set. For a deeper golden color, you can bake for an additional 1–2 minutes, depending on your oven’s temperature.
-
Once baked, let the Pão de Queijo rest in the muffin pan for 3–5 minutes before carefully removing them. This resting period allows them to firm up as steam escapes, preventing them from sticking or collapsing. Serve warm and enjoy!
Nutrition Information (per serving)
|
Carbohydrates: 5g
|
Protein: 1g
|
Fat: 3g
|
Saturated Fat: 1g
|
Polyunsaturated Fat: 1g
|
Monounsaturated Fat: 2g
|
Trans Fat: 0.01g
|
Cholesterol: 10mg
|
Sodium: 98mg
|
Potassium: 16mg
|
Sugar: 0.3g
|
Vitamin A: 43IU
|
Calcium: 34mg
|
Iron: 0.1mg
Nutrition information is automatically calculated, so should only be used as an approximation.
Love this recipe? Leave a comment below!