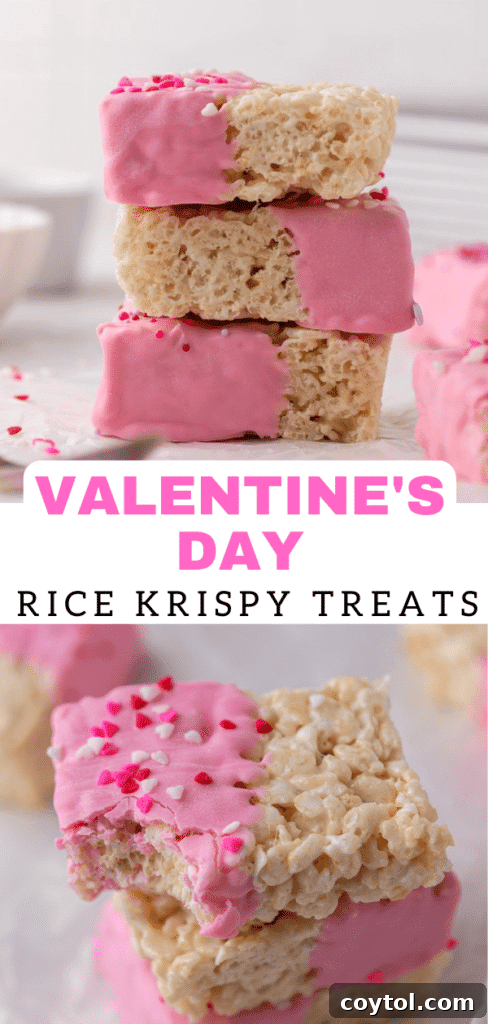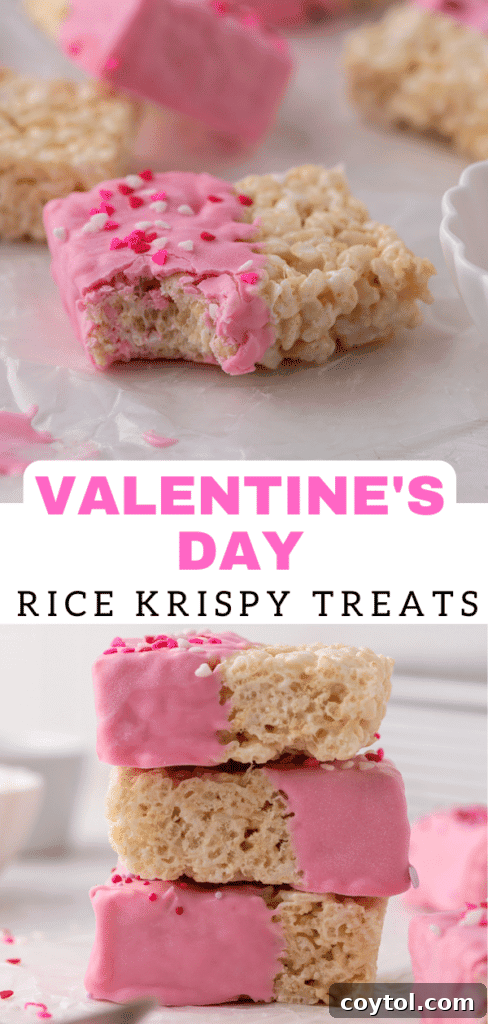
As Valentine’s Day approaches, the air fills with anticipation for sweet gestures and even sweeter treats. These charming, **chocolate-coated Rice Krispie treats** are the ultimate delightful indulgence, perfect for celebrating love and friendship. While they are undoubtedly a hit for Valentine’s, their versatility shines through, allowing you to customize the candy melt colors and sprinkles to suit any holiday or special occasion throughout the year. Imagine vibrant green for St. Patrick’s Day, patriotic red, white, and blue for the Fourth of July, or spooky orange and black for Halloween – the possibilities are endless!
If you’re a devoted fan of classic Rice Krispie treats, you’ll be thrilled to explore more variations on our site. Be sure to check out our Peanut Butter Rice Krispie Treats with Marshmallows for a nutty twist, the Easy Chocolate Peanut Butter Rice Krispie Treats for a doubly decadent experience, and our Crumbl Chocolate Crunch Cookies | Star Crunch Copycat for a cookie version of that irresistible crispy crunch. All these recipes leverage the beloved Rice Krispie cereal, delivering incredible flavor and texture every single time!
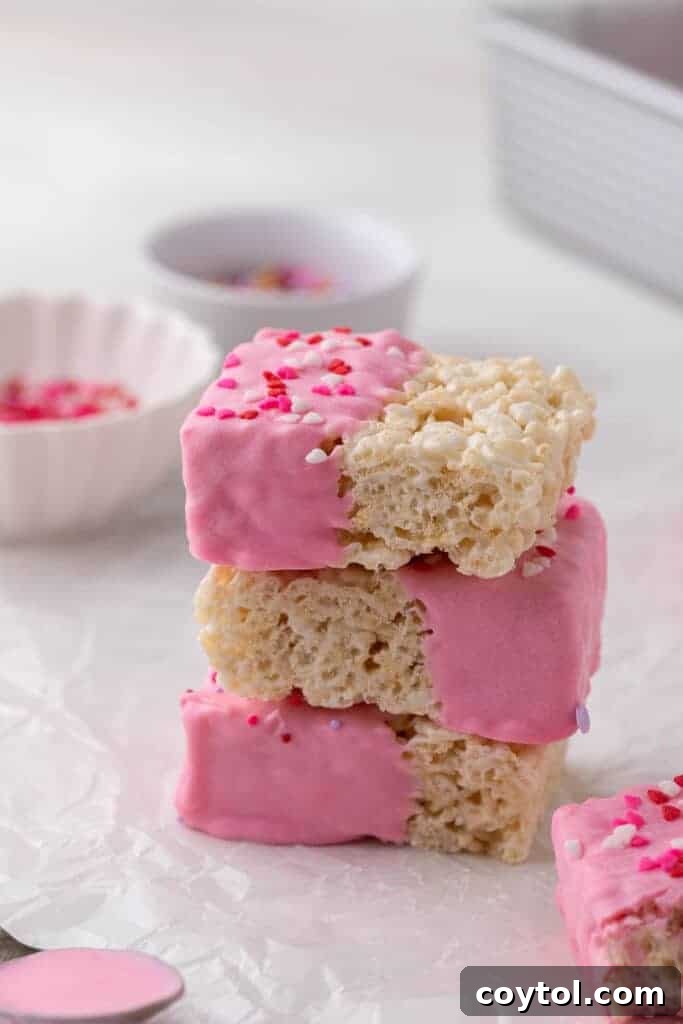
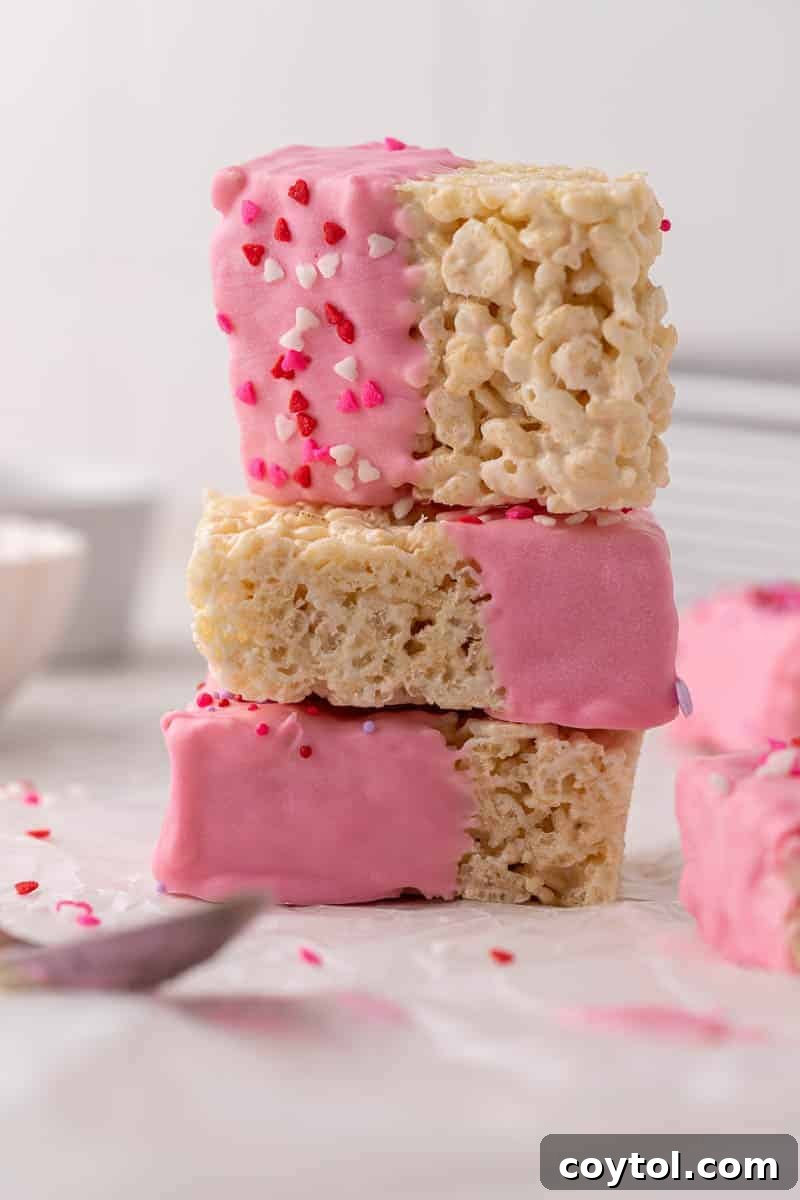
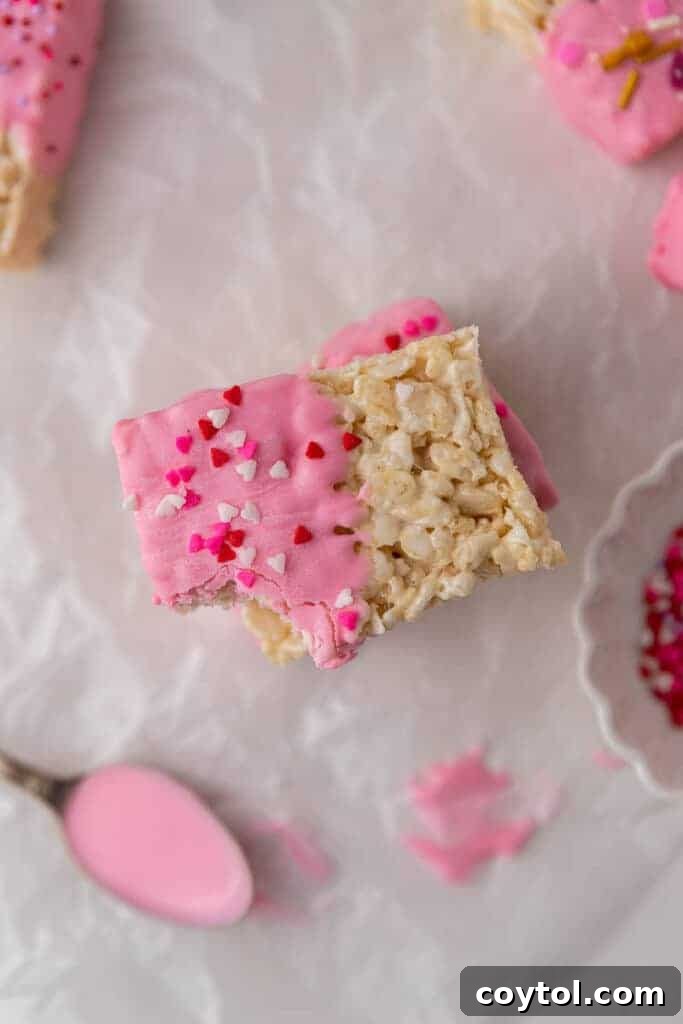
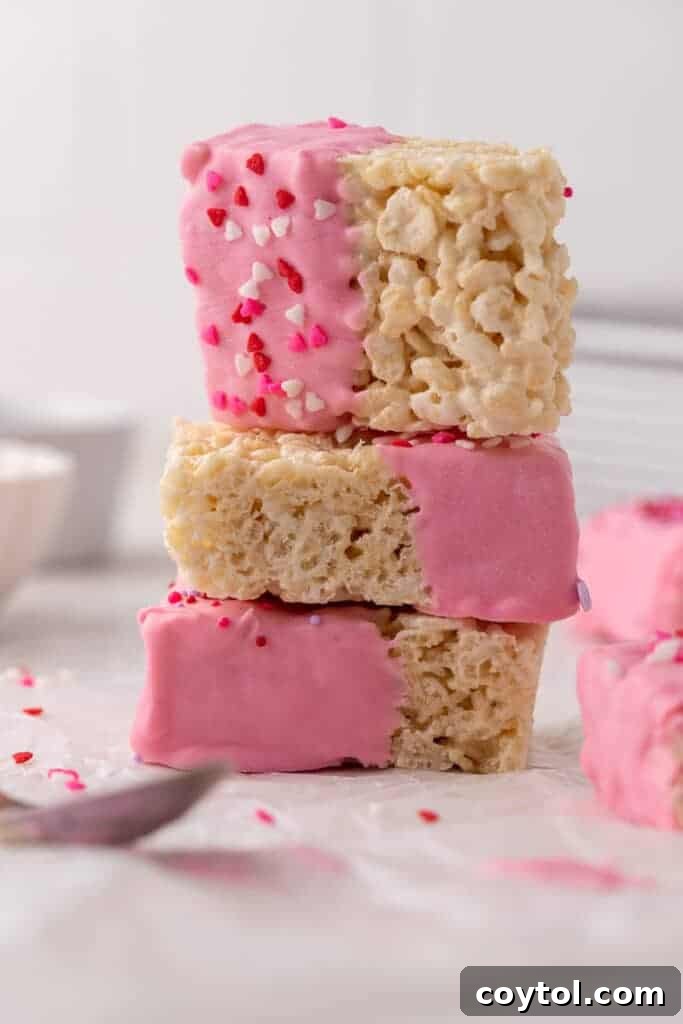
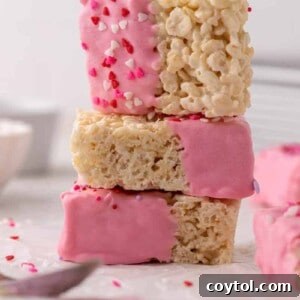
**Chocolate-covered Rice Krispie treats** hold a truly special place in my heart, especially when the holidays roll around. With Valentine’s Day just around the corner, I couldn’t resist making these classic treats extra festive and utterly adorable. I opted for a vibrant pink candy melt coating, enhanced with a touch of oil for that perfectly smooth, dippable consistency. Why not add a splash of color to your celebrations?
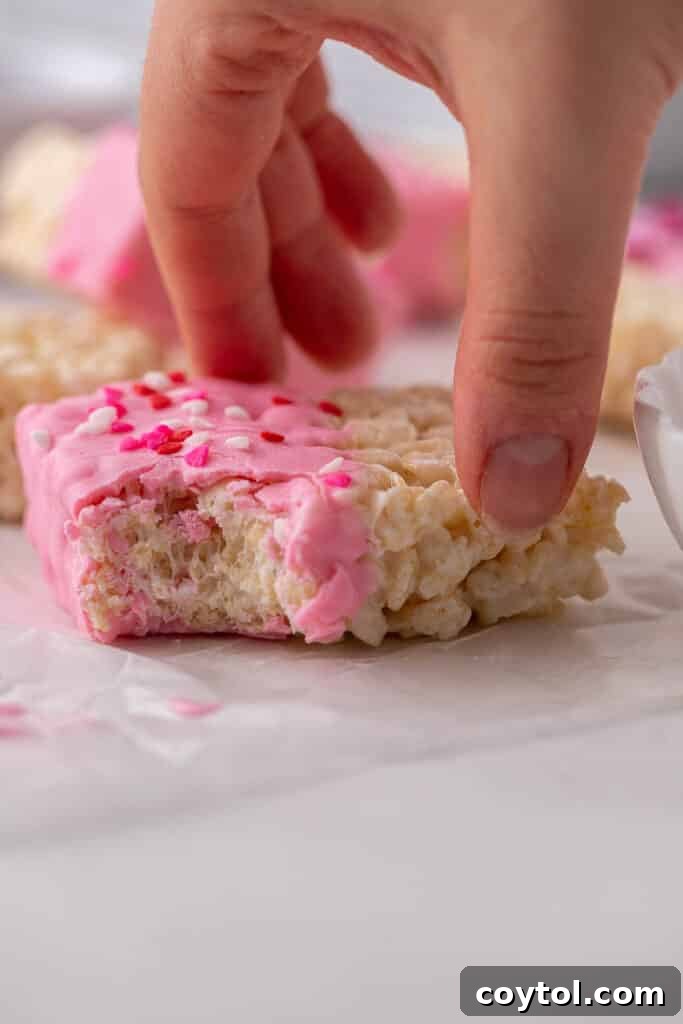
Each crispy bar is then lavishly topped with charming Valentine’s Day sprinkles and shimmering nonpareils, adding a playful finishing touch. What I adore most about these **pink Rice Krispie treats** is the delightful textural contrast: the satisfying crunch of the cereal, the soft chewiness of the marshmallow, and the crisp snap of the chocolate coating, all mingling together in every bite. It’s a truly fun and irresistible experience!
Discover the Best Valentine’s Day Chocolate Coated Rice Krispie Treats Recipe!
Prepare to be enchanted by what we believe is the absolute best **Valentine’s Day chocolate-coated Rice Krispie treats recipe**. This isn’t just a seasonal treat; it’s a testament to simple indulgence and creative customization. We’re confident you’ll appreciate how easily this recipe adapts to any celebration you wish to make them for. Whether it’s a birthday, baby shower, or a specific holiday, these treats are always a crowd-pleaser.
The magic truly happens with a simple change of colors! By swapping out the candy melts and sprinkles, these versatile bars can transform to fit any theme. Imagine pastel shades for Easter, vibrant hues for a summer party, or classic red and green for Christmas. This adaptability makes them a go-to dessert for busy hosts and creative bakers alike. You’ll find yourself reaching for this recipe again and again, knowing you can tailor it to perfection every time.
Your Go-To No-Bake Recipe for Every Occasion, Including Gender Reveals!
Looking for a brilliantly simple **no-bake dessert** that can double as an exciting reveal? This recipe is your answer! Simply choose blue or pink candy melts, dip your treats, and watch the delight unfold. It’s an effortlessly charming way to share big news, and you’ll be glad you discovered this easy, impactful idea!
Why These Easy Rice Krispie Treats Are a Must-Make!
There are countless reasons why these **homemade Rice Krispie treats** should be at the top of your baking list. They offer the perfect combination of minimal effort and maximum reward, making them an ideal choice for any home baker:
- **Effortlessly Simple:** This recipe demands very little time or skill, yet it consistently produces the most adorable and delicious Valentine’s Day Rice Krispie treats. It’s perfect for beginner bakers or those short on time.
- **Incredible Versatility:** While themed for Valentine’s, this **no-bake dessert** is incredibly adaptable. Swap the colors of the candy melts and sprinkles, and you instantly have treats suitable for gender reveal parties, baby showers, Christmas, Halloween, or any other holiday or celebration you can imagine.
- **Pantry-Friendly Ingredients:** You likely already have most of the necessary ingredients on hand. This means less planning and fewer trips to the grocery store, making spontaneous baking a breeze.
- **Perfectly Soft & Chewy Texture:** Just like any truly great Rice Krispie treat should be, these bars are wonderfully soft, delightfully gooey, and supremely chewy. They strike the ideal balance between crisp cereal and melted marshmallow.
- **Fantastic for Family Baking:** This recipe is simple enough for kids to help with, making it a fantastic activity for family baking days. It’s a wonderful way to create lasting memories and delicious results together.
- **Microwave Magic:** For ultimate speed and convenience, the core of this recipe is made in the microwave, ensuring an extremely quick and efficient result without needing to turn on the stove.
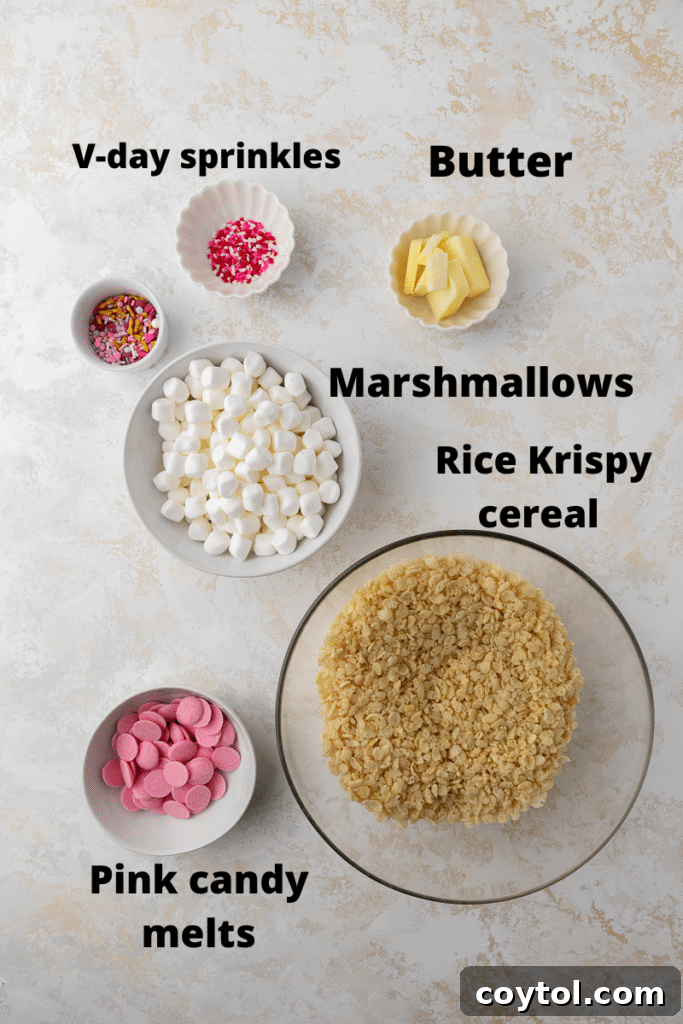
Essential Ingredients for Your Easy Valentine’s Day No-Bake Rice Krispie Treats
Gathering your ingredients for these delightful **pink Rice Krispie treats** is straightforward. Each component plays a crucial role in achieving the perfect texture and festive look. Below is a list of what you’ll need; for exact detailed measurements, please refer to the full recipe card further down this page.
- **Rice Krispy Cereal:** This is the undisputed star and foundation of our crispy treats. There’s simply no making **Rice Krispie treats** without the signature puffed rice cereal that gives them their iconic crunch.
- **Mini Marshmallows:** While larger marshmallows can be used in a pinch, we highly recommend using mini marshmallows for this recipe. Their smaller size allows them to melt more quickly and evenly, ensuring a perfectly smooth and buttery-sweet mixture that coats the cereal beautifully. This leads to a superior, consistent texture in your finished treats.
- **Salted Butter:** The addition of salted butter is key. The salt acts as a brilliant counterbalance, cutting through the sweetness of the marshmallows and candy melts to create a more balanced and nuanced flavor profile. It enhances the overall taste without making the treats overly saccharine.
- **Pink Candy Melts:** These are essential for creating the vibrant, festive coating. While we’re using pink for Valentine’s Day, remember that you can easily swap this for any color to match the theme of your specific holiday or event. Candy melts are designed for easy melting and a smooth finish.
- **Neutral Oil (Vegetable or Canola):** A small amount of oil is crucial for achieving the ideal dipping consistency for your candy melts. It helps to thin out the melted candy, making it smoother, easier to work with, and ensures a delicate, even coating on your Rice Krispie bars without becoming too thick or clumpy.
- **Valentine’s Day Sprinkles:** These decorative elements are purely for fun and visual appeal! Sprinkles add a wonderful pop of color, texture, and a celebratory touch, instantly transforming simple bars into festive masterpieces. Choose a mix of shapes and colors for maximum impact.
The Best Marshmallow Size for Perfect Rice Krispie Treats
When it comes to crafting the ideal batch of **chewy Rice Krispie treats**, the size of your marshmallows can make a slight difference, though both large and small varieties will work. I’ve personally used both in various recipes, so if you’re in a pinch and only have one kind on hand, don’t hesitate to use it.
However, for consistently superior results, I almost always reach for **mini marshmallows**. They melt much faster and more uniformly than their larger counterparts, which is key to preventing the marshmallow mixture from overcooking. Overcooked marshmallows can lead to hard, brittle treats rather than the soft, gooey texture we all crave. Therefore, if you have the option, definitely **make sure to use mini marshmallows** for the best possible outcome!
Crafting Delicious Rice Krispie Treats for Valentine’s Day: A Step-by-Step Guide
Making these sweet and chewy **Valentine’s Day Rice Krispie treats** is wonderfully straightforward, promising a delightful dessert with minimal effort. Follow these steps to create your festive bars. For the full, detailed instructions and precise measurements, please make sure to scroll down to the comprehensive recipe card below.
- **Prepare Your Pan:** Start by lining an 8×8 inch baking pan with parchment paper or wax paper, leaving an overhang on the sides. This will make removing and slicing your treats incredibly easy. Set this aside for later use.
- **Melt Marshmallows & Butter:** In a large microwave-safe bowl, combine your mini marshmallows and salted butter. Microwave the mixture in 30-second intervals, stirring thoroughly after each interval, until it’s completely melted and smooth. Be vigilant to avoid burning the marshmallows.
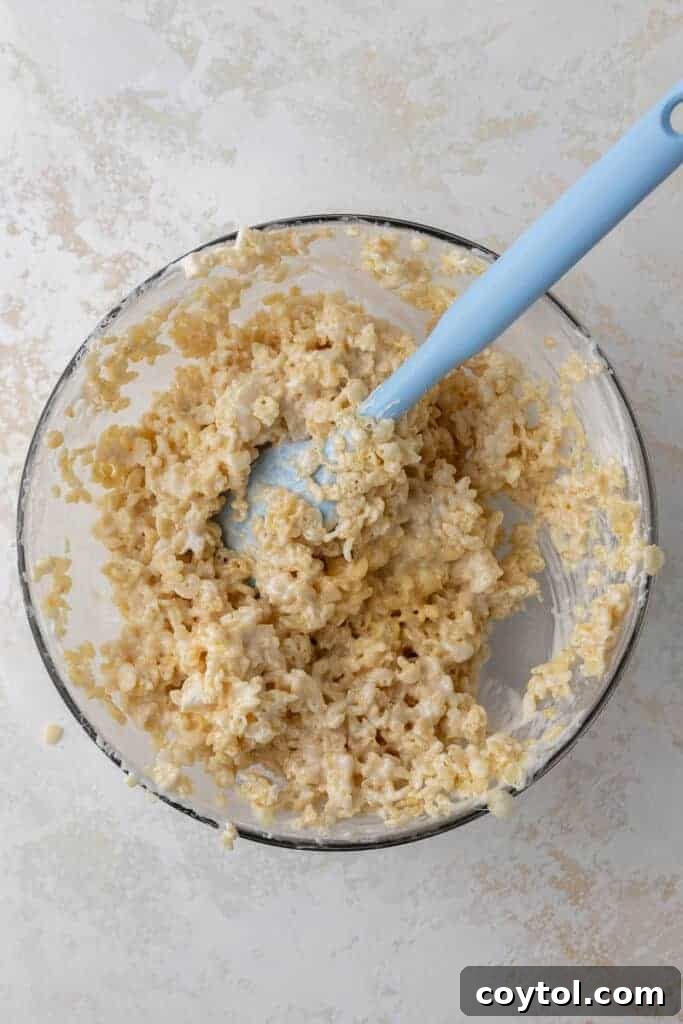
- **Combine with Cereal:** Once your marshmallow mixture is perfectly melted, gently fold in the Rice Krispie cereal. Stir carefully until every piece of cereal is fully coated with the sweet, gooey marshmallow goodness.
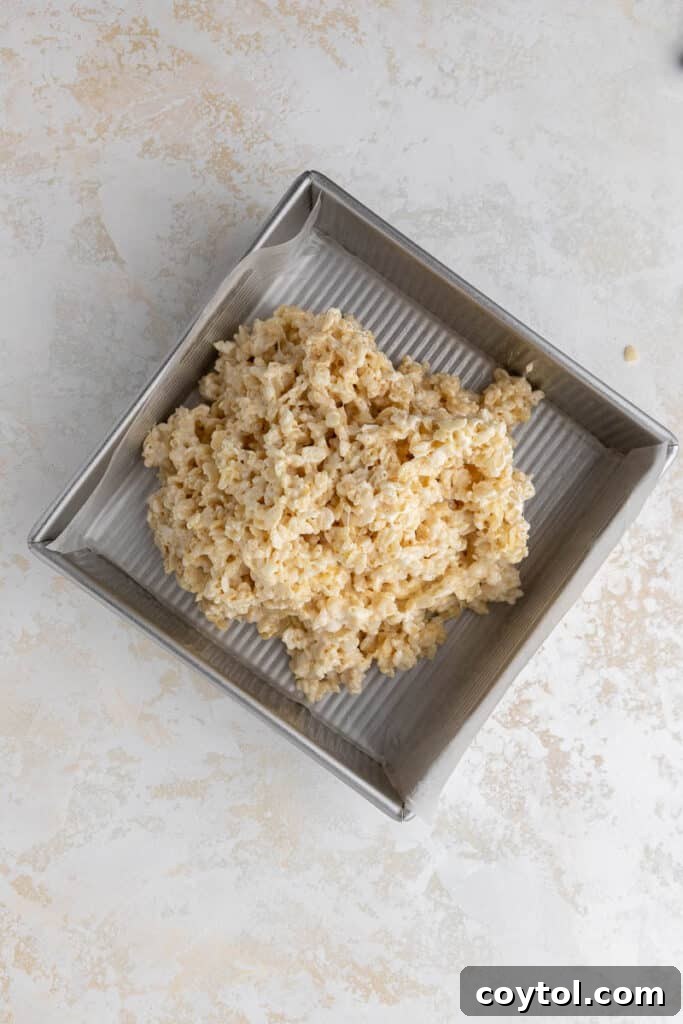
- **Press into Pan:** Transfer the coated cereal mixture into your prepared 8×8 inch pan. Using a buttered spatula or your lightly buttered fingertips, gently spread the mixture evenly. The key here is *not* to pack the treats down too hard, as this can result in tough, hard Rice Krispie bars instead of soft and chewy ones.
- **Set & Slice:** Allow the Rice Krispie treats to set at room temperature for at least 30 minutes, or until firm. Once set, use the parchment paper overhang to lift the entire slab out of the pan. Slice it into 12 equally sized bars.
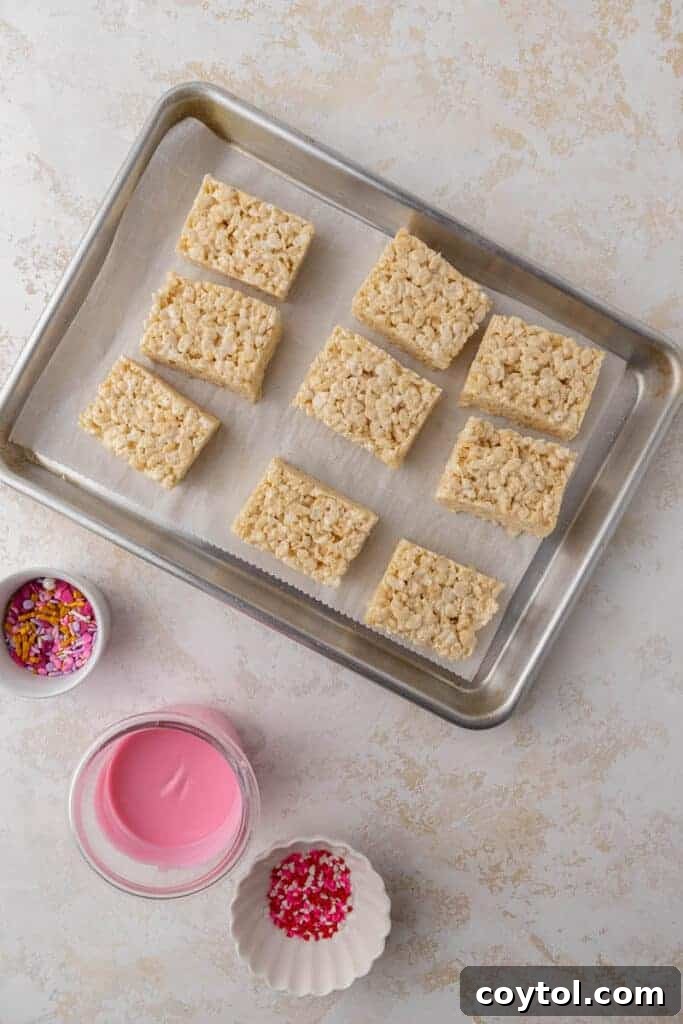
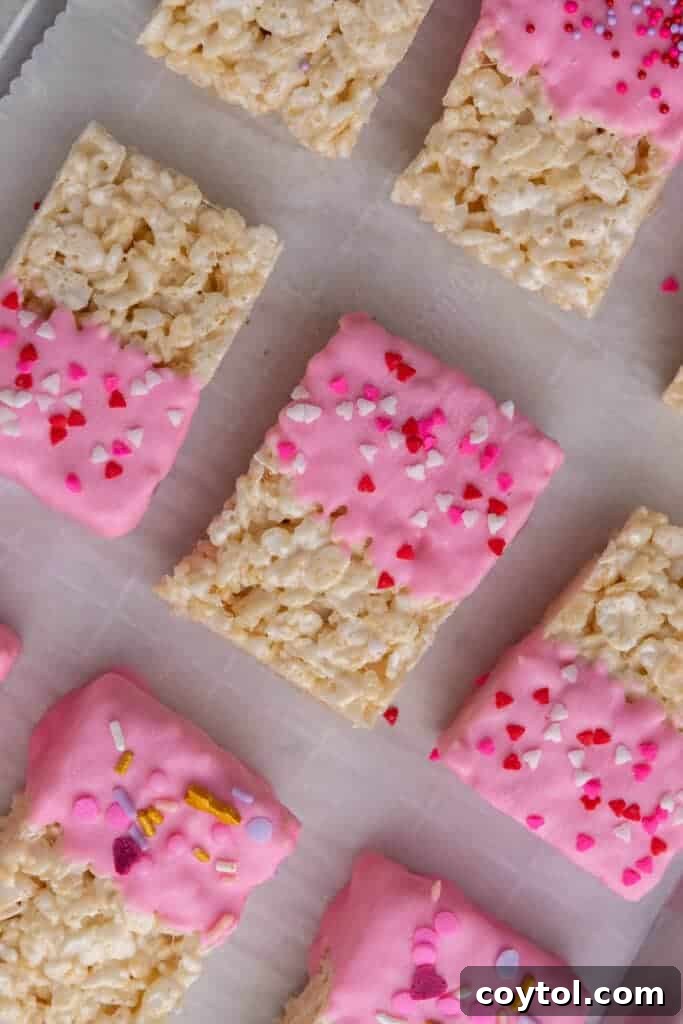
- **Dip & Decorate:** In a separate microwave-safe cup or bowl, melt your pink candy melts with a teaspoon of neutral oil, again stirring every 30 seconds until completely smooth and dippable. Dip half of each Rice Krispie bar into the melted candy, allowing any excess to drip off. Immediately place the dipped bars onto a parchment-lined baking sheet and generously sprinkle with your festive Valentine’s Day sprinkles. Let them set for a few minutes until the candy coating hardens, then serve and enjoy!
Explore More Festive Recipes You’ll Adore!
If you’ve fallen in love with these delightful no-bake treats, you’ll be thrilled to discover more of our favorite recipes that are perfect for sharing, celebrating, or simply enjoying a sweet moment. Dive into these other crowd-pleasing creations:
- Valentine’s Day Muddy Buddies / Puppy Chow: A classic snack mix, reimagined with festive flavors and colors for a perfect Valentine’s treat.
- 18 No-Bake Valentine’s Day Recipes for Kids: A collection of simple, fun, and delicious desserts that little hands can help make, perfect for spreading love.
- Chewy Valentine’s Day Crinkle Chocolate Cookies with Sprinkles: Rich, fudgy chocolate cookies with a beautiful crinkled texture and a burst of colorful sprinkles, ideal for a heartfelt gift.
- Valentine’s Day Very Berry Healthy Smoothie: A refreshing and nutritious option packed with berries, offering a guilt-free way to enjoy the season’s flavors.
Frequently Asked Questions (FAQ) About Rice Krispie Treats
How to Properly Store Your Pink Rice Krispie Treats?
For the absolute best taste and texture, these **pink Rice Krispie treats** are truly best enjoyed on the very day they are made. The crispy cereal and chewy marshmallow are at their prime then. However, if you need to prepare them in advance or have leftovers, proper storage is key to maintaining their quality.
You can store them in an airtight container at room temperature for up to 2-3 days. Make sure the container is sealed tightly to prevent them from drying out or becoming stale. It’s important to note that Rice Krispie treats are a little finicky when it comes to temperature extremes. Avoid placing them in the refrigerator or freezer, as the cold temperatures will cause them to harden significantly, making them too firm and difficult to eat. Room temperature storage is always the best choice for preserving their signature soft and chewy consistency.
Exciting Recipe Variations for Your Rice Krispie Treats
Rice Krispie treats are wonderfully versatile, offering a blank canvas for creativity. This makes them an ideal sweet treat that you can easily customize to fit any craving, occasion, or preference. Here are a few exciting ways I love to experiment and put a unique spin on this classic recipe:
- **Sprinkle-Infused Bars:** For an unexpected pop of color and crunch throughout the entire bar, try mixing some nonpareil sprinkles directly into the Rice Krispie treat mixture before pressing it into the pan. This creates a fun, speckled appearance and adds a delightful subtle texture within the chewiness.
- **Seasonal Color Swaps:** As mentioned, the beauty of this recipe lies in its adaptability. Easily change up the colors of the candy melts to perfectly match any occasion. Think green for St. Patrick’s Day, pastels for Easter, red and blue for patriotic holidays, or even school colors for graduation parties.
- **Candy Mix-Ins:** Elevate your treats by mixing in some holiday-themed M&M’s, chocolate chips, or mini candy pieces at the very end, just before pressing the mixture into the pan. This adds an extra layer of flavor and texture, turning them into an even more decadent delight.
- **Drizzle, Don’t Dip:** If you prefer a lighter coating or a more artistic flair, skip the full dipping method. Instead, melt your colored candy melts and then use a spoon or a piping bag to drizzle decorative patterns over the top of the set Rice Krispie bars. This allows for intricate designs and a less intensely coated treat.
My Rice Krispie Treats are Hard – What Went Wrong?
It’s a common disappointment to end up with hard Rice Krispie treats when you’re aiming for soft and chewy. This has happened to me a few times over the years, and I’ve found there are typically three main reasons behind this texture mishap. Understanding these can help you achieve perfect results every time:
- **Stale Ingredients:** The freshness of your ingredients plays a crucial role in the final texture. If you use stale marshmallows or old cereal, your treats are more likely to turn out hard and brittle. Always reach for the freshest possible marshmallows and a new box of Rice Krispie cereal when preparing this no-bake sweet treat. Fresh ingredients ensure that soft, gooey consistency we all love.
- **Overheating Marshmallows:** This is arguably the most common culprit. When marshmallows are overheated or “overbaked” (even in the microwave), their sugar molecules can crystallize, leading to a tough, brittle texture once cooled. I strongly recommend using mini marshmallows, as they melt faster and more evenly, significantly reducing the risk of overcooking. Melt them in short bursts (e.g., 30-second intervals) and stir frequently until just smooth.
- **Packing Too Tightly:** How you press the mixture into your baking pan has a huge impact. If you pack the Rice Krispie treat mixture down too hard into the pan, you compress all the air pockets, resulting in dense, hard bars. The trick is to spread the mixture gently and evenly, using a buttered spatula or lightly greased hands. Resist the urge to press with force; a light touch is all that’s needed for perfectly chewy treats.
Valentine’s Day Chocolate Coated Rice Krispie Treats
If you’ve made these delightful **Chocolate Dipped Rice Krispie Treats** and enjoyed them as much as we do, please consider leaving a 5-star review! Simply click on the 5 stars located just below the title and description of the recipe. Your feedback helps us immensely and encourages other bakers to try this wonderful recipe. Thank you!
Chocolate Dipped Rice Krispie Treats
Print Recipe
Ingredients
- 3 tbsp salted butter
- 10 oz mini marshmallows
- 5 cup Rice Krispie cereal
- 1 cup pink candy melts
- 1 tsp vegetable oil or canola oil
- Valentine’s Day sprinkles
Instructions
- Line an 8×8 baking pan with parchment or wax paper and set aside.
- In a microwave-safe bowl, melt the marshmallows and the butter in the microwave. Make sure to stir everything every 30 seconds to keep it from burning and achieve a smooth mixture.
- Mix in the Rice Krispie cereal until well coated in the marshmallow mixture.
- Spread the mixture into the parchment-lined 8×8 inch pan. Remember not to pack the Rice Krispie treats too hard, or they will be tough.
- Let everything set for 30 minutes or so at room temperature, then slice it into 12 bars.
- In a microwave-safe cup, melt the candy melts and the oil together, stirring every thirty seconds until fully melted and smooth.
- Dip half of each bar into the candy melt mixture, place on a parchment-lined baking sheet, and sprinkle generously with Valentine’s Day sprinkles. Let the bars set for a few minutes until the candy coating hardens, then serve!
Nutrition
Carbohydrates: 34g |
Protein: 1g |
Fat: 5g |
Saturated Fat: 4g |
Polyunsaturated Fat: 1g |
Monounsaturated Fat: 1g |
Trans Fat: 1g |
Cholesterol: 8mg |
Sodium: 114mg |
Potassium: 17mg |
Fiber: 1g |
Sugar: 20g |
Vitamin A: 864IU |
Vitamin C: 7mg |
Calcium: 2mg |
Iron: 4mg
Nutrition information is automatically calculated, so should only be used as an approximation.
Thank you for journeying through this recipe with us! We hope you’re excited to create these delightful **Valentine’s Day Rice Krispie Treats**.
If you truly enjoyed making and tasting this recipe, we’d be thrilled if you shared your experience in the comments below! Your feedback and ratings mean a lot to us and help our community of food lovers. In the meantime, don’t forget to follow us on Instagram for more delicious inspiration and behind-the-scenes fun!

Shop Ingredients and Tools for This Recipe!
This post may contain affiliate links, meaning that at no additional cost to you, I will earn a small percentage of every purchase you make through these links. We only recommend products we trust and use ourselves.
Loved This Valentine’s Day Rice Krispie Treat Recipe? Pin It for Later!