
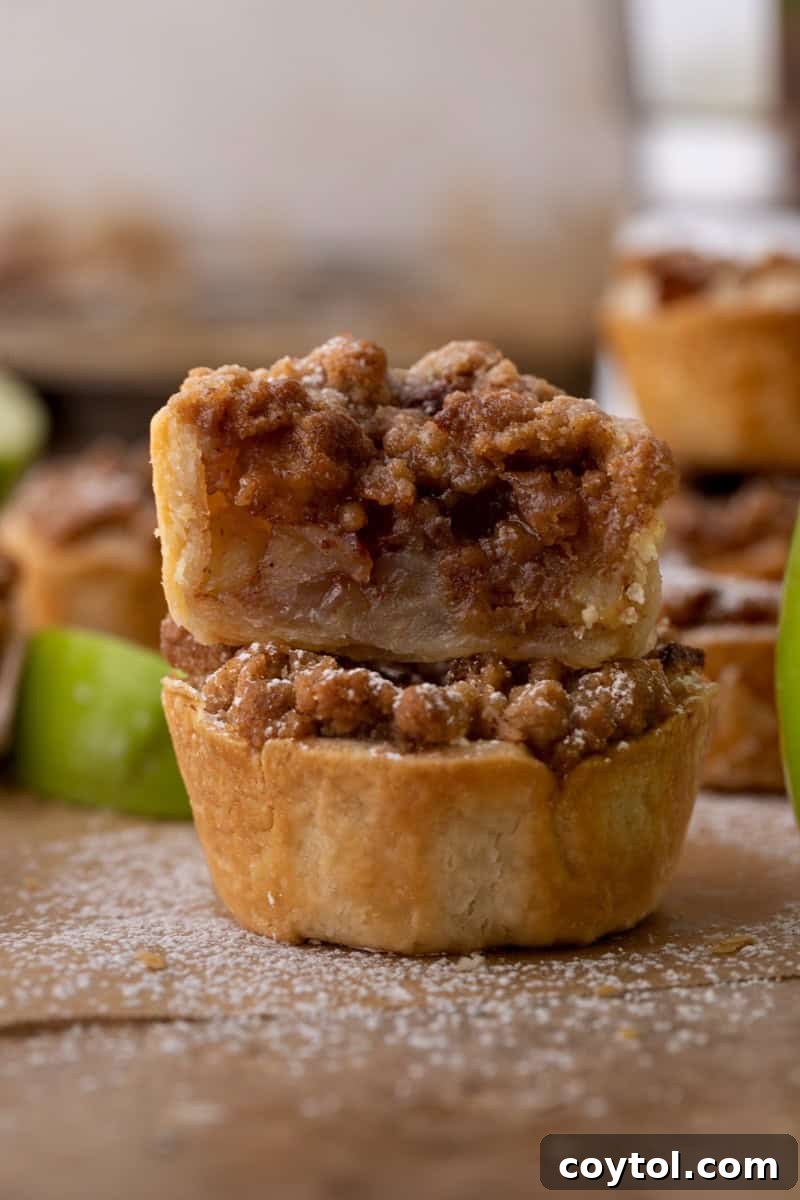
Step aside, traditional apple pies! These individual mini apple pies are captivating everyone’s attention and for good reason. Imagine all the beloved flavors and textures of a classic apple pie, expertly scaled down and baked in a convenient muffin tin. The result? Adorably portioned, perfectly spiced, and utterly delicious single-serving pies that are guaranteed to be the undisputed highlight of any dessert spread, especially your Thanksgiving table.
While you’re here indulging your sweet tooth, be sure to explore some other fantastic dessert ideas. You might love these peach mango Jollibee hand pies for a tropical twist, these decadent mini pecan pies, or these delightful Dutch apple pie bars. And for another apple-inspired treat, don’t miss this incredible apple crumble cheesecake bars recipe!

Let’s Chit Chat About Mini Apple Pies!
I must confess, I have an undeniable soft spot for anything apple pie, and these miniature versions have, without a doubt, become my absolute favorite way to prepare them. There’s something undeniably charming and cozy about a personal-sized pie. They’re not only incredibly cute but also astonishingly easier to serve compared to wrestling with a full-sized pie. Every time I bring a batch of these to a fall gathering, they vanish within minutes! Everyone absolutely adores having their very own personal little pie, making them feel extra special. Plus, that irresistible combination of buttery, flaky crust, warm, tender apple filling, and the satisfying crunch of streusel? It’s pure autumn comfort in every single bite, a symphony of flavors and textures that truly captures the essence of the season.
Why You Need to Bake These Irresistible Mini Apple Pies
If you’re looking for a dessert that delivers on flavor, convenience, and charm, look no further. These mini apple pies are a game-changer for home bakers and entertainers alike. Here’s why this recipe deserves a prime spot in your culinary repertoire:
- Effortless Individual Servings for Any Occasion: Forget the fuss of slicing and serving a large pie. These mini pies offer perfect individual portions, making them ideal for holiday feasts like Thanksgiving, intimate dinner parties, potlucks, or even a cozy weeknight treat. Everyone gets their own beautiful dessert without any messy slicing!
- Superior Streusel Topping – No Complicated Lattice Required: While a lattice crust is beautiful, it can be time-consuming and intimidating for many bakers. Our recipe features a quick, easy, and incredibly delicious streusel topping that adds a delightful crunch and buttery sweetness. It’s much simpler to prepare and just as, if not more, satisfying!
- Kid-Friendly, Freezer-Friendly & Perfect for Make-Ahead: These charming little pies are a hit with children and adults alike. Their small size makes them easy for little hands to handle. Plus, they freeze beautifully, allowing you to bake them in advance for future events or spontaneous cravings. Simply thaw and reheat for that fresh-baked taste.
- Made with Simple, Accessible Ingredients: You won’t need to hunt for exotic items. This recipe relies on readily available ingredients that you likely already have in your pantry and fridge, making it an approachable and stress-free baking project.
- A Showstopper on Any Holiday Dessert Board: Their adorable size and golden-brown streusel topping make these mini pies incredibly photogenic and appealing. Arrange them on a dessert board or platter, and watch them become the star attraction, delighting guests with their rustic charm and delectable taste.
- Unbeatable Flavor in Every Bite: Each mini pie offers a perfect balance of sweet and tart apples, warm spices, a tender flaky crust, and a crisp streusel, ensuring a burst of cozy autumn flavor with every forkful.
Essential Ingredients for These Charming Mini Apple Pies
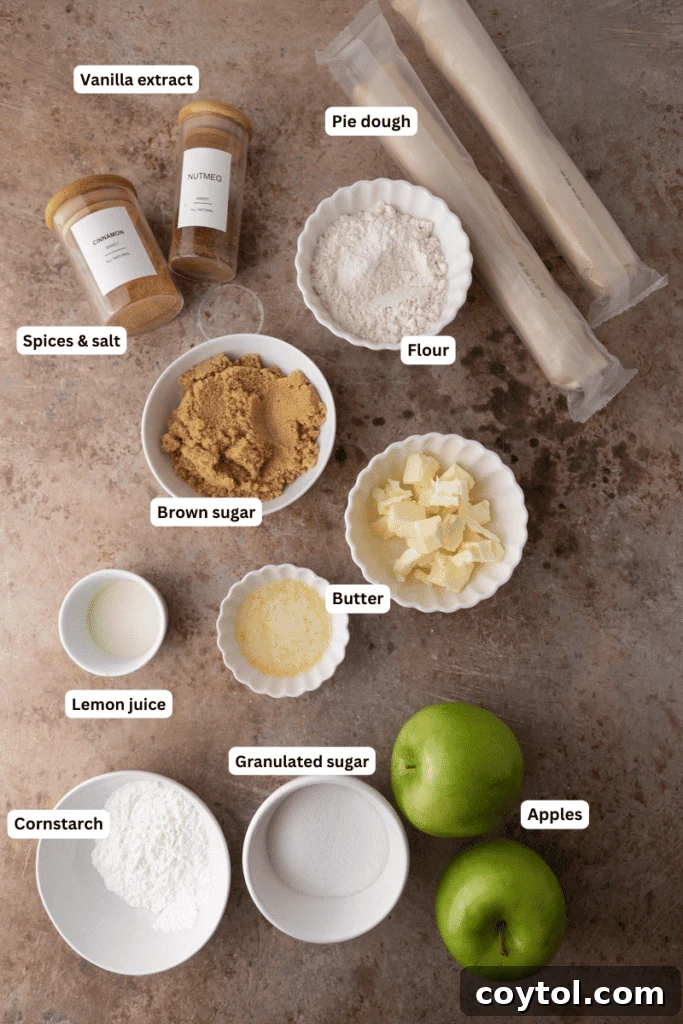
Creating these delightful mini apple pies requires a thoughtful selection of ingredients, each playing a crucial role in achieving that perfect balance of flavor and texture. Here’s a detailed look at what you’ll need to gather to bring this delicious recipe to life. For precise measurements, please refer to the comprehensive recipe card located further down.
- Pie Crust: You have the flexibility to use either store-bought refrigerated pie crusts for ultimate convenience or a batch of your favorite homemade pie dough for an extra touch of artisanal flavor. Both options yield fantastic results, but ensure your store-bought crusts are thawed to room temperature if frozen, or simply chilled if refrigerated, for easier handling.
- Flour: All-purpose flour is essential for the streusel topping, providing structure and that characteristic crumbly texture. A little bit is also used for dusting your work surface when rolling out the pie crusts.
- Brown Sugar and Granulated Sugar: A harmonious blend of both sugars is used. Brown sugar lends a deeper, caramel-like sweetness and adds moisture to the streusel, while granulated sugar provides clean sweetness to the apple filling.
- Cold Butter (Salted or Unsalted): The key to a light, crispy, and perfectly crumbly streusel topping is using very cold, cubed butter. The tiny pockets of butter melt slowly during baking, creating steam that separates the flour, resulting in a wonderfully crisp texture. For the apple filling, a touch of melted butter adds richness.
- Cinnamon and Nutmeg: These classic warming spices are the heart of any good apple pie. Ground cinnamon provides a sweet and woody aroma, while nutmeg adds a hint of pungent, slightly sweet spice that beautifully complements the apples. Feel free to add a pinch of allspice or cardamom for an extra layer of complexity if you desire.
- Salt: A small amount of salt is crucial. It acts as a flavor enhancer, balancing the sweetness of the sugars and brightening the overall taste of both the filling and the streusel.
- Lemon Juice: Fresh lemon juice is vital for two reasons: it adds a bright, tangy note that cuts through the sweetness of the apples, and it helps prevent the apples from browning, keeping them looking fresh and appealing.
- Apples: The star of the show! A mix of apple varieties is often recommended for the best flavor and texture. Varieties like Granny Smith (for tartness and firm texture), Honeycrisp (for sweetness and crispness), Fuji, or Pink Lady are excellent choices. Aim for apples that hold their shape well during baking rather than turning to mush.
- Cornstarch: This is our secret weapon for a perfectly thickened apple filling. It ensures the filling sets beautifully without being runny, preventing a soggy bottom crust.
- Powdered Sugar for Optional Dusting: A light dusting of powdered sugar just before serving adds an elegant finish and a subtle extra touch of sweetness, making your mini pies look even more enticing.
How To Make These Classic Mini Apple Pies: A Detailed Walkthrough
Creating these delightful mini apple pies is a straightforward and enjoyable process. Follow these detailed steps to achieve perfect, individual apple pies every time. Remember to consult the full recipe card below for exact measurements and temperatures!
Step 1: Prepare the Irresistible Homemade Apple Pie Filling
The heart of any great apple pie is its filling. We’re going for a vibrant, perfectly spiced mixture that will bake down into a tender, juicy delight.
- Begin by preparing your apples. Peel, core, and dice the apples into small, uniform pieces (about 1/2 inch). This ensures even cooking and makes them fit perfectly into your mini pie crusts.
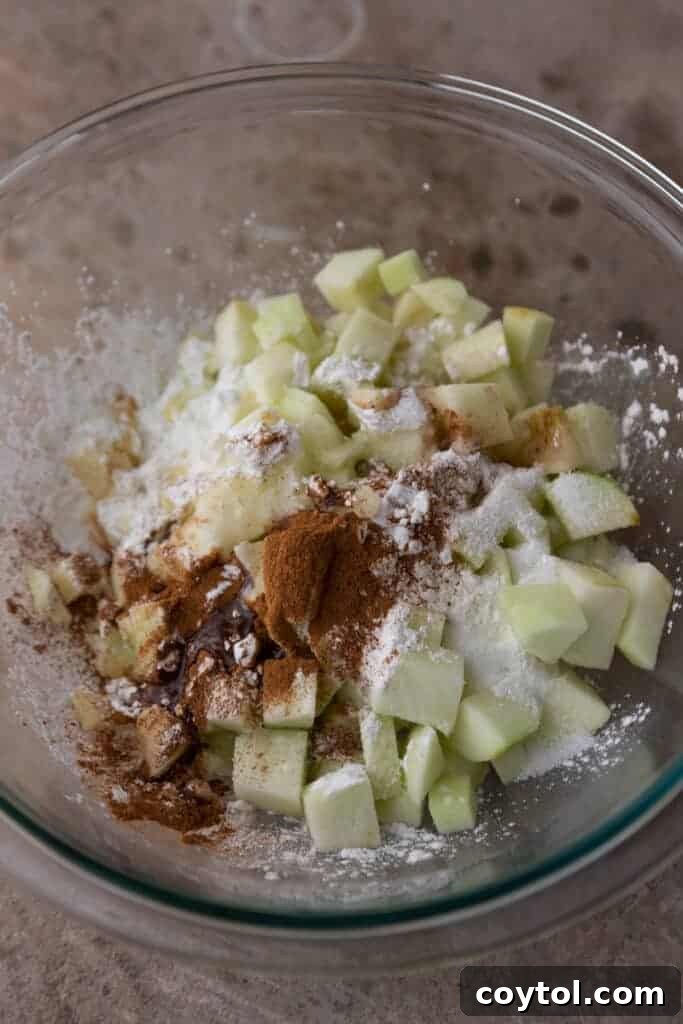
- In a large mixing bowl, combine the diced apples with the granulated sugar, ground cinnamon, ground nutmeg, and a generous squeeze of fresh lemon juice. These ingredients will infuse the apples with warmth and brightness.
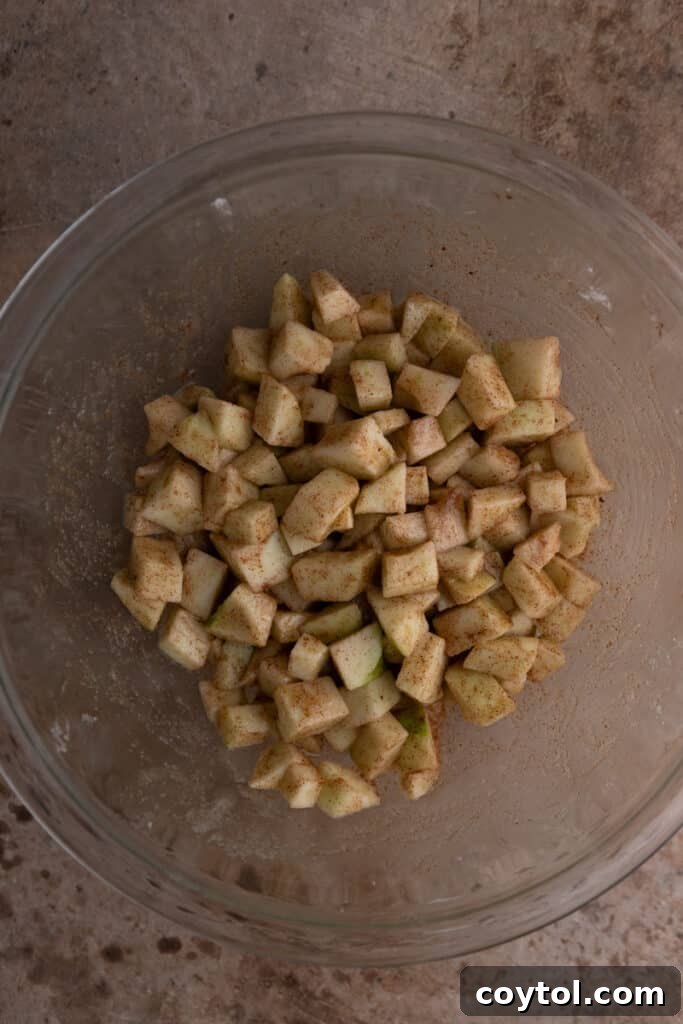
- Add the cornstarch and a touch of melted butter to the apple mixture. Toss everything together gently until the apples are thoroughly and evenly coated with the sugar and spice mixture. The cornstarch will act as a thickening agent, ensuring your filling isn’t watery.
- Set the apple filling aside while you prepare the other components. This brief resting period allows the flavors to meld and the apples to release some of their natural juices.
Step 2: Craft the Perfect Crumb Topping (Streusel)
The streusel topping is what truly elevates these mini pies, adding a delightful crunch and rich buttery flavor without the complexity of a traditional pie crust lattice.
- In a medium-sized bowl, combine the all-purpose flour, packed brown sugar, ground cinnamon, and a pinch of salt. Whisk these dry ingredients together to ensure they are well distributed.
- Add the cubed, very cold butter to the dry mixture. The coldness of the butter is crucial here; it will create those distinct crumbs that become wonderfully crisp when baked.
- Using your fingertips, a pastry cutter, or a fork, work the butter into the flour mixture. Continue mixing until coarse, crumbly bits form, resembling wet sand or small peas. Avoid overworking the mixture, as this can melt the butter and result in a less crumbly topping.
- Store the prepared streusel topping in the fridge. Keeping it cold will help the butter retain its shape and prevent it from melting too quickly in the oven, ensuring a superior crispy texture on top of your mini pies.
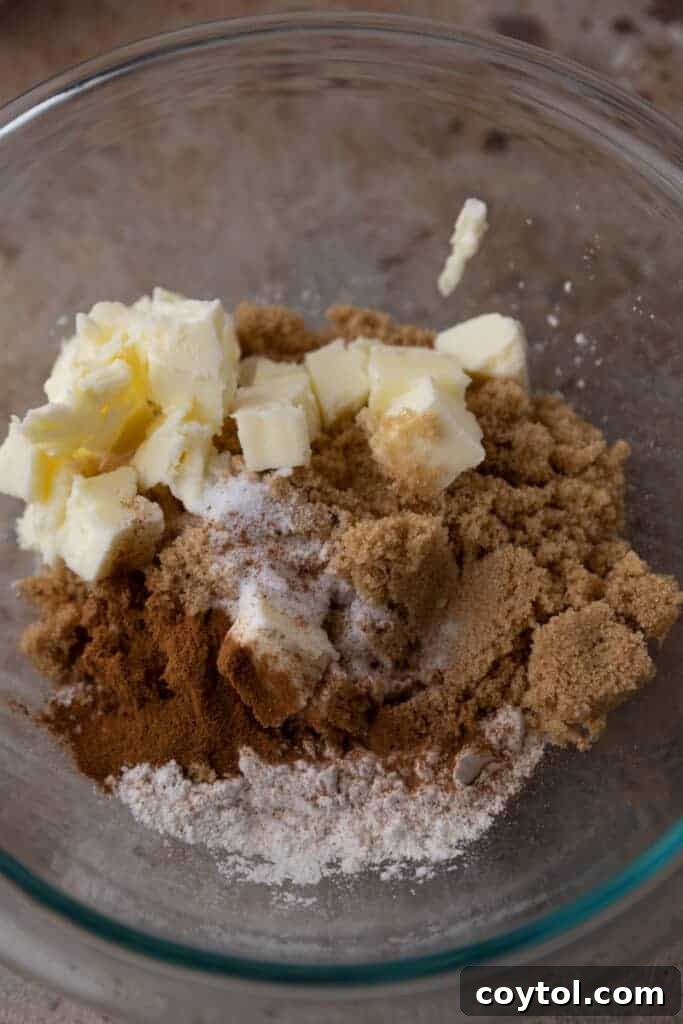
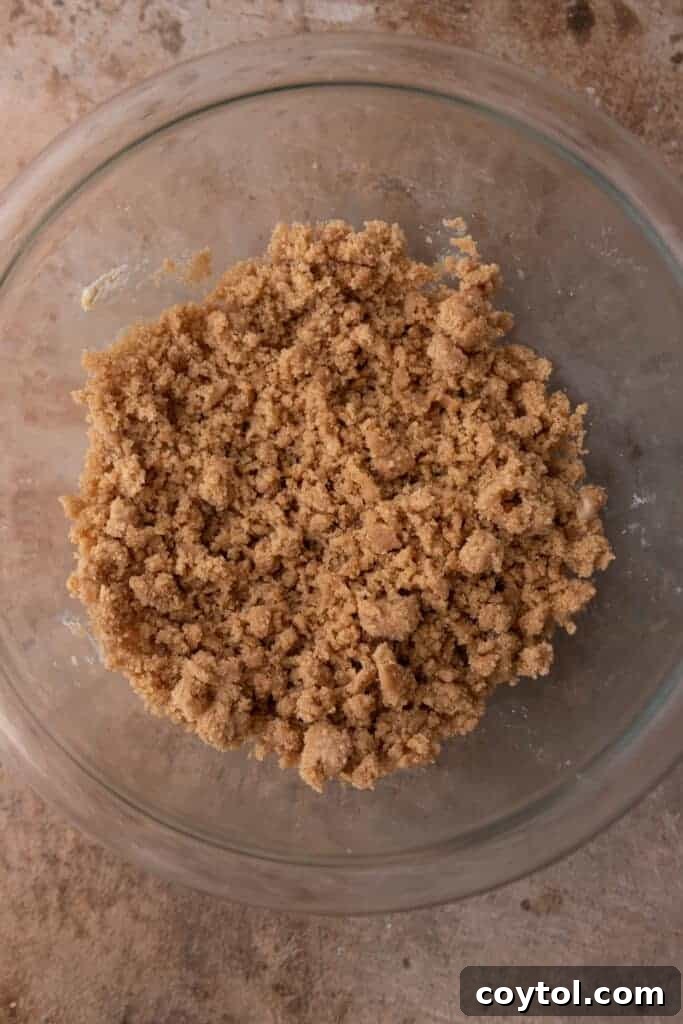
Step 3: Assemble and Bake Your Mini Pie Crusts
Now it’s time to bring all the delicious components together into adorable, bake-ready mini pies!
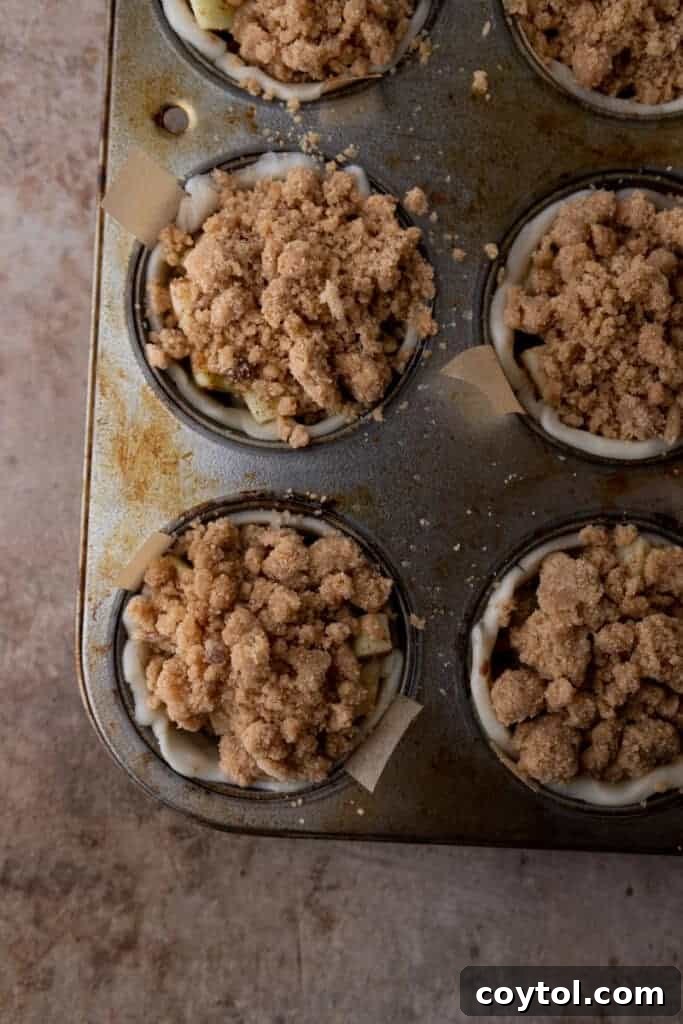
- First, preheat your oven to 375°F (190°C) as specified in the recipe card. Thoroughly spray each cavity of your standard muffin tin with non-stick cooking spray. For even easier removal of the baked pies, you can cut thin strips of parchment paper (about 1 inch wide) and lay one strip across the bottom of each cavity, with the ends sticking up. This creates convenient “handles” to lift out the pies once they’re cooled.
- Unroll your store-bought pie crusts onto a lightly floured surface. Using a 3.5 to 4-inch round cookie cutter, or even the rim of a drinking glass, cut out circles from the pie dough. Aim to get about 6 circles from each standard pie crust, yielding a total of 12 mini crusts. Gather and re-roll any scraps to get additional circles if needed, but be careful not to overwork the dough.
- Gently press each pie crust circle into the prepared cavities of the muffin tin, molding them to the shape of the cups. Ensure the edges come up the sides without tearing. If you’re using parchment strips, make sure they remain poking out for easy lifting later.
- Fill each pie crust cavity generously with the prepared apple pie mixture, mounding it slightly in the center. Don’t overfill, as the apples will soften and release some juices during baking.
- Next, retrieve your chilled streusel topping from the fridge. Evenly sprinkle a generous amount of streusel over the top of each apple-filled crust. Press it down lightly to ensure it adheres.
- Place the muffin tin into your preheated oven. Bake for approximately 30 minutes, or until the pie crusts are golden brown, the apple filling is bubbly, and the streusel topping is beautifully golden and crisp. Baking times can vary slightly depending on your oven, so keep an eye on them.
- Once baked, carefully remove the muffin tin from the oven. It is crucial to allow the mini pies to cool down in the muffin tin for at least 15-20 minutes. This allows the filling to set and the crust to firm up, making them much easier to remove without breaking. After initial cooling, use the parchment strips (if used) or a small offset spatula to gently lift them out and transfer them to a wire rack to cool completely. Enjoy them warm as is, or with your favorite toppings!
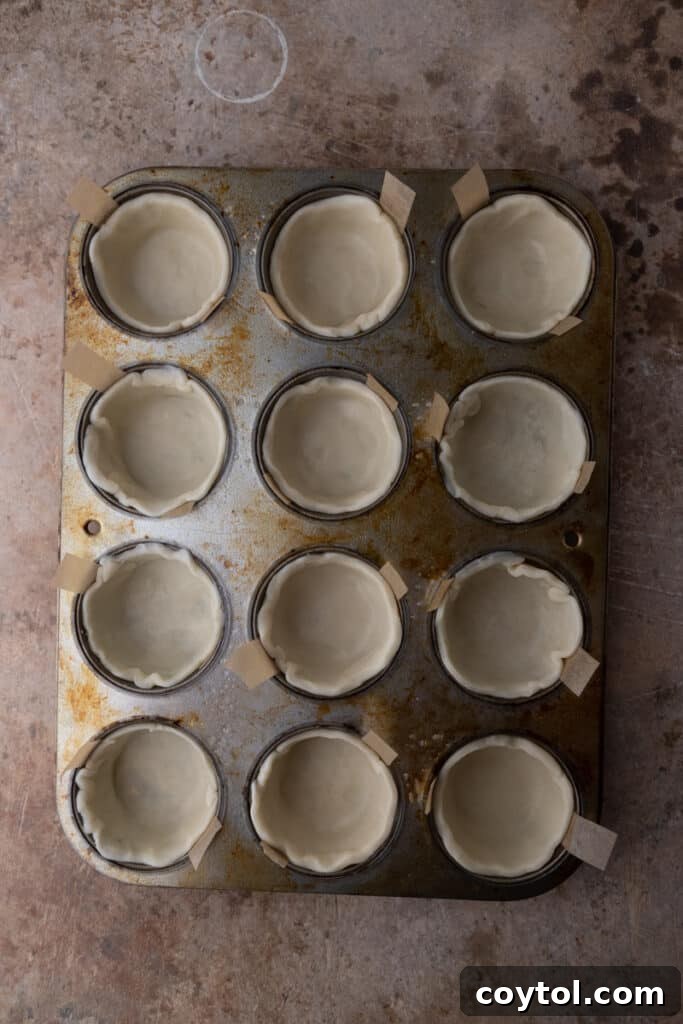
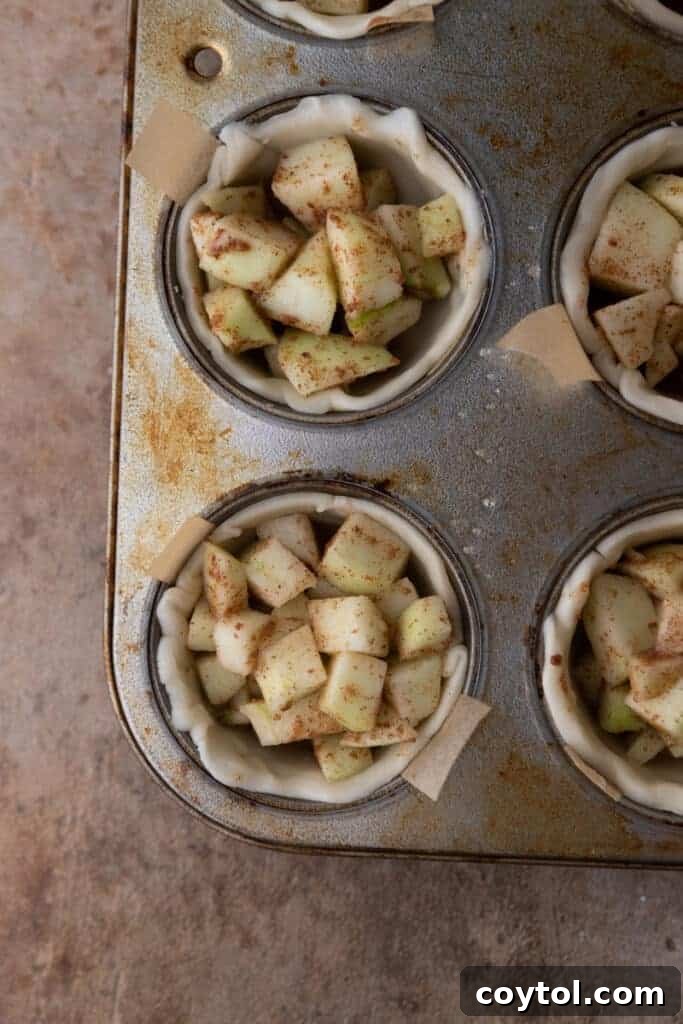
How Should I Serve These Delightful Mini Apple Pies?
These mini apple pies are incredibly versatile and delicious on their own, but adding a special touch can truly elevate the experience. Here are some fantastic serving suggestions to make your mini pies unforgettable:
- A Simple Dusting of Powdered Sugar: For an elegant and understated presentation, a light sifting of powdered sugar over the warm, cooled pies adds a touch of sweetness and visual appeal. It’s quick, easy, and always a crowd-pleaser.
- Scoop of Vanilla Ice Cream: The classic pairing! The cool, creamy vanilla ice cream melts beautifully over the warm apple filling and crispy streusel, creating a delightful contrast in temperature and texture. A scoop of cinnamon ice cream would also be divine.
- Drizzle of Salted Caramel Sauce: For an extra layer of indulgence, a generous drizzle of rich, homemade or store-bought salted caramel sauce takes these mini pies to a gourmet level. The saltiness perfectly complements the sweet apple and buttery crust.
- Served with Tea or Coffee: For a cozy afternoon treat or a delightful ending to a meal, pairing these mini pies with a warm cup of freshly brewed tea or a rich coffee creates a truly comforting experience.
- A Dollop of Whipped Cream: Light and airy homemade whipped cream adds a delicate sweetness and creamy texture that pairs wonderfully with the robust flavors of apple and spice.
Pro Tips for Baking the Best Mini Apple Pies
Achieving bakery-quality mini apple pies is easier than you think with these expert tips:
- Embrace a Mix of Apples: Don’t stick to just one type! Using a combination of sweet and tart apples (such as Granny Smith and Honeycrisp) will give you the most complex and balanced apple flavor profile. Granny Smith provides that essential tartness and structure, while sweeter apples offer depth and aroma.
- Crucial: Keep the Streusel Cold: This cannot be stressed enough! Chilled butter in your streusel topping is the secret to a crisp, crumbly, and distinct texture. If the butter is too warm, it will melt too quickly and create a greasy, dense topping instead of light, crunchy crumbs. Work quickly and keep it refrigerated until ready to use.
- Mindful Filling – Don’t Overfill: It can be tempting to pack those muffin cavities, but resist the urge to overfill them. The apple filling will bubble and expand slightly as it bakes, and too much filling can cause it to overflow, making a mess and potentially creating soggy crusts. Leave a little room at the top.
- Utilize Parchment Strips for Easy Removal: For a completely stress-free experience, line each muffin cavity with two thin strips of parchment paper forming a cross. These “handles” make it incredibly easy to lift the delicate mini pies out of the muffin tin without any damage once they’ve cooled.
- Patience is a Virtue – Let Them Cool Fully: This is another critical step! Allow the mini pies to cool completely in the muffin tin before attempting to remove them. The filling needs time to set, and the crust needs to firm up. Trying to take them out too soon will likely result in them breaking apart.
- Optimize Oven Placement: For the crispiest bottom crust, bake your muffin tin of mini pies on the lower-middle rack of your oven. This allows the direct heat to properly cook and crisp up the pie crust before the streusel topping gets too dark.
- Garnish Just Before Serving: If you’re adding powdered sugar, ice cream, or whipped cream, apply these garnishes just before serving. This ensures the streusel remains crunchy, the ice cream doesn’t melt prematurely, and any whipped cream stays beautifully defined.
- Prevent a Soggy Bottom: Beyond cooling, ensure your filling isn’t too wet. The cornstarch helps, but also avoid letting the apple mixture sit too long after adding sugar, as this can draw out excess moisture.

Frequently Asked Questions – FAQ About Mini Apple Pies
Have questions about these delightful mini apple pies? We’ve got answers to help you bake and enjoy them perfectly!
Once completely cooled, store your mini apple pies in an airtight container at room temperature for up to 1-2 days. If you want to extend their freshness, especially if your kitchen is warm, or if they contain dairy toppings, refrigerate them for up to 3 days. While they are delicious cold, the streusel topping will be at its crispiest and best on day one. For optimal texture on subsequent days, you can briefly warm them in a toaster oven or conventional oven.
Absolutely! These mini apple pies are wonderfully freezer-friendly. Once they have completely cooled, arrange them in a single layer on a baking sheet and freeze until solid. Then, transfer the frozen pies to an airtight freezer-safe container or a heavy-duty freezer bag, placing parchment paper between layers to prevent them from sticking together. They can be stored in the freezer for up to 2 months. When you’re ready to enjoy them, thaw the pies on the counter for a few hours, then refresh them by baking at 350°F (175°C) for 10-15 minutes or air-frying for 5-7 minutes until warmed through and the streusel is crisp again.
For classic apple pie flavor and texture, a blend of apples is highly recommended. Granny Smith is a perennial favorite for its tartness and firm texture that holds up well during baking. However, Honeycrisp, Pink Lady, or Fuji apples are also excellent choices, offering a delightful sweetness and crispness. Using a combination of sweet and tart varieties gives the best overall balance of flavor and prevents the filling from becoming too mushy or too sweet.
Peeling the apples typically results in a softer, more uniform filling texture, which many prefer in a classic apple pie. However, peeling is entirely optional! If you choose not to peel your apples, especially if using organic varieties, you’ll add a bit more fiber and a rustic appearance. Just be sure to wash them thoroughly. Some people enjoy the slight chewiness that unpeeled apples contribute to the filling.
Several factors help prevent a soggy bottom crust. First, ensure your apple filling isn’t too watery; the cornstarch in the recipe is key for thickening. Second, make sure your oven is adequately preheated to 375°F (190°C) and bake the pies on the lower-middle rack to allow direct heat to crisp the bottom. Lastly, allowing the pies to cool completely in the muffin tin before removing them helps the crust set and firm up, reducing the chance of sogginess.

Mini Apple Pies with Streusel Topping
Print Recipe
Ingredients
For the Filling:
- 2 cups peeled cored, and diced apples (about 2 medium-sized apples)
- 1/3 cup granulated sugar
- 1 & 1/2 teaspoon ground cinnamon
- 1/8 teaspoon ground nutmeg
- 1/2 tablespoon lemon juice
- 2 tablespoons cornstarch
- 2 tbsp butter melted
For the Crust:
- 1 packages of store-bought refrigerated pie crusts contains 2 crusts in total
For the Cinnamon Streusel Topping:
- 1/2 cup all-purpose flour
- 1/2 cup brown sugar packed
- 1/4 cup butter salted, or unsalted, cold, cubed
- 1 teaspoon ground cinnamon
- 1/2 teaspoon salt
- powdered sugar for dusting
Instructions
-
Preheat your oven to 375°F (190°C) and prepare your muffin tin. Spray nonstick cooking spray into each cavity. For easier removal, you can also add a strip of parchment paper into each cavity, allowing the ends to poke out, which will act as handles once the pies are baked.
-
In a large mixing bowl, combine the diced apples, granulated sugar, ground cinnamon, ground nutmeg, melted butter, lemon juice, and cornstarch. Toss gently until the apples are thoroughly coated with the sugar and spices. Set this delicious filling aside.2 cups peeled, 1/3 cup granulated sugar, 1 & 1/2 teaspoon ground cinnamon, 1/8 teaspoon ground nutmeg, 1/2 tablespoon lemon juice, 2 tablespoons cornstarch, 2 tbsp butter
-
Unroll one of the refrigerated pie crusts onto a lightly floured surface. Using a 3.4 to 4-inch round cookie cutter or the rim of a glass, cut out circles that are slightly larger than the openings of your standard muffin tin cavities. You should be able to yield about 6 circles from each pie crust. Repeat this process with the second pie crust.1 packages of store-bought refrigerated pie crusts
-
Carefully press each pie crust circle into the prepared cups of your muffin tin, molding them gently to fit the shape of the cups. Ensure that any parchment paper strips you added earlier are still poking out from the sides. Set the prepared crusts aside.
-
In a separate medium bowl, prepare the delightful cinnamon streusel topping. Combine the all-purpose flour, brown sugar, very cold cubed butter, ground cinnamon, and a pinch of salt. Use a pastry cutter, fork, or your fingertips to blend the mixture until it resembles coarse, crumbly bits.1/2 cup all-purpose flour, 1/2 cup brown sugar, 1/4 cup butter, 1 teaspoon ground cinnamon, 1/2 teaspoon salt
-
Fill each prepared pie crust with a generous amount of the apple filling. Then, evenly sprinkle the cinnamon streusel topping over the apples in each mini pie. Gently press the streusel down a bit to ensure it adheres to the filling.
-
Carefully place the muffin tin into the preheated oven and bake for approximately 30 minutes. The pies are ready when the crusts are golden brown, the apple filling is visibly bubbling, and the streusel topping is beautifully crispy and golden.
-
Remove the baked mini apple pies from the oven and allow them to cool in the muffin tin for at least 15-20 minutes. This crucial step helps the filling set and the crust firm up. Then, carefully transfer them to a wire rack to cool completely.
-
Once the mini apple pies with cinnamon streusel have cooled sufficiently, you can serve them as is, or enhance their presentation and flavor with a dusting of powdered sugar, a scoop of creamy vanilla ice cream, or a luscious drizzle of salted caramel sauce. Enjoy!powdered sugar
Nutrition
Nutrition information is automatically calculated, so should only be used as an approximation.